Table of Contents
Advertisement
Quick Links
OWNER'S MANUAL
v14
Model 1902
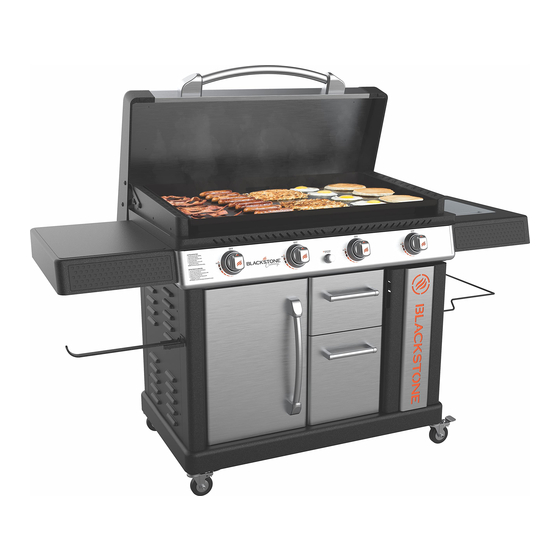
36" GRIDDLE
WITH HOOD, CABINE T & WIND GUARDS
5015923
blackstoneproducts.com/support
Please reference
for the latest version of this manual, and to follow along with assembly videos.
North Atlantic Imports LLC | 1073 West 1700 North Logan, UT 84321 | Blackstoneproducts.com
Advertisement
Table of Contents

Related Manuals for Black Stone Culinary Pro 1902


Summary of Contents for Black Stone Culinary Pro 1902
- Page 1 OWNER’S MANUAL Model 1902 36" GRIDDLE WITH HOOD, CABINE T & WIND GUARDS 5015923 blackstoneproducts.com/support Please reference for the latest version of this manual, and to follow along with assembly videos. North Atlantic Imports LLC | 1073 West 1700 North Logan, UT 84321 | Blackstoneproducts.com...
- Page 2 Owner’s Manual | Model 1902 WA R N I N G D A N G E R D A N G E R INSTALLER/ASSEMBLER: Never place any items within If a fire should occur, keep Leave these instructions 3 in (8 cm) of the cooking away from the appliance with consumer.
- Page 3 | Owner’s Manual Model 1902 COOKING TIPS WA R N I N G This product can expose you to chemicals including Di(2-Ethylhexyl) Phthalate LOW HEAT: VIDEO RECIPES (DEHP), which is known Learn how to use your Cooks slowly and requires more to the State of California new Blackstone with our time.
-
Page 4: Table Of Contents
Owner’s Manual | Model 1902 TABLE OF CONTENTS It is the consumer’s responsibility to see that the unit is properly assem- bled, installed, and maintained. Failure to follow the instructions in this manual could result in bodily injury and/or property damage. CONTENTS 01. -
Page 5: Register Your Product
Register Your Product | Owner’s Manual Model 1902 REGISTER YOUR PRODUCT Registration allows our Customer Service Representatives to quickly provide assistance with your Blackstone product if needed. The North Atlantic Imports LLC 1-Year Warranty covers replacement parts up to one year after the date of purchase. (Please reference the Warranty chapter for more information.) To enable this warranty, you will need to provide: •... -
Page 6: For Your Safety
Owner’s Manual | For Your Safety Model 1902 FOR YOUR SAFET Y D A N G E R Never operate this appliance Before proceeding, make certain that you understand the FOR YOUR unattended. SAFETY section of this manual. Hazardous fire or explosion may result if instructions are ignored. -
Page 7: Section 02. Gas Appliance Safety
For Your Safety | Owner’s Manual Model 1902 WA R N I N G D A N G E R Section 02 If the appliance is not in use, When not in use, turn OFF GAS APPLIANCE the gas must be turned off at appliance by rotating the the supply cylinder. -
Page 8: Assembly Guide
Owner’s Manual | Assembly Guide Model 1902 ASSEMBLY GUIDE E XPLODED VIEW 35.1 1.7f 30.1 PARTS PARTS PARTS Control knob bezels Regulator hose Gas tank slides Electric Igniter Left baffle panel Sliding tray assembly 26.1 Electric igniter wire Right baffle panel Left drawer slides (4pcs per 1 set) with 26.2... - Page 9 Assembly Guide | Owner’s Manual Model 1902 ASSEMBLY GUIDE ILLUSTRATED PARTS LIST Griddle Griddle top Hood Hood Hood Cart base body (1 piece) (1 piece) (1 piece) handle (1 piece) handle standoffs (1 piece) (2 pieces) Front-left Rear-left leg Front-right Rear-right Left drawer Right...
- Page 10 Owner’s Manual | Assembly Guide Model 1902 Hardware pack (1 piece) a. M6x15 screws (49 pieces) b. M5x10 screws (38 pieces) c. Spares d. M5 step bolts (4 pieces) NOT INCLUDED: e. Small M6 step bolts (8 pieces) 20 lb (9 kg) LPG tank f.
- Page 11 Assembly Guide | Owner’s Manual Model 1902 WA R N I N G WA R N I N G WA R N I N G The manufacturer has made • Do not mix old and new The manufacturer has made every effort to eliminate any batteries.
- Page 12 Owner’s Manual | Assembly Guide Model 1902 S T E P 0 4 Use three (3) M6x15 screws (a) to attach the rear-right leg to the cart base. S T E P 0 5 Use two (2) M6x15 screws (a) to attach the front-right leg to the cart base.
- Page 13 Assembly Guide | Owner’s Manual Model 1902 S T E P 0 7 Use four (4) M5x10 screws (b) to attach the left drawer panel and right drawer panel to the back panel. S T E P 0 8 Use three (3) M6x15 screws (a) to attach the left drawer panel to the cart base.
- Page 14 Owner’s Manual | Assembly Guide Model 1902 S T E P 0 9 Use three (3) M6x15 screws (a) to attach the right drawer panel to the cart base. S T E P 1 0 Use four (4) M5x10 screws (b) to attach the top cart bracket to the front-left leg, left drawer panel, right drawer panel and front-right leg.
- Page 15 Assembly Guide | Owner’s Manual Model 1902 S T E P 11 With the help of another person, set the griddle body on its back and use fourteen (14) M6x15 screws (a) to attach the griddle cart to the griddle body. S T E P 12 With the help of another person, set the griddle...
- Page 16 Owner’s Manual | Assembly Guide Model 1902 S T E P 13 Use four (4) M5x10 screws (b) to attach one (1) side panel to the rear-left leg and the front-left leg. S T E P 14 Use two (2) M6x15 screws (a) to attach the cart door handle to the left cart door.
- Page 17 Assembly Guide | Owner’s Manual Model 1902 Attach the right cart door to the cart by first ❶ inserting the door S T E P 1 6 into the upper door hinge pin, then ❷ inserting the lower door hinge pin into the cart base.
- Page 18 Owner’s Manual | Assembly Guide Model 1902 S T E P 1 9 Use seven (7) M5x10 (b) screws to attach one (1) drawer body to the upper drawer front panel. S T E P 2 0 Insert one (1) drawer handle into two (2) handle stand- offs.
- Page 19 Assembly Guide | Owner’s Manual Model 1902 S T E P 2 3 Use four (4) M6x15 screws (a) to attach one (1) left and one (1) right garbage bag holder bracket to the front-right leg and back-right leg. S T E P 2 4 Use four (4) M5 step bolts (d) to attach the garbage bag holder to the garbage bag holder brackets.
- Page 20 Owner’s Manual | Assembly Guide Model 1902 C A U T I O N • Maximum weight on the side shelf is 10 lbs (4.5 kg). • The side shelf may get hot S T E P 2 6 Screw two (2) small M6 step bolts (e) into the top holes of the left while griddle is in use.
- Page 21 SYMPTOMS 01. Burner will not Light with ignition system Assembly Guide | Owner’s Manual Model 1902 02. Pressing the ignitor button does not result in a clicking sound If ignition does not occur in 5 seconds, turn the burner controls off, wait 5 minutes and repeat the lighting procedure.
- Page 22 Owner’s Manual | Assembly Guide Model 1902 WA R N I N G WA R N I N G C A U T I O N Do not leave the hood Do not touch the handle • Maximum weight on the side closed for more than 10 while unit is hot.
- Page 23 Care & Maintenance Assembly Guide | Owner’s Manual Model 1902 WA R N I N G NEVER APPLY COLD WATER ACROSS THE WHOLE SURFACE OF A FIRST TIME CLEANING REMOVING RUST S T E P 3 3 Open the cart door and pull out the gas tank sliding tray. Then, HOT GRIDDLE AT ONCE.
-
Page 24: Fuel | 20 Lb (9 Kg) Propane Tank
Owner’s Manual | Fuel | 20 lb. (9 kg) Propane Tank Model 1902 FUEL | 20 LB. (9 KG) D A N G E R PROPANE TANK An LPG cylinder not connected for use should NOT be stored in the WA R N I N G vicinity of this or any other appliance. -
Page 25: Section 02. Connection & Removal
Fuel | 20 lb. (9 kg) Propane Tank | Owner’s Manual Model 1902 WA R N I N G Section 02 Keep the fuel supply hose CONNECTION & REMOVAL away from any heated surface(s). WA R N I N G REGUL ATOR SAFE T Y Never attempt to attach this If regulator fails in unit, it must be replaced with a Blackstone approved... - Page 26 Owner’s Manual | Fuel | 20 lb. (9 kg) Propane Tank Model 1902 D A N G E R Do not insert any tool or foreign objects into the valve outlet or safety relief valve. REMOVING THE LPG TANK FOR TRANSPORT/ The valve may be damaged STORAGE resulting in a leak.
-
Page 27: Section 03. Leak Test Instructions
Fuel | 20 lb. (9 kg) Propane Tank | Owner’s Manual Model 1902 WA R N I N G Section 03 Keep the LPG container LEAK TEST INSTRUCTIONS valves closed at all times unless the LPG system is in use or the container is being refilled. -
Page 28: Ignition | Battery Powered
Owner’s Manual | Ignition | Battery Powered Model 1902 IGNITION | WA R N I N G BAT TERY POWERED Do not lean over the appli- ance while lighting. WA R N I N G PROPANE BURNER OPERATION If ignition does NOT occur in 5 seconds, turn burner For proper ignition and operation of the appliance follow the steps below. -
Page 29: Troubleshooting
Troubleshooting | Owner’s Manual Model 1902 TROUBLESHOOTING Visit BLACKSTONEPRODUCTS.COM/SUPPORT for additional troubleshooting. Section 01 BAT TERY POWERED IGNITION SYMPTOMS 01. Burner will not Light with ignition system 02. Pressing the ignitor button does not result in a clicking sound If ignition does not occur in 5 seconds, turn the burner controls off, wait 5 minutes and repeat the lighting procedure. -
Page 30: Section 02. Gas Flow
Owner’s Manual | Troubleshooting Model 1902 Section 02 GAS FLOW SYMPTOMS 01. A flame is coming out of the air gate. POSSIBLE CAUSES SOLUTION 01. Something is blocking the venturi Clean the burner assembly to remove in the burner tube. This is not the obstruction. - Page 31 Troubleshooting | Owner’s Manual Model 1902 SYMPTOMS 01. Appliance will not achieve a high heat or heats unevenly. 02. Burner flames start strong, then immediately drop to low even when burner is set to high position. 03. Flame height drops when a second burner is lit. 04.
-
Page 32: Care & Maintenance
Owner’s Manual | Care & Maintenance Model 1902 CARE & MAINTENANCE WA R N I N G When not in use, turn unit Regularly clean your appliance between uses, especially after extended controls and gas source periods of storage. In order to extend the life and condition of unit, OFF. - Page 33 Care & Maintenance | Owner’s Manual Model 1902 STORAGE VALVE CHECK • In order to extend and maintain Ensure gas is o at the supply shut the life and condition of your o valve before checking appli- appliance, we strongly ance valves.
-
Page 34: Section 02. Cleaning The Burner Assembly
Owner’s Manual | Care & Maintenance Model 1902 WA R N I N G Section 02 Ensure that the fuel nozzle CLEANING THE BURNER ASSEMBLY is housed within the burner opening. Unit burners vary, however these instructions apply to all units. Clean burner assembly and check burner for damage. - Page 35 Care & Maintenance | Owner’s Manual Model 1902 WA R N I N G A clogged burner tube can lead to a fire beneath the appliance. BURNER MAINTENANCE BURNER FL AME CHECK In most circumstances, burning Always check burner flame residue o after cooking will keep before use.
-
Page 36: Section 03. Griddle Seasoning Instructions
Owner’s Manual | Care & Maintenance Model 1902 VIDEO TUTORIAL Section 03 GRIDDLE SEASONING INSTRUCTIONS How to Season a New Blackstone Griddle | Blackstone Griddle For best results, we recommended seasoning the griddle before cooking on griddle top. S T E P 0 1 Make sure griddle top is wiped clean of debris. - Page 37 Care & Maintenance | Owner’s Manual Model 1902 C A U T I O N Customers in humid or coastal climates may require more frequent WHY DO I NEED TO seasonings and the use of SEASON MY GRIDDLE? heavier cooking oils to avoid Seasoning leaves a hard protective rusting and corrosion.
-
Page 38: Section 04. Cleaning Your Griddle Top
Owner’s Manual | Care & Maintenance Model 1902 D A N G E R Section 04 DO NOT place flammable CLEANING YOUR GRIDDLE TOP items on side shelves near the griddle. Aerosol Follow these simple cleaning steps to ensure optimal performance and containers are particularly longevity of your Blackstone Griddle. - Page 39 Care & Maintenance | Owner’s Manual Model 1902 WA R N I N G NEVER APPLY COLD WATER ACROSS THE WHOLE SURFACE OF A FIRST TIME CLEANING REMOVING RUST HOT GRIDDLE AT ONCE. Blackstone Griddles are pre-treated If rust appears on the griddle surface, This may cause warping.
-
Page 40: Recipes
Owner’s Manual | Recipes Model 1902 RECIPES FOR LUNCH & DINNER OKL AHOMA FRIED ONION BURGER S T E P 0 1 Pre-heat your Blackstone to high heat. Serves 4 | 7 min. Ingredients S T E P 0 2 Make four (4) 2 oz loosely packed meatballs with the ground beef and place on the hot griddle. - Page 41 Recipes | Owner’s Manual Model 1902 RECIPES FOR BREAKFAST STRAWBERRIES AND CREAM PANCAKES Recipe by Danielle Zechmann S T E P 0 1 Separate egg and whisk egg white until stiff peaks form. Set aside. Serves 6 | 45 min. Pancake Ingredients S T E P 0 2 Cream Cheese Filling...
- Page 42 Owner’s Manual | Recipes Model 1902 RECIPES FOR LUNCH & DINNER TACOS BORRACHOS S T E P 0 1 Season the sirloin steaks with salt and black pepper, making sure Serves 4 | 2 - 4 hours that you rub the salt and pepper well into the steaks. Ingredients S T E P 0 2 Slice the steak into small pieces.
-
Page 43: Warranty
Warranty | Owner’s Manual Model 1902 NORTH ATLANTIC IMPORTS LLC 1-YEAR WARRANT Y North Atlantic Imports, the manufacturer, will warranty for one year from purchase all parts, workmanship, and finishes. It will be the manufacturer’s option as to whether to repair or replace any of the above items. All warran- ties are limited to the original purchaser only. - Page 44 North Atlantic Imports LLC | 1073 West 1700 North Logan, UT 84321 | Blackstoneproducts.com...
Need help?
Do you have a question about the Culinary Pro 1902 and is the answer not in the manual?
Questions and answers