Table of Contents
Advertisement
Quick Links
Advertisement
Table of Contents

Related Manuals for Elation FUZE PENDANT COMPACT


Summary of Contents for Elation FUZE PENDANT COMPACT
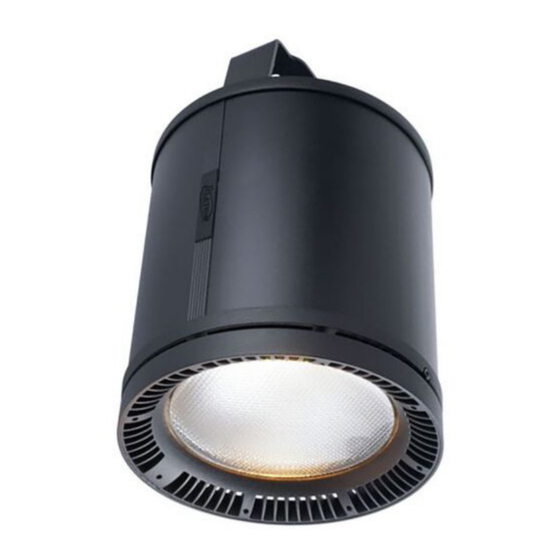
- Page 1 FUZE PENDANT COMPACT User Manual...
- Page 2 ©2022 ELATION PROFESSIONAL all rights reserved. Information, specifications, diagrams, images, and instructions herein are subject to change without notice. ELATION PROFES- SIONAL logo and identifying product names and numbers herein are trademarks of ELATION PROFESSIONAL. Copyright protection claimed includes all forms and matters of copyrightable materials and information now allowed by statutory or judicial law or hereinafter granted.
-
Page 3: Table Of Contents
CONTENTS General Information Limited Warranty Safety Guidelines Maintenance Guidelines Overview Installation Instructions Fixture Installation Accessory Installation E-Fly Wireless Setup Guidelines System Menu 0-10V and Alarm Contact DMX Traits Color Temperature Table Virtual Gel Swatch Book Error Codes Specifications Dimensional Drawings Optional Accessories | FCC Statement... -
Page 4: General Information
BOX CONTENTS Power Cable (x1) Bracket Hole Caps (x2) CUSTOMER SUPPORT Contact ELATION Service for any product related service and support needs. Also visit forums.elationlighting.com with questions, comments, or suggestions. ELATION SERVICE USA - Monday - Friday 8:00am to 4:30pm PST 323-582-3322 | Fax 323-832-9142 | support@elationlighting.com... -
Page 5: Limited Warranty
No accessories should be shipped with the product. If any accessories are shipped with the product, Elation Professional shall have no liability what so ever for loss and/or or damage to any such accessories, nor for the safe return thereof. -
Page 6: Safety Guidelines
This fixture is a sophisticated piece of electronic equipment. To guarantee smooth operation, it is important to follow all instructions and guidelines in this manual. Elation Professional is not responsible for injury and/or damages resulting from the misuse of this fixture due to the disregard of the information printed in this manual. - Page 7 SAFETY GUIDELINES • DO NOT TOUCH the fixture housing during operation. • DO NOT shake fixture, and avoid brute force when installing and/or operating fixture. • DO NOT operate fixture if the power cord is frayed, crimped, damaged and/or if any of the power cord connectors are damaged or do not fit into the fixture securely with ease.
-
Page 8: Maintenance Guidelines
Regular inspections are recommended to ensure proper function and extended life. There are no user serviceable parts inside this fixture. Please refer all service issues to an authorized Elation service technician. Should you need any spare parts, please order genuine parts from an authorized Elation dealer. -
Page 9: Overview
OVERVIEW... - Page 10 OVERVIEW POWER CONNECTIONS Power may be provided to the fixture by means of an industry standard locking power con- nector (Power In). Alternately, for more permanent installations, a power line may be wired to the fixture by connecting a line to the wired power input gland. A wiring block is located directly behind this gland, with wire terminals for Live (L), Neutral (N), and Floating Ground (FG).
-
Page 11: Installation Instructions
INSTALLATION INSTRUCTIONS FLAMMABLE MATERIAL WARNING Keep fixture minimum 5.0 feet (1.5m) away from flammable materials and/or pyrotechnics. ELECTRICAL CONNECTIONS A qualified electrician should be used for all electrical connections and/or installations. MINIMUM DISTANCE TO OBJECTS/SURFACES IS 1 FOOT (0.3 METERS) MINIMUM DISTANCE TO FLAMMABLE MATERIALS IS 1.6 FEET (0.5 METERS) MAXIMUM AMBIENT OPERATING TEMPERATURE IS 113°... -
Page 12: Fixture Installation
FIXTURE INSTALLATION RIGGING Overhead rigging requires extensive experience, including calculating working load limits, knowledge of installation material being used, and periodic safety inspection of all instal- lation material and the fixture, among other things. If you lack these qualifications, do not attempt the installation yourself. -
Page 13: Accessory Installation
ACCESSORY INSTALLATION LENS KIT PLACE FIXTURE ON A STABLE SURFACE AND ALLOW 15 MINUTES TO COOL! DO NOT OVERTIGHTEN SCREWS OR USE A POWER SCREWDRIVER! 1. Loosen screw on the side of lens bezel to open/release, as shown in the image on the left. 2. - Page 14 ACCESSORY INSTALLATION YOKE BRACKET KIT PLACE FIXTURE ON A STABLE SURFACE AND ALLOW 15 MINUTES TO COOL! DO NOT OVERTIGHTEN SCREWS OR USE A POWER SCREWDRIVER! 1. Attach the two (2) yoke spacer discs to the fixture with two (2) screws each. 2.
- Page 15 ACCESSORY INSTALLATION HALF SNOOT KIT & FULL SNOOT KIT PLACE FIXTURE ON A STABLE SURFACE AND ALLOW 15 MINUTES TO COOL! DO NOT OVERTIGHTEN SCREWS OR USE A POWER SCREWDRIVER! To install either snoot kit, align the desired snoot with the lens bezel of the fixture, and secure the snoot in place with two (2) screws).
- Page 16 The Fuze Pendant Compact weighs 11.4 lbs (5.2 kg), and the installation surface must be able to support this weight securely. If in any doubt regarding the suitability of the surface, all weight must be carried by the hanging bracket, with the ceiling mount kit utilized only as a visual trim kit for a clean installation.
- Page 17 ACCESSORY INSTALLATION CEILING MOUNT KIT - INSTALLATION 1. Open an 8.5-inch diameter hole in the desired ceiling panel. Insert the trim ring through the hole, and secure in place with the support brackets and screws. 2. Lower the lighting fixture into the trim ring from above, then secure in place by inserting and tightening the four (4) thumb screws.
- Page 18 ACCESSORY INSTALLATION CEILING MOUNT KIT - INSTALLATION 3. Attach the grid support brackets to the trim ring using the included screws. 4. Install the entire assembly back into the ceiling at the desired location, making sure that the ends of the grid support brackets are resting firmly on the support grid for the ceil- ing.
-
Page 19: E-Fly Wireless Setup Guidelines
E-FLY WIRELESS SET UP GUIDELINES There are many factors that can affect and/or interfere with a wireless signal, including walls, glass, metal, objects, and people. In order to reduce the risk of interference, the fol- lowing points are recommended: • Install devices a minimum of 9.8 ft. (3m) above audiences and/or ground level, as shown in the illustration below. -
Page 20: System Menu
SYSTEM MENU The fixture includes an easy to navigate system menu. The OLED control panel display located at the top of the fixture (illustrated below) provides access to the main system menu where all necessary system adjustments are made to the fixture. •... - Page 21 SYSTEM MENU DMX Address A001 - Axxx Set DMX address Dimmer 1CH Dimmer Color 4CH RGBWL 5CH RGBWL 16bit 10CH DMX Channel Select channel Mode mode Standard 10CH Extended 17CH HSI 4CH HSI Extended 9CH If DMX signal is lost, fixture defaults to Hold Last settings in use...
- Page 22 SYSTEM MENU Dimmer 0 - 100% Color Tempera- 2400 - 8500K ture Select single Swatch Book display color from chart Scrolls thru all Speed = 0 - 22 Color Scroll colors in forward (slow to fast) order Virtual Color Scrolls thru all STANDALONE Speed = 0 - 22 Color C-Scroll...
- Page 23 SYSTEM MENU LED Power Limit 100% Screen Saver 1 - 10 Delay Display Screen Lock Off, 30s, 1-10min PERSONALITY (continued) Rotate Display Yes / No 000 - 255 Green 000 - 255 Calibration Blue 000 - 255 Service White 000 - 255 Passcode = 050 Lime 000 - 255...
-
Page 24: 0-10V And Alarm Contact
0-10V AND ALARM CONTACT These functions control the way that the fixture interprets the signal from the 0-10V con- nector. The 0-10V CONTACT setting is used to enable or disable the fixture’s ability to use the 0-10V input to determine the intensity of light output. Please note that if this feature is enabled, the fixture will adhere to the settings selected in the Color Temperature and Virtual Color functions of the Standalone System Menu. -
Page 25: Dmx Traits
DMX TRAITS CHANNEL DMX VAL- 10ch FUNCTION SNAP 10ch 17ch Dim. RGBWL Dim. RGBWL Color 16bit Strobe 000 - 031 Closed 032 - 063 Open 064 - 095 Strobe, slow to fast 096 - 127 Open 128 - 159 Pulse, slow to fast 160 - 191 Open 192 - 223 Random, slow to fast 224 - 255 Open... - Page 26 DMX TRAITS CHANNEL 10ch FUNCTION SNAP 10ch 17ch VALUES Dim. RGBWL Dim. RGBWL Color 16bit Color Scroll 180 - 201 Clockwise, fast to slow 202 - 207 Stop Counter-clockwise, 208 - 229 slow to fast 230 - 234 Open Random Slots 235 - 239 Fast 240 - 244 Medium 245 - 249 Slow...
- Page 27 DMX TRAITS CHANNEL 10ch FUNCTION SNAP 10ch 17ch VALUES RGBWL RGBWL Color 16bit Dimmer Delay Time 6.0s 7.0s 8.0s 9.0s 142 - 255 Idle Control 000 - 099 Idle Refresh Rate (Hz) 1000 1010 1020 1030 1040 1050 1060 1070 1080 1090 1100...
- Page 28 DMX TRAITS CHANNEL 10ch FUNCTION SNAP 10ch 17ch VALUES RGBWL RGBWL Color 16bit Refresh Rate (Hz) 1140 1150 1160 1170 1180 1190 1200 1210 1220 1230 1240 1250 1260 1270 1280 1290 1300 1310 1320 1330 1340 1350 1360 1370 1380 1390 1400...
- Page 29 DMX TRAITS CHANNEL 10ch FUNCTION SNAP 10ch 17ch VALUES RGBWL RGBWL Color 16bit Refresh Rate (Hz) 1470 1480 1490 1500 2500 4000 5000 6000 10000 15000 20000 25000 169 - 200 Idle Dimmer Curve Linear 201 - 210 (default) 211 - 220 Dimmer Curve Square Dimmer Curve Inverse 221 - 230 Square...
- Page 30 DMX TRAITS CHANNEL 10ch FUNCTION SNAP 10ch 17ch VALUES RGBWL RGBWL Color 16bit 000 - 255 Hue, 0% to 100% Saturation, 0% to 000 - 255 100%...
-
Page 31: Color Temperature Table
COLOR TEMPERATURE TABLE DMX VALUE COLOR TEMP (K) DMX VALUE COLOR TEMP (K) 2400 5500 2500 5600 2600 5700 2700 5800 2800 5900 2900 6000 3000 6100 3100 6200 3200 6300 3300 6400 3400 6500 3500 6600 3600 6700 3700 6800 3800 6900... -
Page 32: Virtual Gel Swatch Book
VIRTUAL GEL SWATCH BOOK VALUE FILTER# COLOR VALUE FILTER# COLOR Pale Yellow Mauve Straw Medium Purple Gold Tint Lavender Spring Yellow Palace Blue Medium Yellow Dark Blue Yellow Medium Blue Deep Amber Deep Blue Deep Straw Daylight Blue Loving Amber Slate Blue Gold Amber Light Blue... -
Page 33: Error Codes
ERROR CODES ERROR CODE DESCRIPTION Temp Error These messages will appear if there is a temperature and/or voltage malfunction. 0-10V Error Note: Error Codes are subject to change without notice. -
Page 34: Specifications
SPECIFICATIONS SOURCE 144W 5-in-1 RGBWL (Red, Green, Blue, White, LimeLED Array 50,000 Hour Average LED Life* *Test lab conditions. May vary depending on several factors including but not limited to: Environmental Conditions, Power/Voltage, Usage Patterns (On-Off Cycling), Control, and Dimming. PHOTOMETRIC DATA 7,200 Total Lumen Fixture Output CRI 90 @ 3,200K... -
Page 35: Dimensional Drawings
DIMENSIONAL DRAWINGS PENDANT BRACKET ATTACHED Dimensions not drawn to scale. - Page 36 DIMENSIONAL DRAWINGS YOKE BRACKET ATTACHED Dimensions not drawn to scale.
- Page 37 DIMENSIONAL DRAWINGS CEILING MOUNT KIT ATTACHED Dimensions not drawn to scale.
- Page 38 DIMENSIONAL DRAWINGS HALF SNOOT ATTACHED Dimensions not drawn to scale.
- Page 39 DIMENSIONAL DRAWINGS FULL SNOOT ATTACHED Dimensions not drawn to scale.
-
Page 40: Optional Accessories | Fcc Statement
OPTIONAL ACCESSORIES SKU NUMBER ITEM FPL25 25° Lens FPL40 40° Lens FPL50 50° Lens FPCMK Ceiling Mount Kit FPYMK Yoke Mount Kit FPHS Half Snoot FPFS Full Snoot FCC STATEMENT This device complies with Part 15 of the FCC Rules. Operation is subject to the following two conditions: (1) this device may not cause harmful interference, and (2) this device must accept any interference received, including interference that may cause undesired operation.
Need help?
Do you have a question about the FUZE PENDANT COMPACT and is the answer not in the manual?
Questions and answers