Table of Contents
Advertisement
Advertisement
Table of Contents

Related Manuals for Elation SHOW DESIGNER 2CF


Summary of Contents for Elation SHOW DESIGNER 2CF
- Page 1 SHOW DESIGNER 2CF User Manual ...
- Page 2 +31 45 546 85 66 | +31 45 546 85 96 fax | www.elationlighting.eu | info@elationlighting.eu Elation Professional Mexico | AV Santa Ana 30 | Parque Industrial Lerma, Lerma, Mexico 52000 +52 (728) 282-7070 D O C U M E N T V E R S I O N Due to additional product features and/or enhancements, an updated version of this document may be available online.
-
Page 3: Table Of Contents
C O N T E N T GENERAL INFORMATION LIMITED WARRANTY (USA ONLY) SAFETY GUIDELINES OVERVIEW MENU AND SETUP FUNCTIONS SWITCHES AND CONTROLS SCENES PRESETS CHASES SHOWS PREVIEW SCENE MASTERS MIDI USING THE COMPACT FLASH INTERFACE USING THE COM PORT FIXTURE LIBRARY SPECIFICATIONS OPTIONAL ACCESSORIES... -
Page 4: General Information
THIS DEVICE MUST ONLY BE USED BY AN AUTHORIZED ELATION TRAINED SERVICE TECHNICIAN. DO NOT ATTEMPT TO USE THIS DEVICE WITHOUT BEING FULLY TRAINED ON HOW TO USE IT. ANY DAMAGES OR REPAIRS TO THIS DEVICE OR ANY ELATION AND/OR NON-ELATION LIGHTING FIXTURES CONNECTED TO THIS DEVICE RESULTING FROM... -
Page 5: Limited Warranty (Usa Only)
2. For warranty service, send the product only to the Elation Professional factory. All shipping charges must be pre-paid. If the requested repairs or service (including parts replacement) are within the terms of this warranty, Elation Professional will pay return shipping charges only to a designated point within the United States. -
Page 6: Safety Guidelines
This device is a sophisticated piece of electronic equipment. To guarantee a smooth operation, it is important to follow all instructions and guidelines in this manual. ELATION PROFESSIONAL is not responsible for injury and/or damages resulting from the misuse of this device due to the disregard of the information printed in this manual. -
Page 7: Overview
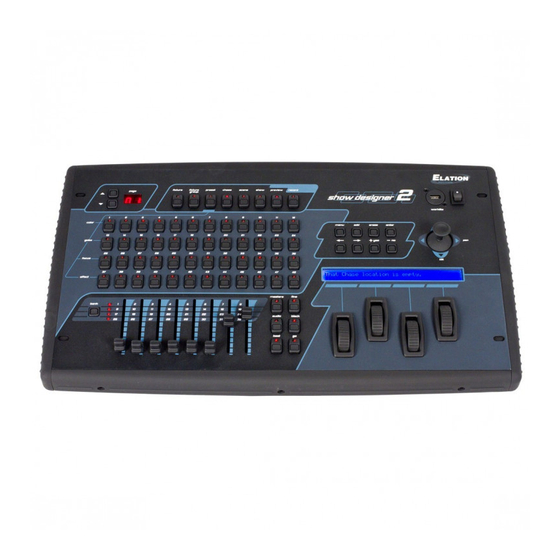
The Show Designer 2CF is a lighting controller based on the successful and simple to use Show Designer 1. The Show Designer 2CF offers all of the same features and much more. It is designed to simplify the programming process as much as possible while still offering lots of power at a low cost. -
Page 8: Menu And Setup Functions
The Show Designer 2CF has a short list of built in list of fixtures to choose from. You can also load in “fixture profiles” that contain more detailed information about a particular lighting fixture than what is offered by the built-in list. - Page 9 Show Designer 2CF supports intelligent lighting fixtures that use as many as 32 DMX channels. Since most fixtures use fewer than 32 channels, Show Designer 2CF will allow you to configure a group of smaller fixtures that are of the same type, under a single fixture number. For example if you have selected a 4-channel scanner for fixture number 1, you can set “multi”...
- Page 10 MENU AND SETUP FUNCTIONS MODIFY FIXTURE This allows you modify some of the channel attributes of a fixture. You can also use this to create a new fixture that isn’t in the library by modifying an existing one. To do this you must first select a fixture as described above in the “Choose Fixture”...
- Page 11 MENU AND SETUP FUNCTIONS PAN FINE is for fixtures that use two channels to control pan. This is also referred to sometimes as the pan “low byte” channel. Set this to “none” if the fixture uses only one channel for pan. The joystick will control this channel with “fine” mode turned on. TILT CHANNEL is the same as described above for pan channel except that it controls tilt.
- Page 12 SET MIDI CHANNEL This allows you to select the MIDI channel that Show Designer 2CF will send and receive on. Select from 1-16 using data wheel #1 then press “enter”. See MIDI section for more details.
- Page 13 Up to 256 fixture profiles can be loaded into memory. LOAD FIXTURE PROFILE FROM COM PORT This allows you to load fixture profiles into the Show Designer 2CF from a PC using the COM port. When this menu item is selected the message “Ready to receive fixture profile” will appear.
- Page 14 This lets you to update the software inside Show Designer 2CF from a software update file on a compact flash card. If a CF card is inserted, the Show Designer 2CF will search the card for the proper file and then install it. The message “RECEIVING NEW PROGRAM” will appear as the new software file is installed.
-
Page 15: Switches And Controls
There is no edit mode as with some lighting controllers. You are essentially always in edit mode and can instantly save the current stage settings as a scene. This is one reason the Show Designer 2CF is so quick and easy to program. The following paragraphs outline the various switches and controls with their functions. - Page 16 This assures that the display matches the fixtures being edited. Show Designer 2CF will display the channel names for most fixtures that are in the built-in library. If a fixture profile has been installed, some channels can display the names of each step within the channel, like color and gobo names.
- Page 17 SWITCHES AND CONTROLS JOYSTICK The joystick controls pan and tilt on all selected fixtures that have a pan or tilt feature. The joystick is the “return to center” type so it operates by moving it in the desired direction. The greater the joystick movement the faster the pan or tilt movement will be.
-
Page 18: Scenes
SCENES A “scene” is a recording of the state of the entire stage. Show Designer 2CF keeps track of all the actions you take to make the stage appear as it does. Anything that affects the look of the stage such as changing channel levels, calling a chase or calling a preset, is recorded in the scene buffer so that you can save these things as a scene. - Page 19 SCENES RECALLING SCENES (add mode) Press and hold the “add” switch when selecting a scene number to play it back in, “add mode”. In add mode, channels that are not part of the new scene will be left in their current positions instead of fading to 0 and any chases that were running will keep running as long as the channels in the chase are not overridden by the new scene.
-
Page 20: Presets
This will save memory. Show Designer 2CF allows you to record up to 24 pages of 48 presets for a total of 1152. For your convenience the words “color”, “gobo”, “focus” and “effect” are printed next to the 4 rows of number switches. - Page 21 PRESETS RECORDING PRESETS (continued) At any time while recording the preset you can enter a name for the preset. Use the cursor switches to move the cursor in the display under each character then use the + or - switch or the data wheel to select characters.
-
Page 22: Chases
The steps are then played back in a continuous loop at a preprogrammed chase speed. Show Designer 2CF lets you to record up to 1152 chases and also provides 48 pre-recorded chases referred to as “factory chases”. - Page 23 CHASES RECORDING CHASES (continued) After you have finished adding channels or presets to the step, press “enter”. Note: (The “fixture” LED must be turned off before pressing “enter”.) The step indicator on the display will automatically increment to the next step. Repeat the previous actions to record up to 256 steps. You can also enter empty steps by pressing “enter”...
- Page 24 CHASES RECORDING CHASES (continued) After you have finished recording all of the steps for a chase, set the speed, fade and lock status, then save the chase by selecting a page and number. The “fixture” and “preset” LEDs must be off. If you select a chase number that is already lit, a message will appear asking if you want to write over the existing chase.
- Page 25 CHASES EDITING CHASES To edit a chase that has already been recorded, press “record” followed by “chase”. Before making any channel changes, press the number of the chase that you want to edit. The message “Edit this existing Chase?” will appear in the display. Press “yes” and the chase will be called up and you can add to it or modify it by selecting steps and changing any channel levels.
-
Page 26: Shows
“go” at each step in the list. This is sometimes referred to as a stack or cue list by other controllers. Show Designer 2CF lets you record up to 24 pages of 48 shows for a total of 1152 shows. - Page 27 SHOWS RECORDING SHOWS (continued) There are several other items that you can program while recording the show that will affect how it will play. These are; loop, manual, and link. “Loop” can be set to on or off and as the name implies, determines whether the show will loop continuously or play through one time and then stop.
- Page 28 SHOWS PLAYING SHOWS To play a show, press the “show” switch, and then select the desired page and number switch. The display will show the page, show number and name of the show along with the current step, the current scene and hold time. The show will start immediately from step 0 which is the “start” step. If the show is set to run in manual mode, the hold time will display “manual”...
-
Page 29: Preview
SHOWS EDITING SHOWS To edit a show that has already been recorded, press “record” followed by “show”. Instead of entering steps for a new show, press the show number of the one you want to edit. The message “Edit this existing Show?” will appear in the display. Press “yes” and the show will be called up and you can add to it or modify it by selecting steps and changing any value. -
Page 30: Scene Masters
HOW THE SCENE MASTERS WORK The Show Designer 2CF is designed primarily for controlling moving lights so almost every function is "LTP" or "latest or last action takes precedence". For those familiar with lighting controllers in general you know that moving lights work best using this type of system rather than "HTP"... -
Page 31: Midi
If that same MIDI message is returned to the MIDI input, that scene will be called. Since the Show Designer uses its own type of MIDI message to record scene changes it is recommended that you use the Show Designer 2CF to record the performance. - Page 32 The message “Rom empty, reload program” will appear in the display if this is the case. You can also force the Show Designer 2CF into auto load by holding down the menu and erase switches when powering up. Before turning on the power you must first insert a CF card with the new software program on it.
- Page 33 USING THE COMPACT FLASH INTERFACE FIXTURE PROFILES Fixture profiles are small files that are available from elationlighting.com that contain detailed information about a lighting fixture such as the name and function of each of the channels as well as the name and DMX values of steps within a channel. Once loaded, a profile can be selected from the fixture list when choosing fixtures.
-
Page 34: Using The Com Port
MEMORY RESTORE USING THE COM PORT To copy a memory file from your PC back to Show Designer 2CF, first go to the menu selection in Show Designer 2CF “load memory file from COM port”. Press “enter”, and the display will read, “Waiting for file from COM port”. -
Page 35: Fixture Library
Elation Design Beam 300E 18 Channels Elation Design Beam 1200C 21 Channels Elation Design Beam 1500E 23 Channels Elation DLED 6 Channel (36, Brick, 72IP, 108IP) Elation DLED Par Zoom 8 Channels Elation DLED Par Zoom MH 13 Channels Elation Design Spot 250 Pro... -
Page 36: Specifications
SPECIFICATIONS CONTROL / CONNECTIONS 2 Universes (1,024 DMX Channels) 48 Fixtures up to 32 DMX Channels each 8 Sliding Faders x 4 Banks 4 Rotary Wheels 80 Character Backlit LCD Display Pan/Tilt Joystick 2 3pin XLR DMX Outputs with (2-,3+/2+,3-)Polarity Switch 2 5pin XLR DMX Outputs MIDI In/Out Ports RS-232 and PS/2 Ports... -
Page 37: Optional Accessories
DIMENSIONAL DRAWINGS O P T I O N A L A C C E S S O R I E S ORDER CODE DESCRIPTION SD2RC SHOW DESIGNER 2CF ROAD CASE 37 ... - Page 38 ...
Need help?
Do you have a question about the SHOW DESIGNER 2CF and is the answer not in the manual?
Questions and answers