Table of Contents
Advertisement
Quick Links
Advertisement
Table of Contents

Subscribe to Our Youtube Channel
Related Manuals for Corradi Pergotenda Flux


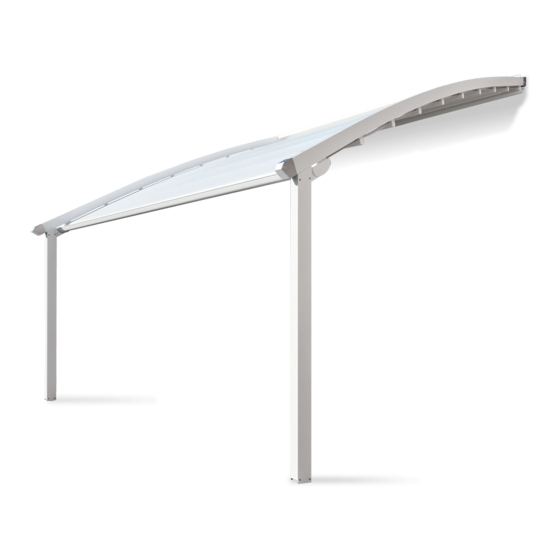
Summary of Contents for Corradi Pergotenda Flux
- Page 1 Pergotenda® Flux Installation manual | EN 1 - 04.2014 Cod. 04838-ING...
-
Page 3: Table Of Contents
Mounting the transmission shafts Assembly impact canvas awning CORRADI S.p.A. reserves the right to make technical modifications to the components or pro- Mounting Impact canvas awning ducts, except for the main features, at any time and without prior notice. -
Page 4: Symbols
Failure to respect the regulations contained herein relieves CORRADI S.p.A. of all responsi- "Attention! Do not touch. Service personnel at work" bility for damage caused to persons, animals, property or components. -
Page 5: Preliminary Checks
SYMBOLS The use of non-original spare parts, or unauthorised interventions or modifications shall relieve CORRADI S.p.A. of any responsibility for damage caused to persons animals or pro- perty. It is absolutely forbidden to tamper with the fixings, the supports, the guides, the fixtures, the command and idler units and any other component of the pERGOTENDA®FLUX. -
Page 6: Controls And Versions
Awning going downwards RADIO CONTROL If FLUX is equipped with radio control, the canvas lift, lower and stop movements are explained in the “motor and automatism” manual. 4 di 53 CORRADI SpA - INSTALLATION MANUAL - pERGOTENDA®FLUX 1 - 04.2014... -
Page 7: Material Check, Unpacking And Preparation
Fixing elements such as screws, stoppers etc. are not included and must be chosen by the installer based on the type of fixture foreseen (wall, wood, metal etc.) 5 di 53 1 - 04.2014 CORRADI SpA - INSTALLATION MANUAL - pERGOTENDA®FLUX... -
Page 8: Features
Support tubes available in colours: white, grey, ivory in glossy or matt finish. painted with certified Qualicoat cycle epoxy powders. AISI 304 stainless steel accessories and 10/10 aluminium protection covers matching the structure. * See Corradi sample kit for other fabrics. 6 di 53 CORRADI SpA - INSTALLATION MANUAL - pERGOTENDA®FLUX... -
Page 9: Versions And Motorisations
Ideal for TILTED AWNINGS with 4 guides to guarantee with every manoeuvre the correct canvas tension, which could change due to the dilatations of the fabric or the guides caused by thermal excursions. 7 di 53 1 - 04.2014 CORRADI SpA - INSTALLATION MANUAL - pERGOTENDA®FLUX... -
Page 10: Mounting Wall Brackets
- the external line of the brackets (1). line marked on the wall. - the intermediate dimensions for fastening the central brackets (with 3-guide structure and equal runner centres). 8 di 53 CORRADI SpA - INSTALLATION MANUAL - pERGOTENDA®FLUX 1 - 04.2014... - Page 11 Check the linearity of the tracing made with a spirit level. position the outside brackets on the line traced on the wall and mark the fixing holes. 9 di 53 1 - 04.2014 CORRADI SpA - INSTALLATION MANUAL - pERGOTENDA®FLUX...
- Page 12 Drill the bracket fixing holes on the wall with a suitable drill bit. - Insert the plugs (suitable for the type of wall and load, see table). - tighten the screws; - check the planarity of each bracket. 10 di 53 CORRADI SpA - INSTALLATION MANUAL - pERGOTENDA®FLUX 1 - 04.2014...
- Page 13 The intermediate bracket must be positioned in correspondence with the line marked on the wall. - the external line of the brackets (1). - the intermediate dimensions for fastening the central brackets (with 3-guide structure and equal runner centres). 11 di 53 1 - 04.2014 CORRADI SpA - INSTALLATION MANUAL - pERGOTENDA®FLUX...
-
Page 14: Mounting Wall Beam (Optional)
Drill the bracket fixing holes on the wall with a suitable drill bit. - Insert the plugs (suitable for the type of wall and load, see table). - tighten the screws; - check the planarity of each bracket. 12 di 53 CORRADI SpA - INSTALLATION MANUAL - pERGOTENDA®FLUX 1 - 04.2014... - Page 15 - Screw in the bracket (3) using bolts and washers (4). - Insert the top corner profile of the beam (2) into the folded end of the bracket (5) and tighten using bolts and washers (5). 13 di 53 1 - 04.2014 CORRADI SpA - INSTALLATION MANUAL - pERGOTENDA®FLUX...
- Page 16 MOUNTING WALL BEAM (OPTIONAL) fig. 12 - Tighten the bolts. - Insert the caps (1) in both ends of the beam. 14 di 53 CORRADI SpA - INSTALLATION MANUAL - pERGOTENDA®FLUX 1 - 04.2014...
-
Page 17: Mounting Guides/Uprights
- Repeat the operation on all the uprights. - pre-tighten the two rear screws (6) to the self-locking nuts (7) but do not over-tighten. - Repeat the operation on all guides. 15 di 53 1 - 04.2014 CORRADI SpA - INSTALLATION MANUAL - pERGOTENDA®FLUX... - Page 18 For 4-guide structures, there are two motor runner cross-bars and they must be installed in the outer clear openings. Use the corner brackets (1) and the screws provided (2) to fit the runner cross-bars (3) to the beams. 16 di 53 CORRADI SpA - INSTALLATION MANUAL - pERGOTENDA®FLUX 1 - 04.2014...
- Page 19 Remove the screws on the runner cross-bar, fit the runner cross-bar with the motor facing the wall to the beams with the screws previously loosened, positioning it so that the motor drive control unit (3) is facing downwards. 17 di 53 1 - 04.2014 CORRADI SpA - INSTALLATION MANUAL - pERGOTENDA®FLUX...
- Page 20 19 - Guide fixing fig. 20 - Guide fixing - Fully tighten all the guide/upright fastening screws. - Fully tighten all the screws fastening the guide with the wall bracket. 18 di 53 CORRADI SpA - INSTALLATION MANUAL - pERGOTENDA®FLUX 1 - 04.2014...
-
Page 21: Mounting Profile With Velcro
Mount the outer supports of the profile with Velcro 10 cm from the inside of the wall bracket aligned at a distance of approximately 9 cm from the lower edge of the wall bracket. The inner supports must be approximately 100 cm apart. Fix the profile with Velcro to the supports by turning the lever of each support. 19 di 53 1 - 04.2014 CORRADI SpA - INSTALLATION MANUAL - pERGOTENDA®FLUX... -
Page 22: Mounting The Transmission Shafts
Take the shaft (2) and loosen the screws (4) and (5). Remove the drive shaft (6) and the two bushes (7). ATTENTION: DO NOT DISMOUNT THE pRE-ASSEMBLED SHAFTS. 20 di 53 CORRADI SpA - INSTALLATION MANUAL - pERGOTENDA®FLUX 1 - 04.2014... - Page 23 Slide the shaft (2) on the drive shaft (6), rotating it to compact the sliders in the runner (I). of the same length. Insert the two bushes (7) on both sides and lock them with the screws (5). 21 di 53 1 - 04.2014 CORRADI SpA - INSTALLATION MANUAL - pERGOTENDA®FLUX...
- Page 24 If the two hexagons do not couple during the insertion (male and female), turn the shaft (2) slightly, always keeping it pushed towards the motor until reaching the first coupling point. 22 di 53 CORRADI SpA - INSTALLATION MANUAL - pERGOTENDA®FLUX 1 - 04.2014...
- Page 25 Take the transmission shaft (3) and loosen the screw (9). Insert into the runner (I) until up against the bush (10). position the bush (10) at 5.5 cm and lock it with the screw (9). 1 - 04.2014 23 di 53 CORRADI SpA - INSTALLATION MANUAL - pERGOTENDA®FLUX...
- Page 26 If the two hexagons do not couple during the insertion (male and female), turn the shaft (3) slightly, always keeping it pushed towards the motor until reaching the first coupling point. 24 di 53 CORRADI SpA - INSTALLATION MANUAL - pERGOTENDA®FLUX 1 - 04.2014...
- Page 27 33 - Shaft installation Tighten the screw (11). Take the shaft (1) and loosen the screw (13). position the bush (14) at 5.5 cm and lock with the screw (13). 25 di 53 1 - 04.2014 CORRADI SpA - INSTALLATION MANUAL - pERGOTENDA®FLUX...
- Page 28 Insert the shaft into the runner (I) until up against the bush (14). Loosen the screw (15), run the shaft (1) rotating it (see fig. 30) to compact the sliders in the runner (I). 26 di 53 CORRADI SpA - INSTALLATION MANUAL - pERGOTENDA®FLUX 1 - 04.2014...
- Page 29 Check the correct working efficiency of the movement by moving the winding handle if the movement is manual, or else by temporarily connecting the electric motor. N.B.: At this point, fully tighten the fixing screws on each guide. 27 di 53 1 - 04.2014 CORRADI SpA - INSTALLATION MANUAL - pERGOTENDA®FLUX...
-
Page 30: Assembly Impact Canvas Awning
N.B.: For structures above 600 cm, the canvas is not supplied mounted. 28 di 53 CORRADI SpA - INSTALLATION MANUAL - pERGOTENDA®FLUX 1 - 04.2014... - Page 31 Insert the windbreak tubes (I) in the respective rubber cords of the canvas awning (Z) as shown in pelmet with Velcro (V), intermediate tubes (I) and terminal tubes (T). the figure. 29 di 53 1 - 04.2014 CORRADI SpA - INSTALLATION MANUAL - pERGOTENDA®FLUX...
- Page 32 Fit the successive windbreaker tubes (I) on the canvas awning rubber cords (Z) and snug against Insert the supports of the central sliders (G) in the respective windbreaker tubes (I). the central slider supports (G). 30 di 53 CORRADI SpA - INSTALLATION MANUAL - pERGOTENDA®FLUX 1 - 04.2014...
- Page 33 45 – Assembling canvas awning Insert the lateral stoppers (Y) in the respective windbreak tubes (I) on both sides. Insert the terminal tubes (T) as illustrated. 31 di 53 1 - 04.2014 CORRADI SpA - INSTALLATION MANUAL - pERGOTENDA®FLUX...
- Page 34 46 – Assembling canvas awning fig. 47 – Assembling canvas awning Insert the slider supports of the terminal tubes (S) as illustrated. Insert the terminal tubes (T) as illustrated. 32 di 53 CORRADI SpA - INSTALLATION MANUAL - pERGOTENDA®FLUX 1 - 04.2014...
- Page 35 Fit the front pelmet (M) on the wall side terminal tube, and the pelmet with Velcro (V) on the outer Insert the outside stoppers (J) in the respective terminal tubes on both sides. side terminal tube. 33 di 53 1 - 04.2014 CORRADI SpA - INSTALLATION MANUAL - pERGOTENDA®FLUX...
- Page 36 On the opposite extremity of the windbreak tube on which the tightener is applied, tighten the canvas by placing the knee on the end stopper of the tube. 34 di 53 CORRADI SpA - INSTALLATION MANUAL - pERGOTENDA®FLUX 1 - 04.2014...
- Page 37 Fix all the screws from one side of the canvas. (X/2) on both sides and proceed with the canvas fixing. NOTE: NEVER FASTEN the plates (P), with the relative screws, to the intermediate joints (if present). 35 di 53 1 - 04.2014 CORRADI SpA - INSTALLATION MANUAL - pERGOTENDA®FLUX...
- Page 38 It is recommended to use the special tool contained in the LAYING KIT (optional on request). NOTE: Tighten the canvas as much as possible. The perfect aesthetic and functional result is directly proportional to the tension of the canvas. 36 di 53 CORRADI SpA - INSTALLATION MANUAL - pERGOTENDA®FLUX 1 - 04.2014...
- Page 39 37 di 53 1 - 04.2014 CORRADI SpA - INSTALLATION MANUAL - pERGOTENDA®FLUX...
-
Page 40: Mounting Impact Canvas Awning
Lower the bar of each lifting kit to the ground. Rest the canvas on the bars. Simultaneously actuate the lifting kits to bring the canvas awning up to the pins on the runners. 38 di 53 CORRADI SpA - INSTALLATION MANUAL - pERGOTENDA®FLUX 1 - 04.2014... - Page 41 NOTE: The drive slider nuts (C1) and the fixed slider nut (C2) should be tightened until the terminal cap is against the slider. The intermediate sliders should be hand-tightened to the end of the thread. 39 di 53 1 - 04.2014 CORRADI SpA - INSTALLATION MANUAL - pERGOTENDA®FLUX...
-
Page 42: Installation Of Assembled Impact Awning
(C2) forward, checking that there is a distance of at least 2 cm between the taught canvas (terminal tube) and the upright pillar. 40 di 53 CORRADI SpA - INSTALLATION MANUAL - pERGOTENDA®FLUX 1 - 04.2014... -
Page 43: Pillar Fixing
Fix the plates (A) by drilling through the floor, with an appropriate tip, in correspondence with the holes of each plate (1). Fix, using the plugs (2). Completely fix the plates (3). 41 di 53 1 - 04.2014 CORRADI SpA - INSTALLATION MANUAL - pERGOTENDA®FLUX... -
Page 44: Tin Hardware
TIN HARDWARE fig. 64 Spread the adhesive noise-reducing gasket on all the beam union bars. 42 di 53 CORRADI SpA - INSTALLATION MANUAL - pERGOTENDA®FLUX 1 - 04.2014... - Page 45 Start with the whole protection cover and end with the trimmed one (valid for all versions). - Fasten with the self-drilling screws (5). - Insert and tighten the bracket cover protections (6) right (cod. 03907) and left (cod. 03906). 43 di 53 1 - 04.2014 CORRADI SpA - INSTALLATION MANUAL - pERGOTENDA®FLUX...
- Page 46 - Drill the wall in correspondence with the holes on the protection cover (3) and insert suitable wall plugs, then fasten with the screws and rivet. - Spread a line of silicon between the roof protective cover and the wall (4). 44 di 53 CORRADI SpA - INSTALLATION MANUAL - pERGOTENDA®FLUX 1 - 04.2014...
- Page 47 - push the idler covering (1) and the covering element (2) onto the guide and fasten them with - place the front beam (1) between the two uprights and fasten it on the angle bars (2) with the the screws provided (3). screws (3). 45 di 53 1 - 04.2014 CORRADI SpA - INSTALLATION MANUAL - pERGOTENDA®FLUX...
-
Page 48: Mounting Lateral Kit
(3). - Drill the holes with a drill bit suitable for the type of wall (4) - Insert suitable anchors to fix the upright pillar (5) 46 di 53 CORRADI SpA - INSTALLATION MANUAL - pERGOTENDA®FLUX 1 - 04.2014... - Page 49 - Block everything by tightening the side screws on the inner side of the union cross-bar. - Fix the lower bracket with an anchor suitable for the floor in question and insert the central upright pillar (3). 47 di 53 1 - 04.2014 CORRADI SpA - INSTALLATION MANUAL - pERGOTENDA®FLUX...
-
Page 50: Ermetika Covering
A covering is envisaged (1) to rest on the box for the Ermetika canvas. drill at about 2 cm from the extreme edge from both sides with a ø 4 drill bit and fix with the supplied screws. 48 di 53 CORRADI SpA - INSTALLATION MANUAL - pERGOTENDA®FLUX 1 - 04.2014... -
Page 51: Gronda Mobile 2011)
RETRACTABLE GUTTER N.B.: refer to the product's specific laying manual for the (Retractable gutter) installation procedures. 49 di 53 1 - 04.2014 CORRADI SpA - INSTALLATION MANUAL - pERGOTENDA®FLUX... -
Page 52: Tables
> 32,7 Hurricane Immense damage * According to the UNI EN 13561 standard TABLE 2 - MAXIMUM DIMENSIONS cm Width Projection 2 runners 3 runners 4 runners 1300 50 di 53 CORRADI SpA - INSTALLATION MANUAL - pERGOTENDA®FLUX 1 - 04.2014... - Page 53 TABLE 4 – Maximum tensile and shear load (not combined) in daN (1 daN ≈ 1 kg) on each bolt (considering 2 bolts for each support) for a maximum wind speed 49km/h (Beaufort scale 6 - Class 3 according to EN 13561) Width (cm) 1000 1050 1100 1150 1200 1250 1300 2 RUNNERS 3 RUNNERS 4 RUNNERS 51 di 53 1 - 04.2014 CORRADI SpA - INSTALLATION MANUAL - pERGOTENDA®FLUX...
- Page 54 TABLE 5 Maximum tensile and shear load (not combined) in daN (1 daN ≈ 1 kg) on each bolt (considering 2 bolts for each support) for a maximum wind speed 74km/h (Beaufort scale 8 -over Class 3 according to EN 13561) Width (cm) 1000 1050 1100 1150 1200 1250 1300 2 RUNNERS 3 RUNNERS 4 RUNNERS 52 di 53 CORRADI SpA - INSTALLATION MANUAL - pERGOTENDA®FLUX 1 - 04.2014...
-
Page 55: Example - Calculation Of Wind Resistance Based On The Loads And The Anchors
For the correct choice and use of the bolts refer exclusively to the manual of the fixing system anchor (not combined) (considering 2 bolts for each support). manufacturer * data taken from the HILTI technical sheets (ST_HY 70_2008.pDF page 259-261 and hsl-3.pDF page62-63) 53 di 53 1 - 04.2014 CORRADI SpA - INSTALLATION MANUAL - pERGOTENDA®FLUX... - Page 56 CORRADIGROUP Corradi SpA Corradi System Srl 39, Via G. Brini 40128 Bologna - Italy 18, Via A. Einstein 47122 Forlì - Italy T +39 051 4188 411 F +39 051 4188 400 T +39 0543 796617 F +39 0543 794339 E info@corradi.eu...
Need help?
Do you have a question about the Pergotenda Flux and is the answer not in the manual?
Questions and answers