Subscribe to Our Youtube Channel
Summary of Contents for Chad Valley 328/9309
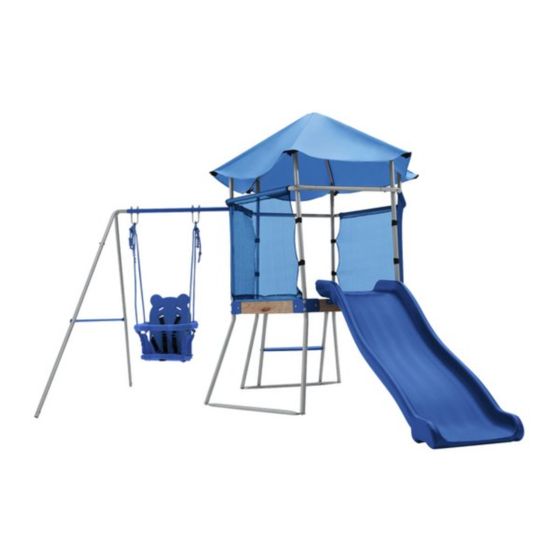
- Page 1 TODDLER SWING, CLIMBER & SLIDE 328/9309 Climber & Slide Age limit: 3-8 years Maximum user weight: 45kg Tips: It will take 2 adults Toddler Swing around 120 minutes to Age limit: 12 - 36 months assemble. Maximum user weight: 25kg...
- Page 2 Safety Information Parts Assembly Instructions 5-16 Care and Maintenance...
- Page 3 Instruct children to avoid swinging the empty swing and not twist the swing chain or loop them over the top support bar since this may reduce the strength of the chain or rope. WARNING. FOR DOMESTIC USE ONLY. Do not allow children to climb on the structure of the Please check to ensure all parts are present before you swing (eg legs, top bar, cross bars and other parts).
- Page 4 (+44) 0330 0904 420 Please check you have all the parts listed below 1.Support Tube 11.Upper Leg 20B.Connection Wood x 6pcs x 1pc x 2pcs 2.Base Connection Tube 12.Upper Leg 21.Small Connection x 2pcs x 1pc Wood x 4pcs 3.Base Connection Tube 13.Lower leg x 1pc x 2pcs...
- Page 5 (+44) 0330 0904 420 Please check you have all the parts listed below Note: The quantities below are the correct amount to complete the assembly. In some cases more x2 (M8×85mm) x15 (M6×25mm) X8 (M6×16mm) X12 (M6×20mm) X8 (M6×40mm) X7 (M6×12mm) x2 (M6x35mm) X20 (M6×12mm) X26 (M6×20mm)
- Page 6 Assembly Instructions Step 1 ● Attach Connection Plate (16) to Support Tube (1) as shown in Figure 1. DO NOT FULLY TIGHTEN THE BOLTS UNTIL THE ENTIRE FRAME IS ASSEMBLED IN STEP 12. FIGURE 1 x 12pcs x 12pcs x 12pcs x 12pcs Step 2 ●...
- Page 7 Assembly Instructions Step 3 ● Attach Base Connection Tube (3) to Support Tube (1) ● Attach Ladder Support Tube (4) and Connection Wood (20B) to Connection Plate (16) as shown in Figure 3. FIGURE 3 x 2pcs x 2pcs x 2pcs x 2pcs x 2pcs Step 4 ●...
- Page 8 Assembly Instructions Step 5 ● Connect all Canopy Tube (9) together in the sequence as shown in Figure 5. FIGURE 5 x 1pc x 1pc x 1pc x 1pc Step 6 ● Insert all Canopy Tube (9) into Support Tube (1) as shown in Figure 6.
- Page 9 Assembly Instructions Step 7 ● Attach Support Plate (17) and Connection Wood (20A) to Connection Plate (16) as shown in Figure 7. FIGURE 7 x 8pcs x 8pcs x 8pcs Step 8 ● Attach Connection Wood (20B) to Connection Plate (16) as shown in Figure 8.
- Page 10 Assembly Instructions Step 9 ● Insert Straight Connection Tube (6) and Connection Tube (8) through the side sleeve of Net (19). ● Insert Straight Connection Tube with Hole (7) and Connection Tube (8) through the side sleeve of Net (18) as shown in Figure 9.
- Page 11 Assembly Instructions Step 11 ● Insert Small Connection Wood (21) through the bottom sleeve of Net (18) and (19), and then secure to Connection Wood (20) as shown in Figure 11. FIGURE 11 x 12pcs Step 12 ● Secure the net to the tubes with velcro straps as shown in Figure 12.
- Page 12 Assembly Instructions Step 13 ● Attach Support Wood (22) to Support Plate (17) as shown in Figure 13. FIGURE 13 x 20pcs Step 14 ● Attach Bottom Support Wood (23) to Connection Wood (20B) as shown in Figure 14. FIGURE 14 x4pcs...
- Page 13 Assembly Instructions Step 15 ● Attach Canopy (24) to the assembled Canopy Tube (9) as shown in Figure 15. FIGURE 15 Step 16 ● Attach Beam (10) to Straight Connection Tube with Hole (7) as shown in Figure 16. FIGURE 16 x 1pc x 1pc x 1pc x 1pc...
- Page 14 Assembly Instructions Step 17 ● Insert Upper Leg (11) and (12) into Beam (10). ● Insert Lower Legs (13) into Upper Leg (11) and (12) and secure together with Rail (14) as shown in Figure 17. FIGURE 17 x 2pcs x 2pcs x 2pcs x 2pcs x 2pcs Step 18 ●...
- Page 15 Assembly Instructions Step 19 ● Attach Anchors (15) to the base of Legs (13) as shown in Figure 19. FIGURE 19 x 2pcs x 2pcs x 2pcs x 2pcs Step 20 ● Attach Slide (26) to Connection Wood (20B) as shown in Figure 20 Once assembly is completed, go over the...
- Page 16 Assembly Instructions Step 21 ● Attach Anchors (27) to Base Connection Tube (2) as shown in Figure 21. FIGURE 21 To anchor the toddler swing ● Position the anchors at 45 degree angle and secure them fully into the ground until the leg of the swing is standing flat and stable on the ground.
- Page 17 Assembly Instructions To secure the child in the Toddler Swing SEAT ADJUSTABLE GUIDE ● The length of the rope is adjustable for the height of the child through the seat connector. ● To adjust, loosen the knot on the seat connector, pull the rope through the holes and tighten again.
-
Page 18: Care And Maintenance
If you need help or have damaged or missing parts,call the Customer Helpline: (+44) 0330 0904 420 Produced for Chad Valley Toys. Argos Ltd. Country of origin: China Address: 489 - 499 Avebury Boulevard, Central Milton Keynes, MK9 2NW. www.argos.co.uk...


Need help?
Do you have a question about the 328/9309 and is the answer not in the manual?
Questions and answers