
Related Manuals for Bosch WAU28PH5NL


Summary of Contents for Bosch WAU28PH5NL
- Page 1 Translated from Dutch to English - www.onlinedoctranslator.com Washing machine WAU28PH5NL [NL] User manual and installation instructions...
-
Page 2: Table Of Contents
Refer to the Digital User's Guide for more information. Index 1 Safety..........4 6 Before using for the first time ....20 1.1 General instructions ....4 6.1 Starting a wash cycle without laundry........20 1.2 Destination of the device rate ........ - Page 3 15 Intelligent dosing system ..36 21 Customer Service......60 21.1 Product number (E no.) and 15.1 Starting the program with the production number (FD) ... 61 intelligent dosing system ... 36 15.2 Filling the dosing container ..36 22 Consumption values ....62 15.3 Contents of the dosing reservoir........
-
Page 4: Safety
NLSafety 1 Safety Observe the following safety regulations. 1.1 General instructions †Please read this manual carefully. †Keep the operating instructions and product information for future reference. for use or for subsequent owners. †Do not connect the device in case of transport damage. 1.2 Destination of the device Only use the device: †to wash machine-safe textiles and wool by hand... -
Page 5: Secure Installation
SafetyNL 1.4 Secure installation Observe the safety regulations when installing the device. WARNING ‒ Risk of electric shock! Improper installations are dangerous. ▶ Connect and operate the device only in accordance with the information on the type plate. ▶ Only connect the device to a mains supply with alternating current via a properly installed earthing socket. - Page 6 NLSafety ▶ If the power cord is too short, contact customer service. ▶ Only use adapters approved by the manufacturer. WARNING ‒ Risk of injury! The heavy weight of the device can cause injuries when lifted. ▶ Do not lift the device alone. If this appliance is installed incorrectly in a washer-dryer column, the installed appliance may fall.
-
Page 7: Safer Use
SafetyNL If the appliance is moved by protruding parts, such as the loading door, the parts can break off. ▶ Do not move the appliance by protruding parts. CAUTION ‒ Risk of cutting! Sharp edges on the device can cause cuts if touched. ▶... - Page 8 NLSafety ▶ In the case of discarded appliances, remove the mains plug from the socket, then cut the mains cable and damage the lock of the appliance door so that the appliance door no longer closes. WARNING ‒ Risk of suffocation! Children can inhale or swallow small parts and choke.
-
Page 9: Safe Cleaning And Maintenance
SafetyNL CAUTION ‒ Risk of burns! The soap gets hot when washing at high temperatures. ▶ Do not touch the hot soapy water. CAUTION ‒ Risk of chemical burns! When opening the detergent drawer, detergent and care products may splash out of the appliance. - Page 10 NLSafety WARNING ‒ Risk of poisoning! Toxic fumes can be generated when cleaning agents containing solvents are used. ▶ Do not use solvent-based cleaning agents.
-
Page 11: Avoiding Material Damage
Avoid material damageNL Make sure that the internal ▶ 2 Material damage diameter of the water tap is at least avoid 17 mm. Make sure that the thread length ▶ on the connection to the water Follow this instruction to avoid tap is at least 10 mm. -
Page 12: Environmental Protection And Saving
NLEnvironmental protection and saving Clean the device only with water ▶ Detergent according to the degree of and a soft, damp cloth. soiling of the laundry . Remove all detergent residues, ▶ aFor a light to normal degree spray mist or residues immediately of contamination, a small amount upon contact with the appliance. -
Page 13: Energy Saving Mode
Set up and connectNL Open the appliance door. The device has an aqua sensor. → †The Ministry in Essence", Page 33 aThe aquasensor monitors during Remove the accessories from the the flush adjusts the turbidity of the drum. flush water and adjusts the duration Close the appliance door. -
Page 14: Installation Site Requirements
NLSet up and connect 4.3 Installation site installation site Requirements requirements Place the device Floor with wooden guess at a beams resistant WARNING wooden plate (thick- Risk of electric shock! too minimal The device contains live parts. 30mm) which Touching live parts is dangerous. screwed to the floor. - Page 15 Set up and connectNL Pull the hoses out of the holders. Remove the 4 sleeves. Loosen and remove all bolts of the 4 Install the 4 cover caps. transport locks with a SW13 open- end wrench † Push the 4 cover caps down. Remove the mains connection cable from the holder.
-
Page 16: Connecting The Device
NLSet up and connect Remark:Observe the pumping 4.5 Connecting the device heights. Connect water supply hose The maximum pumping height bed Connect the water supply hose to the appliance. The connection position tie with a hose clamp (24-40 mm) bore gene. -
Page 17: Adjusting The Device
Set up and connectNL Tighten the lock nuts against the 4.6 Adjusting the device housing with an open-end wrench To reduce noises and vibrations and to SW17 hand-tight. prevent the device from walking, place the device horizontally. Loosen the lock nuts with a SW17 open-end wrench. -
Page 18: Getting To Know Your Device
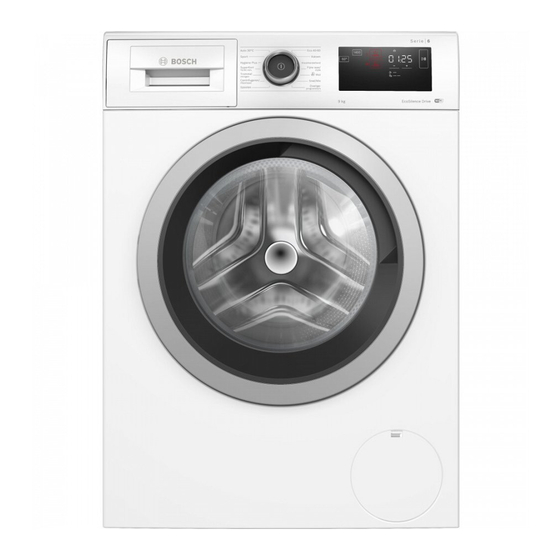
NLGetting to know your device 5 Getting to know your device 5.1 Device Here you will find an overview of the components of your device. Depending on the device type, details in the picture may differ, e.g. the color the vor Service valve n pump Transport protections →... -
Page 19: Detergent Drawer
Getting to know your deviceNL 5.2 Detergent drawer Manual Dosing Compartment / : Dosing container for fabric softener or detergent : Detergent dispenser 1 2 3 5.3 Control panel You can set all functions of your device and obtain information about the operating status via the control panel. -
Page 20: Before Using For The First Time
NLusage change or deactivate it by pressing Approx. Pour 1 liter of tap water into the corresponding button on the the manual dosing compartment. display again. PAY ATTENTION! Violent action on the display may cause damage. ▶ Do not exert strong pressure on the display. - Page 21 usageNL Start the first wash cycle or press to switch off the appliance. → †The Ministry in Essence", Page 33...
-
Page 22: Display
NLDisplay 7 Display The display shows the current setting values, options or information texts. Example display indication name More information Indication 0:40 Approximate expected program duration Program duration / remaining time of or time remaining in the program. the program →... - Page 23 DisplayNL name More information Indication Energy consumption for the set Energy consumption programme. † : lower energy consumption † : higher energy consumption Water consumption for the set water consumption program. † : lower water consumption † : higher water consumption Signal Basic setting Key signal...
- Page 24 NLDisplay name More information Indication The appliance has detected too much Foam detection foam. Door †lights up: the door is locked and can not be opened. †flashes: the door is not closed. †off: the door is unlocked and can be den open.
- Page 25 TestsNL 8 Keys The selection of the program settings depends on the program set. Knob Choise More information (Start/Pause) †start Start, cancel or pause program. †Cancel †pause speed †activate Activate or deactivate reduced program duration. †deactivate Remark:The energy consumption is higher.
- Page 26 NLTests Knob Choise More information - 1400 - 1400 rpm Adjust the spin speed or deactivate (Spin) the spin. The selection drains the water and deactivates the spin cycle. The laundry remains wet in the drum. †Switch Turn the device on or off. (mains switch †Switch off boot)
- Page 27 TestsNL Knob Choise More information †activate Activate or deactivate washing with less (Anti wrinkle) crease. †deactivate To reduce creasing in the laundry, the spin process and spin speed are adjusted. The laundry is so damp after washing that it hangs out well on the clothesline.
-
Page 28: Programs
NLPrograms 9 Programs Remark:The care labels on the laundry give you additional information on program selection. max. Program Description bela- thing (kg) Cotton Wash hard-wearing fabrics made of cotton, linen and blended fabrics. Also suitable as a shortened program for normally soiled laundry if you activate Speed. - Page 29 ProgramsNL max. Program Description bela- thing (kg) Fast mix Wash textiles made of cotton, linen, synthetic materials and blended fabrics. Suitable for lightly soiled laundry. Program setting: †max. 60 °C †max. 1400 rpm Delicate silk Wash delicate, washable textiles made of silk, viscose and synthetics.
- Page 30 NLPrograms max. Program Description bela- thing (kg) Hygiene Plus Wash hard-wearing fabrics made of cotton, linen and blended fabrics. Suitable for allergy sufferers and with high hygiene requirements. Remark:When the set temperature is reached, it remains constant throughout the washing process. Program setting: †max.
- Page 31 ProgramsNL max. Program Description bela- thing (kg) Halve the amount of detergent to avoid foaming. Do not use fabric softener. Do not use wool, delicates or liquid detergents. Remark:If you have not used a program with a temperature of 60 °C or higher for a long time, the drum cleaning indicator flashes as a reminder.
-
Page 32: Accessories
– Tie fabric belts, apron straps, etc. in the table of contents or on together, or use a laundry bag www.bosch-home.com. 11.1 Preparing the laundry – Tie together long drawstrings and cords with fixed ends in hoods or... -
Page 33: Detergent And Care Ginger
Remark:More information can be found in the digital operating instructions by scanning the QR code 12 Detergent and detergent in the table of contents or on www.bosch-home.com. care product 13.1 Switch on device Comments Required:The device is correctly set †More information can be found in the digital manual by scanning the QR code in up and connected. -
Page 34: Saving Program Settings
NLService 13.6 Dosing detergent and care †When you use the intelligent dosing activates or deactivates the agent system, the setting is saved. In programs where intelligent dosing 13.4 Save program settings is not possible or desired, you can dose the detergent manually. You can save your individual program Tip:In addition to the intelligent settings as favourites. -
Page 35: Loading The Laundry
Child lockNL Wipe the rubber sleeve dry and 13.8 Loading laundry remove any foreign objects. Press . The device pauses. Remark:When appears it is not possible to add laundry. When goes out, then it is filling of laundry possible. Open the appliance door. Reload or remove the laundry. -
Page 36: Intelligent Dosing System
NLIntelligent dosing system Requirements 15 Intelligent dosing system †The laundry is prepared. → †Preparing the laundry", teem Page 32 †The laundry is sorted. †The Depending on the program and the settings, the optimum amounts of laundry has been placed. → †Fill the drum with laundry", liquid detergent and fabric softener are dosed automatically. -
Page 37: Reservoir
Intelligent dosing systemNL If you want to replace liquid detergent Remark:Close the filling lids or fabric softener in the dispenser immediately after filling to ensure with another product, clean the that the liquid detergent or fabric detergent drawer beforehand. softener does not dry out. If necessary, add detergents such as →... -
Page 38: Basic Dosing Amount
WiFi setting on the device instructions by scanning the QR code rate is activated. in the table of contents or on → †Activate WiFi on the device", www.bosch-home.com. page 40 The Home Connect services are not †The appliance has available in every country. The... -
Page 39: Connecting The Device To A Wlan Home Network (Wifi) Without Wps Function
Home ConnectNL At least 3 seconds on ken. 16.2 Connecting device to Busy- WLAN home network aThe display showsauto reflected (WiFi) without WPS to give. function Press . Press the WPS button on the If your router does not have WPS router within 2 minutes. -
Page 40: Device With The Ho- Connect Me Connect App
NLHome Connect Enter the network name (SSID) and As soon as the appliance is password (key) of your home displayed in the Home Connect network in the Home Connect app. app, follow the last steps in the Home Connect app. Follow the steps in the Home aWhen the displayconagain- Connect app to connect the... -
Page 41: Resetting The Device's Network
Home ConnectNL Press . 16.6 Resetting the device's ▶ Pressing the button for at least 3 network settings seconds opens the Home Connect Press for at least 3 seconds. menu. When you press the button, the appliance is enabled for remote Set program to position 5. -
Page 42: Basic Settings
QR code PAY ATTENTION! in the table of contents or on The pump unit contains electrical www.bosch-home.com. components. Electrical components can be damaged by contact with water. 18 Cleaning and care ▶... - Page 43 Cleaning and maintenanceNL Remove the pump unit. Clean the pump unit with a damp cloth. Unlock and remove the detergent drawer lid. Clean the detergent drawer and lid with a soft, damp cloth or hand shower. Empty the detergent drawer. Insert the detergent drawer, dry the lid and the pump unit and install.
-
Page 44: Cleaning The Drain Pump
NLCleaning and maintenance Open and remove the service door. Clean the housing of the detergent drawer in the appliance. Place a sufficiently large container under the opening. Slide the detergent drawer into the appliance. Remove the drain hose from the holder. 18.3 Cleaning the drain pump Clean the drain pump in the event of malfunctions, e.g. - Page 45 Cleaning and maintenanceNL Cleaning the drain pump CAUTION - Risk of burns!The soap gets hot when washing at high Required:The drain pump is empty. → Page 44 temperatures. As there may still be residual ▶ Do not touch the hot soapy water. water in the pump, carefully Pull off the sealing cap to allow the unscrew the lid.
- Page 46 NLCleaning and maintenance Install the pump cover. Before the next wash Check that the pump cover To prevent unused detergent from † components are correctly flowing into the drain during the next assembled. wash, run the programmeDrainoff after you have emptied the pump. Open the tap.
-
Page 47: Troubleshooting
TroubleshootingNL 19 Troubleshooting You can remedy minor faults on the device yourself. Before contacting customer service, please refer to the troubleshooting information. This way you avoid unnecessary costs. WARNING Risk of electric shock! Improper repairs are dangerous. Only qualified personnel may carry out repairs on the device. ▶... - Page 48 NLTroubleshooting Cause and Troubleshooting Malfunction "E:36 / -10" When dosing manually, reduce the amount of ▶ detergent for the next wash with an equal load. Unauthorized extension mounted on the water drain hose. Remove unauthorized extensions from the water ▶ drain hose.
- Page 49 TroubleshootingNL Cause and Troubleshooting Malfunction Open the water tap. "E:30 / -10" and/or ▶ Water supply hose is kinked or pinched. Make sure that the water supply hose is not ▶ kinked or pinched. Water level measuring system defective. Remark:With the error message, the device starts a draining procedure.
- Page 50 NLTroubleshooting Cause and Troubleshooting Malfunction burns. Temperature is too high. Wait for the temperature to drop. ▶ → †program cancel", Page 35 ▶ Water level is too high. Select a suitable program for draining. ▶ → †Programs", Page 28 flashes. Door is not closed.
- Page 51 TroubleshootingNL Cause and Troubleshooting Malfunction To start the program, press . Program does not start. Child lock is activated. → †Deactivate child lock", page 35 ▶ / is activated. Check if / is activated. ▶ → †Buttons", Page 25 Laundry is wedged in the door. Open the door again.
- Page 52 NLTroubleshooting Cause and Troubleshooting Malfunction Door cannot be Open the door with the emergency release. ▶ → †Emergency release", page 59 opened. Drain pipe or water drain hose is clogged. Washing water is not pumped out. Clean the drain pipe and the water drain hose. ▶...
- Page 53 TroubleshootingNL Cause and Troubleshooting Malfunction No water flows into was not pressed. the device. The Press . ▶ detergent was not The strainers in the water supply are clogged. washed in. ▶ Clean the strainers in the water supply. Water tap is closed. Open the water tap.
- Page 54 NLTroubleshooting Cause and Troubleshooting Malfunction Vibration and movement Secure the device feet. of the ▶ → †Adjusting the device", Page 17 device during the centrifuge Transport protections have not been removed. run. → †Remove transport locks", page 14 † ▶ Load recognition is active.
- Page 55 TroubleshootingNL Cause and Troubleshooting Malfunction Program centrifugal Drain pipe or water drain hose is kinked or pinched. run does not start. Make sure that the drain pipe and the water ▶ drain hose are not kinked or pinched. The unbalance detection system has interrupted the spin cycle due to uneven distribution of the laundry.
- Page 56 NLTroubleshooting Cause and Troubleshooting Malfunction wrinkling. Unsuitable program set for the type of fabric. Select a suitable program for the type of fabric. ▶ Spin result is Low spin speed is set. not to satisfaction- Set a higher spin speed for the next wash. ▶...
- Page 57 TroubleshootingNL Cause and Troubleshooting Malfunction Detergent residue on Empty the dosing containers. → †Cleaning the detergent drawer", Page the damp laundry. Clean the dosing containers. Refill the dosing containers. → †Filling the dosing container", page 36 Basic dosing amount not set correctly. When the intelligent dosing is activated, reduce the ▶...
- Page 58 NLTroubleshooting Cause and Troubleshooting Malfunction Insufficient cleaning Unsuitable detergent has been placed in the dosing next operation. container of the intelligent dosing system. Check whether the detergent used is suitable. → †Detergent and care agent", Page 33 Empty the dosing containers. →...
-
Page 59: Emergency Release
→ †Set up and connection", Remark:More information can be found clue in the digital usage by page 13 and scanning v in the table → and the QR code †Before using for the first time", of contents or on Page 20 † www.bosch-home.co... -
Page 60: Customer Service
NLcustomer service 20.4 Disposal of your old chemical equipment (waste electrical and electronic device equipment - WEEE). Environmentally friendly disposal The Directive sets the means that valuable raw materials can framework for the take- be reused. back valid in the EU and processing of old appliances. -
Page 61: Product Number (E No.) And Production Number (Fd)
customer serviceNL 21.1 Product number (E no.) and production number (FD) The product number (E-Nr.) and the production number (FD) can be found on the type plate of the device. The type plate is located depending on the model: †on the inside of the door. -
Page 62: Contents Of The Dosing 22 Consumption Values
NLConsumption values 22 Consumption values The following information is provided in accordance with the EU Ecodesign Regulation. The specified values for other programs asEco 40-60are only guide values and have been determined in accordance with the applicable standard EN60456. The automatic dosing function has been disabled for this purpose. Notes on the comparative test: deactivate the automatic dosing function, unless this function is the subject of the test. -
Page 63: Technical Data
24 Declaration of Conformity standby becomes ring set (Wi-Fi Fi): 5 min †network Robert Bosch Hausgeräte GmbH unions standing hereby declares that the appliance by (WiFi): with Home Connect functionality 1.50 W complies with the basic requirements and other applicable provisions of Depending on the device output Directive 2014/53/EU. - Page 64 NLDeclaration of Conformity 2.4 GHz band (2400–2483.5 MHz): max. 100 mW 5 GHz band (5150–5350 MHz + 5470–5725 MHz): max. 100 mW UK (NI) 5 GHz WLAN (WiFi): for indoor use only. ALREADY 5 GHz WLAN (WiFi): for indoor use only.
- Page 68 Contact data of all countries are listed in the attached service directory. BSH Hausgeräte GmbH Carl-Wery-Strasse 34 81739 Munich, GERMANY www.bosch-home.com A Bosch Company * 9001619972* 9001619972†020303)
Need help?
Do you have a question about the WAU28PH5NL and is the answer not in the manual?
Questions and answers