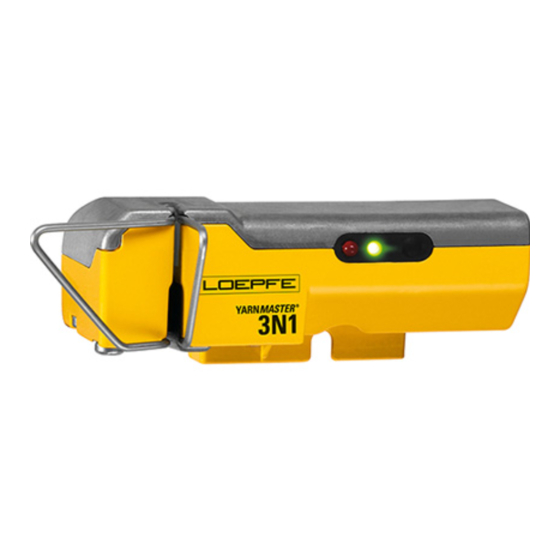
Loepfe YARNMASTER 3N1 Fitting Instruction
Hide thumbs
Also See for YARNMASTER 3N1:
- Fitting instruction (30 pages) ,
- Instruction manual (62 pages) ,
- Fitting instruction (26 pages)
Table of Contents
Advertisement
Quick Links
Advertisement
Table of Contents

Related Manuals for Loepfe YARNMASTER 3N1


Summary of Contents for Loepfe YARNMASTER 3N1
- Page 1 YARNMASTER ® Fitting Instruction Schlafhorst ACO 240...
- Page 3 All rights reserved. No part of this may be repro duced in whatever form (by printing, photocopying, microfilm or oth- er) without a written grant of Loepfe Brothers Ltd., nor may it be processed or distributed by any electronic mean.
- Page 4 INHALTSVERZEICHNIS...
-
Page 5: Table Of Contents
TABLE OF CONTENTS Table of Contents Safety Instructions Norms and Regulations Instruction Manual Liability Operational Notes Fitting 3N1 Preparation of Major Cabling SCU Side Power Supply Connection LAN to Q-Board Connection 4K to SCU Fitting of Sensors Cabling of the Section Electronic (SE) Connections to SAG Power Supply for SE Q-Board Connections... -
Page 7: Safety Instructions
SAFETY INSTRUCTIONS Safety Instructions Norms and Regulations The LOEPFE YarnMaster 3N1 yarn clearing system is a prod- ® uct which has been inspected for technical safety. It complies with the following directives: 98 / 37 / EEC Machinery Directive 2006 / 95 / EC... -
Page 8: Operational Notes
SAFETY INSTRUCTIONS Operational Notes The installation of the equipment should only be performed by qualified personnel being familiar with all safety checks, installation and service guidelines. Improper operation of the equipment could cause hazards. In accordance with 98 / 37 / EEC, 2006 / 95 / EC, 2004 / 108 / EC. -
Page 9: Fitting 3N1
FITTING 3N1 Fitting 3N1 Basic situation is a machine without any clearer system. If there is one fitted to the machine, it must be removed before installing 3N1 Time instructions (based on 240 Rotors) Time for Approx. man hours Deinstallation of old system Installation of 3N1 (full and basic) Time for: Hours... -
Page 10: Preparation Of Major Cabling
PREPARATION OF CABLING Preparation of Major Cabling SCU Side Power supply 24 V Ground LAN to Q-Board The power supply must be installed by an electrician Cabling SCU Front Cabling SCU Front 1. Drill 4 holes Ø 5mm and deburr. 2. -
Page 11: Power Supply Connection
PREPARATION OF CABLING Power Supply Connection Black: Power supply from machine or external White: Power supply for SCU: 24V (30W), only use one of the outputs!! Power: To be connected with an external power supply or have it connected to the machine electronics by an electri- cian. -
Page 12: Lan To Q-Board
PREPARATION OF CABLING LAN to Q-Board Yellow: LAN to Q- Board Red: 4K cable to 4K card at Schlafhorst Informator Blue: Ground: to housing (or somewhere else with an as- sured ground) White: power cable for power supply, front side as installed. Black: power supply from machine or external. -
Page 13: Connection 4K To Scu
PREPARATION OF CABLING Connection 4K to SCU Red: 4K 4K cable to 4K card (inside of the Informator) The card is written down. -
Page 14: Fitting Of Sensors
FITTING OF SENSORS Fitting of Sensors Prepare the sensors and screw the mounting piece to the sensor. Picture 1 Picture 2 Screw the sensing head into the existing hole of the bar (Pic- ture 1) and position it in the middle of the hole of the mount- ing piece (Picture 2). - Page 15 FITTING OF SENSORS At least: the measuring slit should be in the range of the press roller. (Picture) If this is not so, the metal bar with with screwed on sensor should be slided. This should be done by the mill mechanics. To do this the adjusting parts for the sensor should be used, if available.
-
Page 16: Cabling Of The Section Electronic (Se)
Cabling of the Section Electronic (SE) View from below machine head first section free SAG unit calculator LOEPFE power supply free Informator Main powerline (from machine or external line) Specification see power supply unit Black: Power supply 24V for SE... -
Page 17: Connections To Sag
CABLING OF THE SECTION ELECTRONIC (SE) Connections to SAG Red: Q-Stop cable, each for one side (12 rotors) The SAG board requires an Interface print. It can be simply plugged on. Position 1 to connector lower connector on the SE-Board Position 2 to connector superior connector on the SE-Board (top connector) -
Page 18: Power Supply For Se
CABLING OF THE SECTION ELECTRONIC (SE) Power Supply for SE The power supply must be installed separately. The conduc- tor is looped in in series. The main conductor can be pow- ered by Schlafhorst or externally. A first cable is laid from this power supply up to the first empty shaft door. -
Page 20: Q-Board Connections
CABLING OF THE SECTION ELECTRONIC (SE) Q-Board Connections Red: Stop cable: Lower for SAG Board IF connector number 1 Superior for SAG Board IF connector number 2 White: Power supply 24 V from SAG Yellow: LAN to SCU, is splitted by each section see the following picture... -
Page 21: Earthing Of Se-Board
CABLING OF THE SECTION ELECTRONIC (SE) Output for next section (if last, empty) Input from SCU or last Q-Board LAN for Q-Board Earthing of SE-Board The screw must be screwed onto the Q-Board at the upper left side, as illustrated. The earthing is assured by the cable channel. -
Page 22: Se Address
CABLING OF THE SECTION ELECTRONIC (SE) SE Address Set the right address on the switch of the SE. Address sticker is on the SE case. Labeling of SE-Board The labelling is to be done by the fitter. As soon as the Q- Boards are placed the attached stickers must be fixed. -
Page 23: Sensor Cables
CABLING OF THE SECTION ELECTRONIC (SE) Sensor Cables On each machine side: 6 cables, length 3 m (SCU side, longest way to Q-Board) 6 cables, length 2 m (shorter way to Q-Board) Cable from the sensor to the inside of the machine. Use the support (different types available). - Page 24 CABLING OF THE SECTION ELECTRONIC (SE) Option 1: Tie-Wraps Fit the cable with tie-wraps or with cable channels (depends on the machine and on the preinstallation) And connect to the right connector of the SE-board Affix the tie-wraps on a mounting. Before affixing the mount- ing, clean the place very properly (rotor position 3 / 6 / 9 / 11, starts from the section beginning).
-
Page 25: Specifications
SPECIFICATIONS Specifications (Section Electronic) A905262: Q-UNIT 3N1 ACO FP => Full clearer A9052621: Q-UNIT 3N1 ACO BASIC => Basic clearer A905265: Q-UNIT 3N1 ACO240/STD FP = Full clearer A9052651: Q-UNIT 3N1 ACO240/STD BASIC => Basic clearer – Unit – supply voltage : 24Vdc SELV –... - Page 26 Loepfe Brothers Ltd. 8623 Wetzikon / Switzerland Phone +41 43 488 11 11 Fax +41 43 488 11 00 info@loepfe.com www.loepfe.com Subject to technical modifications...
Need help?
Do you have a question about the YARNMASTER 3N1 and is the answer not in the manual?
Questions and answers