Kenwood TH-G71E Instruction Manual
144/440/430 mhz fm dual bander
Hide thumbs
Also See for TH-G71E:
- Instruction manual (61 pages) ,
- Service manual (32 pages) ,
- Instruction manual (60 pages)

Subscribe to Our Youtube Channel
Related Manuals for Kenwood TH-G71E


Summary of Contents for Kenwood TH-G71E
- Page 1 INSTRUCTION MANUAL 144/440 MHz FM DUAL BANDER TH-G71A 144/430 MHz FM DUAL BANDER TH-G71A 144/430 MHz FM DUAL BANDER TH-G71E KENWOOD CORPORATION © B62-0739-20 (K,E,T,M) 09 08 07 06 05 04 03 02...
-
Page 2: Features
THANK YOU! We are grateful you decided to purchase this KENWOOD FM transceiver. This series of handhelds was developed to satisfy the requirement for a compact rig that’s simple to operate yet contains numerous sophisticated features. KENWOOD believes that the compact size, coupled with reasonable cost, will meet your satisfaction. - Page 3 The transceiver may overheat. • Do not modify this transceiver unless instructed by this manual or by KENWOOD documentation. • When using a regulated power supply, connect the specified DC cable (option) to the DC jack on the transceiver.
-
Page 4: Table Of Contents
SUPPLIED ACCESSORIES ... 1 CONVENTIONS FOLLOWED IN THIS MANUAL ... 1 q q q q q CHAPTER PREPARATION BATTERY OPERATING TIME ... 2 INSTALLING THE NiCd BATTERY PACK ... 2 INSTALLING ALKALINE BATTERIES ... 3 INSTALLING THE ANTENNA ... 4 ATTACHING THE HAND STRAP ... - Page 5 CALL CHANNEL ... 21 Recalling the Call Channel ... 21 Changing Call Channel Contents ... 21 MEMORY ➡ VFO TRANSFERS ... 22 CHANNEL DISPLAY FUNCTION ... 22 INITIALIZING MEMORY ... 23 Partial Reset (VFO) ... 23 Full Reset (Memory) ... 23 i i i i i CHAPTER SCAN...
- Page 6 PROGRAMMABLE VFO ... 39 CHANGING SPEAKER CONFIGURATIONS ... 39 KEYPAD DIRECT ENTRY ... 40 Frequency Entry ... 40 Memory Channel Number Entry ... 40 CHANGING FREQUENCY STEP SIZE ... 40 !2 !2 !2 !2 !2 CHAPTER MICROPHONE CONTROL !3 !3 !3 !3 !3 CHAPTER MAINTENANCE GENERAL INFORMATION ...
-
Page 7: Supplied Accessories
SUPPLIED ACCESSORIES Accessory Part Number Antenna T90-0634-XX NiCd battery pack PB-38 (6 V, 650 mAh) W09-0909-XX PB-39 (9.6 V, 600 mAh) W09-0911-XX Battery case (BT-11) A02-2078-XX Battery charger U.S.A./ Canada W08-0437-XX United Kingdom W08-0438-XX Europe W08-0440-XX General W08-0441-XX AC plug adapter E19-0254-XX Belt hook J29-0631-XX... -
Page 8: Preparation
BATTERY OPERATING TIME The following table shows the approximate battery life (hours) relative to the transmit output power. VHF Band Batteries PB-38 NiCd PB-39 NiCd Alkaline INSTALLING THE NiCd BATTERY PACK Note: Because the battery pack is provided uncharged, charge the battery pack before using it with the transceiver. -
Page 9: Installing Alkaline Batteries
INSTALLING ALKALINE BATTERIES WARNING! ◆ DO NOT INSTALL THE BATTERIES IN A HAZARDOUS ENVIRONMENT WHERE SPARKS COULD CAUSE AN EXPLOSION. ◆ NEVER DISCARD OLD BATTERIES IN FIRE BECAUSE EXTREMELY HIGH TEMPERATURES CAN CAUSE BATTERIES TO EXPLODE. Note: ◆ It is recommended to use high quality alkaline batteries rather than manganese batteries to enjoy longer periods of battery life. -
Page 10: Installing The Antenna
INSTALLING THE ANTENNA Hold the provided antenna at its base, and screw the antenna into the connector on the top panel of the transceiver until it is snug. ATTACHING THE HAND STRAP If you want, attach the provided hand strap to the belt hook before installing the hook onto the transceiver. -
Page 11: First Qso
EQUIPMENT CAN INTERFERE WITH THAT EQUIPMENT. ALSO, TRANSMITTING NEAR A REGULATED POWER SUPPLY, THAT IS NOT RECOMMENDED BY , MAY KENWOOD CAUSE THE POWER SUPPLY TO OUTPUT AN EXTREMELY HIGH VOLTAGE. THIS VOLTAGE COULD DAMAGE BOTH YOUR TRANSCEIVER AND ANY OTHER EQUIPMENT CONNECTED TO THE POWER SUPPLY. -
Page 12: Getting Acquainted
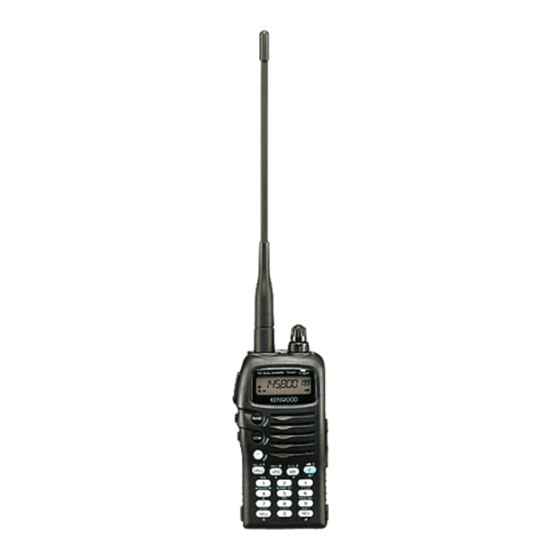
ORIENTATION Antenna switch LAMP MONI BAND switch GETTING ACQUAINTED BASIC TRANSCEIVER MODES This section introduces you to the basic modes you can select on this transceiver. VFO mode Press [VFO] to select. In this mode you can change the operating frequency using the Tuning control. Tuning control VOL control On Air/Busy... -
Page 13: Display
Low transmit power Economic low transmit power Battery Saver Automatic Power Off Transceiver Lock Memory Channel Lockout Memory channel containing data TH-G71E only What You Press Ref. to Cancel Page — [F], [6] [F], [LOW] [F], [REV], [F], [REV] (TH-G71E: one... -
Page 14: Operating Basics
SWITCHING POWER ON/OFF 1 Press the PWR switch (1 s) to switch ON the transceiver. • A beep sounds. 2 To switch OFF the transceiver, press the PWR switch (1 s) again. ADJUSTING VOLUME Turn the VOL control clockwise to increase the audio level and counterclockwise to decrease the audio level. -
Page 15: Selecting A Band
SELECTING A BAND Press [BAND] to select the VHF or UHF band. Note: If in Memory Recall mode {page 6}, press to select a band. [BAND] SELECTING FREQUENCIES Turn the Tuning control clockwise to increase the frequency or counterclockwise to decrease the frequency. -
Page 16: Menu Set-Up
WHAT IS A MENU? Many functions on this transceiver are selected or configured via a software-controlled Menu instead of physical controls on the transceiver. Once familiar with the Menu system, you will appreciate the versatility it offers. MENU ACCESS 1 Press [F], [BAND] to enter Menu mode. •... -
Page 17: Menu Configuration
MENU CONFIGURATION Menu Description Scan resume method Memory recall method Programmable VFO (Upper/ lower limits) Battery Saver Automatic Power Off Beep function Automatic Repeater Offset Offset frequency Tuning Control Enable DTMF number storing/ confirming Priority Scan method TX Inhibit DTMF Tone TX Hold Speaker configuration Transceiver Control AM/FM selection... -
Page 18: Operating Through Repeaters
Repeaters are often installed and maintained by radio clubs, sometimes with the cooperation of local businesses involved in the communications industry. Compared to simplex communication, you can usually transmit over much greater distances by using a repeater. Repeaters are typically located on a mountain top or other elevated location. -
Page 19: Selecting Offset Direction
VHF band is 600 kHz no matter which market version; the default on the UHF band is 5 MHz (TH-G71A) or 1.6 MHz (TH-G71E). 1 Select the desired band. 2 Press [F], [BAND] to enter Menu mode. -
Page 20: Activating Tone Function
Switching the Tone function ON after activating the CTCSS deactivates the CTCSS. When you access repeaters that require 1750 Hz TH-G71E only: tones, you need not activate the Tone function. No matter which selection you make here, pressing [LOW]... -
Page 21: Automatic Repeater Offset (U.s.a./ Canada/ Europe Only)
■ Automatic Repeater Offset (U.S.A./ Canada/ Europe Only) This function automatically selects an offset direction and activates the Tone function, according to the frequency that you select on the VHF band. The transceiver is programmed for offset direction as shown below. To obtain an up-to-date band plan for repeater offset direction, contact your national Amateur Radio association. -
Page 22: Reverse Function
REVERSE FUNCTION When used while monitoring a repeater, the Reverse function allows you to manually check the signal strength of a station accessing the repeater. If the station’s signal is strong, it is best to move to a simplex frequency to continue the contact and free up the repeater. -
Page 23: Memory Channels
In memory channels, you can store frequencies and related data that you often use. Then you need not reprogram those data every time. You can quickly recall wanted channels by simple operation. A total of 200 memory channels are available for VHF and UHF. You can also store a name for each memory channel. -
Page 24: Storing Simplex Frequencies Or Standard Repeater Frequencies
STORING SIMPLEX FREQUENCIES OR STANDARD REPEATER FREQUENCIES 1 Press [VFO] to select VFO mode. 2 Press [BAND] to select the desired band. 3 Turn the Tuning control to select the desired frequency. • You can also enter digits directly from the keypad. See “KEYPAD DIRECT ENTRY”... -
Page 25: Recalling Memory Channels
RECALLING MEMORY CHANNELS 1 Press [MR] to enter Memory Recall mode. • The memory channel used last is recalled. 2 Turn the Tuning control to select the desired memory channel. • You cannot recall empty memory channels. • To restore VFO mode, press [VFO]. You may want to recall only memory channels that store frequencies of the current band. -
Page 26: Naming Memory Channels
NAMING MEMORY CHANNELS You can name memory channels using up to 6 alphanumeric characters. When you recall a named memory channel, its name appears on the display instead of the stored frequency. Names can be callsigns, repeater names, cities, names of people, etc. You can also name the Program Scan and Priority channels , but Note: you cannot name the Call channel. -
Page 27: Call Channel
CALL CHANNEL The Call channel can be used to store any frequency and related data that you will recall often. The Call channel also can be programmed either as a simplex&repeater or odd-split channel. No matter what mode the transceiver is in, the Call channel can always be selected quickly. -
Page 28: Memory ➡ Vfo Transfers
MEMORY ➡ VFO TRANSFERS Transferring the contents of a memory channel or the Call channel to the VFO can be useful if you want to search for other stations or a clear frequency, near the selected memory channel or Call channel frequency. 1 Recall the desired memory channel or the Call channel. -
Page 29: Initializing Memory
INITIALIZING MEMORY If your transceiver seems to be malfunctioning, initializing the transceiver may resolve the problem. Remember that you need to re-program memory channels after initialization. On the other hand, initialization is a quick way to clear all memory channels. While using the Channel Display or Transceiver Lock function, Note: you cannot do Partial Reset nor Full Reset. -
Page 30: Scan
Scan is a useful feature for hands-off monitoring of your favorite frequencies. After becoming comfortable with how to use all types of Scan, the monitoring flexibility gained will increase your operating efficiency. Note: ◆ Remember to adjust the squelch threshold level before using Scan. ◆... -
Page 31: Scan Resume Methods
SCAN RESUME METHODS Before using Scans other than Priority Scan, it’s necessary to decide under what condition you want your transceiver to continue scanning after detecting and stopping for a signal. You can choose one of the following modes. The default is Time-Operated mode. •... -
Page 32: Vfo Scan
VFO SCAN VFO Scan allows you to scan all frequencies from the lowest frequency to the highest frequency on the band. The current frequency step size {page 40} is used. 1 Select the desired band. 2 Press [VFO] (1 s). •... -
Page 33: Locking Out Memory Channels
■ Locking Out Memory Channels Memory channels that you prefer not to monitor while scanning can be locked out. 1 Recall the desired memory channel. 2 Press [F], [0] to switch Lockout ON (or OFF). • A star appears below the memory channel number to indicate that the channel has been locked out. -
Page 34: Program Scan
PROGRAM SCAN Program Scan is similar to VFO Scan except that you select the frequency range of the scan. ■ Setting Scan Limits You can store up to 10 scan ranges in memory channels L0/U0 to L9/U9. 1 Select the desired band. 2 Turn the Tuning control to display the desired lower limit. -
Page 35: Using Program Scan
■ Using Program Scan 1 Press [VFO] to select VFO mode. 2 Select the desired band. 3 Select a frequency equal to or between the programmed scan limits. 4 Press [VFO] (1 s). • The 1 MHz decimal blinks while scanning is in progress. -
Page 36: Priority Scan
PRIORITY SCAN You may sometimes want to monitor your favorite frequency on one band while operating on another band. Use Priority Scan. This Scan always monitors your favorite frequency in the background. When receiving signals on your specific frequency, the transceiver immediately recalls that frequency on the display and allows you to use it for QSO. -
Page 37: Selecting Priority Scan Method
■ Selecting Priority Scan Method This transceiver prepares the following two modes for Priority Scan. Use mode B when you do not want Priority Scan to disrupt your current QSO. Mode A: Monitors the Priority channel every 3 seconds no matter whether or not signals are being received on the current operating frequency. -
Page 38: Continuous Tone Coded Squelch System (Ctcss)
CONTINUOUS TONE CODED SQUELCH SYSTEM (CTCSS) You may sometimes want to hear calls from only specific persons. The Continuous Tone Coded Squelch System (CTCSS) allows you to ignore (not hear) unwanted calls from other persons who are using the same frequency. Simply select the same CTCSS tone as selected by the other persons in your group. -
Page 39: Automatic Tone Frequency Id
Note: ◆ Skip steps 3 to 5 if you have already programmed the appropriate CTCSS frequency. ◆ You can select a separate tone frequency for the CTCSS and Tone functions. ◆ You cannot use the CTCSS and Tone functions simultaneously. Switching the CTCSS function ON after activating the Tone function deactivates the Tone function. -
Page 40: Dual Tone Multi-Frequency (Dtmf) Functions
DUAL TONE MULTI-FREQUENCY (DTMF) FUNCTIONS You can send DTMF tones by using the DTMF keys on the keypad. The keypad includes the 12 keys found on a push-button telephone plus 4 additional keys (A, B, C, D). These additional keys are required for various control operations by some repeater systems. -
Page 41: Storing Dtmf Numbers For Automatic Dialer
STORING DTMF NUMBERS FOR AUTOMATIC DIALER To store a DTMF number with a maximum of 16 digits in any of 10 dedicated DTMF memory channels, follow the procedure below. Audible DTMF tones from other transceivers near you may be Note: picked up by your microphone. -
Page 42: Transmitting Stored Dtmf Numbers
TRANSMITTING STORED DTMF NUMBERS To transmit a stored DTMF number, follow the procedure below. 1 Press [PTT]+[BAND]. • The first 4 DTMF digits of the channel used last and the channel number appear. 2 Release only [BAND], then press [0] to [9] to select the desired channel. -
Page 43: Auxiliary Functions
TX INHIBIT You can disable the TX function to prevent unauthorized individuals from transmitting, or to eliminate the risk of accidentally transmitting by yourself. Access Menu No. 12 (TXS) to switch TX Inhibit ON or OFF (default). • Pressing the PTT switch after switching TX Inhibit ON causes the transceiver to generate an error beep and display “TXSTOP”. -
Page 44: Lamp Function
LAMP FUNCTION You can illuminate the transceiver display by pressing [LAMP]. Approximately 5 seconds after releasing [LAMP], the light goes OFF if no other key is pressed. Pressing any key other than [LAMP] while the display is lit restarts the 5 second timer; pressing [LAMP] turns OFF the light immediately. -
Page 45: Programmable Vfo
PROGRAMMABLE VFO If you want, you can set limits for the minimum and maximum frequencies that are selectable using the Tuning control. For example, if you select 436 MHz for the lower limit and 437 MHz for the upper limit, the tunable range will be from 436.000 MHz to 437.975 MHz. -
Page 46: Keypad Direct Entry
KEYPAD DIRECT ENTRY You can select the desired operating frequency or memory channel by entering digits directly from the keypad. Enter the next digit within 10 seconds. ■ Frequency Entry 1 Press [VFO] to select VFO mode. 2 Select the desired band. 3 Press the numeric keys in sequence on the keypad. -
Page 47: Microphone Control
(or key combination) function. The assigned default functions are as follows: [1]: Band select [2]: VFO/ Memory Recall mode switch [3]: Call channel recall (TH-G71E: Transmit power select) Note: ◆ Turn OFF the transceiver power before connecting the optional speaker microphone. -
Page 48: Maintenance
You may return your transceiver for service to the authorized KENWOOD dealer from whom you purchased it or any authorized KENWOOD service center. A copy of the service report will be returned with the transceiver. Please do not send subassemblies or printed circuit boards. -
Page 49: Charging The Nicd Battery Pack
CHARGING THE NiCd BATTERY PACK You must charge the battery pack before using it with the transceiver, or after storing the pack removed from the transceiver for more than 2 months. It takes several charge/ discharge cycles before achieving the full battery pack capacity. -
Page 50: Troubleshooting
TROUBLESHOOTING The problems described in this table are commonly encountered operational malfunctions. These types of difficulties are usually caused by improper hook-up, accidental incorrect control settings, or operator error due to incomplete programming. These problems are usually not caused by circuit failure. Please review this table, and the appropriate section(s) of this instruction manual, before assuming your transceiver is defective. - Page 51 Problem You cannot transmit 1 You selected a frequency outside the even though you allowable transmit frequency range. press the PTT 2 You selected a transmit offset that switch. places the transmit frequency outside the allowable transmit frequency range. 3 The TX Inhibit function is ON. 4 The Tone Alert function is ON.
-
Page 52: Optional Accessories
SMC-32 SMC-33 Remote Control Speaker Speaker Microphone Microphone EMC-3 Clip Microphone with Earphone BC-17 BC-19 Wall Charger Rapid Charger OPTIONAL ACCESSORIES SMC-34 Remote Control Speaker Microphone (with Volume Control) PB-38 PB-39 Standard Battery Pack High-power Battery Pack (6 V/ 650 mAh) (9.6 V/ 600 mAh) PG-2W PG-3J... -
Page 53: Equipment Installation And Connection
Switch OFF the transceiver and power supply before making any connections. ◆ Only use the power supplies recommended by your authorized KENWOOD dealer. The supply voltage must be between 6 V and 16 V to prevent damaging the transceiver. 1 Connect the red lead of the optional PG-2W DC cable to the positive (+) terminal on the power supply. -
Page 54: Connecting Equipment For Remote Control
CONNECTING EQUIPMENT FOR REMOTE CONTROL Make connections as shown when remotely controlling equipment. Ø2.5 SP jack plug Ø3.5 MIC jack plug Note 1 Note 2 10 µF Voltage is developed across the 100 Note 1: in the transceiver. When 2 mA flows, approximately 3.3 V is developed. -
Page 55: Specifications
Specifications are subject to change without notice due to advancements in technology. General U.S.A./ Canada Frequency range General Market Europe Mode Usable temperature range External power supply (DC IN) Rated voltage Battery terminals Receive with no signals Battery Saver ON Transmit with HI, 13.8 V (DC IN) Current Transmit with HI, 9.6 V (battery terminals) - Page 56 HI, 13.8 V HI, 9.6 V Power output HI, 6.0 V LO, 6.0 V EL, 6.0 V Modulation Maximum frequency deviation Spurious emissions Circuitry 1st intermediate frequency 2nd intermediate frequency Sensitivity (12 dB SINAD) Squelch sensitivity Selectivity (–6 dB) Selectivity (–40 dB) 9.6 V (battery terminals) Audio output (10% distortion)
-
Page 57: Quick Reference Guide
Note: ◆ This guide covers only the functions that require a small number of operation steps. Automatic Power Off (APO) ON/OFF ◆ Some functions ask you to press any key other than a couple of Battery Saver ON/OFF keys to complete the setting or to stop operation. - Page 58 Reset Reverse ON/OFF Scan Start Scan Stop Scan Resume Method Speaker Configuration Change Squelch Level Adjust Tone Alert Transceiver Lock Transmit Power Select TX Inhibit ON/OFF Function POWER OFF ➡ [F]+ POWER ON ➡ [F] Full (memory) POWER OFF ➡ [VFO]+ POWER ON ➡ [VFO] Partial (VFO) Select band ➡...
- Page 59 Accessories Optional ... 46 Supplied ... 1 Automatic Power Off (APO) ... 37 Automatic Tone Frequency ID ... 33 Autopatch (U.S.A. and Canada) ... 34 Battery Charging ... 43 Installing, Alkaline ... 3 Installing, NiCd ... 2 Battery Saver ... 37 Band, Selecting ...
Need help?
Do you have a question about the TH-G71E and is the answer not in the manual?
Questions and answers