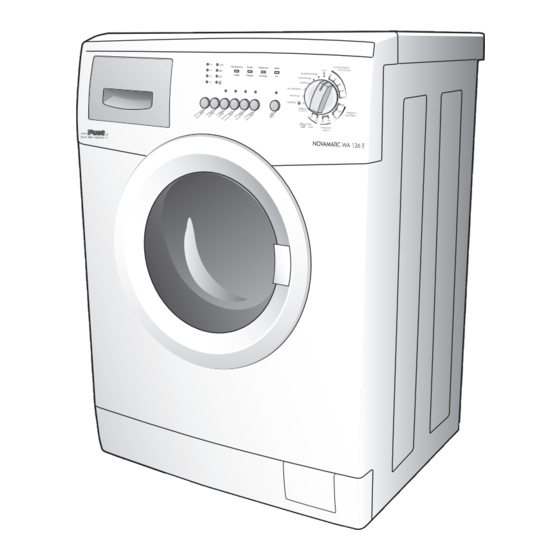
Summary of Contents for FUST NOVAMATIC WA 126 E
- Page 1 Bedienungs- und Wartungshandbuch Livret d’instructions et d’entretien Manuale uso e manutenzione User instructions and maintenance WA 126 E www. Service - Telefon: 0848 559 111...
-
Page 2: Table Of Contents
ENGLISH Dear customer, Thank you for choosing our product. Please read these instructions carefully before connecting and using the machine. An awareness of how the machine operates will help guarantee its correct and safe use. The instructions also contain some useful information on the machine’s functions that will help you get the most out of its use. - Page 3 NOTES AND USEFUL ADVICE FOR THE USER NOTES AND USEFUL ADVICE FOR THE USER ▼ ▼ The washing machine has been designed The washing machine must never be over- for domestic use only, and as such any other loaded. use is regarded as improper and therefore ▼...
-
Page 4: Notes And Advice For The User
NOTES AND USEFUL ADVICE FOR THE USER ▼ After washing rugs, blankets or any other long fi bre fabrics, remember to check the fi lter and, if necessary, clean it. The symbol on the product, or on the documents accompanying the product, indi- ▼... - Page 5 INSTALLING THE MACHINE (ACCORDING TO MODEL) The machine must be installed by professionally qualifi ed technicians, according to the manufacturer’s indications. Incorrect installation may result in damage to persons and property. The machine can be installed anywhere, provided the temperature in the place of installation is not below 3°C and the cables and hoses at the rear of the machine are not crushed in any way.
- Page 6 INSTALLING THE MACHINE SETTING THE MACHINE LEVEL After selecting a suitable position, level the machine carefully using the adjustable feet (Fig. 6). Particular care must be taken when selecting the position, levelling the washing machine and ensuring the safety of lock nuts. If levelling is not carried out correctly, the washing machine will be unstable and noisy during operation, which may result in damage.
-
Page 7: Installing The Machine
INSTALLING THE MACHINE CONNECTING TO THE POWER SUPPLY ▼ Check that the voltage indicated on the technical data plate on the back of the washing machine is the same as that of the mains power supply (fi g. 12). ▼ The fuses, electric cables and wall socket must be rated to withstand the maxi- mum power load indicated on the data plate. -
Page 8: Use Of Detergents
USING THE MACHINE USE OF DETERGENTS The washing machine has a three-compartment detergent drawer. compartment for pre-wash or soak powder detergent (1) compartment for normal wash powder detergent (2) compartment for fabric softener (3) use a low-foam detergent and softener (if necessary), of the type indicated for auto- matic washing machines. -
Page 9: International Clothing Care Symbols
USING THE MACHINE HOW TO REMOVE STAINS Some stains cannot be removed by just washing in a washing machine. Before trying to remove any type of stain by hand, fi rst try the removal procedure on a small area of hidden fabric starting from the edge of the stain and working inwards, this will prevent a dark ring from forming around the site of the stain. -
Page 10: Wash Cycle
USING THE MACHINE Optional function buttons Spin speed indicator leds Delayed start led Spin selection button Delayed start button Start button Programme and temperature knob Programme status led WASH CYCLE: (follow these instructions and the washing machine will run the selected wash cycle) Open the door Load the washing in the drum and close the door. -
Page 11: Delayed Start
USING THE MACHINE DELAYED START: The machine is fi tted with a delayed start function. This allows the washing machine to be programmed to start the wash cycle up to 8 hours later. The delay in hours can be selected as follows: press the button to set a delay of 1, 2, 4, 8 hours. When the START button (L) is pressed, the selected led will fl... -
Page 12: Extra Rinse
OPTIONAL FUNCTIONS EXTRA RINSE: The washing machine has been designed to reduce water consumption to a mini- mum. In very soft water areas, or in the case where detergent residues are noticed at the end of the wash cycle, pressing this button will add one more rinse to the programme. ANTI-CREASE: When this button is pressed, at the end of the wash cycle, the items loaded in the washing machine will continue to rotate for a further thirty minutes to reduce creasing. -
Page 13: Easy Logic" Technology
PROGRAMME TABLES BUTTONS ENABLED PROGRAMMER WASH Detergent FABRIC TYPE SYMBOL compartment KNOB TEMPERATURE Extra rinse Pre-wash Intensive Anticrease wash Delicate coloured synthetic fabrics SYNTHETICS that are lightly soiled Delicate coloured synthetic SYNTHETICS fabrics that are lightly soiled Delicate cotton, viscous and DELICATES mixed delicate fabrics Delicate cotton, viscous and... -
Page 14: Maintenance
MAINTENANCE CLEANING THE WASHING MACHINE The washing machine has been designed to reduce maintenance to a minimum. However, it is important that you remember to clean it regularly. Before cleaning, make sure that the appliance has been disconnected from the power supply and that the water supply tap has been turned off. -
Page 15: Troubleshooting
MAINTENANCE TROUBLESHOOTING If the appliance is not working properly, check through the following troubleshooting list before calling for technical assistance.In some models malfunctions are shown with a code at the end of the cycle. Code: E:00 Carry out all checks listed in paragraphed marked with * E:01 Carry out all checks listed in paragraphed marked with ** E:02... - Page 16 461306837 SM2209 23/10/2006...


Need help?
Do you have a question about the NOVAMATIC WA 126 E and is the answer not in the manual?
Questions and answers