Table of Contents
Advertisement
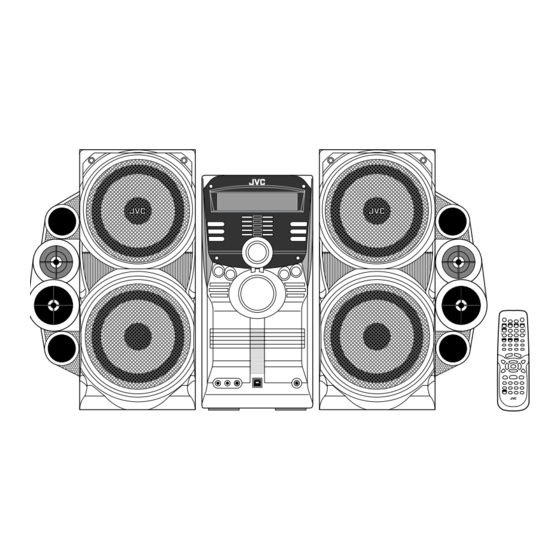
COMPACT COMPONENT SYSTEM
HX-D77
SP-HXD77
—Consists of CA-HXD77 and SP-HXD77
CA-HXD77
INSTRUCTIONS
SP-HXD77
For Customer Use:
Enter below the Model No. and Serial
No. which are located either on the rear,
bottom or side of the cabinet. Retain this
information for future reference.
Model No.
Serial No.
LVT1540-001A
[J]
Advertisement
Chapters
Table of Contents
Troubleshooting

Related Manuals for JVC HX HX-D77


Summary of Contents for JVC HX HX-D77
- Page 1 COMPACT COMPONENT SYSTEM HX-D77 SP-HXD77 INSTRUCTIONS —Consists of CA-HXD77 and SP-HXD77 CA-HXD77 SP-HXD77 For Customer Use: Enter below the Model No. and Serial No. which are located either on the rear, bottom or side of the cabinet. Retain this information for future reference. Model No.
- Page 2 Consult the dealer or an experienced radio/TV technician for help. CAUTION Changes or modifications not approved by JVC could void the user’s authority to operate the equipment. For U.S.A. For the main unit:...
- Page 3 24 kg / 53 lbs. CAUTION! To avoid personal injury or accidentally dropping the unit, have two persons unpack, carry, and install the unit. ATTENTION! Pour éviter toute blessure personnelle ou chute accidentelle del’appareil, faites déballer, transporter et installer l’appareil par deux personnes. [European Union only] [Union européenne uniquement] CAUTION: Proper Ventilation...
-
Page 4: How To Read This Manual
Precautions Installation • Install in a place which is level, dry and neither too hot nor too cold—between 5°C (41°F) and 35°C (95°F). • Install the System in a location with adequate ventilation to prevent internal heat buildup in the System. DO NOT install the System in a location near heat sources, or in a place subject to direct sunlight, excessive dust or vibration. -
Page 5: Table Of Contents
Before Operating the System... 3 Playable Disc Types ... 3 Getting Started... 4 Step 1: Unpack ... 4 Step 2: Prepare the Remote Control... 4 Step 3: Hook Up... 5 Display Indication... 8 Daily Operations—Playback ... 10 Listening to the Radio ... 11 Playing Back a Disc... -
Page 6: Before Operating The System
Before Operating the System Playable Disc Types This unit has been designed to play back the following discs: Disc Type Mark (Logo) DVD Video Video CD (VCD) DIGITAL VIDEO Super Video CD (SVCD) Audio CD DIGITAL AUDIO CD-R The System can play back CD-R or CD-RW recorded in the Audio CD, Video CD, SVCD, CD-RW MP3, WMA and JPEG formats. -
Page 7: Getting Started
Step 1 :Unpack the package and check the accessories. Step 2 : Prepare the remote control. Step 3 : Hook up the components such as AM/FM antennas, speakers, etc. (see pages 5 to 7). Finally plug the AC power cord. Now you can operate this System. -
Page 8: Step 3: Hook Up
Step : Hook Up If you need more detailed information, see page 6 and 7. Do not connect the AC power cord until all other connections have been made. Illustrations of the input/output terminals below are typical examples. When you connect other components, refer also to their manuals since the terminal names actually printed on the rear may vary. - Page 9 To assemble and connect the AM loop antenna To assemble the AM loop antenna To connect the AM loop antenna cords AM loop antenna cord (supplied) • Make sure the antenna conductors do not touch any other terminals, connecting cords and power cord. Also, keep the antennas away from metallic parts of the System, connecting cords, and the AC power cord.
- Page 10 To select the color system You can select the video output to match it to the color system of your TV. • The color system can be changed only while DVD/CD is selected as the source and playback is stopped. Press NTSC/PAL.
-
Page 11: Display Indication
The indications on the display tell you a lot of things while you are operating the System. Before operating the System, be familiar with when and how the indicator illuminates on the display. 1 BEEP ON indicator • Lights when key-touch tone is activated. 2 Timer indicators •... - Page 12 Indications on the main display • While listening to radio: Band Reception mode (FM only) • While playing a disc: DVD Video: Title number Elapsed playing time Chapter number DVD VR: Chapter number Title number Elapsed playing time SVCD/VCD/CD: Elapsed playing time* Track number Disc type* MP3/WMA*...
-
Page 13: Daily Operations-Playback
Daily Operations In this manual, the operation using the remote control is mainly explained; however, you can use the buttons and controls on the main unit if they have the same (or similar) name and marks. Disc number buttons, number buttons TOP MENU/PG 3/2/5/∞... -
Page 14: Listening To The Radio
To save the power consumption while on standby—Eco mode While on standby... Canceled The display illumination (including the display demonstration) disappears. Listening to the Radio To select the band (FM/AM) To tune in to a station While FM or AM is selected... sec. -
Page 15: Playing Back A Disc
Playing Back a Disc Before operating a disc, be familiar how a disc is recorded. • DVD Video/DVD-VR comprises of “Titles” which includes “Chapters,” MP3/WMA comprise of “Groups” which includes “Tracks,” and CD/SVCD/VCD comprise of only “Tracks.” For MP3/WMA/JPEG playback, see also page 30. To insert discs •... - Page 16 Remote To select a title/group ONLY While playing a disc... Skips to the next title/group. Skips to the previous (While holding...) title/group. To select a chapter/track While playing... Increases the chapter/track numbers. Decreases the chapter/track numbers. To locate a particular portion While playing a disc except MP3/WMA...
-
Page 17: Playing Back From The Pc
To move to the next or previous page of the current menu: Moves to the next page. Moves to the previous page. To return to the previous menu: (While holding...) To cancel PBC You can also cancel PBC function by pressing the number button to select a track. -
Page 18: Playing Back From Other External Equipment
Check if the drivers are correctly installed. Open the Control Panel on your PC: Select [Start] = [Settings] = [Control Panel] Click [System] = [Hardware] = [Device Manager] = [Sound, video and game controllers] and [Universal Serial Bus controllers] • The following window appears, and you can check whether the drivers are installed. -
Page 19: Adjustments
Daily Operations Remote Control DIMMER CLOCK/TIMER CLEAR VOICE FADE MUTING SURROUND MODE SOUND MODE 3/2/5/∞, ENTER BEEP 4/¢ SHIFT DVD LEVEL Main unit BEEP VOL +/– SOUND TURBO SURROUND MODE SOUND MODE SUBWOOFER LEVEL + SUBWOOFER LEVEL – —Sound and Other Adjustments Adjusting the Volume The volume level can be adjusted in 32 steps (VOL MIN, VOL 1 –... -
Page 20: Making The Center Channel Sound Clear -Clear Voice
Making the Center Channel Sound Clear —Clear Voice Remote ONLY When a multi-channel disc with center-channel signal is loaded on the current tray, you can increase the output level for the center channel sound. • This function allows you to easily understand the dialogue of DVD Video even with the low volume level. -
Page 21: Changing The Picture Tone
Changing the Picture Tone While showing a playback picture on the TV, you can select the preset picture tone, or adjust it and store your own preference. To select a preset picture tone Activate VFP. NORMAL GAMMA BRIGHTNESS CONTRAST SATURATION TINT SHARPNESS On the TV screen... -
Page 22: Turning On Or Off The Key-Touch Tone
Turning On or Off the Key-Touch Tone Remote control: (While holding...) BEEP OFF BEEP ON • When the key-touch tone is activated, the BEEP ON indicator lights up. Changing the Display Brightness You can dim the display window. DIMMER OFF DIMMER 2 Setting the Clock Remote... -
Page 23: Unique Dvd/Vcd Operations
Unique DVD/VCD Operations Remote Control Number buttons 5/∞, ENTER ¢ AUDIO SHIFT Selecting the Sound Track For DVD Video: While playing back a chapter containing multiple audio tracks, you can select the one to listen to. For DVD-VR/SVCD/VCD: When playing back a track, you can select the audio channel to play. -
Page 24: Selecting The Subtitle Language
Selecting the Subtitle Language For DVD Video: While playing back a chapter (of DVD Video) containing subtitles in different languages, you can select the subtitle language to display on the TV screen. For DVD-VR: While playing, you can turn the subtitle on or off. -
Page 25: Special Picture Playback
Special Picture Playback Still picture playback To start still picture To resume normal playback: playback: While playing... Frame-by-frame playback While playing... Still picture playback starts. Advance the still picture frame by frame. To resume normal playback, press DISC PLAY 3. Slow-motion playback While playing... -
Page 26: Advanced Disc Operations
Advanced Disc Operations Remote Control Number buttons 5/∞, ENTER ¢ SHIFT Main unit Programming the Playing Order —Program Play You can arrange the playing order of the tracks (up to 99) before you start playback. • Program play cannot be used for DVD-VR disc. Before starting playback, activate Program Play. - Page 27 To skip a track: To pause: To release, press DISC PLAY 3. To check the programmed contents Before or after playback... in the reverse order in the programmed order Remote ONLY To modify the program Before or after playback... To erase the last entry: To erase the entire program: (holding then...)
-
Page 28: Playing Repeatedly-Repeat Play
Playing Repeatedly—Repeat Play You can repeat playback. • You can also select the repeat mode using the on-screen bar (see page 27). • For JPEG and DVD-VR discs, see page 32. • For DVD Video: While playing... CHAP On the TV screen Before starting playback... -
Page 29: On-Screen Disc Operations
On-Screen Disc Operations Remote control Number buttons 3/2/5/∞, ENTER DISC PLAY 3 On-screen bars See also page 27. DVD Video DVD-VIDEO 8.5 Mbps TIME DVD-VR REPEAT DVD-VR TIME SVCD ON SCREEN SVCD ¡ TIME ZOOM TIME TIME CHAP 3 TOTAL 1:01:58 DISC 1 TITLE 2 CHAP. -
Page 30: About The On-Screen Bar
About the On-screen Bar You can check the information on disc (except for MP3/WMA/JPEG disc) and use some functions through the on-screen bar. On-screen bar Ex.: While playing a DVD Video DISC 1 TITLE 2 CHAP 3 8.5 Mbps DVD-VIDEO TIME CHAP. - Page 31 Changing the time information You can change the time information in the on-screen bar and the display window on the main unit. 1 Display the on-screen bar with the pull-down menu. DISC 1 TITLE 2 CHAP 3 8.5 Mbps DVD-VIDEO TIME CHAP.
-
Page 32: Time Search
A-B Repeat • A-B repeat is not available for MP3/WMA and some DVDs. 1 While playing, display the on-screen bar with the pull-down menu. 2 Select 3 Display the pop-up windows. DISC 1 TITLE 2 CHAP 3 DVD-VIDEO 8.5 Mbps TIME CHAP. -
Page 33: Operations On The Control Screen
Chapter/Track Search You can search for the chapter (DVD Video/DVD-VR) number to play. 1 While playing, display the on-screen bar with the pull-down menu. 2 Select CHAP. TRACK 3 Display the pop-up window. DISC 1 TITLE TITLE 2 CHAP CHAP 3 DVD-VIDEO 8.5 Mbps TIME... - Page 34 Control screen for DVD-R/-RW in DVD-VR format The control screen is superimposed on the TV screen when you call up Original Program (PG) or Play List (PL). To select playback type To select the Program List: To select the Play List: Playback starts.
- Page 35 To repeat slide-show for JPEG Before starting playback... GROUP On the TV screen Indication Display TV screen window REPEAT GROUP Repeats the current group. REPEAT 1 DISC Repeats the current disc. DISC REPEAT Repeats all discs. Selects to cancel Repeat indication Play mode.
-
Page 36: Timer Operations
Remote control CLOCK/TIMER CANCEL SHIFT Timer Operations Setting the Timer Using Daily Timer, you can wake up with your favorite song. • To correct a misentry during the process, press CANCEL AUDIO (while holding SHIFT). You can return to the previous step. - Page 37 Select the playback source—“TUNER FM,” “TUNER AM,” “CD,” “AUX,” or “USB.” (While holding...) Ex.: When “TUNER FM” is selected. • When you select “TUNER FM” or “TUNER AM,” repeat the procedure to select a preset station. Select the volume level. (While holding...) Turn off the System (on standby) if you have set the timer with the System turned on.
-
Page 38: Set Up Menu Operations
Set up Menu Operations Remote control 3/2/5/∞, ENTER SET UP Set up Menu Icons The icon for the selected Set up Menu will be highlighted. Set up Menu Ex.: LANGUAGE is selected. LANGUAGE MENU LANGUAGE ENGLISH AUDIO LANGUAGE ENGLISH SUBTITLE ON SCREEN LANGUAGE ENGLISH SELECT... - Page 39 Repeat steps 3 to 4 to set other items on the same Set up Menu. Repeat steps 2 to 4 to set other items on another Set up Menu. To remove the Set up Menu 7 LANGUAGE Set up Menu You can select the initial languages for disc playback.
- Page 40 PICTURE SOURCE You can obtain optimal picture quality by selecting an appropriate option—picture source type (either video source or film source). Select one of the following: AUTO: Normally select this. When playing back a disc containing both video and film sources, the System automatically changes the processing to match it to the picture type (film or video source) of the current chapter.
- Page 41 D. RANGE COMPRESSION You can compress the dynamic range (the difference between the loudest sound and the softest sound) to enjoy a powerful sound even at a low volume level when listening to Dolby Digital software. This is useful at night. •...
-
Page 42: Operating The Tv
TV CH + / – SHIFT Operating the TV Operating TV You can operate the JVC’s TV using this remote control. To turn on or off the TV: To select the input mode (either TV or VIDEO): TV VOL + / –... -
Page 43: Additional Information
Additional Information Learning More about This System Before Operating the System Playable Disc Types: • About audio format – Linear PCM: Uncompressed digital audio, the same format used for CDs and most studio masters. – Dolby Digital: Compressed digital audio, developed by Dolby Laboratories, which enables multi-channel encode to create the realistic surround sound. - Page 44 Unique DVD/VCD Operations (see pages 20 to 22) Selecting the Sound Track: On some DVD videos, you cannot change audio languages while playing back. Special Picture Playback: • During slow-motion playback, no sound will be reproduced. • While zoomed in, the picture may look coarse. •...
-
Page 45: Maintenance
Maintenance To get the best performance of the System, keep your discs clean. Handling discs • Remove the disc from its case by holding it at the edge while pressing the center hole lightly. • Do not touch the shiny surface of the disc, or bend the disc. •... -
Page 46: Optical Digital Output Signals
USB Operations: Unable to play back through the USB connection. USB connection and setting is incorrect (see page 14). The sound through the USB connection stops. Noise and static electricity may stop the sound through the USB connection. In this case, do the following operations: •... -
Page 47: Language Code List
Language Code List Afar Abkhazian Afrikaans Ameharic Arabic Assamese Aymara Azerbaijani Bashkir Byelorussian Bulgarian Bihari Bislama Bengali, Bangla Tibetan Breton Catalan Corsican Czech Welsh Danish Bhutani Greek Esperanto Estonian Basque Persian Finnish Fiji Faroese Frisian Irish Scots Gaelic Galician Guarani Gujarati Hausa Hindi... -
Page 48: Parts Index
Parts Index Refer to the pages to see how to use the buttons and controls. Remote control 12, 23 11, 19 19, 33, 34 33, 34 19, 24, 34 7, 13, 18, 21, 23, 24, 27–31, 35, 39 11, 13, 14, 19, 24, 33, 34 11–14, 19, 24, 33, 34, 39 Main unit 12, 25... -
Page 49: Specifications
Specifications Amplifier section—CA-HXD77 Output Power: SUBWOOFERS: 180 W per channel, min. RMS, driven into 3 Ω at 63 Hz with no more than 10% total harmonic distortion. MAIN SPEAKERS: 90 W per channel, min. RMS, driven into 6 Ω at 1 kHz with no more than 10% total harmonic distortion. - Page 52 © 2006 Victor Company of Japan, Limited 0206KMMMDWSAM...
- Page 53 COMPACT COMPONENT SYSTEM SYSTEME DE COMPOSANTS COMPACT HX-D77 — Consists of CA-HXD77 and SP-HXD77 — Composé du CA-HXD77 et du SP-HXD77 SP-HXD77 CA-HXD77 SP-HXD77 INSTRUCTIONS MANUEL D’INSTRUCTIONS LVT1540-002A...
- Page 54 Consult the dealer or an experienced radio/TV technician for help. CAUTION Changes or modifications not approved by JVC could void the user’s authority to operate the equipment. For U.S.A. For the main unit:...
- Page 55 24 kg / 53 lbs. CAUTION! To avoid personal injury or accidentally dropping the unit, have two persons unpack, carry, and install the unit. ATTENTION! Pour éviter toute blessure personnelle ou chute accidentelle del’appareil, faites déballer, transporter et installer l’appareil par deux personnes. [European Union only] [Union européenne uniquement] CAUTION: Proper Ventilation...
- Page 56 Precautions Installation • Install in a place which is level, dry and neither too hot nor too cold—between 5°C (41°F) and 35°C (95°F). • Install the System in a location with adequate ventilation to prevent internal heat buildup in the System. DO NOT install the System in a location near heat sources, or in a place subject to direct sunlight, excessive dust or vibration.
- Page 57 Before Operating the System... 3 Playable Disc Types ... 3 Getting Started... 4 Step 1: Unpack ... 4 Step 2: Prepare the Remote Control... 4 Step 3: Hook Up... 5 Display Indication... 8 Daily Operations—Playback ... 10 Listening to the Radio ... 11 Playing Back a Disc...
-
Page 58: Before Operating The System
Before Operating the System Playable Disc Types This unit has been designed to play back the following discs: Disc Type Mark (Logo) DVD Video Video CD (VCD) DIGITAL VIDEO Super Video CD (SVCD) COMPACT Audio CD DIGITAL AUDIO CD-R The System can play back CD-R or CD-RW recorded in the Audio CD, Video CD, SVCD, CD-RW MP3, WMA and JPEG formats. -
Page 59: Getting Started
Step 1 :Unpack the package and check the accessories. Step 2 : Prepare the remote control. Step 3 : Hook up the components such as AM/FM antennas, speakers, etc. (see pages 5 to 7). Finally plug the AC power cord. Now you can operate this System. -
Page 60: Step 3: Hook Up
Step : Hook Up If you need more detailed information, see page 6 and 7. Do not connect the AC power cord until all other connections have been made. Illustrations of the input/output terminals below are typical examples. When you connect other components, refer also to their manuals since the terminal names actually printed on the rear may vary. - Page 61 To assemble and connect the AM loop antenna To assemble the AM loop antenna To connect the AM loop antenna cords AM loop antenna cord (supplied) • Make sure the antenna conductors do not touch any other terminals, connecting cords and power cord. Also, keep the antennas away from metallic parts of the System, connecting cords, and the AC power cord.
- Page 62 To select the color system You can select the video output to match it to the color system of your TV. • The color system can be changed only while DVD/CD is selected as the source and playback is stopped. Press NTSC/PAL.
-
Page 63: Display Indication
The indications on the display tell you a lot of things while you are operating the System. Before operating the System, be familiar with when and how the indicator illuminates on the display. 1 BEEP ON indicator • Lights when key-touch tone is activated. 2 Timer indicators •... - Page 64 Indications on the main display • While listening to radio: Band Frequency Reception mode (FM only) • While playing a disc: DVD Video: Title number Elapsed playing time Chapter number DVD VR: Chapter number Title number Elapsed playing time SVCD/VCD/CD: Elapsed playing time* Track number Disc type*...
-
Page 65: Daily Operations-Playback
Daily Operations In this manual, the operation using the remote control is mainly explained; however, you can use the buttons and controls on the main unit if they have the same (or similar) name and marks. Disc number buttons, number buttons TOP MENU/PG 3/2/5/∞... -
Page 66: Listening To The Radio
To save the power consumption while on standby—Eco mode While on standby... Canceled The display illumination (including the display demonstration) disappears. Listening to the Radio To select the band (FM/AM) To tune in to a station While FM or AM is selected... sec. -
Page 67: Playing Back A Disc
Playing Back a Disc Before operating a disc, be familiar how a disc is recorded. • DVD Video/DVD-VR comprises of “Titles” which includes “Chapters,” MP3/WMA comprise of “Groups” which includes “Tracks,” and CD/SVCD/VCD comprise of only “Tracks.” For MP3/WMA/JPEG playback, see also page 30. To insert discs •... - Page 68 Remote To select a title/group ONLY While playing a disc... Skips to the next title/group. Skips to the previous (While holding...) title/group. To select a chapter/track While playing... Increases the chapter/track numbers. Decreases the chapter/track numbers. To locate a particular portion While playing a disc except MP3/WMA...
-
Page 69: Playing Back From The Pc
To move to the next or previous page of the current menu: Moves to the next page. Moves to the previous page. To return to the previous menu: (While holding...) To cancel PBC You can also cancel PBC function by pressing the number button to select a track. -
Page 70: Playing Back From Other External Equipment
Check if the drivers are correctly installed. Open the Control Panel on your PC: Select [Start] = [Settings] = [Control Panel] Click [System] = [Hardware] = [Device Manager] = [Sound, video and game controllers] and [Universal Serial Bus controllers] • The following window appears, and you can check whether the drivers are installed. -
Page 71: Reinforcing The Bass Sound
Daily Operations Remote Control DIMMER CLOCK/TIMER CLEAR VOICE FADE MUTING SURROUND MODE SOUND MODE 3/2/5/∞, ENTER BEEP 4/¢ SHIFT DVD LEVEL Main unit BEEP VOL +/– SOUND TURBO SURROUND MODE SOUND MODE SUBWOOFER LEVEL + SUBWOOFER LEVEL – —Sound and Other Adjustments Adjusting the Volume The volume level can be adjusted in 32 steps (VOL MIN, VOL 1 –... -
Page 72: Making The Center Channel Sound Clear -Clear Voice
Making the Center Channel Sound Clear —Clear Voice Remote ONLY When a multi-channel disc with center-channel signal is loaded on the current tray, you can increase the output level for the center channel sound. • This function allows you to easily understand the dialogue of DVD Video even with the low volume level. -
Page 73: Changing The Picture Tone
Changing the Picture Tone While showing a playback picture on the TV, you can select the preset picture tone, or adjust it and store your own preference. To select a preset picture tone Activate VFP. NORMAL GAMMA BRIGHTNESS CONTRAST SATURATION TINT SHARPNESS On the TV screen... -
Page 74: Turning On Or Off The Key-Touch Tone
Turning On or Off the Key-Touch Tone Remote control: Main unit: (While holding...) BEEP OFF BEEP ON • When the key-touch tone is activated, the BEEP ON indicator lights up. Changing the Display Brightness You can dim the display window. DIMMER OFF DIMMER 2 Setting the Clock... -
Page 75: Unique Dvd/Vcd Operations
Unique DVD/VCD Operations Remote Control Number buttons 5/∞, ENTER ¢ AUDIO SHIFT Selecting the Sound Track For DVD Video: While playing back a chapter containing multiple audio tracks, you can select the one to listen to. For DVD-VR/SVCD/VCD: When playing back a track, you can select the audio channel to play. -
Page 76: Selecting The Subtitle Language
Selecting the Subtitle Language For DVD Video: While playing back a chapter (of DVD Video) containing subtitles in different languages, you can select the subtitle language to display on the TV screen. For DVD-VR: While playing, you can turn the subtitle on or off. -
Page 77: Special Picture Playback
Special Picture Playback Still picture playback To start still picture To resume normal playback: playback: While playing... Frame-by-frame playback While playing... Still picture playback starts. Advance the still picture frame by frame. To resume normal playback, press DISC PLAY 3. Slow-motion playback While playing... -
Page 78: Advanced Disc Operations
Advanced Disc Operations Remote Control Number buttons 5/∞, ENTER ¢ SHIFT Main unit Programming the Playing Order —Program Play You can arrange the playing order of the tracks (up to 99) before you start playback. • Program play cannot be used for DVD-VR disc. Before starting playback, activate Program Play. -
Page 79: Playing At Random-Random Play
To skip a track: To pause: To release, press DISC PLAY 3. To check the programmed contents Before or after playback... in the reverse order in the programmed order Remote ONLY To modify the program Before or after playback... To erase the last entry: To erase the entire program: (holding then...) -
Page 80: Playing Repeatedly-Repeat Play
Playing Repeatedly—Repeat Play You can repeat playback. • You can also select the repeat mode using the on-screen bar (see page 27). • For JPEG and DVD-VR discs, see page 32. • For DVD Video: While playing... CHAP On the TV screen Before starting playback... -
Page 81: On-Screen Disc Operations
On-Screen Disc Operations Remote control Number buttons 3/2/5/∞, ENTER DISC PLAY 3 On-screen bars See also page 27. DVD Video DVD-VIDEO 8.5 Mbps TIME DVD-VR REPEAT DVD-VR TIME SVCD ON SCREEN SVCD ¡ TIME ZOOM TIME TIME CHAP 3 TOTAL 1:01:58 DISC 1 TITLE 2 CHAP. -
Page 82: About The On-Screen Bar
About the On-screen Bar You can check the information on disc (except for MP3/WMA/JPEG disc) and use some functions through the on-screen bar. On-screen bar Ex.: While playing a DVD Video DISC 1 TITLE 2 CHAP 3 8.5 Mbps DVD-VIDEO TIME CHAP. - Page 83 Changing the time information You can change the time information in the on-screen bar and the display window on the main unit. 1 Display the on-screen bar with the pull-down menu. DISC 1 TITLE 2 CHAP 3 8.5 Mbps DVD-VIDEO TIME CHAP.
- Page 84 A-B Repeat • A-B repeat is not available for MP3/WMA and some DVDs. 1 While playing, display the on-screen bar with the pull-down menu. 2 Select 3 Display the pop-up windows. DISC 1 TITLE 2 CHAP 3 DVD-VIDEO 8.5 Mbps TIME CHAP.
- Page 85 Chapter/Track Search You can search for the chapter (DVD Video/DVD-VR) number to play. 1 While playing, display the on-screen bar with the pull-down menu. 2 Select CHAP. TRACK 3 Display the pop-up window. DISC 1 TITLE TITLE 2 CHAP CHAP 3 DVD-VIDEO 8.5 Mbps TIME...
- Page 86 Control screen for DVD-R/-RW in DVD-VR format The control screen is superimposed on the TV screen when you call up Original Program (PG) or Play List (PL). To select playback type To select the Program List: To select the Play List: Playback starts.
- Page 87 To repeat slide-show for JPEG Before starting playback... GROUP On the TV screen Indication Display TV screen window REPEAT GROUP Repeats the current group. REPEAT 1 DISC Repeats the current disc. DISC REPEAT Repeats all discs. Selects to cancel Repeat indication Play mode.
-
Page 88: Setting The Timer
Remote control CLOCK/TIMER CANCEL SHIFT Timer Operations Setting the Timer Using Daily Timer, you can wake up with your favorite song. • To correct a misentry during the process, press CANCEL AUDIO (while holding SHIFT). You can return to the previous step. - Page 89 Select the playback source—“TUNER FM,” “TUNER AM,” “CD,” “AUX,” or “USB.” (While holding...) Ex.: When “TUNER FM” is selected. • When you select “TUNER FM” or “TUNER AM,” repeat the procedure to select a preset station. Select the volume level. (While holding...) Turn off the System (on standby) if you have set the timer with the System turned on.
-
Page 90: Set Up Menu Operations
Set up Menu Operations Remote control 3/2/5/∞, ENTER SET UP Set up Menu Icons The icon for the selected Set up Menu will be highlighted. Set up Menu Ex.: LANGUAGE is selected. LANGUAGE MENU LANGUAGE ENGLISH AUDIO LANGUAGE ENGLISH SUBTITLE ON SCREEN LANGUAGE ENGLISH SELECT... - Page 91 Repeat steps 3 to 4 to set other items on the same Set up Menu. Repeat steps 2 to 4 to set other items on another Set up Menu. To remove the Set up Menu 7 LANGUAGE Set up Menu You can select the initial languages for disc playback.
- Page 92 PICTURE SOURCE You can obtain optimal picture quality by selecting an appropriate option—picture source type (either video source or film source). Select one of the following: AUTO: Normally select this. When playing back a disc containing both video and film sources, the System automatically changes the processing to match it to the picture type (film or video source) of the current chapter.
- Page 93 D. RANGE COMPRESSION You can compress the dynamic range (the difference between the loudest sound and the softest sound) to enjoy a powerful sound even at a low volume level when listening to Dolby Digital software. This is useful at night. •...
-
Page 94: Operating The Tv
TV CH + / – SHIFT Operating the TV Operating TV You can operate the JVC’s TV using this remote control. To turn on or off the TV: To select the input mode (either TV or VIDEO): TV VOL + / –... -
Page 95: Additional Information
Additional Information Learning More about This System Before Operating the System (see page 3) Playable Disc Types: • About audio format – Linear PCM: Uncompressed digital audio, the same format used for CDs and most studio masters. – Dolby Digital: Compressed digital audio, developed by Dolby Laboratories, which enables multi-channel encode to create the realistic surround sound. - Page 96 Unique DVD/VCD Operations (see pages 20 to 22) Selecting the Sound Track: On some DVD videos, you cannot change audio languages while playing back. Special Picture Playback: • During slow-motion playback, no sound will be reproduced. • While zoomed in, the picture may look coarse. •...
-
Page 97: Maintenance
Maintenance To get the best performance of the System, keep your discs clean. Handling discs • Remove the disc from its case by holding it at the edge while pressing the center hole lightly. • Do not touch the shiny surface of the disc, or bend the disc. •... -
Page 98: Optical Digital Output Signals
USB Operations: Unable to play back through the USB connection. USB connection and setting is incorrect (see page 14). The sound through the USB connection stops. Noise and static electricity may stop the sound through the USB connection. In this case, do the following operations: •... -
Page 99: Language Code List
Language Code List Afar Abkhazian Afrikaans Ameharic Arabic Assamese Aymara Azerbaijani Bashkir Byelorussian Bulgarian Bihari Bislama Bengali, Bangla Tibetan Breton Catalan Corsican Czech Welsh Danish Bhutani Greek Esperanto Estonian Basque Persian Finnish Fiji Faroese Frisian Irish Scots Gaelic Galician Guarani Gujarati Hausa Hindi... -
Page 100: Parts Index
Parts Index Refer to the pages to see how to use the buttons and controls. Remote control 12, 23 11, 19 19, 33, 34 33, 34 19, 24, 34 7, 13, 18, 21, 23, 24, 27–31, 35, 39 11, 13, 14, 19, 24, 33, 34 11–14, 19, 24, 33, 34, 39 Main unit 12, 25... -
Page 101: Specifications
Specifications Amplifier section—CA-HXD77 Output Power: SUBWOOFERS: 180 W per channel, min. RMS, driven into 3 Ω at 63 Hz with no more than 10% total harmonic distortion. MAIN SPEAKERS: 90 W per channel, min. RMS, driven into 6 Ω at 1 kHz with no more than 10% total harmonic distortion. - Page 102 EN, FR © 2006 Victor Company of Japan, Limited 0206KMMMDWSAM...
Need help?
Do you have a question about the HX HX-D77 and is the answer not in the manual?
Questions and answers