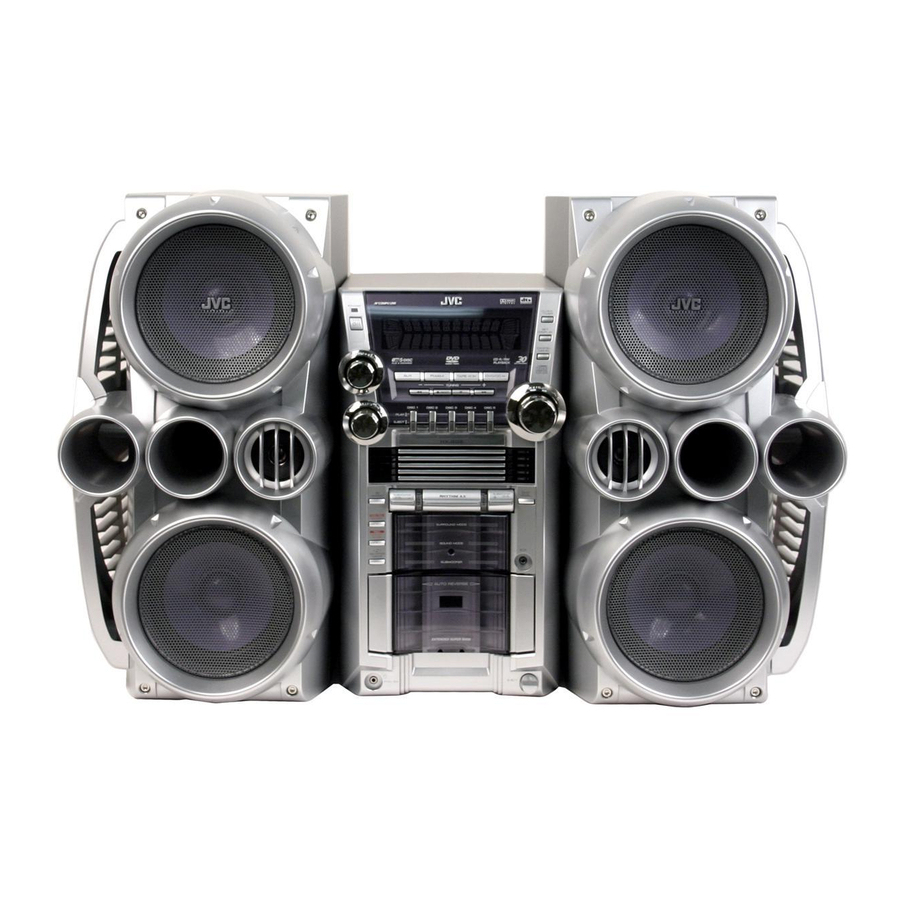
JVC HX-GD8 Instructions Manual
Compact component system
Hide thumbs
Also See for HX-GD8:
- Service manual (111 pages) ,
- Instructions manual (56 pages) ,
- Schematic diagrams (18 pages)
Table of Contents
Advertisement
Available languages
Available languages
COMPACT COMPONENT SYSTEM
SYSTEME DE COMPOSANTS COMPACT
HX-GD8
SP-HXGD8
D I G I T A L
—Consists of CA-HXGD8 and SP-HXGD8
For Customer Use:
Enter below the Model No. and Serial No.
which are located either on the rear, bot-
tom or side of the cabinet. Retain this
information for future reference.
Model No.
Serial No.
DISC
C O M P A C T
C O M P O N E N T
S Y S T E M
HX-GD8
SURROUND MODE
SOUND MODE
SUBWOOFER
CA-HXGD8
SP-HXGD8
INSTRUCTIONS
MANUEL D'INSTRUCTIONS
GVT0125-002A
[C]
Advertisement
Chapters
Table of Contents

Related Manuals for JVC HX-GD8


Summary of Contents for JVC HX-GD8
- Page 1 COMPACT COMPONENT SYSTEM SYSTEME DE COMPOSANTS COMPACT HX-GD8 DISC C O M P A C T SP-HXGD8 CA-HXGD8 D I G I T A L INSTRUCTIONS MANUEL D’INSTRUCTIONS —Consists of CA-HXGD8 and SP-HXGD8 For Customer Use: Enter below the Model No. and Serial No.
- Page 2 Mises en garde, précautions et indications diverses CAUTION RISK OF ELECTRIC SHOCK DO NOT OPEN CAUTION: TO REDUCE THE RISK OF ELECTRIC SHOCK, DO NOT REMOVE COVER (OR BACK). NO USER SERVICEABLE PARTS INSIDE. REFER SERVICING TO QUALIFIED SERVICE PERSONNEL. The lightning flash with arrowhead symbol, within an equilateral triangle is intended to alert the user to the presence of uninsulated...
- Page 3 For U.S.A. This equipment has been tested and found to comply with the limits for a Class B digital device, pursuant to part 15 of the FCC Rules. These limits are designed to provide reasonable protection against harmful interference in a residential installation.
- Page 4 1 CLASS 1 LASER PRODUCT 2 CAUTION: Do not open the top cover. There are no user serviceable parts inside the Unit; leave all servicing to qualified service personnel. 3 CAUTION: Visible and invisible laser radiation when open and interlock failed or defeated.
-
Page 5: Table Of Contents
Introduction ... 2 Precautions ...2 How to Read This Manual ...2 Getting Started ... 3 Step 1: Unpack ...3 Step 2: Prepare the Remote Control ...3 Step 3: Hook Up ...4 Before Operating the System ... 7 Playable Disc Types ...7 About the Display Indication ...8 Daily Operations—Playback ... -
Page 6: Introduction
Precautions Installation • Install in a place which is level, dry and neither too hot nor too cold—between 5°C and 35°C. • Install the System in a location with adequate ventilation to prevent internal heat buildup in the System. DO NOT install the System in a location near heat sources, or in a place subject to direct sunlight, excessive dust or vibration. -
Page 7: Getting Started
Step 1 :Unpack the package and check the accessories. Step 2 : Prepare the remote control. Step 3 : Hook up the components such as AM/FM antennas, speakers, etc. (see pages 4 to 6). Finally plug the AC power cord. Now you can operate this System. -
Page 8: Step 3: Hook Up
Step : Hook Up If you need more detailed information, see page 6. Turn the power off to all components before connections. Illustrations of the input/output terminals below are typical examples. When you connect other components, refer also to their manuals since the terminal names actually printed on the rear may vary. - Page 9 For better FM/AM reception Outdoor FM antenna (not supplied) Disconnect the supplied FM antenna, and connect to an outdoor FM antenna using a 75 Ω wire with coaxial type connector (IEC or DIN45325). AM loop antenna Keep it connected. Vinyl-covered wire (not supplied) Extend it horizontally.
- Page 10 To connect the AV COMPU LINK cords The AV COMPU LINK control system allows you to use JVC’s TV with simple operations; by starting playing back a disc, the TV automatically turns on and changes the input mode to the appropriate position so that you can view the playback picture.
-
Page 11: Before Operating The System
Before Operating the System Playable Disc Types This unit has been designed to play back the following discs: Disc Type Mark (Logo) DVD Video DVD Audio Video CD (VCD) Super Video CD (SVCD) COMPACT Audio CD DIGITAL AUDIO CD-R The System can play back CD-R or CD-RW recorded in the Audio CD, Video CD, SVCD, CD-RW MP3, WMA, and JPEG formats. -
Page 12: About The Display Indication
About the Display Indication The indications on the display teach you a lot of things while you are operating the System. Before operating the System, be familiar with when and how the indicator illuminates on the display. TITLE GROUP SURROUND DVD AUDIO LPCM Indications on the main display... - Page 13 1 BEEP ON indicator • Lights when key-touch tone is activated. 2 File type indicators • MP3: lights while playing back an MP3 track. • WMA: lights while playing back a WMA track. • JPEG: lights while playing back a JPEG file. 3 TITLE indicator •...
-
Page 14: Daily Operations-Playback
Daily Operations In this manual, the operation using the remote control is mainly explained; however, you can use the buttons and controls on the main unit if they have the same (or similar) name and marks. Disc number buttons, 10 keys RETURN TOP MENU 3/2/5/∞... -
Page 15: Listening To The Radio
Listening to the Radio To select the band (FM/AM) To tune in to a station While FM or AM is selected... sec. Increases the frequency. Decreases the frequency. When a station (frequency) with sufficient signal strength is tuned in, the frequency search stops. •... -
Page 16: Playing Back A Disc
Playing Back a Disc Before operating a disc, be familiar how a disc is recorded. • DVD Video comprises of “Titles” which includes “Chapters,” DVD Audio/MP3/WMA comprise of “Groups” which includes “Tracks,” and CD/SVCD/VCD comprise of only “Tracks.” For JPEG playback, see “Operations on the CONTROL” on page 28. - Page 17 Remote ONLY To select an item directly You can select a title/chapter/track directly and start playback. For DVD Video, you can select a title before starting playback, while you can select a chapter after starting playback. Examples: To select number 5, press 5. To select number 15, press +10, then 5.
-
Page 18: Playing Back A Tape
Playing Back a Tape To insert a tape You can play back type I tapes. • The use of C-120 or longer tape is not recommended. To start: To stop: REV.MODE To rewind tape: Before or after play... Rewinds the tape to the right. Rewinds the tape to the left. -
Page 19: Sound&Other Adjustments
Daily Operations Remote Control PROGRESSIVE 3/2/5/∞ ENTER SOUND MODE 3D PHONIC BEEP ON/OFF SUBWFR RHYTHM AX LEVEL +/- FADE MUTING DVD LEVEL Main unit SOUND MODE PRESET 7/BEEP 3D PHONIC RHYTHM —Sound&Other Adjustments Adjusting the Volume The volume level can be adjusted in 32 steps (VOLUME MIN, VOLUME 1 –... -
Page 20: Selecting The Sound Modes
Selecting the Sound Modes You can select one of the preset Sound Modes. Remote control: Main unit: Surround modes* DANCE Increases resonance and bass. HALL Adds depth and brilliance to the sound. STADIUM Adds clarity and spreads the sound, as in an outdoor stadium. -
Page 21: Selecting 3D Phonic Mode
Selecting 3D PHONIC Mode While playing... 3D ACTION 3D DRAMA 3D OFF 3D THEATER 3D PHONIC ACTION On the TV screen 3D ACTION Suitable for action movies and sports programs. 3D DRAMA Creates natural and warm sound. Enjoy movies in a relaxed mood. 3D THEATER Enjoy sound effects like in a major theater. -
Page 22: Turning On Or Off The Key-Touch Tone
GAMMA Adjust if the neutral color is bright or dark. The brightness of dark and bright portions is maintained (–3 to +3). BRIGHTNESS Adjust if the picture is bright or dark as a whole (–8 to +8). CONTRAST Adjust if the far and near position is unnatural (–7 to +7). -
Page 23: Unique Dvd/Vcd Operations
Unique DVD/VCD Operations Remote Control 10 Keys PAGE ANGLE ZOOM AUDIO SUB TITLE 3/2/5/∞ ENTER DVD/CD 3 SLOW -/+ SHIFT Selecting the Sound Track For DVD Video: While playing back a chapter containing audio languages, you can select the language to listen to. For DVD Audio: While playing back a track containing audio channels, you can select the audio channel to listen to. -
Page 24: Selecting The Subtitle Language
Selecting the Subtitle Language For DVD Video: While playing back a chapter (of DVD Video) containing subtitles in different languages, you can select the subtitle language to display on the TV screen. For SVCD: While playing, you can select the subtitles even if no subtitles are recorded on the disc. -
Page 25: Playing Back A Bonus Group On A Dvd Audio
Playing Back a Bonus Group on a DVD AUDIO Some DVD Audios have a special group called “bonus group” whose contents are not open to the public. • To play back a bonus group, you have to enter the specific “key number”... -
Page 26: Advanced Disc Operations
Advanced Disc Operations Remote Control 10 Keys CANCEL 5/∞ 4/¢ SHIFT Main unit 7 /BEEP ,8 4/¢ EJECT Programming the Playing Order —Program Play You can arrange the playing order of the tracks (up to 99) before you start playback. Before starting playback, activate Program Play. -
Page 27: Playing At Random—Random Play
To skip a track: To pause: To release, press DVD/ CD 3. To check the programmed contents Before or after playback... in the reverse order in the programmed order Remote ONLY To modify the program Before or after playback... To erase the last step: To erase the entire program: You can also use... -
Page 28: Playing Repeatedly
Playing Repeatedly Remote ONLY • You can also select the repeat mode using the on-screen bar (see page 26). Repeat Play You can repeat playback. • For DVD Video: While playing... TITLE CHAP Before starting playback... • For DVD Audio: While playing or before playback... -
Page 29: On-Screen Disc Operations
On-Screen Disc Operations Remote control 10 keys ZOOM 3/2/5/∞ ENTER On-screen bars DVD Video DISC 8.5Mbps TITLE TITLE 2 CHAP CHAP 3 DVD-VIDEO TIME CHAP. TIME DVD Audio GROUP 14 TRACK 23 DISC DVD-AUDIO TIME TRACK PAGE SVCD DISC TRACK 3 TITLE CHAP SVCD... -
Page 30: Operations Using The On-Screen Bar
Operations Using the Remote ONLY On-screen Bar Basic operation procedure through the on-screen bar is as follows: Ex.: Selecting a subtitle (French) for DVD Video While a disc is selected as the source... Display the on-screen bar with the pull-down menu. 8.5Mbps DISC 2 TITLE 2... -
Page 31: Time Search
5 Finish the setting. Pop-up window goes off. To cancel Repeat Play, select “OFF” in step 4. To erase the on-screen bar A-B Repeat 1 While playing, display the on-screen bar with the pull- down menu. 2 Select 3 Display the pop-up window. DISC 2 TITLE 2 CHAP 3... -
Page 32: Operations On The Control Screen
Chapter/Track Search You can search for the chapter (DVD Video) or track (DVD Audio) number to play. 1 While playing, display the on-screen bar with the pull- down menu. 2 Select CHAP. TRACK 3 Display the pop-up window. DISC 2 TITLE 2 CHAP CHAP 3... - Page 33 To move the highlight bar between group list and track list Moves the bar to the track list. Moves the bar to the group list. To select a group/track in the list Move the highlight bar to a desired item. •...
-
Page 34: Advanced Tape Operations
Advanced Tape Operations Remote Control START/STOP SHIFT Main unit DISC REC START REC START /STOP REVERSE MODE IMPORTANT It may be unlawful to record or play back copyrighted material without the consent of the copyright owner. Recording on a Tape You can use type I tapes for recording. -
Page 35: Synchronized Disc Recording
Start playing the source—“FM,” “AM,” “DVD/CD,” or “AUX.” • When recording a disc, you can also use “Synchronized Disc Recording” (see the next column). Start recording. sec. REC START/STOP To stop recording sec. REC START/STOP Synchronized Disc Recording You can start and stop both disc play and tape recording at the same time. -
Page 36: Timer Operations
Main unit 4/¢ Timer Operations Setting the Timer Using Daily Timer, you can wake up with your favorite song. On the other hand, with Recording Timer, you can make a tape of a radio broadcast automatically. CLOCK • To correct a misentry during the process, press /TIMER CANCEL/DEMO. -
Page 37: Timer Priority
5 For Daily Timers: • You can select the volume level (“VOLUME 5,” “VOLUME 10,” “VOLUME 15” and “VOLUME --”). If you select “VOLUME --,” the volume is set to the last level when the system has been turned off. Turn off the System (on standby) if you have set the timer with the System turned on. -
Page 38: Set Up Menu Operations
Set up Menu Operations Remote control 10 keys SET UP Set up Menu Icons The icon for the selected Set up Menu will be highlighted. Ex.: LANGUAGE Set up Menu is selected. LANGUAGE MENU LANGUAGE ENGLISH ENGLISH AUDIO LANGUAGE SUBTITLE ON SCREEN LANGUAGE ENGLISH SELECT... -
Page 39: Language Set Up Menu
Repeat steps 3 to 4 to set other items on the same Set up Menu. Repeat steps 2 to 4 to set other items on another Set up Menu. To finish the Set up Menu 7 LANGUAGE Set up Menu You can select the initial languages for disc playback. -
Page 40: Audio Set Up Menu
PICTURE SOURCE You can obtain optimal picture quality by selecting an appropriate option—picture source type (either video source or film source). Select one of the following: AUTO: Normally select this. When playing back a disc containing both video and film sources, the System automatically changes the processing to match it to the picture type (film or video source) of the current chapter. -
Page 41: Others Set Up Menu
To activate the on-screen guide icons. OFF: To cancel the on-screen guide icons. AV COMPULINK MODE When connecting the System to a JVC’s TV with the AV COMPU LINK remote control system, select the proper setting. Select one of the following: DVD1: To deactivate the AV COMPU LINK remote system. -
Page 42: Restricting The Review-Parental Lock
Restricting the Review Remote —Parental Lock ONLY You can restrict playback of DVD Video containing violent scenes and those unsuitable for your family members. Once you have set the rating level, such violent scenes (for which a higher level than you set is assigned) may be skipped or changed to another scene (depending on how the disc is programmed). - Page 43 To change the setting Display the PARENTAL LOCK sub menu. • Follow steps 1 to 4 of “To set Parental Lock” . PA R E N TAL L O CK COUNTRY CODE SET LEVEL _ _ _ _ PASSWORD EXIT SELECT PASSWORD? •••...
-
Page 44: Operating The Tv
Sharp Sony Toshiba Zenith Operating the TV Operating TV You can operate the JVC’s or other manufacturers’ TV using this remote control. Keep pressing the button until the following steps are complete. Enter the code setting mode. ENTER TV CHANNEL - / + Enter the 2-digit manufacture’s code number. -
Page 45: Daily Operations—Sound&Other Adjustments
Additional Information Learning More about This System Before Operating the System (see pages 7 to 9) Playable Disc Types: • About audio format – Linear PCM: Uncompressed digital audio, the same format used for CDs and most studio masters. – Dolby Digital: Compressed digital audio, developed by Dolby Laboratories, which enables multi-channel encode to create the realistic surround sound. - Page 46 Selecting the Clock: • “AM 12:00” will flash on the display until you set the clock. • The clock may gain or lose 1 to 2 minutes per month. If this happens, reset the clock. Turning Off the Power Automatically: •...
-
Page 47: Maintenance
Timer Operations (see pages 32 to 33) Setting the Timer: • If you do not specify the preset station or track number correctly while setting a timer, the currently selected station or the first track will be played when timer is activated. -
Page 48: Troubleshooting
Troubleshooting If you are having a problem with your System, check this list for a possible solution before calling for service. General: Adjustments or settings are suddenly canceled before you finish. ] There is a time limit. Repeat procedure again. Operations are disabled. -
Page 49: Language Code List
Language Code List Afar Abkhazian Afrikaans Ameharic Arabic Assamese Aymara Azerbaijani Bashkir Byelorussian Bulgarian Bihari Bislama Bengali, Bangla Tibetan Breton Catalan Corsican Czech Welsh Danish Bhutani Greek Esperanto Estonian Basque Persian Finnish Fiji Faroese Frisian Irish Scots Gaelic Galician Guarani Gujarati Hausa Hindi... -
Page 50: Country/Area Codes List For Parental Lock
Country/Area codes list for Parental Lock √ Andorra United Arab Emirates Afghanistan Antigua and Barbuda Anguilla Albania Armenia Netherlands Antilles Angola Antarctica Argentina American Samoa Austria Australia Aruba Azerbaijan Bosnia and Herzegovina Barbados Bangladesh Belgium Burkina Faso Bulgaria Bahrain Burundi Benin Bermuda Brunei Darussalam... -
Page 51: Optical Digital Output Signals
Nepal Nauru Niue New Zealand Oman Panama Peru French Polynesia Papua New Guinea Philippines Pakistan Poland Saint Pierre and Miquelon Pitcairn Puerto Rico Portugal Palau Paraguay Qatar Réunion Romania Russian Federation Rwanda Saudi Arabia Solomon Islands Seychelles Sudan OPTICAL DIGITAL OUTPUT Signals DIGITAL AUDIO OUTPUT Playback disc... -
Page 52: Parts Index
DISC 4 DISC 5 PLAY EJECT C O M P A C T C O M P O N E N T S Y S T E M HX-GD8 DISC 5 DISC 4 DISC 3 DISC 2 DISC 1 SUBWOOFER... -
Page 53: Specifications
Specifications Amplifier section—CA-HXGD8 Output Power: SUBWOOFERS: 195 W per channel, min. RMS, driven into 6 Ω at 63 Hz with no more than 10% total harmonic distortion. MAIN SPEAKERS: 80 W per channel, min. RMS, driven into 6 Ω at 1 kHz with no more than 10% total harmonic distortion. - Page 54 MEMO...
- Page 55 Introduction ... 2 Précautions ...2 Comment lire ce manuel ...2 Pour démarrer ... 3 Étape 1: Déballage ...3 Étape 2: Préparation de la télécommande ...3 Étape 3: Connexions...4 Avant d’utiliser la chaîne ... 7 Types de disques reproductibles ...7 À propos des indications sur l’affichage ...8 Opérations quotidiennes—Lecture ...
-
Page 56: Introduction
Précautions Installation • Installez la chaîne dans un endroit plat, sec, et ni trop chaud, ni trop froid—entre 5°C et 35°C. • Installez la chaîne dans un endroit avec une bonne ventilation pour éviter tout échauffement à l’intérieur de l’appareil. N’INSTALLEZ PAS la chaîne dans en endroit proche d’une source de chaleur ou sujet à... -
Page 57: Pour Démarrer
Étape 1 :Déballage et vérification des accessoires. Étape 2 :Préparation de la télécommande. Étape 3 : Connexion des composants tels que les antennes AM/FM, les enceintes etc. (voir pages 4 à 6) . Finalement, branchez le cordon d’alimentation. Maintenant, vous pouvez utiliser cette chaîne. -
Page 58: Étape 3: Connexions
Étape : Connexions Si vous avez besoin d’informations plus détaillées, voir page 6. Mettez tous les appareils hors tension avant les connexions. Les illustrations des prises d’entrée/sortie ci-dessous sont des exemples typiques. Quand vous connectez d’autres appareils, référez-vous aussi à leurs modes d’emploi car le nom des prises imprimé... - Page 59 Pour une meilleure réception FM/AM Antenne cadre AM Gardez-la connectée. Antenne FM extérieure (non fournie) Déconnectez l’antenne FM fournie et connectez l’appareil à une antenne FM extérieure en utilisant un connecteur de type coaxial 75 Ω (IEC ou DIN45325). S- VI DE O CO MP ON EN...
- Page 60 Pour connecter les cordons AV COMPU LINK Ce système vous permet d’utiliser très facilement un téléviseur JVC; en démarrant la lecture d’un disque, le téléviseur se met automatiquement sous tension et change son mode d’entrée sur la position appropriée de façon que vous puissiez voir l’image de lecture.
-
Page 61: Avant D'utiliser La Chaîne
Avant d’utiliser la chaîne Types de disques reproductibles Cet appareil a été conçu pour reproduire les disques suivants: Type de Marque (Logo) disque DVD Vidéo DVD Audio CD Vidéo (VCD) Super CD Vidéo (SVCD) COMPACT CD Audio DIGITAL AUDIO CD-R Cette chaîne peut reproduire les CD-R ou CD- RW enregistrés aux formats CD Audio, CD CD-RW... -
Page 62: À Propos Des Indications Sur L'affichage
À propos des indications sur l’affichage Les indications sur l’affichage vous donnent beaucoup d’informations pendant l’utilisation de la chaîne. Avant d’utiliser la chaîne, familiarisez-vous avec les indicateurs, et en particulier, quand et comment ils s’allument sur l’affichage. TITLE GROUP SURROUND DVD AUDIO LPCM Indications sur l’affichage principal... - Page 63 Indicateur BEEP ON • S’allume quand la fonction de tonalité de touche est en service. Indicateurs de type de fichier • MP3: s’allume lors de la lecture d’une plage MP3. • WMA: s’allume lors de la lecture d’une plage WMA. •...
-
Page 64: Opérations Quotidiennes
Opérations quotidiennes Dans ce manuel, nous expliquons principalement les opérations à l’aide de la télécommande; cependant, vous pouvez utiliser les touches et les commandes de l’appareil si elles portent le même nom (ou un nom similaire) et la même marque. Touches de numéro de disque,... -
Page 65: Écoute De La Radio
Écoute de la radio Pour choisir la bande (FM/AM) Pour accorder une station Quand FM ou AM est choisi... sec. Augmente la fréquence. Diminue la fréquence. Quand une station (fréquence) avec un signal suffisamment fort est accordée, la recherche de fréquence s’arrête. •... -
Page 66: Lecture D'un Disque
Lecture d’un disque Avant d’utiliser un disque, familiarisez vous avec la façon dont un disque est enregistré. • Les DVD Vidéo sont composés de “titres” qui eux-mêmes sont composés de “chapitres”, les DVD Audio/MP3/ WMA sont composés de “groupes” qui eux-mêmes sont composés de “plages”, et finalement, les CD/SVCD/VCD sont composés uniquement de “plages”. - Page 67 Pour localiser un passage particulier Lors de la lecture d’un disque non WMA/MP3... • Aucun ne sort pendant la recherche sur un DVD/SVCD/ VCD. Pour retourner à la lecture normale, appuyez sur DVD/CD 3. Pour choisir un élément directement Vous pouvez choisir un titre, un chapitre ou une plage directement et démarrer la lecture.
-
Page 68: Lecture D'une Cassette
Lecture d’une cassette Pour insérer une cassette Vous ne pouvez reproduire les cassettes de type I. • L’utilisation de cassettes C-120 ou plus longues n’est pas recommandée. Pour démarrer: Pour arrêter: REV.MODE Pour rebobiner la bande: Avant ou après la lecture... Rebobine la bande vers la droite. -
Page 69: Opérations Quotidiennes
Opérations quotidiennes Télécommande PROGRESSIVE 3/2/5/∞ ENTER SOUND MODE 3D PHONIC BEEP ON/OFF SUBWFR RHYTHM AX LEVEL +/- FADE MUTING DVD LEVEL Appareil SOUND MODE PRESET 7/BEEP 3D PHONIC RHYTHM —Ajustement du son et autres ajustements Ajustement du volume Le niveau de volume peut être ajuster sur 32 pas (VOLUME MIN, VOLUME 1 –... -
Page 70: Sélection Du Mode Sonore
Sélection du mode sonore Vous pouvez choisir un des modes sonores préréglés. Télécommande: DANCE HALL STADIUM Appareil: Modes Surround* DANCE Accentue la résonance et les graves. HALL Ajoute de la profondeur et de la brillance au son. STADIUM Ajoute de la clarté et étend le son comme dans un stade en plein air. -
Page 71: Sélection Du Mode 3D Phonic
Sélection du mode 3D PHONIC Pendant la lecture... 3D ACTION 3D DRAMA 3D OFF 3D THEATER 3D PHONIC ACTION Sur l’écran du téléviseur 3D ACTION Pour les films d’action et les programmes sportifs. 3D DRAMA Crée un son naturel et chaleureux. Profiter d’un film dans une ambiance détendue. -
Page 72: Mise En Ou Hors Service La Tonalité Des Touches
GAMMA Ajustez ce réglage si les couleurs neutres sont lumineuses ou sombres. La luminosité des parties sombres et lumineuse est maintenue (–3 à +3). LUMINOSITE Ajustez ce réglage si l’image est entièrement lumineuse ou sombre (–8 à +8). CONTRASTE Ajustez ce réglage si la position éloignée et proche n’est pas naturelle (–... -
Page 73: Opérations Spécialisées Pour Les Dvd/Vcd
Opérations spécialisées pour les DVD/VCD Télécommande Touches numériques PAGE ANGLE ZOOM AUDIO SUB TITLE 3/2/5/∞ ENTER DVD/CD 3 SLOW -/+ SHIFT Sélection de la piste sonore Pour les DVD Vidéo: Lors de la lecture d’un chapitre contenant plusieurs langues audio, vous pouvez choisir la langue à... -
Page 74: Sélection De La Langue Des Sous-Titres
Sélection de la langue des sous-titres Pour les DVD Vidéo: Lors de la lecture d’un chapitre (d’un DVD Vidéo) contenant des sous-titres en différentes langues, vous pouvez choisir la langue des sous-titres à afficher sur l’écran du téléviseur. Pour les SVCD: Pendant la lecture, vous pouvez choisir les sous-titres, même si aucun sous-titre n’est enregistré... -
Page 75: Lecture D'un Groupe Bonus Sur Un Dvd Audio
Lecture d’un groupe bonus sur un DVD Audio Certains DVD Audio possèdent un groupe spécial appelé “groupe bonus” dont le contenu n’est pas accessible au public. • Pour reproduire un groupe bonus, vous devez entrer un “numéro de code” (une sorte de mot de passe) pour le groupe bonus. -
Page 76: Opérations Avancées Des Disques
Opérations avancées des disques Télécommande Touches numériques CANCEL 5/∞ 4/¢ SHIFT Appareil 7 /BEEP ,8 4/¢ EJECT Programmation de l’ordre de lecture—Lecture programmée Vous pouvez arranger l’ordre de lecture des plages (99 maximum) avant de démarrer la lecture. Avant de démarrer la lecture, mettez en service la lecture programmée. -
Page 77: Lecture Dans Un Ordre Aléatoire-Lecture Aléatoire
Démarrez la lecture. La lecture démarre dans l’ordre de programmation. Pour sauter une Pour faire une plage: pause: Pour reprendre la lecture, appuyez sur DVD/CD 3. Pour vérifier le contenu programmé Avant ou après la lecture... dans l’ordre inverse dans l’ordre programmé Pour modifier le programme Avant ou après la lecture... -
Page 78: Répétition De La Lecture
Répétition de la lecture Remote ONLY • Vous pouvez aussi choisir le mode de répétition en utilisant la barre sur l’écran (voir page 26). Lecture répétée Vous pouvez répéter la lecture. • Pour les DVD Vidéo: Pendant la lecture... TITLE CHAP Avant de démarrer la lecture... -
Page 79: Opération Des Disques En Utilisant L'affichage Sur L'écran
Opération des disques en utilisant l’affichage sur l’écran Télécommande Touches numériques ZOOM 3/2/5/∞ ENTER Barres sur l’écran DVD Vidéo DISC 8.5Mbps TITLE TITLE 2 CHAP CHAP 3 DVD-VIDEO TIME CHAP. TIME DVD Audio GROUP 14 TRACK 23 DISC DVD-AUDIO TIME TRACK PAGE SVCD... -
Page 80: Opérations En Utilisant La Barre Sur L'écran
Opérations en utilisant la barre sur l’écran La procédure de fonctionnement de base à l’aide de la barre sur l’écran est la suivante: Ex.: Sélection d’un sous-titre (français) pour un DVD Vidéo Quand un disque est choisi comme source... Affichez la barre sur l’écran avec le menu déroulant. 8.5Mbps DISC 2 TITLE 2... -
Page 81: Recherche Temporelle
5 Terminez le réglage. La fenêtre contextuelle disparaît. Pour annuler la lecture répétée, choisissez “ARRET” à l’étape 4. Pour effacer la barre sur l’écran Répétition A-B 1 Pendant la lecture, affichez la barre sur l’écran avec le menu déroulant. 2 Choisissez 3 Affichez la fenêtre contextuelle. - Page 82 Recherche de chapitre/plage Vous pouvez recherche le numéro de chapitre (DVD Vidéo) ou de plage (DVD Audio) à reproduire. 1 Pendant la lecture, affichez la barre sur l’écran avec le menu déroulant. 2 Choisissez CHAP. TRACK 3 Affichez la fenêtre contextuelle. DISC 2 TITLE 2 CHAP...
- Page 83 Pour déplacer la barre de mise en valeur de la liste des groupes sur la liste des plages Déplace la barre sur la liste des plages. Déplace la barre sur la liste des groupes. Pour choisir un groupe ou une plage dans la liste Déplacez la barre de mise en valeur sur l’élément souhaité.
-
Page 84: Opérations Avancées Pour Les Cassettes
Opérations avancées pour les cassettes Télécommande START/STOP SHIFT Appareil DISC REC START REC START /STOP REVERSE MODE IMPORTANT Il peut être illégal d’enregistrement ou de reproduire un matériel protégé par des droits d’auteur sans le consentement du propriétaire des droits. Enregistrement sur une cassette Vous pouvez utiliser des cassettes de type I pour l’enregistrement. -
Page 85: Enregistrement Synchronisé De Disque
Démarrez la lecture de la source—“FM”, “AM”, “DVD/CD” ou “AUX”. • Lors de l’enregistrement d’un disque, vous pouvez aussi utiliser l’“Enregistrement synchronisé de disque” (voir la colonne suivante). Démarrez l’enregistrement. sec. REC START/STOP Pour arrêter l’enregistrement sec. REC START/STOP Enregistrement synchronisé de disque Vous pouvez démarrer et arrêter à... -
Page 86: Utilisation De La Minuterie
Utilisation de la minuterie Appareil 4/¢ Réglage de la minuterie En utilisant la minuterie quotidienne, vous pouvez vous réveiller au son de votre musique préférée. D’autre part, avec la minuterie d’enregistrement, vous pouvez enregistrer CLOCK une émission de radio automatiquement. /TIMER •... -
Page 87: Priorité Des Minuteries
4 Choisissez une station préréglée pour “TUNER- FM” et “TUNER-AM”, ou choisissez un disque et un numéro de plage pour “DISC”. Numéro de disque Numéro de plage Numéro de groupe Ex.: Quand “DISC” est choisi. 5 Pour les minuteries quotidiennes: •... -
Page 88: Utilisation Du Menu De Réglages
Utilisation du menu de réglages Télécommande Touches numériques SET UP Icônes du menu de réglages L’icône pour le menu de réglage choisi est mis en valeur. Ex.: Le menu de réglage LANGUE est choisi. LANGUE LANGUE MENU ANGLAIS ANGLAIS LANGUE AUDIO SOUS-TITRE ARRET FRANÇAIS... -
Page 89: Menu De Réglage Langue
Répétez les étapes 3 à 4 pour régler un autre élément sur le même menu de réglage. Répétez les étapes 2 à 4 pour régler un autre élément sur un autre menu de réglage. Pour quitter le menu de réglage 7 Menu de réglage LANGUE Vous pouvez choisir la langue initiale pour la lecture des disques. -
Page 90: Menu De Réglage Audio
SOURCE D’IMAGE Vous pouvez obtenir une qualité d’image optimale en choisissant l’option appropriée—type de source d’image (source vidéo ou source de film). Choisissez un des réglages suivants: AUTO: Normalement choisissez ce réglage. Lors de la lecture d’un disque contenant à la fois des sources vidéo et de film, la chaîne change le traitement automatiquement de façon à... -
Page 91: Menu De Réglage Autres
Pour mettre hors service les icônes guides sur l’écran. MODE COMPULINK AV Lors de la connexion de la chaîne à un téléviseur JVC muni du système de commande à distance AV COMPU LINK, choisissez le réglage correct. Choisissez un des réglages suivants: DVD1: Poour mettre hors service le système de... -
Page 92: Restriction De La Visualisation-Censure Parentale
Restriction de la visualisation —Censure parentale Vous pouvez limiter la lecture des DVD Vidéo contenant des scènes violentes ou qui ne conviennent pas à certains membres de votre famille. Une fois que vous avez réglé le niveau de classement, les scènes violentes (pour lesquelles un niveau supérieur au niveau réglé... - Page 93 Pour changer le réglage Affichez le sous-menu CENSURE PARENTALE. • Suivez les étapes 1 à 4 de “Pour régler la censure parentale”. CENSURE PARENTALE CODE PAYS ETABLIR NIVEAU _ _ _ _ CODE SORTIE SELECTION CODE?•••SAISIR TOUCHES 0 ~ 9 ENTRER POUR QUITTER, APPUYER SUR [SET UP].
-
Page 94: Commande Du Téléviseur
Sharp Sony Toshiba Zenith Commande du téléviseur Vous pouvez commander un téléviseur JVC ou d’un autre fabricant en utilisant cette télécommande. Maintenez cette touche pressée jusqu’à ce que les étapes suivantes soient terminées. Entrez en mode de réglage du code. -
Page 95: Informations Additionnelles
Informations additionnelles Pour en savoir plus sur cette chaîne Avant d’utiliser la chaîne (voir pages 7 à 9) Types de disques reproductibles: À propos du format audio • Linear PCM: – Format audio numérique non compressé, le même format qui est utilisé pour les CD et la plupart des originaux de studio. - Page 96 Réglage de l’horloge: • “AM 12:00” clignote sur l’affichage jusqu’à ce que vous régliez l’horloge. • L’horloge peut avancer ou retarder d’une ou deux minutes par mois. Si cela se produit, réglez de nouveau l’horloge. Mise hors tension automatique de l’appareil automatiquement: •...
-
Page 97: Manipulation Des Disques
• Quand la fin de la bande est atteinte dans la direction avant ) pendant l’enregistrement, le dernier morceau est enregistré à nouveau au début de la face arrière ( • Quand la fin de la bande est atteinte sur la face arrière ( pendant l’enregistrement, l’enregistrement s’arrête même si le disque n’est pas entièrement enregistré. -
Page 98: Guide De Dépannage
Guide de dépannage Si vous des problèmes avec votre chaîne, cherchez d’abord une solution dans cette liste avant d’appeler un réparateur. Général: Les ajustements ou les réglages sont annulés soudainement avant la fin. Il y a un temps limite. Recommencez la procédure. L’appareil ne fonctionne pas. -
Page 99: Liste Des Codes De Langue
Liste des codes de langue Afar Abkhaze Afrikaans Amharique Arabe Assamais Aymara Azerbaïdjanais Bachkir Biélorusse Bulgare Bihari Bichlamar Bengali, Bangla Tibétain Breton Catalan Corse Tchèque Gallois Danois Dzongkha Grec Espéranto Estonien Basque Perse Finnois Fidji Féroïen Frison Irlandais Gaélique écossais Galicien Guarani Goudjrati... -
Page 100: Codes Des Pays/Zones Pour La Censure Parentale
Codes des pays/zones pour la censure parentale √ Andorre Émirats arabes unis Afghanistan Antigua-et-Barbuda Anguilla Albanie Arménie Antilles néerlandaises Angola Antarctique Argentine Samoa américaines Autriche Australie Aruba Azerbaïdjan Bosnie-Herzégovine Barbade Bangladesh Belgique Burkina Faso Bulgarie Bahreïn Burundi Bénin Bermudes Brunei Bolivie Brésil Bahamas... -
Page 101: Signaux Optical Digital Output
Népal Nauru Nioué Nouvelle-Zélande Oman Panama Pérou Polynésie française Papouasie-Nouvelle-Guinée Philippines Pakistan Pologne Saint-Pierre-et-Miquelon Pitcairn, Îles Porto Rico Portugal Belau Paraguay Qatar Réunion Roumanie Russie Rwanda Arabie Saoudite Salomon, Îles Seychelles Soudan Signaux OPTICAL DIGITAL OUTPUT SORTIE AUDIO NUM. Disque de lecture DVD Vidéo avec 48 kHz, 16/20/24 bits Linear PCM... -
Page 102: Nomenclature
DISC 4 DISC 5 PLAY EJECT C O M P A C T C O M P O N E N T S Y S T E M HX-GD8 DISC 5 DISC 4 DISC 3 DISC 2 DISC 1 SUBWOOFER... -
Page 103: Spécifications
Spécifications CA-HXGD8 Section de l’amplificateur— Puissance de sortie: SUBWOOFERS: 195 W par canal, min. RMS, entraîné sur 6 Ω à 63 Hz avec moins de 10% de distorsion harmonique totale. MAIN SPEAKERS: 80 W par canal, min. RMS, entraîné sur 6 Ω à 1 kHz avec moins de 10% de distorsion harmonique totale. - Page 104 VICTOR COMPANY OF JAPAN, LIMITED EN,FR 0304AIMMDWJEM © 2004 VICTOR COMPANY OF JAPAN, LIMITED...
Need help?
Do you have a question about the HX-GD8 and is the answer not in the manual?
Questions and answers