Table of Contents
Advertisement
Quick Links
Advertisement
Table of Contents

Related Manuals for Clearwell Mobility Aguna Ultralight


Summary of Contents for Clearwell Mobility Aguna Ultralight
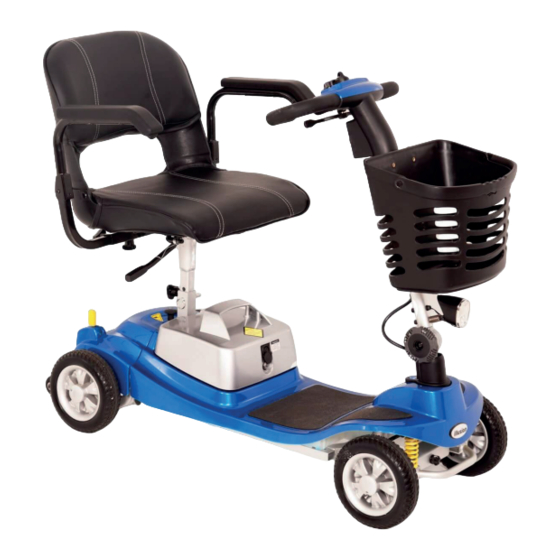
- Page 1 Aguna Ultralight MOBILITY SCOOTER USER MANUAL...
-
Page 2: Table Of Contents
If in doubt we suggest you consult a healthcare professional for advice. Modifications Any modifications to the specifications will invalidate the warranty and may render the vehicle dangerous. Clearwell Mobility Technical Support Helpline 01444 253 300 www.clearwellmobility.co.uk... -
Page 3: Dashboard Controls
Dashboard Controls Before driving your vehicle it is important to familiarise yourself with the controls. Do not att empt to drive the vehicle unti l you have understood these instructi ons. Light Switch Charging Port Fuse To Turn On: Insert the key and turn clockwise. To Turn Off : Turn key back anti -clockwise. -
Page 4: Freewheeling The Scooter
Freewheeling the Scooter Freewheeling the Scooter The freewheel lever is located on the rear secti on of the scooter. Before driving the scooter needs to be put into the drive positi on. The two positi ons are: 1. Drive Mode- is indicated by 'Closed'. Pull the lever backwards for this positi on. 2. -
Page 5: Tiller Adjustments
Tiller Adjustments Tiller Adjustment Knob Tiller Adjustment • Loosen the ti ller adjustment knob by turning Knob anti -clockwise- see diagram. • Raise the ti ller to the required positi on. • Fully ti ghten the adjustment knob by turning clockwise making sure the ti ller is securely positi oned with the teeth fully engaged together. -
Page 6: Disassembly
Disassembly Disassembly You can disassemble the scooter into five main pieces: the basket, the front section, rear section, seat and battery box as shown: Basket Front Section Rear Seat Battery Box Section Disassembly Procedure 1. Remove the seat- Stand behind the scooter and fold the seat back down, then with both hands lift seat directly upwards. -
Page 7: Assembly
Assembly Assembly NOTE: Ensure you have suffi cient room when disassembling or assembling your scooter to move the parts around. No tools are required to disassemble or assemble your scooter. Connecti ng Front & Rear Secti ons • Connect the front and rear secti on by aligning them and gently lift ing the front secti on onto the two hooks of the rear secti on. -
Page 8: Battery Charging
Battery Charging Charging Your Batteries • Turn off the scooter power and remove the • Slide away the cover of the charger outlet point positioned on the front of the battery box or tiller charging port as shown. • Put the charger plug into the outlet point. •... -
Page 9: Simple Maintenance
Simple Maintenance Simple Maintenance Maintenance should only be carried out by a qualifi ed engineer. You should check the following before each journey: 1. Visually check the tyres for damage. 2. Check the steering moves freely. 3. The ti ller knob is ti ght. 4. -
Page 10: Hazards
Hazards Getting On and Off the Vehicle • When getting on, make sure that the vehicle is on level ground and not in freewheel mode. • Ensure that the armrests are secure. • When getting off, park on level ground, turn off the ignition and remove the key before leaving your seat. - Page 11 Hazards Stowed Transport •Follow the disassembly instructi ons to correctly dismantle your scooter for stowed transport. Transportati on in Vehicles • This scooter is not suitable to use as a seat in a vehicle, it has not been crash tested. •...
-
Page 12: Troubleshooting
Speed pot error Contact Clearwell Mobility for assistance Motor voltage error Contact Clearwell Mobility for assistance Other internal errors Contact Clearwell Mobility for assistance... - Page 13 Troubleshooti ng Symptom Possible Soluti on Scooter does not move 1. Key switch is not 'ON' 1. Turn key switch 'ON' 2. Main circuit breaker tripped 2. Reset circuit breaker 3. Brake release lever in 'Freewheel 3. Place lever in 'Drive Mode' Mode' 4.
-
Page 14: Warranty
5. The model and serial number of your scooter (These can be found on the label Clearwell Mobility shall not be liable for stuck to the outside of your scooter pack). any indirect or consequential damages. -
Page 15: Technical Specification
Technical Specifi cati on Aguna Ultralight Specifi cati ons Weight capacity 20st (125kg) Overall length 41" (103.5cm) Overall width 19" (49cm) Overall height 36" (92cm) Total mass (without batt eries) 28kg Total mass (with batt eries) 30.7kg Mass of the heaviest part 9.9kg... - Page 16 Aguna Endurance Specifications The Aguna Endurance comes with all the features of, and functions in the same way as, the Aguna Ultralight. With a 21Ah battery, it also has increased range of up to 20 miles on a single charge.
- Page 17 @clearwellmobility @clearwellmob...
-
Page 18: Clearwell Mobility
Clearwell Mobility 21 Albert Drive Burgess Hill West Sussex RH15 9TN www.clearwellmobility.co.uk Call Us: 01444 253 300...
Need help?
Do you have a question about the Aguna Ultralight and is the answer not in the manual?
Questions and answers