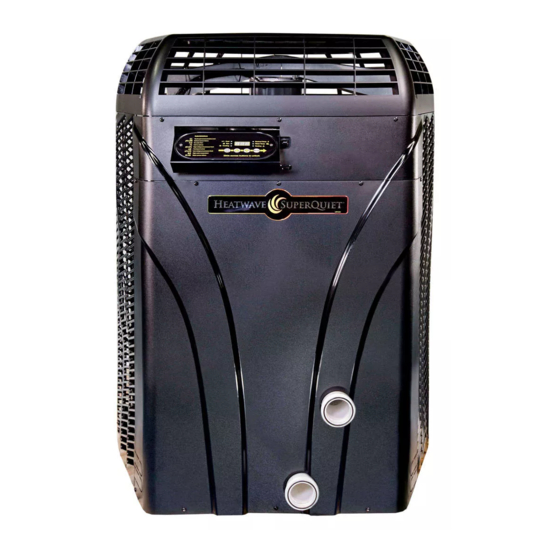
Aquacal HeatWave SuperQuiet SQ120R Installation Manual
Hide thumbs
Also See for HeatWave SuperQuiet SQ120R:
- Installation manual (105 pages) ,
- Instruction manual (41 pages) ,
- Operation manual (58 pages)
Table of Contents
Advertisement
Advertisement
Chapters
Table of Contents
Troubleshooting

Related Manuals for Aquacal HeatWave SuperQuiet SQ120R


Summary of Contents for Aquacal HeatWave SuperQuiet SQ120R
- Page 1 ® AquaCal Installation Manual ® WATER CHILLER Important Read this document before operating / installing this product For additional product manuals and operation / installation procedures, please visit www.AquaCal.com LTP0114 REV 2.03 - (project rel 7.02)
-
Page 3: Table Of Contents
Table of Contents Contacting AquaCal AutoPilot, Inc. Safety Instructions 1 - Installation 1.1 Positioning Equipment 1.2 Clearances 1.3 Dimensions 1.4 Plumbing 1.4.a Plumbing Requirements 1.4.b Plumbing Diagrams 1.4.c Water Connections to Heat Pump 1.4.d In-Line Chlorine Feeders 1.4.e Water Flow Rates 1.4.f Adjusting Water Flow Using ΔT (Delta-T) - Page 4 3.3 Weights 3.4 Heating Recommendations 3.5 Cooling Recommendations 3.6 Available Accessories...
-
Page 5: Contacting Aquacal Autopilot, Inc
Repair and service of heat pump must be performed by an authorized service center. Warranties may be voided if the equipment has been improperly installed, maintained or serviced. If service is deemed necessary, please contact AquaCal. See "Contacting AquaCal AutoPilot, Inc." above. SAFETY SIGNALS Throughout this document, safety signals have been placed where particular attention is required. - Page 6 Failure to heed the following may result in injury or death. WARNING Installation and repairs must be performed by a qualified technician. The heat pump contains refrigerant under pressure. Repairs to the refrigerant circuit must not be attempted by untrained and/or unqualified individuals. Service must be performed only by qualified HVAC technicians. Recover refrigerant before opening the system.
-
Page 7: Installation
1 - Installation Failure to heed the following may result in injury or death. WARNING Installation of this equipment by anyone other than a qualified installer can result in a safety hazard. The information contained throughout the "Installation" section is intended for use by qualified installation technicians familiar with the swimming Pool/Spa safety standards. -
Page 8: Positioning Equipment
They should be used to anchor the heat pump to the pad. ® If needed, contact AquaCal to obtain anchoring kit information. Please have the heat pump model number and serial number when requesting support. See "Identifying Model Specifications" on page 79. -
Page 9: Clearances
1.2 Clearances Proper air circulation is required for the heat pump to operate efficiently. The following diagrams show the minimum clearances required for the proper operation of the heat pump. Avoid storing chemical containers near the heat pump. The chemicals can cause equipment damage. Avoid placing objects near or on top of the heat pump. -
Page 10: Dimensions
1.3 Dimensions ® ® (HeatWave SuperQuiet SQ120R, (TropiCal T035, T055 and T075) ® SQ125, SQ145, SQ166R and SQ225) (TropiCool TC500) ® (TropiCool TC1500) ® ® (TropiCal T090, T115 and T135) (TropiCal T170) ® (TropiCool TC1000) Page - 6... -
Page 11: Plumbing
The basic plumbing configurations for typical installations are shown. ® If the installation does not closely follow any of the supplied plumbing diagrams, AquaCal Technical Support is available for installation advice and guidance. Confirm water provided to the heat pump is clean and filtered. - Page 12 Heat Pump with water flows greater than the maximum listed flow rate See "Water Flow Rates" on page 11. Heat Pump with Spillover Spa (One filter Pump) Page - 8...
- Page 13 Heat Pump with Spillover Spa (Two filter Pumps) Heat Pump with Solar Panels in Plumbing Circuit Heat Pump with Gas Heater backup Page - 9...
-
Page 14: Water Connections To Heat Pump
Heat Pump union sizes are specified on diagrams. Connections to site plumbing are made via PVC solvent cement to the female slip socket of the plumbing unions. ® Plumbing unions are available from AquaCal Failure to heed the following may result in damage to equipment. NOTICE Do not use glue on the threaded portion of the equipment’s unions. -
Page 15: In-Line Chlorine Feeders
® ® TropiCal T090, T115, T135 TropiCal T170 1.4.d In-Line Chlorine Feeders Place in-line chlorinators downstream from the heat pump and as low in elevation as possible. If an erosion type feeder is used, it is recommended that a Hartford Loop be installed to protect internal heat pump components. - Page 16 FLOW RATES MODEL HEAT EXCHANGER TYPE MINIMUM MAXIMUM T055 Titanium Tube-in-Tube 20 GPM (75.7 L/min) 45 GPM (170 L/min) T075 Titanium Tube-in-Tube 20 GPM (75.7 L/min) 45 GPM (170 L/min) ® T090 Titanium ThermoLink 30 GPM (113.6 L/min) 70 GPM (265 L/min) ®...
-
Page 17: Adjusting Water Flow Using Δt (Delta-T)
1.4.f Adjusting Water Flow Using ΔT (Delta-T) The Delta-T is the temperature difference between the water temperatures entering and leaving the heat pump. The equipment can be fine-tuned for maximum performance by balancing water flow rates to maintain an ideal ∆T. The adjustment procedure must be completed with the unit in heating mode. - Page 18 Table 1 - Temperature Chart PLEASE NOTE - Temperature differences are based on pool water temperatures of 69° to 75° F. (20.5° to 23.8° C) ® For water temperatures outside this range, contact AquaCal . See "Contacting AquaCal AutoPilot, Inc." on page 1. Page - 14...
-
Page 19: Maintaining Ability To Winterize
1.4.g Maintaining Ability to Winterize Do not glue the threaded portion of the unions. The unions are used to decouple the heat pump from the plumbing system during hard freeze conditions. Failure to heed the following may result in damage to equipment. NOTICE Do not use glue on the threaded portion of the equipment’s unions. -
Page 20: Electrical
Therefore a water flow switch must be used in place of a water pressure switch to determine if incoming water is being sent to the heat pump. See "Grid Flow Switch (# 0040S)" on page 83. ® 9. If the heat pump continues to operate without water flow, contact AquaCal 1.5 Electrical 1.5.a Electrical Requirements Failure to heed the following will result in injury or death. - Page 21 Electrical Standards Standards Title The electrical installation must conform to the current NFPA 70, Nat'l Elec. version of the National Electric Code (NEC), and all Code 2017 applicable local and state codes IEC 60335-1 Household and similar electrical appliances - Safety - General Requirements Household and similar electrical appliances - Safety –...
- Page 22 Minimum and Maximum Operating Voltage The heat pump must operate within specified voltages. Failure to heed the following may result in damage to equipment. NOTICE Operating equipment under higher or lower voltage conditions may result in damage to your compressor, motors or other electrical components.
-
Page 23: Incoming Power Access Holes
1.5.b Incoming Power Access Holes ® ® ® (HeatWave SuperQuiet (TropiCal T035, T055 (TropiCal T090, T115 SQ120R, SQ125, SQ145, and T075) and T135) ® ® SQ166R and SQ225) (TropiCool TC500) (TropiCool TC1000) ® (TropiCool TC1500) ® (TropiCal T170) Page - 19... -
Page 24: Access Panels
1.5.c Access Panels Failure to heed the following will result in injury or death. DANGER RISK OF ELECTRICAL SHOCK FROM ENERGY STORED IN CAPACITORS - MODELS EQUIPPED WITH VARIABLE FREQUENCY COMPRESSOR DRIVES STORE ELECTRICITY EVEN AFTER THE POWER HAS BEEN DEACTIVATED AT THE POWER BREAKER. Wait for 2 minutes after the shut down of equipment before servicing. -
Page 25: Verifying Transformer Setting
1.5.d Verifying Transformer Setting Transformer voltage must be confirmed and set correctly depending on the measured voltage found on the site. Incorrect settings may cause heat pump damage. The following procedure will allow the installer to set the heat pump's transformer for the appropriate site voltage. Failure to heed the following will result in injury or death. -
Page 26: Three-Phase Adjustment
3. When heat pump starts, disconnect power and verify off. Then confirm all line voltage connections are securely tightened. Reconnect power. ® If the heat pump does not start, contact AquaCal for further assistance. See "Contacting AquaCal AutoPilot, Inc." on page 1. -
Page 27: External Equipment
1.6 External Equipment 1.6.a Connecting a Call Flex To support a direct connection to a call flex accessory, AquaCal ® heat pumps are equipped with optional terminal blocks on the microprocessor. The microprocessor is located on the low-voltage side of the electrical enclosure. - Page 28 Configure Call Flex Enter "Installer Menus", then proceed Page - 24...
-
Page 29: Connecting A Chlorinator
1.6.b Connecting a Chlorinator To support an AutoPilot ® ChlorSync chlorinator, select AquaCal ® heat pumps are equipped with a power supply outlet on the front of the unit. The chlorination cell can be plugged directly into the heat pump without the need for a ChlorSync power supply. -
Page 30: Connecting External Controllers To Heat Pump
ChlorSync Connectioned to Heat Pump 1.6.c Connecting External Controllers to Heat Pump ® To support a direct connection to an external controller, AquaCal heat pumps are equipped with optional removable terminal blocks on the microprocessor. The microprocessor is located on the low-voltage side of the electrical enclosure. -
Page 31: Connecting Smart Bus Controllers
Failure to heed the following may result in injury or death. WARNING This section is only for qualified installers who are familiar with the swimming pool and spa safety standards. The installer must be familiar with service industry techniques. Failure to heed the following may result in damage to equipment. NOTICE Do not use an electric heater connection on external controllers for heat pump wiring. - Page 32 Typically a smart bus controller will have four wires on its smart bus for a heat pump. The power and ground (usually the 1st and 4th wire) are not used. Figure 3 Figure 2 5. If dip-switch settings are required, configure them on the external controller now. Failure to heed the following will result in injury or death.
- Page 33 Configure for Smart Bus Controller Enter "Installer Menus", then proceed Page - 29...
- Page 34 10. If after 45 seconds, the heat pump displays a " SMART COMM FAULT ": A. Confirm dip switches - If external controller uses dip switches, confirm switches are in the correct position. Otherwise, proceed to confirm wiring. a. Deactivate power to the external controller. b.
-
Page 35: Connecting Two-Wire Controllers (With Internal Thermostat)
c.2 Connecting Two-wire Controllers (with internal thermostat) PLEASE NOTE 2-Wire controllers are not designed to control chiller operation. For full functionality, the Heat and Cool, and Cool Only heat pumps must use an external controller that has a SMART bus connection. Check with the external controller manufacturer for more information. - Page 36 Configure 2-wire controller Enter "Installer Menus", then proceed Page - 32...
-
Page 37: Connecting Gas Backup Heater To Heat Pump
1.6.d Connecting Gas Backup Heater to Heat Pump To support a direct connection to a gas backup heater, AquaCal ® heat pumps are equipped with optional terminal blocks on the microprocessor. The microprocessor is located on the low-voltage side of the electrical enclosure. - Page 38 The wire size connecting the gas heater to the heat pump must be 22-gauge (minimum), 2-conductor, low-voltage wire. Use direct connection ( dry contact) provided on the microprocessor for the gas heater. Failure to follow the manufacturer's installation requirements for a fireman (cool down) switch may result in damage to the gas heater.
- Page 39 Dry Contact Connection Points to the 4. Connect the controller wires to the port labeled "Gas" on the Microprocessor microprocessor as indicated. 5. Reattach heat pump and gas heater access panels. 6. Apply power to heat pump and gas heater. 7.
- Page 40 Page - 36...
- Page 41 Configure for Scheduled Mode Enter "Installer Menus", then proceed Page - 37...
- Page 42 Page - 38...
-
Page 43: Connecting Multiple Heat Pumps (Master / Slaved)
1.6.e Connecting Multiple Heat Pumps (Master / Slaved) Up to 16 heat pumps can be connected and controlled from a primary heat pump. There are two reasons for using a multiple heat pump configuration: 1. Controlling multiple heat pumps from one location; the master heat pump. 2. - Page 44 6. Use "Port C" on the microprocessors as indicated. Connecting the "Y" to the "Y" and the "B" to the "B" on each heat pump's port "C" connection point. The "G" and "R' connection points are not used. See Figure 8 . 7.
- Page 45 Page - 41...
- Page 46 Slaved (Secondary) Heat Pumps Go to the next connected heat pump and configure it as a slaved unit with a heat pump address of "01". Each additionally connected heat pump will require a unique heat pump address ("02", "03", etc.) Enter "Installer Menus", then proceed Page - 42...
- Page 47 Page - 43...
-
Page 48: Connecting A Pool/Spa Switching Relay
1.6.f Connecting a Pool/Spa Switching Relay A direct connection to an external flow relay switch has been provided on the terminal microprocessor. A pool/spa relay switch will automatically change between the pool and spa thermostat depending on the position of the plumbing valves. When water flows to the pool, the pool thermostat will be used. - Page 49 Connecting Switch 1. Deactivate power to heat pump. Dry Contact Connection Points to the 2. Plumb the switch as indicated in accessories installation Microprocessor instructions. 3. Remove heat pump electrical access panel. 4. Using two of the three wires from the installed switch, route wires to the low voltage side of the electrical enclosure.
- Page 50 Page - 46...
-
Page 51: Program Heat Pump For The Customer
1.7 Program Heat Pump for the Customer 1.7.a Setting Date and Time Set the heat pump's time and date using the following steps. Page - 47... -
Page 52: Setting Time And Date Format
1.7.b Setting Time and Date Format The heat pump's time and date format can be customized. Customize Time The time can be displayed in 24-hour military time (the default display is 12 hour). Enter "Installer Menus", then proceed Page - 48... - Page 53 Page - 49...
- Page 54 Customize Date The date can be displayed as Day-Month-Year (the default is Month-Day-Year). Enter "Installer Menus", then proceed Page - 50...
- Page 55 Page - 51...
-
Page 56: Selecting Celsius Or Fahrenheit
1.7.c Selecting Celsius or Fahrenheit Set the water temperature to show in either Fahrenheit (default) or Celsius. Enter "Installer Menus", then proceed Page - 52... -
Page 57: Configure Variable Speed Compressors
1.7.d Configure Variable Speed Compressors Selected heat pumps have variable speed compressors designed to more quickly and efficiently reach a temperature set point. The compressor's performance can be controlled using a turbo boost mode or two different types of efficiency modes. Turbo Boost Upon demand, the heat pump's compressor can be set to maximum speed to heat or cool the water quickly. - Page 58 Turbo Boost Page - 54...
- Page 59 Set Efficiency Mode to 24 Hour Page - 55...
- Page 60 Set Efficiency Mode to Filtration Schedule Page - 56...
- Page 61 Page - 57...
-
Page 62: Setting Entry Code Option
1.7.e Setting Entry Code Option The entry code feature can prevent unauthorized temperature adjustments. This feature initiates after the heat pump goes into the sleep mode for the first time. Failure to heed the following may result in damage to equipment. NOTICE Before enabling the entry code feature, be sure to record the code. - Page 63 Page - 59...
-
Page 64: Using Entry Code To Access Heat Pump
1.7.f Using Entry Code to Access Heat Pump If a user entry code has been enabled in the user menu, an entry code will be required to access heat pump options. PLEASE NOTE - If the entry code has been misplaced, the heat pump will need to be reset to factory defaults. After three minutes of inactivity, the heat pump's sleep mode will activate. - Page 65 Page - 61...
-
Page 66: Cleaning Equipment After Installation
Formula 409 ® Cascade ® All Power Plain Detergent (3% Solution) Table 3 - Cleaning Agents • The trademarks used in approved cleaning agents are the property of their owners and are not related to AquaCal ® Page - 62... - Page 67 APPROVED POLISHING AGENTS ® Simoniz ® Glo-Coat Armor All ® Protectant Table 4 - Polishing Agents • The trademarks used in approved polishing agents are the property of their owners and are not related to ® AquaCal Page - 63...
-
Page 68: Troubleshooting
2 - Troubleshooting IN THIS SECTION: Fault Codes AIR TEMP SENSOR OPEN or AIR TEMP SENSOR SHORT CLOCK LOW BATTERY DEFROST1 SENSOR OPEN or DEFROST2 SENSOR OPEN DEFROST1 SENSOR SHORT or DEFROST2 SENSOR SHORT ERROR AT MASTER UNIT HIGH PRESSURE FAULT HIGH WATER TEMPERATURE HP5 SYSTEM LOCKOUT LOW PRESSURE FAULT... -
Page 69: Air Temp Sensor Open Or Air Temp Sensor Short
A fault code indicates a specific issue or condition that will require action before the equipment can resume operating. Please perform the following troubleshooting. If the issue reoccurs, please contact AquaCal. See "Contacting AquaCal AutoPilot, Inc." on page 1. Failure to heed the following will result in injury or death. -
Page 70: Defrost1 Sensor Open Or Defrost2 Sensor Open
DEFROST1 SENSOR OPEN DEFROST2 SENSOR OPEN ISSUE Open defrost sensor. RESOLUTION A qualified technician should replace the defrost sensor. DEFROST1 SENSOR SHORT DEFROST2 SENSOR SHORT ISSUE Shorted defrost sensor. RESOLUTION A qualified technician should replace the defrost sensor. ERROR AT MASTER UNIT ISSUE The heat pump is slaved to a master heat pump that is displaying a fault code. -
Page 71: High Pressure Fault
Cool Only Units Determine if an insufficient amount of air is being supplied to the equipment. ® 1. Check for proper fan operation. If the fan is not operating, contact AquaCal Technical Support. 2. Check for obstructed airflow around the heat pump. -
Page 72: High Water Temperature
HIGH WATER TEMPERATURE ISSUE Incoming water temperature has exceeded 110° F (43° C) and the unit has been deactivated. The heat pump will not operate until the incoming water temperature drops to 100° F (38° C) or lower. RESOLUTION 1. Determine if a gas heater is sending water directly to the heat pump. This situation would need to be corrected before continuing. -
Page 73: Low Pressure Fault
Heat Only Units Place heat pump in heating mode and perform the following troubleshooting. ® 1. Check for proper fan operation. If the fan is not operating, contact AquaCal Technical Support. 2. Check for obstructed airflow around the heat pump. -
Page 74: Multi-Unit Comm Fault
MULTI-UNIT COMM FAULT ISSUE Slaved heat pump is not receiving a signal from the master heat pump. RESOLUTION 1. Confirm the master heat pump is operating correctly. If, for example, no power is supplied to the master heat pump, an error will appear on the slaved heat pumps. 2. -
Page 75: Blank Display
Failure to heed the following may result in damage to equipment. NOTICE Service by unauthorized personnel will void the factory warranty. Please perform the following troubleshooting. For further assistance, please contact AquaCal. See "Contacting AquaCal AutoPilot, Inc." on page 1. Blank Display ISSUE The Heat Pump may have an incoming power problem. -
Page 76: Displays "Defrosting
Displays Defrosting Displays "DEFROSTING" ISSUE The heat pump has sensed the coil is icing up. See "Ice Forming on the Heat Pump" on page 76. No action is required. RESOLUTION Heat Only Units - Passive Defrost When ice starts to form on the coil, the compressor will stop operating while the fan continues to operate. -
Page 77: Displays "Set To Switch Remotely
RESOLUTION The model number and serial number will need to be re-entered into the system. The system will then operate as normal. ® If the issue reoccurs, please contact AquaCal Technical Support. Heat Pump Not Running ISSUE The heat pump will not run. -
Page 78: Heat Pump Won't Shut Off
Heat Pump Won’t Shut Off ISSUE The heat pump will not deactivate. RESOLUTION PLEASE NOTE When the heat pump is set to off, the display will show the current water temperature or no water flow indicator. 1. Confirm the correct mode has been set on the heat pump. 2. -
Page 79: Heat Pump Is Running, Not Cooling
Heat Pump Is Running, Not Cooling ISSUE The heat pump is running. But the water is not cooling. RESOLUTION 1. If the heat pump is using an external controller, confirm the heat pump is programmed properly to allow for cooling. 2. -
Page 80: Ice Forming On The Heat Pump
Ice Forming on the Heat Pump Ice Forming on the Heat Pump ISSUE When conditions are too cold for proper operation, the heat pump will enter a defrost mode. This prevents ice from building up on the evaporator coil. RESOLUTION Heat Only Units: The heat pump may develop a fine layer of white frost on the outside coil before entering the defrost mode. -
Page 81: Water Coming From Heat Pump
Water Coming From Heat Pump ISSUE The water may be normal condensation produced as a by-product of the heat pump's refrigeration process. The heat pump can produce up to 8 to 10 gallons (30 to 38 liters) of condensation per hour depending on the humidity of the ambient air. -
Page 82: Appendix
3 - Appendix IN THIS SECTION: 3.1 Factory Defaults 3.2 Identifying Model Specifications 3.3 Weights 3.4 Heating Recommendations 3.5 Cooling Recommendations 3.6 Available Accessories 3.1 Factory Defaults Certain programming options have been preset at the factory. These options can be overwritten for site- specific conditions. -
Page 83: Identifying Model Specifications
Installer Menus MENUS DEFAULT OPTIONS 12 Hour SET TIME FORMAT 12 Hour 24 Hour SET DATE FORMAT Fahrenheit SET TEMPERATURE UNITS Fahrenheit Celsius SET BACKUP HEAT MODE SCHEDULED 24HR SET ENTRY CODE ENABLED SET USER ENTRY CODE SET CALL-FLEX INSTALLED SET CALL-FLEX MODE CALL FLEX... - Page 84 Model Number Example Page - 80...
- Page 85 3.3 Weights NOTE: Specifications subject to change. Model Type Model Number Install Weight ® 180 Pounds TropiCal T035 (81.6 kg) ® 180 Pounds TropiCal T055 (81.6 kg) ® TropiCal 200 Pounds T075 (90.7 kg) ® TropiCal 255 Pounds T090 (115.7 kg) ®...
- Page 86 This will allow the Heat Pump the time required to cool the water at start-up. After the water has reached the desired temperature, reset the filter pump to normal operating time-frames. 3.6 Available Accessories Accessories may be purchased through an authorized dealer of AquaCal ® products.
- Page 87 (345 kPa). Liquid Blankets An invisible liquid heat barrier designed to retain heat and extend the swimming season. ® ® AquaCal recommends Lo-Chlor Aqua Blanket ™ Over Temperature Alarm Kit This kit is an additional safety device. It disables the heat pump if any malfunction occurs that allows the water temperature to surpass a safe level.
- Page 88 Plumbing Unions 2 Inch Unions - (# PLS2627) Temperature Port Kit (# STK0096) This kit can be used to adjust water flow using Delta-T. The kit comes with a port, installation components, and a temperature probe. Page - 84...
- Page 90 MASTERTEMP POOL AND SPA HEATER ® INSTALLATION AND USER’S GUIDE FOR YOUR SAFETY - READ BEFORE OPERATING If you do not follow these instructions exactly, a fire or explosion may result, causing property damage, personal injury or loss of life. For additional free copies of this manual;...
- Page 91 Customer Service and Tecnincal Support If you have questions about ordering Pentair Aquatic Systems replacement parts, and pool products, please call: Phone: (800) 831-7133 Fax: (800) 284-4151 (8 A.M. to 4:30 PM Eastern Time/Pacific Time) Web sites: www.pentairpool.com - www.staritepool.com P/N 472592 Rev.
- Page 92 Contents Section 1. Heater Identification Information ............... Section 2. Warning and Safety Information ................. Important Notices ....................................Warranty Information .................................... Code Requirements ....................................Consumer Information and Safety Information ............................6 - 9 General Specifications ..................................Section 3. Installation ......................Heater Description ....................................Putting the Heater into Service ................................
-
Page 93: Section 1. Heater Identification Information
Section 1. Heater Identification Information Section 1: Heater Identification Information To identify the heater, see rating plate on the inner front panel of the heater. There are two designators for each heater, one is the Model Number and the other is the Heater Identification Number (HIN). a. -
Page 94: Important Notices
Section 2. Warning and Safety Instructions Section 2: Warning and Safety Instructions IMPORTANT SAFETY INSTRUCTIONS READ AND FOLLOW ALL INSTRUCTIONS SAVE THESE INSTRUCTIONS MASTERTEMP ® Pool and Spa Heater Congratulations on your purchase of the MasterTemp Pool and Spa Heater. Proper installation and service of your new heating system and correct chemical maintenance of the water will ensure years of enjoyment. -
Page 95: Code Requirements
Section 2. Warning and Safety Instructions CODE REQUIREMENTS Installation must be in accordance with all local codes and/or the latest edition of the National Fuel Gas Code, ANSI Z223.1 and the latest edition of the National Electrical Code, NFPA 70 (US). Installation in Canada must be in accordance with the latest CAN/CGA-B149.1 or .2 and CSA C22.1 Canadian Electric Code, part 1. - Page 96 Section 2. Warning and Safety Instructions SAFETY INFORMATION ® The MasterTemp pool heaters are designed and manufactured to provide many years of safe and reliable service when installed, operated and maintained according to the information in this manual. Throughout the manual, safety warnings and cautions are identified by the “...
- Page 97 Section 2. Warning and Safety Instructions SAFETY INFORMATION, (cont’d.) WARNING — Risk of fire or explosion from incorrect fuel use or faulty fuel conversion. Do not try to run a heater set up for natural gas on propane gas or vice versa. Only qualified service technicians should attempt to convert heater from one fuel to the other.
-
Page 98: General Specifications
Section 2. Warning and Safety Instructions CONSUMER INFORMATION AND SAFETY WARNING The U.S. Consumer Product Safety Commission warns that carbon monoxide is an "invisible killer". Carbon monoxide is a colorless and odorless gas. 1. Carbon monoxide is produced by burning fuel, including natural gas and propane. 2. -
Page 99: Section 3. Installation
Section 3. Installation Instructions Section 3: Installation Instructions HEATER DESCRIPTION Figure 1 is a diagram of the heater showing how it operates. Precisely matched orifice plates meter the air and gas into the mixer. The blower draws the air and gas through the mixer and forces it into the burner’s flame holder. -
Page 100: Specifications
Section 3. Installation Instructions SPECIFICATIONS These installation instructions are designed for use by qualified personnel only, trained especially for installation of this type of heating equipment and related components. Some states require installation and repair by licensed personnel. If this applies in your state, be sure your contractor bears the appropriate license. See Figure 2 for Outdoor and Indoor Installations. -
Page 101: Plumbing Connections
Section 3. Installation Instructions PLUMBING CONNECTIONS The MasterTemp heater has the unique capability of direct schedule 40 PVC plumbing connections. A set of bulkhead fittings is included with the MasterTemp heater to insure conformity with Pentair’s recommended PVC plumbing procedure. Other plumbing connections can be used. See Figure 3 for plumbing connections. -
Page 102: Valves
Section 3. Installation Instructions VALVES When any equipment is located below the surface of the pool or spa, valves should be placed in the circulation piping system to isolate the equipment from the pool or spa. Check valves are recommended to prevent back-siphoning. Back- siphoning is most likely to occur when the pump stops, creating a pressure-suction differential. -
Page 103: Gas Connections
Section 3. Installation Instructions GAS CONNECTIONS GAS LINE INSTALLATIONS Before installing the gas line, be sure to check which gas the heater has been designed to burn. This is important because different types of gas require different gas pipe sizes. The rating plate on the heater will indicate which gas the heater is designed to burn. -
Page 104: Gas Pipe Sizing
Section 3. Installation GAS PIPE SIZING STAGE TWO “LOW PRESSURE” GAS PIPE SIZING ) . t l a r c i b c i b ” 2 ” 4 ” 1 / 1 - ” 4 / 1 - ” 2 ”... -
Page 105: Testing Gas Pressure/Gas Pressure Requirements
Section 3. Installation Instructions CAUTION The use of Flexible Connectors (FLEX) is NOT recommended unless they are properly sized according to the supplier recommendations for the heater rating. GAS PRESSURE REQUIREMENTS l a r . C . t e l t e l o f i ±... -
Page 106: Outdoor Installation Venting Guidelines
Section 3. Installation Instructions For minimum exhaust vent clearances for all building openings, including but not limited to vented eaves, doors, windows, gravity air inlet, see Figure 9, show below. In Canada, the heater must be installed with the top of the vent at least 10 feet (3m) below, or to either side of, any opening into a building. -
Page 107: Indoor Venting - General Requirements (Category I And Category Iii Requirements)
Section 3. Installation Instructions INDOOR VENTING — General Requirements The heater may be installed as a Category I or Category III appliance. Vertical only Vented Appliance (Category I) – An appliance that operates with a nonpositive vent static pressure and with a vent gas temperature that avoids excessive condensate production in the vent, see pages 20-23. -
Page 108: Combustion Air Supply /Direct Air Intake Duct With 3-Inch Pvc Pipe (Indoor Installation)
Section 3. Installation Instructions COMBUSTION AIR SUPPLY For indoor installation, the heater location must provide sufficient air supply for proper combustion and ventilation of the surrounding area. The minimum requirements for the air supply specify that the room in which a heater is installed should be provided with two permanent air supply openings;... -
Page 109: Corrosive Vapors And Possible Causes
Section 3. Installation Instructions Combustion 3 in. PVC Pipe Inlet Air Intake Duct Requirements* Combustion Air Intake 3 in. Pipe (Vertical or Horizontal) No. of 90° Elbows Maximum Length in Feet (M) 70 ft. (21.3 M) 58 ft. (17.7 M) 46 ft. -
Page 110: Vent Installation (Indoor Installation For U.s. Or Outdoor Shelter For Canada)
Section 3. Installation Instructions VENT INSTALLATION – INDOOR INSTALLATION (U.S.) OR OUTDOOR SHELTER (CANADA) (Category I) NOTE *: Vent must be at least eight (8) feet away from nearest vertical surface. Vents extending five (5) feet or Always vent the heater to the outdoors, see Note*. more above the roof must be braced or guyed. - Page 111 Section 3. Installation Instructions NOTE The allowable vent runs for each vent pipe diameter are different and can not be exceeded. Each 90-degree elbow reduces the maximum horizontal vent run by 12 feet and each 45-degree elbow in the vent run reduces the maximum vent run by 6 feet. See Table 7 on page 21 for the maximum vent lengths using 90-degree and 45-degree elbows.
- Page 112 Section 3. Installation Instructions 4. Install vent pipe so that it can expand and contract freely as the temperature changes. Support the vent pipe according to applicable codes and the vent manufacturer’s instructions. Pipe support must allow the vent pipe free movement out and back, from side to side, or up and down as necessary, without putting a strain on the heater or vent body.
-
Page 113: Horizontal Or Vertical Venting - Positive Pressure
Section 3. Installation Instructions HORIZONTAL OR VERTICAL VENTING - POSITIVE PRESSURE (See Figures 14, 15, and (Category III) Vent the heater either horizontally or vertically using an optional vent adapter of the 4-inch special gas approved Category III vent pipes. Install the vent pipe in accordance with local codes and the provisions of the National Fuel Gas Code, ANSI Z223.1 (U.S.), or the standards CSA B149.1, Natural Gas and Propane Installation Codes (Canada), and the vent manufacturer’s instructions. - Page 114 Section 3. Installation Instructions WARNING Risk of carbon monoxide poisoning if adapter is improperly attached. Mechanical connections (such as screws) can cause cracking and leaks in the adapter. Do NOT drill holes or use screws to connect the appliance adapter to the heater vent body.
- Page 115 Section 3. Installation Instructions Max. 12" 4' Min. 4' Min. Min. 3" Vent Vent Termination Termination Vent 4' Min. Termination 1' Min. 4' Min. At least 7' above grade adjacent 1' Minimum Gas Meter to public above snow or Forced Air walkways finished grade Inlet...
-
Page 116: Outdoor Shelter Vent Installation
Section 3. Installation Instructions OUTDOOR SHELTER INSTALLATION In Canada, this pool heater can only be installed outdoors or in an enclosure that is not normally occupied and has no direct openings into occupied areas. WARNING Risk of asphyxiation if exhaust is not correctly vented. Follow venting instructions exactly when installing heater. Do not use a draft hood with this heater, as the exhaust is under pressure from the burner blower and a draft hood will allow exhaust fumes to blow into the room housing the heater. -
Page 117: Control Panel Indexing
Section 3. Installation Instructions CONTROL PANEL INDEXING On an outdoor shelter installation, the exhaust discharges into a vent pipe. Top Panel Orient the heater so that the vent pipe does not interfere with adjustment of the Door operating controls. The control panel located on the top panel can be rotated to Access Panel any of the three sides of the heater for easy access, see... -
Page 118: Electrical Connections
Section 3. Installation Instructions ELECTRICAL CONNECTIONS Electrical Rating: 60 Hz 120 / 240 Volts AC, single phase Enclose the incoming AC power line to the heater, in an approved flexible conduit connected directly to the junction box on the inside of the access door panel. Line voltage field wiring should be 14 gauge, with a circuit capacity of 15 Amps. CAUTION This heater is designed to operate at 120 or 240 VAC. -
Page 119: Fireman's Switch Connection/Remote Control Connections
Section 3. Installation Instructions CONNECTION OF FIREMAN’S SWITCH OR REMOTE CONTACT CAUTION If, while there is line voltage connected to the heater, you touch either line voltage terminal with any 24VAC wire that is connected to the control board (including the Fireman’s Switch jumper), you will immediately destroy the control board and void the warranty. -
Page 120: Mastertemp Heater Wiring Diagram
Section 3. Installation Instructions MASTERTEMP HEATER WIRING DIAGRAM (3-WIRE SYSTEM) CONNECTION DIAGRAM AGS Switch Air Flow Switch Stack Flue Sensor Extra Switch 1 Y/BL Gas Valve Hi-Limit Switch Pressure Switch NA/LP Models Only Y/BL OPERATING CONTROL MEMBRANE PAD CONNECTION JMP3 External Control Interface Circuit Disabled, Heater Membrane Pad Enabled Spa Line... -
Page 121: Electrical Schematic Ladder Diagram
Section 3. Installation Instructions MASTERTEMP HEATER ELECTRICAL SCHEMATIC LADDER DIAGRAM LADDER DIAGRAM IGNITER BLOWER CLASS II TRANSFORMER 24 VAC OPERATING CONTROL 24 VAC 24 VAC FLOW LOGIC SWITCH WATER LIMIT PRESSURE SWITCH SWITCH COM NO INLET TEMPERATURE SWITCH CONTROL SWITCH GAS VALVE STACK FLUE THERMISTOR... -
Page 122: Section 4. Operation
Section 4. Operation Instructions Operation Instructions BASIC SYSTEM OPERATION Start pump, make sure the pump is running and is primed, to close the water pressure switch and supply power to heater. Be sure the pool and/or spa is properly filled with water. Follow the Lighting/Operating instructions below. -
Page 123: Operating
Section 4. Operation Instructions OPERATING INSTRUCTIONS 1. STOP! Read the safety information on (page 33). Water Pressure Switch 2. Set both pool and spa thermostats to the lowest settings. 3. Turn off all electric power to the appliance. 4. This appliance does not have a pilot. It is equipped with an ignition device which automatically lights the burner. -
Page 124: Safety Controls
Section 4. Operation Instructions SAFETY CONTROLS Figure 27. AIR FLOW SWITCH (AFS) The air flow switch, (see Figure 27), is a safety device used to insure that the combustion air blower (fan) is operating and has been designed to monitor the vacuum (negative) pressure within the blower housing. - Page 125 Section 4. Operation Instructions SAFETY CONTROLS, (cont’d.) Diagnostic LED Flame Current 1 Flash - Air Flow Fault Check Point 2 Flashes - Flame No Call for Heat OPERATION OF IGNITION MODULE 3 Flashes - Ignition Lockout , (see Figure 30), The Ignition Module is microprocessor based and operates on 24VAC supplied by the transformer.
- Page 126 Section 4. Operation Instructions TEMPERATURE SETTING The heater comes factory set at 78° F. for the pool mode and 100° F. for the spa mode. Using the up and down arrows, you can set the thermostats to a minimum temperature of 65° F., or a maximum of 104° F. If you desire to heat only one body of water, the thermostat is capable of an off mode.
-
Page 127: Section 5. Troubleshooting
Section 5. Troubleshooting Troubleshooting Instruction Initial Troubleshooting Only qualified, trained service technicians with appropriate test equipment should service the heater. Remember that all parts of the system affect heater operation. Before starting this troubleshooting procedure, make sure that the pump is running correctly, that there are no blockages in the system, that the valves are correctly set and that the time clock is correctly set and is running. -
Page 128: Heater Will Not Fire Troubleshooting
Section 5. Troubleshooting Heater Will Not Fire - A Start Depress “POOL” or “SPA” ON Heater should fire on demand Is green “SPA” or button on Membrane Pad. for heat. “POOL” LED “on” Does “POOL” or “SPA” LED come on? Check that correct 12-pin Check for line voltage to Restore power to heater. - Page 129 Section 5. Troubleshooting Heater Will Not Fire - B Start Increase POOL/SPA tempera- Is red “SERVICE Is red “SERVICE SYSTEM” ture setting on Membrane HEATER” LED “on” LED on? Pad above actual water tem- perature. Heater should fire on demand for heat. If not, Verify that pump is on, filter is and no other red LED’s light, not blocked, and the water...
- Page 130 Section 5. Troubleshooting Heater Will Not Fire - C Start Is “SERVICE HEATER” LED Go to “INITIAL “on”? TROUBLESHOOTING” Turn off power to heater for 5 seconds, Continue to observe heater and turn back on. for several minutes. Cycle Make sure tempera- heater on and off several ture setting is above times.
- Page 131 Section 5. Troubleshooting Heater Will Not Fire - D IMPORTANT! READ ME FIRST! IMPORTANT! READ ME FIRST!! If your heater is correctly connected to 240 Volts AC, the meter will read either 0 VAC or 240 VAC. If your ICM is good, your meter will read some voltage between 0 and Ignition Control Module (ICM) will convert the 240VAC to an intermittent pulse to the ignitor.
- Page 132 Section 5. Troubleshooting Diagnostic LED's: AGS, AFS, HLS, PS, THERMISTOR Verify that water flow rate is Service pump and filter to AGS or HLS "on" above minimum required for restore proper flow. After ser- heater. vicing, verify proper operation Replace High Limit of Pressure Switch (PS).
- Page 133 Section 5. Troubleshooting Diagnostic LED's: SFS SFS "on" Check Heat Exchanger Coil for leaks, liming, soot, or low flow. Heater starts and runs OK, but temperature of exhaust climbs to 450˚–500˚ in 3–5 Check Thermal minutes. Regulator: Open at 120˚? Replace Heater (HD ) Membrane Pad.
-
Page 134: Burner / Heat Exchanger Troubleshooting
Section 5. Troubleshooting Burner Troubleshooting SYMPTOM CAUSE REMEDY Loud, high-pitched whine Flame is too rich. Verify pressure tap between gas valve and blower inlet. See page 15 and verify that the gas regulator setting is –0.2" (–0.5cm) wc. Contact a qualified technician or service agency to replace the gas orifice. -
Page 135: Section 6. Maintenance
Section 6. Maintenance Maintenance Instructions CARE AND MAINTENANCE WARNING Risk of fire or explosion from flammable vapors. Do not store gasoline, cleaning fluids, varnishes, paints, or other volatile flammable liquids near heater or in the same room with heater. The following maintenance is recommended every six months and at the start of every swimming season: 1. -
Page 136: After Start-Up
Section 6. Maintenance AFTER START-UP CHECKING WATER FLOW WARNING Fire or flooding hazard. If the unit overheats and the burner fails to shut off, follow instructions under “To Turn Off Gas to the Appliance”, page 34, and call a qualified service technician to repair unit. After start-up, the outlet water pipe should feel slightly warmer than the inlet pipe. -
Page 137: Maintaining Pool Temperature
Section 6. Maintenance MAINTAINING POOL TEMPERATURE To maintain pool temperature, make sure that the heater switch and valving are reset to pool settings after using the spa. ENERGY SAVING TIPS 1. Keep the pool or spa covered when not in use. This will reduce heating costs, reduce water evaporation, conserve chemicals and reduce load on the filtering system. -
Page 138: Chemical Balance
Section 6. Maintenance CHEMICAL BALANCE, (cont’d.) It is wise to test pool water regularly. Never allow chlorine residual to drop below 0.6 ppm (parts per million). The minimum level for effective chlorine or bromine residual is 1.4 ppm. pH - The term pH refers to the acid/alkaline balance of water expressed on a numerical scale from 0 to 14. A test kit for measuring pH balance of your pool water is available from your local pool supply store;... -
Page 139: Replacement Parts
Section 6. Maintenance/Replacement Parts MASTERTEMP HEATER REPLACEMENT PARTS For complete Electrical System parts breakdown (Key Nos. 1 through 4), See Page 53 For complete Burner System parts breakdown (Key Nos. 5 through 7), See Page 51 For complete Water System parts breakdown (Key Nos. - Page 140 Section 6. Maintenance/Replacement Parts MASTERTEMP HEATER REPLACEMENT PARTS CLAMP LID TUB DESIGN Lid Nut/Washer (9x) Combustion Chamber Gasket For heaters manufactured between 1/12/2009 and 10/31/2013 (clamp lid tub design) Note: Kits also include Clamp Assembly, O-Ring and Silicon Tube (see page 52) ®...
- Page 141 Section 6. Maintenance/Replacement Parts MASTERTEMP HEATER REPLACEMENT PARTS REPAIR PARTS – BURNER SYSTEM Model Part 175NA 200NA 250NA 300NA 400NA Qty. Description 175LP 200LP 250LP 300LP 400LP Combination Gas Control Valve Kit 42001-0051S 42001-0051S 42001-0051S 42001-0051S 42001-0051S 3/4" Union 38404-4097S 38404-4097S 38404-4097S 38404-4097S...
- Page 142 Section 6. Maintenance/Replacement Parts MASTERTEMP HEATER REPLACEMENT PARTS REPAIR PARTS – WATER SYSTEM Model Part 175NA - 200NA 250NA 300NA 400NA Description Qty. 175LP - 200LP 250LP 300LP 400LP Tube Sheet Coil Assembly Kit (NA, LP Series) (Includes Key No.3) 77707-0232 460747 77707-0233...
- Page 143 Section 6. Maintenance/Replacement Parts MASTERTEMP HEATER REPLACEMENT PARTS REPAIR PARTS – ELECTRICAL SYSTEM Model Part 175NA - 200NA 250NA 300NA 400NA Description Qty. 175LP - 200LP 250LP 300LP 400LP Heater Display Cover 42002-0035 42002-0035 42002-0035 42002-0035 Igniter Bracket 42001-0030S 42001-0030S 42001-0030S 42001-0030S Igniter/Igniter Gasket Kit Incl.
- Page 144 N TES ® Rev. L 8-12-13 MASTERTEMP Pool and Spa Heater Installation and User’s Guide...
- Page 145 1620 HAWKINS AVE., SANFORD, NC 27330 • (919) 566-8000 10951 WEST LOS ANGELES AVE., MOORPARK, CA 93021 • (805) 553-5000 www.pentairpool.com All Pentair trademarks and logos are owned by Pentair or by one of its global affiliates. Pentair Aquatic Systems™, MasterTemp®, IntelliTouch®, EasyTouch®, are trademarks and/or registered trademarks of Pentair Water Pool and Spa, Inc.
Need help?
Do you have a question about the HeatWave SuperQuiet SQ120R and is the answer not in the manual?
Questions and answers
has power but completely dead
The Aquacal HeatWave SuperQuiet SQ120R may have power but appear completely dead due to the following possible causes:
1. Incorrect phase wiring – If the line voltage "field" wiring is not correctly oriented, the unit may not start. Switching the incoming power wires at L1, L2, and L3 may be required.
2. Phase monitor issue – If the phase monitor detects improper phase rotation, the unit will not start.
3. Stored energy in capacitors – Even after power is deactivated, capacitors may still hold energy. Wait 2 minutes after shutdown before servicing.
4. Loose or improper electrical connections – All line voltage connections must be securely tightened.
5. Service mode enabled – If "SERVICE MODE" is set to "ON", the unit may be unresponsive. You must disable service mode to resume normal operation.
6. Control board or wiring faults – Damaged wiring or a faulty control board can prevent operation.
Each of these should be checked systematically to identify the issue.
This answer is automatically generated