NuWave Brio 14Q Owner's Manual
The ultimate oven & grill
Hide thumbs
Also See for Brio 14Q:
- User manual ,
- Owner's manual (72 pages) ,
- Owner's manual & complete recipe book (69 pages)
Advertisement
Quick Links
Advertisement

Related Manuals for NuWave Brio 14Q


Summary of Contents for NuWave Brio 14Q
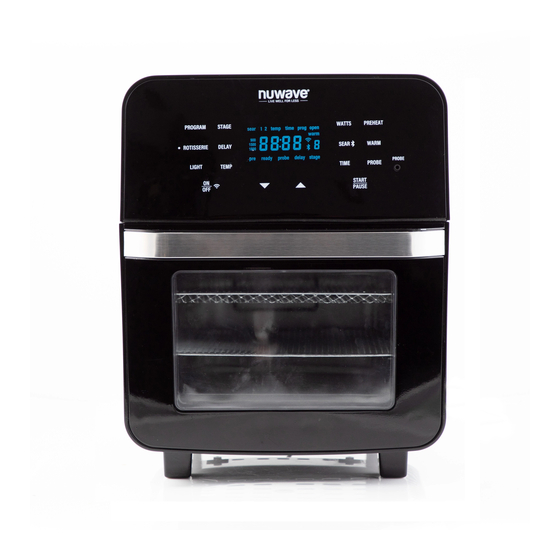
- Page 1 OWNER’S MANUAL The Ultimate Air Fryer Oven & Grill nuwavenow.com...
- Page 2 As a special thank-you for registering your NuWave DOWNLOAD THE QR CODE unit, you’ll automatically receive an additional 3 months added to your limited manufacturer’s warranty!* APP TO YOUR MOBILE DEVICE All you have to do is follow these simple steps.
- Page 3 IMPORTANT SAFEGUARDS TABLE OF CONTENTS HOUSEHOLD USE ONLY • READ ALL INSTRUCTIONS BEFORE USE WARNING: When using the Do not let the cord hang OWNER’S MANUAL Brio, basic safety precautions over the edge of table Important Safeguards ............5-8 should always be followed: or counter or touch hot Parts &...
- Page 4 Department. operation, service MUST the wall outlet. plug is intended to fit into 1-877-689-2838 be done by NuWave 23. Always remove plug by the a polarized outlet only help@nuwavenow.com LLC or authorized by the head not the cord.
- Page 5 IMPORTANT SAFEGUARDS HOUSEHOLD USE ONLY • READ ALL INSTRUCTIONS BEFORE USE PARTS & 13. Do not use metal utensils with the Tray, Racks, Grill/ Power Base ACCESSORIES Griddle Plate as this can Part #: 38005 damage the surface. Stainless Steel Mesh Tray 14.
- Page 6 ASSEMBLY GUIDE Before Use Place the second Rotisserie 1. Remove all the packaging Skewer fork onto the other materials. end of the Skewer and push the fork forward until it 2. Remove the glue and labels pierces the end of the meat. on the appliance.
- Page 7 ASSEMBLY GUIDE Grill/Griddle Plate Assembly To Remove Door Non-Stick Baking Pan Bring down the right side of the bar of Basket into the With the Mesh Rack in either bracket, then insert the left Position 1 or 2, place the Grill bar of the Basket into the Baking Pan on top of the Rack.
- Page 8 QUICKSTART ROTISSERIE After placing food on Skewer, in Basket and into the Brio, press ROTISSERIE. Use the up and down arrows to adjust temp and time. Press START/PAUSE to automatically turn spit and begin cooking. 1500 1800 PROGRAM Press PROGRAM and press up or down arrows to choose preset items (1-100) to cook.
- Page 9 INSTRUCTIONS Note: Preset temperatures Probe Temp Guide and times may need minor Time adjustments to achieve your Meats Temp. Rare Well Rare Well Min. desired results. Chicken, breast 6 - 8 per lb CAUTION: This appliance Turkey, breast 360˚F 165* 7 - 9 per lb cooks using hot air.
- Page 10 INSTRUCTIONS LIGHT Getting Started • During delay the (:) will Press TIME to see or adjust Press LIGHT once to turn the flash, indicating the delay cooking time. light on. Press again to turn off. time countdown has started. Press START/PAUSE to To change light bulb in oven, see 360F begin cooking at set time.
- Page 11 INSTRUCTIONS Stage 2: To add additional • If no time is set for stages 2-5 • Cooking temperature 400°F and default sear 1 time is stages press STAGE once. those stages will be skipped and time can be adjusted 5 min. (00:05). Press TIME.
- Page 12 INSTRUCTIONS SEAR 2 WARM To set a different • Warm can be set Default sear 2 temperature is temperature and time for Warm can be used as an immediately after adjusting 400˚F and default sear 2 time is Sear 1 and 2 press SEAR independent function to heat up regular cooking times and 5 minutes (00:05).
- Page 13 INSTRUCTIONS • Numbers 101-200 are Press START/PAUSE to Press PROGRAM again • Adjustments to your created unique begin cooking your set to store and save program temperatures and times programs (recipes). program (recipe). can be made for each recipe to the chosen Once your program number program number.
- Page 14 INSTRUCTIONS PROBE ROTISSERIE • Adjust TEMP and TIME. To change the cooking The digital temperature Probe is temperature, press the up • The Brio will continue used to show an accurate internal or down arrows to adjust. cooking your food with the 360F temperature of your food.
- Page 15 INSTRUCTIONS CLEANING & MAINTENANCE Slow-Cook Hand-wash Clean your Brio after every use or in between a number of large Slow-cook roasts, chicken, or any other food items. batches. Do not use metal utensils or harsh abrasives when cleaning as this can damage the coating. Unplug the Brio and make sure it cools completely.
- Page 16 CLEANING & MAINTENANCE TROUBLESHOOT GUIDE Removing Door for Cleaning The Brio is not turning on or working. 1 inch The Door on the Brio is removable The Brio is not plugged in. for easier, more thorough cleaning, Did not press ON/OFF button. including glass.
- Page 17 Contact Customer Service Department at failure to operate in accordance with the Manufacturer’s written 1-877-689-2838 or help@nuwavenow.com. instructions, abnormal use or commercial use. NuWave LLC reserves the right to void the Limited Warranty, where allowable by law, for Probe sensor not detecting temperature products purchased from an unauthorized dealer.
- Page 18 NuWave product. For any dispute arising out EXPRESSED OR IMPLIED ARISING BY LAW OR OTHERWISE, of your use of NuWave’s website, you have thirty (30) days from the INCLUDING WITHOUT LIMITATION, THE IMPLIED WARRANTIES date you provided information to the website to opt out of arbitration.
- Page 19 REPLACEABLE PARTS To replace the entire unit use part number 38005. To order replaceable parts head over to NuWaveNow.com Part Name Part Description Part No. Electrical base/housing of the Brio. Base 38005 Removable door opens and 38208 Door closes appliance. Used to place food on.
- Page 20 REPLACEABLE PARTS To replace the entire unit use part number 38005. To order replaceable parts head over to NuWaveNow.com Part Name Part Description Part No. For baking and cooking pasta. Made 37212 Non-Stick Baking Pan with non-stick coating. Perfect for baking cakes, muffins, breads, mousse, jams, chocolate, Silicone Cupcake Liners 22113...
- Page 21 Designed & Developed in USA by: NuWave LLC 1795 N. Butterfield Road Libertyville, IL 60048, U.S.A. Print No: BM38004 Customer Service: Rev. 03-OG 1-877-689-2838 • help@nuwavenow.com 06-01-20 Made in China ©2020 NuWave LLC • All Rights Reserved. DJ01 CC01...
Need help?
Do you have a question about the Brio 14Q and is the answer not in the manual?
Questions and answers