NuWave Brio 15.5Q Owner's Manual
Hide thumbs
Also See for Brio 15.5Q:
- Owner's manual (43 pages) ,
- User manual ,
- Quick start manual (4 pages)
Table of Contents
Advertisement
Quick Links
Advertisement
Table of Contents

Related Manuals for NuWave Brio 15.5Q


Summary of Contents for NuWave Brio 15.5Q
- Page 1 Master Your Brio Air Fryer Scan the code to find recipes, AIR FRYER how-to videos and more! Owner’s Manual Model: 38021 Questions or Concerns? Amazon Purchases: support@nuwavenow.com All Other Purchases: help@nuwavenow.com 1-888-502-7805 1-877-689-2838 Mon-Fri 7:30am-4:30pm CST...
- Page 2 THANK YOU! Congratulations on your Nuwave® purchase. We know there are many options available and sincerely appreciate the trust you have placed in us. For the last 30 years, we have committed to introducing products that promote healthy living at affordable prices. By combining the highest quality designs with cutting edge technology, we have always strived to blend feature, function, and innovation into every product we make.
-
Page 3: Table Of Contents
TABLE OF CONTENTS Important Safeguards ..............4 – Parts & Accessories ..............6 Assembly Guide ................7 – General Use...................10 – Cleaning & Maintenance ..............16-17 Troubleshooting Guide ..............18-19 Limited Warranty ................19-22 Menu Preset ..................22-23 Para la versión en español de este manual, visita www.nuwavenow.com nuwavenow.com | 3... -
Page 4: Important Safeguards
Any service MUST be done by Nuwave LLC or block the air vents. authorized by the manufacturer for 19. ALWAYS keep at least 3 inches of free repairs. - Page 5 IMPORTANT SAFEGUARDS Electrical Information A short power-supply cord (or detachable power-supply cord) is provided to reduce the risk of becoming entangled in or tripping over a longer cord. Longer detachable power-supply cords or extension cords are available and may be used if care is exercised in their use. If a longer detachable power- supply cord or extension cord is used: The marked electrical rating of the extension cord should be at least as great as the electrical rating of the appliance.
-
Page 6: Parts & Accessories
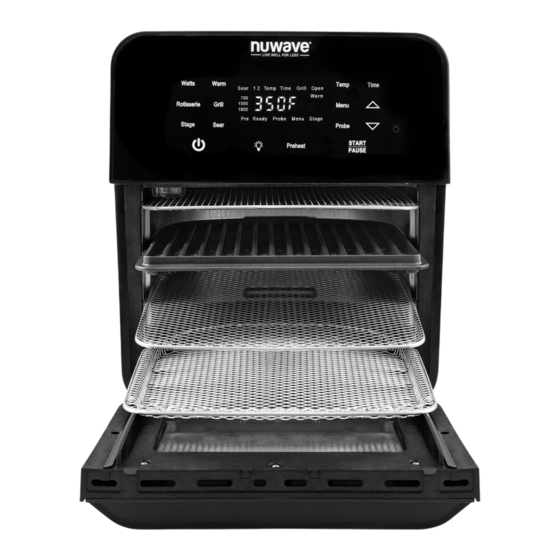
PARTS & ACCESSORIES 1500 1800 Door Part #: B15P1 Power Base Part #: B15A11 Plastic Hinge (2) Door Screws (2) Part #: B15P6 Part #: B15P8 Stainless Steel Stainless Steel Drip Tray Mesh Tray Mesh Rack Part #: B15A7 Part #: B15A2 Part #: B15A3 Rotisserie Skewer Grill/Griddle Plate... -
Page 7: Assembly Guide
ASSEMBLY GUIDE Before Use 1. Remove all the packaging materials. 2. Remove all tape and stickers. 3. Clean all parts thoroughly with hot water, a nonabrasive sponge, and mild dish detergent. If washing in the dishwasher, use the top rack only. The temperature probe MUST be hand washed. - Page 8 ASSEMBLY GUIDE Rotisserie Basket Assembly To use the Rotisserie Basket with the Brio, follow the steps and illustrations below: To remove the top lid from the Rotisserie Basket: Squeeze the prongs on the outside of the top lid Left Shaft Brackets toward the middle and lift.
- Page 9 ASSEMBLY GUIDE Grill/Griddle Plate Assembly Grill Right Shaft Left Shaft Brackets Brackets Griddle Position: • The Grill/Griddle Plate can be used in Positions 1-3, see picture. For crispier results it’s recommended to use Position 3. Left • Position 4 is primarily used for dehydrating foods using the Mesh Rack.
-
Page 10: General Use
GENERAL USE Setting the Clock Press and hold Preheat and Time at the same time until 2 beeps are heard. The display will show “12:00” and “:” will flash. Use the Up and Down arrows to set the time. • The clock is programmed using the 24-hour format. - Page 11 GENERAL USE Switching from Fahrenheit to Celsius The defaults will always display: Fahrenheit 350°F and Celsius 177°F. Press and hold Temp until 2 beeps are heard. Will display 177°F. Repeat to switch to Fahrenheit. • You will not be able to switch while the Brio is cooking. Adjusting Default Temperature Default temperature is 350°F, this can be changed for your convenience.
- Page 12 GENERAL USE Preheat The Brio will preheat automatically to set the cooking temperature for all functions. Set the cooking temperature and time. Press START, Pre and the temperature will flash in the display. Once preheated, the Brio will beep twice, display 350F “Ready”, countdown to 10 seconds, will beep once and begin cooking.
- Page 13 GENERAL USE Grill When activated can select from levels 1-9. Default is Level 4, 425°F for 9 minutes. Maximum grill time is 15 minutes. 1. Press Grill and select level to be used. 2. If needed, adjust the temperature. 3. Press START, the cooking cycle will begin. Level 1-425°F/5min Level 6-425°F/11min Level 2-425°F/7min...
- Page 14 GENERAL USE Slow-Cook Slow Cook is achieved when the Internal temperature is reached and maintained for a set time. Set the probe internal target temperature. Press Menu and Probe 01:00” (1 hour) will be displayed, adjust the amount of time to slow-cook.
- Page 15 GENERAL USE Stage 5 stages gives you the ability to cook your food at different temperatures throughout the cooking process. The default for Stage 1 is 350°F for 15 minutes, and 350°F for 0 minutes for all subsequent stages. Press Stage, Stage 1 will display.. Adjust the cooking temperature and time.
-
Page 16: Cleaning & Maintenance
CLEANING & MAINTENANCE Removing the Door for Cleaning To Remove the Brio Door To Remove the Plastic Window Open the Brio Door. The Brio Door can be disassembled to clean the inner plastic window. Using a screwdriver, unscrew both Fully open the Brio Door. screws located at the Door hinge to remove the Door (as shown in image Using a screwdriver, unscrew the... - Page 17 CLEANING & MAINTENANCE Hand-wash Clean your Brio after every use or in between a number of large batches. Do not use metal utensils or harsh abrasives when cleaning as this can damage the coating. Unplug the Brio and cool completely. Use a damp cloth to wipe the outside of the appliance.
-
Page 18: Troubleshooting Guide
TROUBLESHOOTING GUIDE The Brio is not turning on or working. Brio is not plugged in. The Power button was not pressed. Insert the plug into an appropriate grounded power socket. Press the Power button. The ingredients are not completely cooked. Too many ingredients were used. -
Page 19: Limited Warranty
Original Purchaser only. The Manufacturer will provide the necessary parts and labor to repair the product at the Nuwave LLC Service Department. After the expiration of the warranty, the cost of the parts and labor will be the responsibility of the owner. - Page 20 Manufacturer’s written instructions, abnormal use, commercial or rental uses, or resold units. Nuwave LLC reserves the right to void the Limited Warranty, where allowable by law, for products purchased from an unauthorized dealer.
- Page 21 LIMITED WARRANTY DISPUTE RESOLUTION PROCEDURE For disputes relating to use of the website or use or purchase of a Nuwave product or service (collectively “Disputes”), you agree to first contact Nuwave LLC at legal@nuwavenow.com. If we cannot resolve your dispute informally, any and all disputes shall be submitted to final and binding arbitration.
-
Page 22: Menu Preset
LIMITED WARRANTY to refrain from bringing or joining any claims in any representative or class-wide capacity, including but not limited to, bringing or joining any claims in any class action or any class-wide arbitration. 100 Presets Beef/Pork Rack Time Temp. Probe (Refer to Recipe Book for Preset #1-27) Position... - Page 23 100 Presets Fish/Seafood Rack Time Temp. Probe (Refer to Recipe Book for Presets #37-38) Position (Min.) 360°F 145°F Rotisserie Swordfish Steak with Charred Lemons* 360°F Cajun Shrimp* Vegetables/Snacks Rack Time Temp. Probe (Refer to Recipe Book for Presets #39-51) Level (Min.) 390°F Home Fries*...
- Page 24 For All Other Purchases: help@nuwavenow.com For patent information please go to: www.nuwavenow.com/legal/patent Designed & Developed in USA Nuwave LLC 560 Bunker Ct. Vernon Hills, IL 60061, U.S.A. Item No: BM38021 V2-JL Made in China 07-18-24 ©2024 Nuwave LLC • All Rights Reserved.
Need help?
Do you have a question about the Brio 15.5Q and is the answer not in the manual?
Questions and answers