Table of Contents
Advertisement
Available languages
Available languages
Quick Links
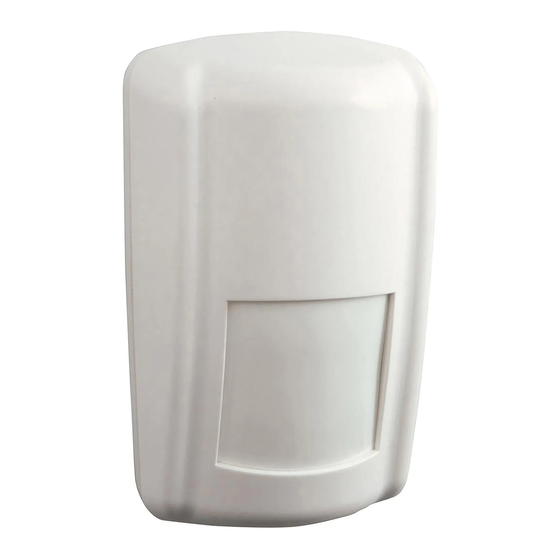
PIR MOTION DETECTOR (IR200)
DS80IR9B-001A
DETECTEUR DE MOUVEMENT PIR (IR200)
LBT80624
PIR DETEKTOR GIBANJA (IR200)
GB
The PIR picks up movements within an assigned area and signals the Control Panel to activate the
alarm if an intruder crosses its' path of detection.
The PIR consists of a two-part design made up of a cover and a base. The cover contains all the
electronics and optics and the base provides a means of fixing. The base has knockouts to allow
mounting on either a flat surface or in a corner situation with fixing screws and plugs provided.
Provision for a tamper switch that will be activated when the cover is detached from the base prevents
unauthorized access and removal from the mounting surface. The PIR can also alert you to signal
communication problems and low battery situations.
The PIR is designed to give a typical detection range of 12 meters when mounted at 2 meters above
ground.
IDENTIFYING THE PARTS
Remove the cover by loosening the button fixing screw, the inside of the PIR will revealed as shown.
Learn/Test Button
This button is used for testing the radio performance and for
learning purpose.
Tamper Switch
The Tamper switch protects the enclosure from being opened.
Test/Normal Mode Jumper Switch (JP1)
It is a 3-pin jumper switch
If the jumper link is in inserted between the left 2 pins, the
PIR is in Test mode.
If the jumper link is inserted between the right 2 pins, the PIR is in Normal operation mode.
1/10
Advertisement
Table of Contents

Related Manuals for Elkron IR200


Summary of Contents for Elkron IR200
- Page 1 PIR MOTION DETECTOR (IR200) DS80IR9B-001A DETECTEUR DE MOUVEMENT PIR (IR200) LBT80624 PIR DETEKTOR GIBANJA (IR200) The PIR picks up movements within an assigned area and signals the Control Panel to activate the alarm if an intruder crosses its’ path of detection.
-
Page 2: Supervision Function
SUPERVISION FUNCTION When the PIR is in Normal operation mode it will conduct a Self-test Periodically by transmit a supervisory signal once every 30 to 50 min. If the Control Panel can’t receive the Supervisory signals transmitted from a certain PIR, an “Out-Of- Order”... -
Page 3: Mounting Method
MOUNTING METHOD The PIR is designed to be mounted on either a flat surface or in a • corner situation with fixing screws and plugs provided. The base has knockouts, where the plastic is thinner, for mounting • purpose. Two knockouts are for surface fixing and four knockouts are for corner fixing as shown below. -
Page 4: Identification Des Pièces
L’IR200 peut aussi vous alerter pour signaler des problèmes de communication et des situations de pile faible. L’IR200 est conçu pour offrir une plage de détection de 12 mètres lorsqu'il est monté à 2 mètres au- dessus du sol. -
Page 5: Mise En Service
Le voyant clignote continuellement pendant 30 secondes. (Le PIR chauffe). Pendant la période • de chauffage, l’IR200 n'est pas activé. Il est conseillé de s'éloigner de la zone de détection pendant cette période. Une fois la période de chauffage terminée, le voyant s'éteint et l’IR200 est prêt à... -
Page 6: Conseils D'installation
• Ne placez pas un IR200 pour surveiller directement une porte protégée par un contacteur de porte, car le signal radio de ce dernier et celui de l’IR200 peuvent être émis au même instant et s'annuler mutuellement. N'installez pas l’IR200 en exposition complète à la lumière du jour directe. - Page 7 PIR na določenem območju zazna gibanje in v primeru vsiljivca signalizira nadzorni plošči naj sproži alarm. PIR je sestavljen iz dveh delov, osnovne plošče in pokrova. Pod pokrovom je vsa elektronika in optika, osnovna plošča pa služi pritrditvi. Pripravljena mesta za odprtine na osnovni plošči vam, s pomočjo priloženh pritrditvenih vijakov in čepkov, omogočajo pritrditev detektorja bodisi na ravni površini ali v kotu.
- Page 8 LED INDIKATOR LED indikator se nahaja za lečo, v zgornjem desnem kotu. V načinu Normalno delovanje LED ne bo svetila, razen v primerih : Ko je stanje baterije nizko in detektor zazna gibanje, bo LED, za približno 2 sekundi, zasvetila. •...
- Page 9 PRIPOROČILA MONTAŽE PIR je priporočljivo montirati na naslednje lokacije : • o Tako, da je območje zaznavanja kjer bi se vsiljivec običajno premikal. o Od 2 do 2,5 m od tli, za najboljše rezultate. o V kot, za širše območje zaznavanja. o Na mesto, kjer zaznavanje ne bo ovirano, npr.
- Page 10 Made in TAIWAN Head Office: Elkron S.p.A. Via Cimarosa, 39 – 10154 TORINO (TO) ITALY Tel. +39(0)11 3986711 Fax +39(0)11 3986790; web: www.elkron.com ; e-mail: info@elkron.it Milan Office: Via Gadames, 109 – 20151 MI ; Tel: +39(0)2 334491 – Fax: +39(0)2 33449213...
Need help?
Do you have a question about the IR200 and is the answer not in the manual?
Questions and answers