Sign In
Upload
Download
Table of Contents
Contents
Add to my manuals
Delete from my manuals
Share
URL of this page:
HTML Link:
Bookmark this page
Add
Manual will be automatically added to "My Manuals"
Print this page
×
Bookmark added
×
Added to my manuals
Manuals
Brands
Yamaha Manuals
Music Mixer
AG03MK2
User manual
Yamaha AG03MK2 User Manual
Live streaming mixer
Hide thumbs
1
Table Of Contents
2
3
4
5
6
7
8
9
10
11
12
13
14
15
16
17
18
19
20
21
22
23
24
25
26
27
28
29
30
31
32
33
34
35
36
37
38
39
40
41
42
43
44
45
46
47
48
49
50
51
52
53
54
55
56
57
58
59
60
61
62
63
64
65
66
67
68
69
70
71
72
73
74
75
76
77
page
of
77
Go
/
77
Contents
Table of Contents
Troubleshooting
Bookmarks
Table of Contents
Table of Contents
About this Guide
How the Manuals Are Organized
Product Features
Accessories
Component Names and Functions
Rear Panel
Front Side
Getting Ready to Use this Product
Connecting to an Iphone/Ipad
Connecting to Android Devices
Connecting to Your Computer and Configuring the Settings (Windows)
Connecting to Your Computer and Configuring the Settings (Mac)
Using this Product for Livestreaming (17LIVE, Twitch, Youtube Live)
Using with an Iphone/Ipad
Using this Product with an Android Device
Using this Product with Your Computer
Operations While Livestreaming
Connecting Your Musical Instrument or Music Player
Using this Product in a Web Meeting Using with an Iphone/Ipad
Using this Product with an Android Device
Using this Product with Your Computer
Using this Product for a Podcast Using Wavelab Cast
Using this Product for Recording
Using Rec'n'share with an Iphone/Ipad
Using Cubase AI with Your Computer
Using this Product in Music Production
Using Cubasis LE with an Iphone/Ipad
Using Cubase AI with Your Computer
Troubleshooting
Power-Related
Audio-Related and Other Issues
Appendix
General Specifications
Input / Output Characteristics
Dimensions
Block and Level Diagrams
Advertisement
Quick Links
1
Product Features
2
Component Names and Functions
3
Front Side
4
Connecting to Your Computer and Configuring the Settings (Windows)
5
Using this Product with Your Computer
Download this manual
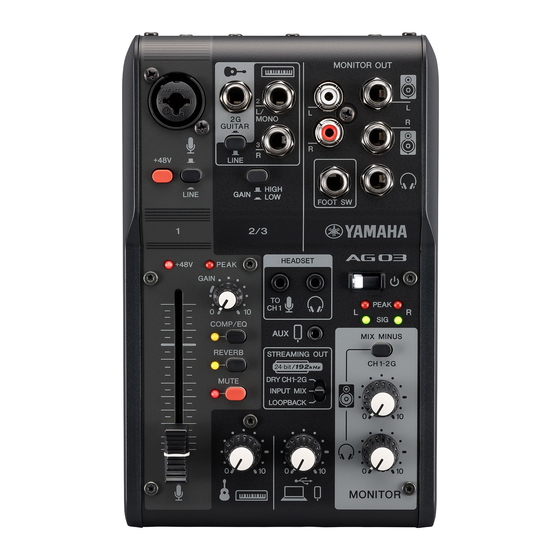
LIVE STREAMING MIXER
User Guide
EN
Table of
Contents
Previous
Page
Next
Page
1
2
3
4
5
Advertisement
Table of Contents
Need help?
Do you have a question about the AG03MK2 and is the answer not in the manual?
Ask a question
Questions and answers
Related Manuals for Yamaha AG03MK2
Music Mixer Yamaha AM602 Operation Manual
Yamaha mixer operation manual (38 pages)
Music Mixer Yamaha AM602 Operation Manual
Yamaha am602 audio mixers: user guide (38 pages)
Music Mixer Yamaha AM602 Operation Manual
(38 pages)
Music Mixer Yamaha AM802 Operation Manual
Yamaha mixer operation manual (38 pages)
Music Mixer Yamaha AM802 Operation Manual
Yamaha am802 audio mixers: user guide (38 pages)
Music Mixer Yamaha AM802 Operation Manual
(38 pages)
Music Mixer Yamaha AI8-ML8F Owner's Manual
(9 pages)
Music Mixer Yamaha AI8-ML8AB Owner's Manual
Analog input box, mic/line input unit, (9 pages)
Music Mixer Yamaha AW2816 Operation Manual
Yamaha aw2816 audio mixers: operation manual (2 pages)
Music Mixer Yamaha AX44 Owner's Manual
Audio expansion unit (51 pages)
Music Mixer Yamaha AG06 Owner's Manual
Mixing console (2 pages)
Yamaha AG06 - Mixing Console Manual
(article)
Music Mixer Yamaha AG06MK2 User Manual
Live streaming mixer (77 pages)
Music Mixer Yamaha RIVAGE PM5 Owner's Manual
Digital mixing systems, control surface (36 pages)
Music Mixer Yamaha MG12XUK Owner's Manual
Mixing console (28 pages)
Music Mixer Yamaha RM800 User Manual
Yamaha recording mixer user's guide (163 pages)
This manual is also suitable for:
Ag06mk2
Ag03mk2w
Ag03mk2b
Ag06mk2w
Ag06mk2b
Table of Contents
Save PDF
Print
Rename the bookmark
Delete bookmark?
Delete from my manuals?
Login
Sign In
OR
Sign in with Facebook
Sign in with Google
Upload manual
Upload from disk
Upload from URL


Need help?
Do you have a question about the AG03MK2 and is the answer not in the manual?
Questions and answers