Advertisement
Quick Links
Sunnata Dimmer MyLevel Personalization
Sunnata Models
ST-PRO-N
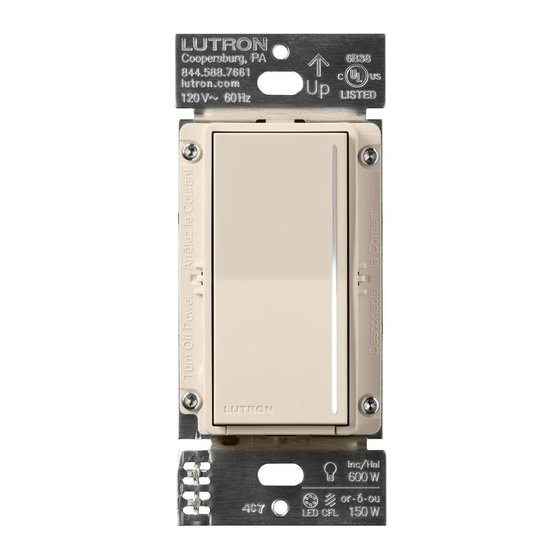
Sunnata PRO Dimmer
RRST-PRO-N Sunnata RF Dimmer
HRST-PRO-N Sunnata RF Dimmer
Overview
MyLevel personalization gives you the ability to customize your Sunnata touch dimmer . From the main dimmer, you can
adjust the brightness of the light bar as well as set a favorite level using the Feature menu . Before adjusting these features,
it is important to have a good understanding of the advanced features . MyLevel personalization cannot be entered from a
companion dimmer . Companion dimmers will match the settings of the main dimmer .
Identify your main dimmer:
Pull the FASS (Front Accessible Service Switch) out and push it back in . If the light bar blinks, this is your main dimmer .
If not, go to your next location in your installation and repeat until you locate your main dimmer .
Easily adjust your dimmer in 5 steps:
1. Enter Feature menu
2. Select the feature you want to change
3. Change the feature
4. Save the setting
5. Exit
For instructional videos on how to adjust features, visit
Dimmer
On
Off
Default Settings
Feature
High-end trim
Low-end trim
Light level indicator / Locator light
Light bar brightness
Preset light level
®
LED 9
LED 8
Adjust:
LED 7
(Light Bar)
• Touch light bar to set
LED 6
lamps to desired level .
LED 5
• Slide to adjust light
LED 4
level .
LED 3
LED 2
LED 1
FASS
(Front Accesible Service Switch)
Default
Highest level of trim range
Middle level of trim range
ON /ON
Medium brightness
Tapping the ON button always sets the lights to full (locked preset at high-end)
STCL-153P Sunnata LED+ Dimmer
STCL-153M Sunnata LED+ Dimmer
www .lutron .com/sunnatasupport
Glossary: . . . . . . . . . . . . . . . . . . . . . . . . . . . 2
High-End Trim: Adjust the maximum light level of the load . . . 3
Low-End Trim: Adjust the minimum light level of the load . . . 4
Phase Select Mode (PRO-N only): Select to operate in
forward- or reverse-phase dimming . . . . . . . . . . . . . . 5
Preset Light Level: Change the behavior of the device
when the ON button is pressed from the OFF state to ON . . .
Light Bar Brightness: Select between high, medium,
and low brightness of the control's light bar . . . . . . . . . . 10
Light Level Indicator / Locator Light: Select between ON and
OFF for the light bar when not interacting with the control . . 12
Restore Factory Default Settings:
Return the control to its original settings . . . . . . . . . . . 14
System Features: . . . . . . . . . . . . . . . . . . . . . . 14
1
Customer Assistance — 1.844.LUTRON1
Application Note #734
November 2021
en español
Revision F
/
en français
7
Advertisement

Related Manuals for Lutron Electronics Sunnata ST-PRO-N


Summary of Contents for Lutron Electronics Sunnata ST-PRO-N
- Page 1 Application Note #734 Revision F November 2021 Sunnata Dimmer MyLevel Personalization Sunnata Models en español en français ST-PRO-N Sunnata PRO Dimmer STCL-153P Sunnata LED+ Dimmer RRST-PRO-N Sunnata RF Dimmer STCL-153M Sunnata LED+ Dimmer HRST-PRO-N Sunnata RF Dimmer Overview MyLevel personalization gives you the ability to customize your Sunnata touch dimmer . From the main dimmer, you can adjust the brightness of the light bar as well as set a favorite level using the Feature menu .
- Page 2 Application Note #734 Glossary Allows the user to modify the selected feature . Change Feature Mode Default Setting The way the feature operates when the control is first used . Factory Default The way all the features operate when the control is first used . Tab at the bottom of the control, required to be pulled out for light bulb(s) replacement and FASS changing advanced features;...
- Page 3 Application Note #734 High-End Trim Shortcut This feature allows the user to determine the maximum light level and adjust the settings accordingly . It is typically used to avoid undesirable lamp behavior near high-end or to reduce power consumption . Default Setting: Highest level of trim range.
- Page 4 Application Note #734 Low-End Trim Shortcut This feature minimizes LED bulb flickering and strobing when the dimmer is at the minimum light level . This feature can also be used to set a personal preference . Default Setting: Middle level of trim range. TOUCH 1 .
-
Page 5: Press And Hold
Application Note #734 Phase-Select Mode (PRO-N only) 1 . Pull the Front Accessible Service Switch (FASS) out to the open position . PULL 2 . Press and hold the button . (Press the left side of the button to not mistakenly affect the light bar .) PRESS AND HOLD 3 . - Page 6 Application Note #734 Phase-Select Mode (PRO-N only) (continued) 4 . Release the button and LED 1 or LED 9 will continue to flash slowly (~4 times/second) to indicate current phase mode . - LED 9 - Forward-phase - LED 1 - Reverse-phase (default) Touch the light bar to select the desired phase .
- Page 7 Application Note #734 Preset Light Level Change the behavior of the device when the button is pressed from the state . – Unlocked Preset (Last Level Preset) indicates that the device will come to its last level prior to turning This level is indicated by an LED that glows brighter in the locator light state .
- Page 8 Application Note #734 Preset Light Level (continued) 3 . While continuing to hold the button, push the Front Accessible Service Switch (FASS) in to the closed position . Continue to hold the button for approximately 6 seconds . The light bar will begin to flash slowly (~4 times/second) .
- Page 9 Application Note #734 Preset Light Level (continued) Choose either . . . 6 . a. Unlocked Preset b. Locked Preset Lights turn on to the level they were at the last Lights turn on to this specified level no matter time they were turned off .
- Page 10 Application Note #734 Light Bar Brightness Mode Adjust the brightness of the LEDs on the light bar in the Active, Light Level Indicator, and Locator Light states . Select between high-, medium-, and low-brightness of the control’s light bar . Default Setting: Medium brightness 1 .
- Page 11 Application Note #734 Light Bar Brightness Mode (continued) 5 . Select the Light Bar Brightness menu by touching LED 5 and TOUCH tapping the button . An LED will be flashing quickly to indicate the current Light Bar Brightness setting . LED 9: Light Level Indicator / Locator Light LED 5: Light Bar Brightness...
- Page 12 Application Note #734 Light Level Indicator / Locator Light Mode This feature can enable or disable the Light Level Indicator and the Locator Light . – Light Level Indicator - Light bar behavior when load is ON and it has not been touched for about 2 seconds . –...
- Page 13 Application Note #734 Light Level Indicator / Locator Light Mode (continued) 5 . Select the Light Level Indicator / Locator Light feature by touching TOUCH LED 9 and tapping the button . An LED will begin flashing quickly LED 9: Light Level Indicator / Locator Light to indicate the current Light Level Indicator setting .
-
Page 14: Restore Factory Default Settings
Application Note #734 Restore Factory Default Settings The dimmer can be returned to its original factory settings . This allows the customer a risk-free experience to try multiple settings . Default Settings Feature Default High-end trim Highest level of trim range Low-end trim Middle level of trim range Light level indicator / Locator light... - Page 15 Application Note #734 Lutron, FASS, MyLevel, RadioRA 3, and Sunnata are trademarks or registered trademarks of Lutron Electronics Co ., Inc . in the US and/or other countries . Lutron Contact Numbers WORLD HEADQUARTERS UK AND EUROPE: ASIA: Lutron EA Limited Lutron GL Ltd.
Need help?
Do you have a question about the Sunnata ST-PRO-N and is the answer not in the manual?
Questions and answers