Table of Contents
Advertisement
Start-Up, Operation, and Maintenance Instructions
Manufacturer reserves the right to discontinue, or change at any time, specifications or designs without notice and
without incurring obligations.
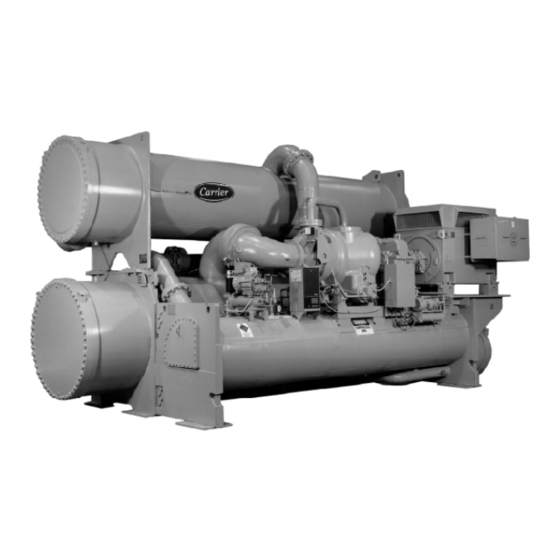
PC 211
Catalog No. 531-715
Centrifugal liquid chillers are designed to provide safe and reliable service when
operated within design specifications. When operating this equipment, use good
judgement and safety precautions to avoid damage to equipment and property or injury
to personnel.
Be sure you understand and follow the procedures and safety precautions contained
in the machine instructions as well as those listed in this guide.
®
9-95
Form 17/19EX-1SS
Copyright © Carrier Corporation 1995
Safety Considerations
Centrifugal Liquid Chillers
with HFC-134a
Replaces: 19EX-1SS
17/19EX
50/60 Hz
Advertisement
Table of Contents
Troubleshooting

Related Manuals for Carrier 17/19EX


Summary of Contents for Carrier 17/19EX
-
Page 1: Safety Considerations
Be sure you understand and follow the procedures and safety precautions contained in the machine instructions as well as those listed in this guide. Centrifugal Liquid Chillers ® 9-95 Form 17/19EX-1SS Copyright © Carrier Corporation 1995 Safety Considerations 17/19EX 50/60 Hz with HFC-134a Replaces: 19EX-1SS... - Page 2 DANGER DANGER DO NOT VENT refrigerant relief valves within a building. Outlet from rupture disc or relief valve must be vented outdoors in accordance with the latest edition of ASHRAE 15 (Safety Code for Mechanical Refrigeration). The accumulation of refrigerant in an enclosed space can displace oxygen and cause asphyxiation. PROVIDE adequate ventilation in accordance with ASHRAE 15, especially for enclosed and low overhead spaces.
- Page 3 WARNING WARNING DO NOT WELD OR FLAMECUT any refrigerant line or vessel until all refrigerant ( liquid and vapor ) has been removed from chiller. Traces of vapor should be dis- placed with dry air or nitrogen and the work area should be well ventilated. Refrig- erant in contact with an open flame produces toxic gases .
- Page 4 Operation of this equipment with refrigerants other than those cited herein should comply with ASHRAE-15 (latest edition). Contact Carrier for further information on use of this machine with other refrigerants. DO NOTATTEMPT TO REMOVE fittings, covers, etc., while machine is under pres- sure or while machine is running.
- Page 5 CAUTION CAUTION DO NOT STEP on refrigerant lines. Broken lines can whip about and cause per- sonal injury. DO NOT climb over a machine. Use platform, catwalk, or staging. Follow safe practices when using ladders. USE MECHANICAL EQUIPMENT (crane, hoist, etc.) to lift or move inspection cov- ers or other heavy components.
- Page 6 CAUTION CAUTION PERIODICALLY INSPECT all valves, fittings, and piping for corrosion, rust, leaks, or damage. PROVIDE A DRAIN connection in the vent line near each pressure relief device to prevent a build-up of condensate or rain water.
-
Page 7: Table Of Contents
List of Tables List of Figures Safety Considerations Introduction Abbreviations 17/19EX Machine Familiarization Machine Identification Label System Components Cooler Condenser Motor-Compressor Control Center Motor Starter Utility Vessel Contents... - Page 8 Refrigeration Cycle Motor/Oil Refrigeration Cooling Cycle Hermetic Machines (19 Series) Lubrication Cycle Summary Details Open-Drive Machines (17 Series) Lubrication Cycle Summary Details Starters Controls Definitions Analog Signal Digital Signal Volatile Memory Contents...
- Page 9 General PIC System Components Processor Module (PSIO) Starter Management Module (SMM) Local Interface Device (LID) 6-Pack Relay Board 8-Input Modules Oil Heater Contactor (1C) Oil Pump Contactor (2C) Hot Gas Bypass Contactor Relay (3C) (Optional) Control Transformers (T1-T4) Control and Oil Heater Voltage Selector (S1) Oil Differential Pressure/Power Supply Module Contents...
- Page 10 Contents LID Operation and Menus General Alarms and Alerts LID Default Screen Menu Items Menu Structure To View or Change Point Status Override Operations To View or Change Time Schedule Operation To View and Change Set Points Service Operation PIC System Functions Capacity Control Entering Chilled Water Control Deadband...
- Page 11 Demand Limiting Machine Timers Occupancy Schedule Safety Controls Shunt Trip Default Screen Freeze Motor Cooling Control (Hermetic Motors Only) Auxiliary Oil Pump Control (Open-Drive Machines Only) Shaft Seal Oil (Open Drive Machines Only) Ramp Loading Control Capacity Override High Discharge Temperature Control Oil Sump Temperature Control Oil Cooler Remote Start/Stop Controls...
- Page 12 Spare Safety Inputs Spare Alarm Contacts Condenser Pump Control Condenser Freeze Prevention Tower-Fan Relay Auto. Restart After Power Failure Water/Brine Reset Demand Limit Control, Option (Requires Optional 8-Input Module) Surge Prevention Algorithm Surge Protection Lead/Lag Control Common Point Sensor Installation Machine Communication Wiring Lead/Lag Operation Faulted Chiller Operation...
- Page 13 Load Balancing Auto. Restart After Power Failure Ice Build Control Ice Build Initiation Start-Up/Recycle Operation Temperature Control During Ice Build Termination of Ice Build Return to Non-Ice Build Operations Attach to Network Device Control Attaching to Other CCN Modules Service Operation To Log On To Log Off Holiday Scheduling...
- Page 14 Start-Up/Shutdown/Recycle Sequence Local Start-Up Shutdown Sequence Automatic Soft Stop Amps Threshold Chilled Water Recycle Mode Safety Shutdown Before Initial Start-Up Job Data Required Equipment Required Using the Utility Vessel and Pumpout System Remove Shipping Packaging Open-Drive Motor Electrical Connection Open-Drive Motor Auxiliary Devices Open Oil Circuit Valves Contents...
- Page 15 Leak Test Machine Standing Vacuum Test Machine Dehydration Inspect Water Piping Check Optional Pumpout Compressor Water Piping Check Relief Devices Inspect Wiring Check Insulation Resistance (Hermetic Motor) Check Insulation Resistance (Open-Drive Motor) Open-Drive Motor Pre-Start Checks Carrier Comfort Network Interface Contents...
- Page 16 Check Starter Mechanical-Type Starters Solid-State Starters Oil Charge Power Up the Controls and Check the Oil Heater Software Version Set Up Machine Control Configuration Input the Design Set Points Input the Local Occupied Schedule (OCCPC01S) Input Service Configurations Password Input Time and Date Change LID Configuration If Necessary Modify Controller Identification If Necessary Input Equipment Service Parameters If Necessary...
- Page 17 Modify Equipment Configuration If Necessary Check Voltage Supply Perform an Automated Control Test Check Pumpout System Controls and Optional Pumpout Compressor High Altitude Locations Charge Refrigerant into Machine Trimming Refrigerant Charge Initial Start-Up Preparation Manual Operation of the Guide Vanes Dry Run to Test Start-Up Sequence Check Rotation (Open-Drive Motor) Check Rotation (Hermetic Motor)
-
Page 18: Motor-Compressor
Check Oil Pressure and Compressor Stop Calibrate Motor Current Demand Setting To Prevent Accidental Start-Up Hot Alignment Check for Open-Drive Machines Doweling for Open-Drive Machines Check Machine Operating Condition Instruct the Customer Operator Cooler-Condenser Utility Vessel Pumpout System Motor Compressor Assembly Motor Compressor Lubrication System Control System Auxiliary Equipment... - Page 19 Review Maintenance Safety Devices and Procedures Check Operator Knowledge Review the Start-Up, Operation, and Maintenance Manual Operating Instructions Operator Duties Prepare the Machine for Start-Up To Start the Machine Check the Running System To Stop the Machine After Limited Shutdown Extended Shutdown After Extended Shutdown Cold Weather Operation...
- Page 20 Pumpout and Refrigerant Transfer Procedures Preparation Operating the Optional Pumpout Compressor To Read Refrigerant Pressures Transferring Refrigerant from Normal Operation into the Utility Vessel Transferring Refrigerant from Normal Operation into the Cooler/Condenser/Compressor Section Return Refrigerant to Normal Operating Conditions General Maintenance Refrigerant Properties Adding Refrigerant Removing Refrigerant...
- Page 21 Test After Service, Repair, or Major Leak Refrigerant Tracer To Pressurize with Dry Nitrogen Repair the Leak, Retest, and Apply Standing Vacuum Test Checking Guide Vane Linkage Contact Seal Maintenance (Open-Drive Machines) Seal Disassembly Seal Reassembly Machine Alignment (Open-Drive Machines) Alignment Methods Preliminary Alignment Near Final Alignment...
- Page 22 Weekly Maintenance Check the Lubrication System Scheduled Maintenance Service Ontime Inspect the Control Center Check Safety and Operating Controls Monthly Changing Oil Filter 19EX Compressors FA Style Compressors Oil Specification Oil Changes To Change the Oil Refrigerant Filter Oil Reclaim Filter Contents...
- Page 23 Inspect Refrigerant Float System Inspect Relief Valves and Piping Coupling Maintenance (Open-Drive Machines) Procedure Motor Maintenance (Open-Drive Machines) Cleanliness Sleeve Bearings Open-Drive Motor Handling/Rigging Open-Drive Motor Storage Compressor Bearing and Gear Maintenance Inspect the Heat Exchanger Tubes Cooler Condenser Water Leaks Water Treatment Contents...
- Page 24 Inspect the Starting Equipment Check Pressure Transducers Pumpout System Maintenance Optional Pumpout Compressor Oil Charge Pumpout Safety Control Settings Ordering Replacement Chiller Parts Open-Drive Motor Renewal Parts Troubleshooting Guide Overview Checking the Display Messages Checking Temperature Sensors Resistance Check Voltage Drop Check Sensor Accuracy Dual Temperature Sensors Contents...
- Page 25 Checking Pressure Transducers Oil Differential Pressure/Power Supply Module Calibration Troubleshooting Transducers Transducer Replacement Control Algorithms Checkout Procedure Control Test Control Modules Red LED Green LEDs Notes on Module Operation Processor Module (PSIO) Inputs Outputs Contents...
- Page 26 Starter Management Module (SMM) Inputs Outputs Options Modules (8-Input) Replacing Defective Processor Modules Installation of New PSIO Module 17/19EX Physical Data and Wiring Schematics Compressor Fits and Clearances Initial Start-Up Checklist for 17/19EX Centrifugal Liquid Chiller Contents...
- Page 27 List of Tables Table 1 — Major PIC Components and Panel Locations Table 2 — LID Screens Example 1 — Status01 Display Screen Example 2 — Status02 Display Screen Example 3 — Status03 Display Screen Example 4 — Setpoint Display Screen Example 5 —...
- Page 28 Table 3 — Protective Safety Limits and Control Settings Table 4 — Capacity Overrides Table 5A — HFC-134a Pressure — Temperature (F) Table 5B — HFC-134a Pressure — Temperature (C) Table 6 — Recommended Torque Table 7 — Control Test Menu Functions Table 8 —...
- Page 29 N. Other Problems/Malfunctions Table 9A — Thermistor Temperature (F) vs Resistance/Voltage Drop Table 9B — Thermistor Temperature (C) vs Resistance/Voltage Drop Table 10 — 17/19EX Heat Exchanger, Economizer/Storage Vessel, Piping, and Pumpout Unit Weights Table 11 — Additional Condenser Weights Table 12 —...
- Page 30 Contents Table 14 — Marine Waterbox Cover Weights Table 15 — NIH Waterbox Cover Weights Table 16 — Auxiliary Systems, Electrical Data Table 17 — Open-Drive Compressor Fits and Clearances Table 18 — Hermetic Compressor Fits and Clearances...
- Page 31 List of Figures Figure 1 — 17/19EX Identification Figure 2 — Typical 17EX Installation Figure 3 — Typical 19EX Installation Figure 4 — Refrigerant, Motor Cooling, and Oil Cooling Cycles Figure 5 — Hermetic Compressor Lubrication System (EX Compres- sor Shown) Figure 6 —...
- Page 32 Figure 19 — Example of Time Schedule Operation Screen Figure 20 — Example of Set Point Screen Figure 21 — 17/19EX Hot Gas Bypass/Surge Prevention Figure 22 — 17/19EX with Default Metric Settings Figure 23 — Example of Attach to Network Device Screen Figure 24 —...
- Page 33 Contents Figure 27 — Shipping Bolt on Open Drive Motor Figure 28 — 17/19EX Leak Test Procedures Figure 29 — Dehydration Cold Trap Figure 30 — Correct Motor Rotation Figure 31 — Refrigeration Log Figure 32 — Pumpout Arrangement and Valve Number Locations (12-ft Vessel Shown) Figure 33 —...
- Page 34 Contents Figure 41 — Adjusting Angular Misalignment in Plan Figure 42 — Correcting Parallel Misalignment Figure 43 — Alignment Check — Assembled Coupling Figure 44 — Removing the Oil Filter Figure 45 — Typical Float Valve Arrangement Figure 46 — Lifting Open-Drive Motor Figure 47 —...
- Page 35 Figure 55 — Open-Drive Compressor Fits and Clearances Figure 56 — Hermetic Compressor Fits and Clearances Figure 57 — Electronic PIC Controls Wiring Schematic — Hermetic Machine Figure 58 — Electronic PIC Controls Wiring Schematic — Open-Drive Machine Figure 59 — Machine Power Panel, Starter Assembly, and Motor Wiring Schematic Figure 60 —...
- Page 36 Prior to initial start-up of the 17/19EX unit, those involved in the start-up, operation, and maintenance should be thoroughly familiar with these instructions and other necessary job data. This book is outlined so that you may become familiar with the control system before performing start-up procedures.
- Page 37 WARNING WARNING This equipment uses, and can radiate, radio frequency energy. If not installed and used in accordance with the instruction manual, it may cause interference to radio communications. It has been tested and found to comply with the limits for a Class A computing device pursuant to Subpart J of Part 15 of FCC Rules, which are designed to provide reasonable protection against such interference when operated in a commercial environment.
- Page 38 Frequently used abbreviations in this manual include: — Carrier Comfort Network — Counterclockwise — Chilled Water CHWR — Chilled Water Return CHWS — Chilled Water Supply — Clockwise — Entering Chilled Water ECDW — Entering Condenser Water — Energy Management System HGBP —...
-
Page 39: 17/19Ex Machine Familiarization
Click here for Figure 1 — 17/19EX Identification Click here for Figure 2 — Typical 17EX Installation Click here for Figure 3 —... -
Page 40: Control Center
• records the total machine operating hours and how many hours the machine has been running • sequences machine start, stop, and recycle under microprocessor control • provides access to other CCN (Carrier Comfort Network) devices... -
Page 41: Motor Starter
Motor Starter (Purchased Separately) The starter allows for the proper starting and disconnecting of the electrical energy for the compressor-motor, oil pump, oil heater, and control panels. Utility Vessel During normal operation, this vessel functions as an economizer, returning flash gas to the second stage of the compressor and increasing the efficiency of the refrigeration cycle. - Page 42 Compression raises the refrigerant temperature above that of the water flowing through the condenser tubes. When the warm (typically 98 to 102 F [37 to 40 C]) refrigerant vapor comes into contact with the condenser tubes, the relatively cool condensing water (typically 85 to 95 F [29 to 35 C]) removes some of the heat and the vapor condenses into a liquid.
-
Page 43: Motor/Oil Refrigeration Cooling Cycle
Motor/Oil Refrigeration Cooling Cycle The motor is cooled by liquid refrigerant taken from the bottom of the condenser vessel (Figure 4). Flow of refrigerant is maintained by the pressure differential that exists due to compressor operation. After the refrigerant flows past an isolation valve, an in-line filter, and a sight glass/moisture indicator, the flow is split between motor cooling and oil cooling systems. - Page 44 always a minimum flow bypassing the TXV, which flows through an orifice. The TXV valve regulates flow into the oil/refrigerant plate and frame-type heat exchanger. The bulb for the expansion valve controls oil temperature to the bearings. The refrigerant leaving the heat exchanger then returns to the cooler.
- Page 45 Details Oil is charged into the reservoir (Item 1) through a hand valve (Item 4) which also functions as an oil drain. If there is refrigerant in the machine, a pump is required for charging. Sight glasses (Item 10) on the reservoir wall permit observation of the oil level. The normal operating oil level is from the middle of the lower sight glass to the top of the lower sight glass.
- Page 46 As the oil leaves the oil cooler, it passes the oil pressure transducer (Item 14) and then the thermostatic expansion valve bulb (Item 13). The oil flow is then divided, and a portion flows to the motor-end bearing (Item 19) and seal. The remainder lubricates the compressor transmission (Item 2) and the thrust and journal bearings (Item 3).
- Page 47 During the machine start-up, the PIC will energize the oil pump and provide 15 seconds of prelubrication to the bearings after the oil pressure is verified and before the controls start the compressor. During shutdown, the oil pump will run for 60 seconds after the compressor actually shuts down for the purpose of post-lubrication.
- Page 48 Open-Drive Machines (17 Series) Lubrication Cycle Summary The main oil pump and oil reservoir are contained in the compressor base. Oil is pumped through an oil cooler and a filter to remove heat and any foreign particles. A portion of the oil is then directed to shaft-end bearing and the shaft seal.
- Page 49 Water flow through the oil cooler is manually adjusted by a plug valve (Item 9) to maintain the oil at an operating temperature of approximately 145 F (63 C). During shutdown, the oil temperature is also maintained at 150 to 160 F (65 to 71 C) by an immersion heater (Item 3) in order to minimize absorption of refrigerant by the oil.
- Page 50 All starters, whether supplied by Carrier or the customer, must meet Carrier Starter Specification Z-375. This specification can be obtained from the Carrier Sales Representative. The purpose of this specification is to ensure the compatibility of the starter and the machine.
- Page 51 General The 17/19EX hermetic centrifugal liquid chiller contains a microprocessor-based control center that monitors and controls all operations of the machine. The microprocessor control system matches the cooling capacity of the machine to the cooling load while providing state-of- the-art machine protection.
-
Page 52: Pic System Components
The PIC can be interfaced with the Carrier Comfort Network (CCN) if desired. It can communicate with other PIC-equipped chillers and other CCN devices. - Page 53 The PIC consists of 3 modules housed inside the 3 major components. The component names and the control voltage contained in each component are listed below (also see Table • control center – all extra low-voltage wiring (24 v or less) •...
- Page 54 These inputs are connected to the PSIO module. The PSIO also provides outputs to the: guide vane actuator; oil pump; oil heater; hot gas bypass (optional); motor cooling solenoid; and alarm contact. The PSIO communicates with the LID, the SMM, and the optional 8-input modules for user interface and starter management.
- Page 55 6-Pack Relay Board This device is a cluster of 6 pilot relays located in the control center. It is energized by the PSIO for the oil pump, oil heater, alarm, optional hot gas bypass relay, and motor cooling solenoid (19EX machines) on auxiliary oil pump (17EX machines). 8-Input Modules One optional module is factory installed in the control center panel when ordered.
- Page 56 Hot Gas Bypass Contactor Relay (3C) (Optional) This relay, located in the power panel, controls the opening of the hot gas bypass valve. The PIC energizes the relay during low load, high lift conditions. Oil Auxiliary Relay (4C) This relay, supplied only with open-drive machines, opens the oil cooler solenoid valve and interlocks the oil pump with the compressor.
- Page 57 pressure and outputs the difference as an oil differential pressure signal to the PSIO. The PSIO converts this signal to differential oil pressure. To calibrate this reading, refer to the Troubleshooting Guide, Checking Pressure Transducers Click here for Figure 7 — 17EX Controls and Sensor Locations Click here for Figure 8 —...
- Page 58 Click here for Figure 13 — Power Panel with Options (Hermetic Machine Shown) LID Operation and Menus Figure 19, and Figure General • The LID display will automatically revert to the default screen after 15 minutes if no softkey activity takes place and if the machine is not in the Pumpdown mode (Figure 14).
- Page 59 Alarms and Alerts Alarm (*) and alert (!) status are indicated on the Default screen and the Status tables. An alarm (*) will shut down the compressor. An alert (!) notifies the operator that an unusual condition has occurred. The machine will continue to operate when an alert is shown. Alarms are indicated when the control center alarm light (!) flashes.
- Page 60 LID Default Screen Menu Items To perform any of the operations described below, the PIC must be powered up and have successfully completed its self test. The Default screen menu selection offers four options (Status, Schedule, Setpoint, and Service). The Status menu allows for viewing and limited calibration/modification of control points and sensors, relays and contacts, and the options board.
- Page 61 Menu Structure To perform any of the operations described below, the PIC must be powered up and have successfully completed its self test. • Press MENU to select from the four available options. • Press the softkey that corresponds to the desired menu structure. STATUS •...
- Page 62 • Press SELECT to access the highlighted point. NEXT • Press QUIT to leave the selected decision or field without saving any changes. INCREASE • Or, press ENTER to leave the selected decision or field and save changes. INCREASE PREVIOUS SELECT DECREASE QUIT...
- Page 63 Status01 — Status of control points and sensors • Status02 — Status of relays and contacts • Status03 — Status of both optional 8-input modules and sensors NEXT Click here for Figure 16 — 17/19EX Menu Structure (Figure SCHEDULE SETPOINT SERVICE PREVIOUS...
- Page 64 Click here for Figure 17 — 17/19EX Service Menu Structure 3. Press SELECT to view the desired Point Status table. NEXT 4. On the Point Status table press NEXT or PREVIOUS until desired point is displayed on the screen. NEXT For Discrete Points —...
- Page 65 For Analog Points — Press INCREASE or DECREASE to select the desired value. INCREASE 5. Press ENTER to register new value. INCREASE Override Operations Note: When overriding or changing metric values, it is necessary to hold the softkey down for a few seconds in order to see a value change, especially on kilopascal values.
- Page 66 To Remove an Override 1. On the Point Status table press NEXT or PREVIOUS to highlight the desired point. NEXT 2. Press SELECT to access the highlighted point. NEXT 3. Press RELEASE to remove the override and return the point to the PIC’s automatic control. INCREASE PREVIOUS SELECT...
- Page 67 Override Indication An override value is indicated by ‘‘SUPVSR,’’ ‘‘SERVC,’’ or ‘‘BEST’’ flashing next to the point value on the Status table. To View or Change Time Schedule Operation ( 1. On the Menu screen, press SCHEDULE . STATUS 2. Press NEXT or PREVIOUS to highlight one of the following schedules. OCCPC01S —...
- Page 68 3. Press SELECT to access and view the time schedule. NEXT 4. Press NEXT or PREVIOUS to highlight the desired period or override that you wish to change. NEXT 5. Press SELECT to access the highlighted period or override. NEXT PREVIOUS SELECT PREVIOUS...
- Page 69 6. a. Press INCREASE or DECREASE to change the time values. Override values are in one- hour increments, up to 4 hours. INCREASE b. Press ENABLE to select days in the day-of-week fields. Press DISABLE to eliminate days from the period. ENABLE 7.
- Page 70 8. Press EXIT to leave the period or override. NEXT 9. Either return to Step 4 to select another period or override, or press EXIT again to leave the current time schedule screen and save the changes. NEXT 10. Holiday Designation (HOLIDEF table) may be found in the must assign the month, day, and duration for the holiday.
- Page 71 To View and Change Set Points 1. To view the Set Point table, at the Menu screen press SETPOINT. STATUS 2. There are 4 set points on this screen: Base Demand Limit; LCW Set Point (leaving chilled water set point); ECW Set Point (entering chilled water set point); and ICE BUILD set point. Only one of the chilled water set points can be active at one time, and the type of set point is activated in the Service menu.
- Page 72 4. Press SELECT to modify the highlighted set point. NEXT 5. Press INCREASE or DECREASE to change the selected set point value. INCREASE 6. Press ENTER to save the changes and return to the previous screen. INCREASE Service Operation To view the menu-driven programs available for Service Operation, see section.
- Page 73 Table 2 — LID Screens Example 1 — Status01 Display Screen Example 2 — Status02 Display Screen Example 3 — Status03 Display Screen Example 4 — Setpoint Display Screen Example 5 — Configuration (CONFIG) Display Screen Example 6 — Lead/Lag Configuration Display Screen Example 7 —...
-
Page 74: Pic System Functions
PIC System Functions Note: Throughout this manual, words printed in capital letters and italics are values that may be viewed on the LID. See Table 2 for examples of LID screens. Point names are listed in the Description column. An overview of LID operation and menus is given in Figure Figure Figure... -
Page 75: Control Point
Deadband This is the tolerance on the chilled water/ brine temperature CONTROL POINT . If the water temperature goes outside of the DEADBAND , the PIC opens or closes the guide vanes in response until it is within tolerance. The PIC may be configured with a 0.5° to 2° F (0.3° to 1.1°... - Page 76 vane response to chilled water temperature below deadband plus control point. It can be adjusted on the LID from a setting of 2 to 10, and the default setting is 6.0. Increasing either of these settings will cause the vanes to respond slower than a lower setting. The PROPORTIONAL ECW GAIN can be adjusted at the LID display from a setting of 1.0 to 3.0, with a default setting of 2.0.
- Page 77 The chiller also maintains a start-to-start timer and a stop-to-start timer. These timers limit how soon the machine can be started. See the for operational information. Occupancy Schedule This schedule determines when the chiller is either occupied or unoccupied. Each schedule consists of from one to 8 occupied/unoccupied time periods, set by the operator.
- Page 78 Note: This schedule is for illustration only, and is not intended to be a recommended schedule for chiller operation. Whenever the chiller is in the LOCAL mode, the machine uses Occupancy Schedule 01. The Ice Build Time Schedule is Schedule 02. When in the CCN mode, Occupancy Schedule 03 is used.
-
Page 79: Safety Controls
Safety Controls The PIC monitors all safety control inputs, and if required, shuts down the machine or limits the guide vanes to protect the machine from possible damage from any of the following conditions: • high bearing temperature • high motor winding temperature •... - Page 80 CAUTION If compressor motor overload or ground fault occurs, check the motor for grounded or open phases before attempting a restart. If the controller initiates a safety shutdown, it displays the fault on the LID with a primary and a secondary message, and energizes an alarm relay in the starter and blinks the alarm light on the control center.
-
Page 81: Default Screen Freeze
Default Screen Freeze Whenever an alarm occurs, the LID default screen will freeze displaying the condition of the machine at the time of alarm. Knowledge of the operating state of the chiller at the time an alarm occurs is useful when troubleshooting. Current machine information can be viewed on the Status tables. -
Page 82: Ramp Loading Control
alert threshold (18 psid [124 kPa]). Once running, the auxiliary oil pump will remain on until the compressor is turned off and will deenergize with the main oil pump after the post-lube time period. Shaft Seal Oil Control (Open Drive Machines Only) All open drive machines require that the shaft seal be bathed in oil at all times, especially when the machine is not running. -
Page 83: Capacity Override
There are 2 methods of ramp loading with the PIC. Ramp loading can be based on chilled water temperature or on motor load. 1. Temperature ramp loading limits the rate at which either leaving chilled water or entering chilled water temperature decreases by an operator-configured rate. The lowest temperature ramp table will be used the first time the machine is started (at commissioning). -
Page 84: High Discharge Temperature Control
Whenever the motor current demand limit set point is reached, it activates a capacity override, again with a 2-step process. Exceeding 110% of the rated load amps for more than 30 seconds will initiate a safety shutdown. The compressor high lift (surge prevention) set point will cause a capacity override as well. When the surge prevention set point is reached, the controller normally will only hold the guide vanes from opening. -
Page 85: Oil Sump Temperature Control
Oil Sump Temperature Control The oil sump temperature control is regulated by the PIC which uses the oil heater relay when the machine is shut down. As part of the pre-start checks executed by the controls, oil sump temperature is compared against evaporator refrigerant temperature. -
Page 86: Oil Cooler
Oil Cooler The oil must be cooled when the compressor is running. EX Compressors: This is accomplished through a small, plate-type heat exchanger. The heat exchanger uses liquid condenser refrigerant as the cooling liquid. A refrigerant thermostatic expansion valve (TXV) regulates refrigerant flow to control oil temperature entering the bearings. -
Page 87: Spare Safety Inputs
Automatic Restart After a Power Failure is not activated when a power failure occurs, and the remote contact is closed, the machine will indicate an alarm because of the loss of voltage. The contacts for Remote Start are wired into the starter at terminal strip TB5, terminals 8A and 8B. -
Page 88: Condenser Freeze Prevention
Condenser Pump Control The machine will monitor the CONDENSER PRESSURE and may turn on this pump if the pressure becomes too high whenever the compressor is shut down. CONDENSER PRESSURE OVERRIDE is used to determine this pressure point. This value is found on the Equipment Service1 LID table and has a default value PRESSURE is greater than or equal to the CONDENSER PRESSURE OVERRIDE , and the ENTERING CONDENSER WATER TEMP (Temperature) is less than 115 F (46 C), then the... -
Page 89: Tower-Fan Relay
CONDENSER FREEZE POINT , then the CONDENSER WATER PUMP shall be energized until the CONDENSER REFRIG TEMP is greater than the CONDENSER FREEZE POINT plus 5° F (2.7° C). An alarm will be generated if the machine is in PUMPDOWN mode and the pump is energized. -
Page 90: Auto. Restart After Power Failure
IMPORTANT: Afield-supplied water temperature control system for condenser water should be installed. The system should maintain the leaving condenser water temperature at a temperature that is 20° F (11° C) above the leaving chilled water temperature. CAUTION The tower-fan relay control is not a substitute for a condenser water temperature control. -
Page 91: Water/Brine Reset
Water/Brine Reset Three types of chilled water or brine reset are available and can be viewed or modified on the Equipment Configuration table Config selection. The LID default screen status message indicates when the chilled water reset is active. The Control Point temperature on the Status01 table indicates the machine’s current reset temperature. - Page 92 automatic reset to the set point based on a temperature sensor wired to the number one 8- input module (see wiring diagrams or certified drawings). The temperature sensor must be wired to terminal J1-19 and J1-20. To configure Reset Type 2, enter the temperature of the remote sensor at the point where no temperature reset will occur.
-
Page 93: Surge Prevention Algorithm
Demand Limit Control, Option (Requires Optional 8-Input Module) The demand limit may be externally controlled with a 4 to 20 mA signal from an energy management system (EMS). The option is set up on the Config table. When enabled, the control is set for 100% demand with 4 mA and an operator configured minimum demand set point at 20 mA. - Page 94 Points, (T1/P1;T2/P2). These points have default settings as defined on the Service1 table, or Table 4. These settings and the algorithm function are graphically displayed in Figure 21 Figure 22. The 2 sets of load points on this graph (default settings are shown) describe a line which the algorithm uses to determine the maximum lift of the compressor.
-
Page 95: Surge Protection
PERIOD . The SURGE TIME PERIOD is displayed and configured on the Service1 screen. It has a default of 2 minutes. Click here for Figure 21 — 17/19EX Hot Gas Bypass/Surge Prevention Click here for Figure 22 — 17/19EX With Default Metric Settings... -
Page 96: Lead/Lag Control
Lead/Lag Control Lead/Lag is a control system process that automatically starts and stops a lag or second chiller in a 2-chiller water system. Refer to selection information. On machines that have PSIO software with Lead/Lag capability, it is possible to utilize the PIC controls to perform the lead/lag function on 2 machines. A third machine can be added to the lead/lag system as a standby chiller to start up in case the lead or lag chiller in the system has shut down during an alarm condition and additional cooling is required. - Page 97 Common Point Sensor Installation Lead/lag operation does not require a common chilled water point sensor. Common point sensors can be added to the 8-input option module, if desired. Refer to the certified drawings for termination of sensor leads. Note: If the common point sensor option is chosen on a chilled water system, both machines should have their own 8-input option module and common point sensor installed.
- Page 98 To configure the LAG ADDRESS value on the LEAD/LAG Configuration table, always use the address of the other chiller on the system for this value. Using this address will make it easier to rotate the lead and lag machines. Carrier Comfort Network Interface section...
- Page 99 If the address assignments placed into the LAG ADDRESS and STANDBY ADDRESS values conflict, the lead/lag will be disabled and an alert (!) message will occur. For example, if the LAG ADDRESS matches the lead machine’s address, the lead/lag will be disabled and an alert (!) message will occur.
- Page 100 If the configured lead chiller does not complete the start-up before the PRESTART FAULT TIMER (user configured value) elapses, then the lag chiller shall be started and the lead chiller will shut down. The lead chiller then monitors the start request from the acting lead chiller to start.
- Page 101 Lag Chiller Start-Up Requirements Before the lag chiller can be started, the following conditions must be met: 1. Lead chiller ramp loading must be complete. 2. Lead chiller CHILLED WATER temperature must be greater than the CONTROL POINT plus 1/2 the WATER/BRINE DEADBAND. Note: The chilled water temperature sensor may be the leaving chilled water sensor, the return water sensor, the common supply water sensor, or the common return water sensor, depending on which options are configured and enabled.
- Page 102 Lag Chiller Shutdown Requirements The following conditions must be met in order for the lag chiller to be stopped. 1. Lead chiller COMPRESSOR MOTOR LOAD value is less than the lead chiller percent capacity plus 15%. Note: Lead chiller percent capacity = 100 – LAG PERCENT CAPACITY The LAG PERCENT CAPACITY value is configured on the Lead/Lag Configuration screen.
- Page 103 If the lag chiller faults when the lead chiller is also faulted, the standby chiller reverts to a stand-alone CCN mode of operation. If the lead chiller is in an alarm (*) condition (as shown on the LID panel), the RESET softkey is pressed to clear the alarm, and the chiller is placed in the CCN mode, the lead chiller will now communicate and monitor the RUN STATUS of the lag and standby chillers.
-
Page 104: Ice Build Control
Auto. Restart After Power Failure When an autorestart condition occurs, each chiller may have a delay added to the start-up sequence, depending on its lead/lag configuration. The lead chiller does not have a delay. The lag chiller has a 45-second delay. The standby chiller has a 90-second delay. The delay time is added after the chiller water flow verification. - Page 105 The Ice Build Time Schedule defines the period during which ice build is active if the ice build option is ENABLED. If the Ice Build Time Schedule overlaps other schedules defining time, then the Ice Build Time Schedule shall take priority. During the ice build period, the WATER/BRINE CONTROL POINT is set to the ICE BUILD SETPOINT for temperature control.
- Page 106 or standby chiller for lead/lag and is actively controlled by a lead chiller. The lead chiller communicates the ICE BUILD SETPOINT, desired CHILLER START/STOP state, and ACTIVE DEMAND LIMIT to the lag or standby chiller as required for ice build, if config- ured to do so.
- Page 107 chilled water flowing. If the entering CHILLED WATER/BRINE TEMPERATURE increases above the ICE BUILD SETPOINT plus the RECYCLE DELTA T value, the compressor will restart and control the CHILLED WATER/BRINE TEMPERATURE to the ICE BUILD SETPOINT. Temperature Control During Ice Build During ice build, the capacity control algorithm uses the WATER/BRINE CONTROL POINT minus 5 F (2.7 C) to control the LEAVING CHILLED WATER temperature.
- Page 108 3. Remote Contacts/Ice Level Input — Termination of compressor operation occurs when ICE BUILD TERMINATION is set to CONTACTS ONLY OPTION and the remote contacts are open. In this case, the contacts are provided for ice level termination control. The remote contacts can still be opened and closed to start and stop the chiller when the Ice Build Time Schedule is UNOCCUPIED.
-
Page 109: Attach To Network Device Control
Attach to Network Device Control On the Service menu, one of the selections is ATTACH TO NETWORK DEVICE. This table serves the following purposes: • to upload the Occupancy Schedule Number (if changed) for OCCPC03S, as defined in the Service01 table •... - Page 110 Attaching to Other CCN Modules If the machine PSIO has been connected to a CCN Network or other PIC controlled chillers through CCN wiring, the LID can be used to view or change parameters on the other controllers. Other PIC machines can be viewed and set points changed (if the other unit is in CCN control), if desired from this particular LID module.
-
Page 111: Service Operation
Note: The LID will not automatically re-attach to the PSIO module on the machine. Press the ATTACH softkey to attach to LOCAL DEVICE and view the machine PSIO. Click here for Figure 23 — Example of Attach to Network Device Screen Service Operation An overview of the menu-driven programs available for Service Operation is shown in Figure... - Page 112 The menu bar (Next-Previous-Select-Exit) is displayed to indicate that you have success- fully logged on. NEXT If the password is entered incorrectly, an error message is displayed. If this occurs, return to Step 1 and try logging on again. Note: The initial factory set password is 1-1-1-1. To Log Off Access the Log Out of Device table of the Service menu in order to password-protect the Service menu.
- Page 113 Holiday Scheduling (Figure The time schedules may be configured for special operation during a holiday period. When modifying a time period, the ‘‘H’’ at the end of the days of the week field signifies that the period is applicable to a holiday. (See The Broadcast function must be activated for the holidays configured in the Holidef tables to work properly.
- Page 114 2. If not logged on, follow the instructions for To Log On or To Log Off. Once logged on, press NEXT until Equipment Configuration is highlighted. NEXT 3. Once Equipment Configuration is highlighted, press SELECT to access. NEXT 4. Press NEXT until Holidef is highlighted. This is the Holiday Definition table. NEXT PREVIOUS SELECT...
- Page 115 5. Press SELECT to enter the Data Table Select screen. This screen lists 18 holiday tables. NEXT 6. Press NEXT to highlight the holiday table that you wish to view or change. Each table is one holiday period, starting on a specific date, and lasting up to 99 days. NEXT 7.
- Page 116 8. Press NEXT or PREVIOUS to highlight the month, day, or duration. NEXT 9. Press SELECT to modify the month, day, or duration. NEXT 10. Press INCREASE or DECREASE to change the selected value. INCREASE PREVIOUS SELECT EXIT PREVIOUS SELECT EXIT DECREASE QUIT...
- Page 117 11. Press ENTER to save the changes. INCREASE 12. Press EXIT to return to the previous menu. NEXT Click here for Figure 24 — Example of Holiday Period Screen DECREASE QUIT ENTER PREVIOUS SELECT EXIT...
-
Page 118: Local Start-Up
Start-Up/Shutdown/Recycle Sequence Local Start-Up Local start-up (or a manual start-up) is initiated by pressing the LOCAL menu softkey which is on the default LID screen. Local start-up can proceed when Time Schedule 01 is in OCCUPIED mode, and after the internal 15-minute start-to-start timer and the stop-to-start inhibit timer have expired. - Page 119 RECYCLE mode. If the water/brine temperature is high enough, the start-up sequence continues on to check the guide vane position. If the guide vanes are more than 6% open, the start-up waits until the PIC closes the vanes. If the vanes are closed, and the oil pump pressure is less than 4 psid (28 kPad), the oil pump relay will then be energized.
-
Page 120: Shutdown Sequence
Shutdown Sequence Shutdown of the machine can occur if any of the following events happen: • the STOP button is pressed for at least one second (the alarm light will blink once to confirm stop command) • recycle condition is present (see •... -
Page 121: Automatic Soft Stop Amps Threshold
Certain conditions during shutdown will change this sequence: • if the COMPRESSOR MOTOR LOAD is greater than 10% after shutdown, or the starter contacts remain energized, the oil pump and chilled water pump remain ener- gized and the alarm is displayed •... -
Page 122: Chilled Water Recycle Mode
When the SOFT STOP AMPS THRESHOLD is being applied, a status message ‘‘SHUTDOWN IN PROGRESS, COMPRESSOR UNLOADING’’ is shown. Chilled Water Recycle Mode The machine may cycle off and wait until the load increases to restart again when the compressor is running in a lightly loaded condition. This cycling of the chiller is normal and is known as recycle. - Page 123 is an operator-configured function which defaults to 5° F (3° C). This value is viewed/modified on the Service1 table. The compressor will restart when: in LCW CONTROL the LEAVING CHILLED WATER temperature is greater than the • CONTROL POINT plus the RECYCLE RESTART DELTA T ; or in ECW CONTROL, the ENTERING CHILLED WATER temperature is greater than •...
-
Page 124: Safety Shutdown
Safety Shutdown A safety shutdown is identical to a manual shutdown with the exception that the LID will display the reason for the shutdown, the alarm light will blink continuously, and the spare alarm contacts will be energized. A safety shutdown requires that the RESET softkey be pressed in order to clear the alarm. -
Page 125: Before Initial Start-Up
(product data submittal) • machine certified drawings • starting equipment details and wiring diagrams • diagrams and instructions for special controls or options • 17/19EX Installation Instructions • pumpout unit instructions Equipment Required • mechanic’s tools (refrigeration) • digital volt-ohmmeter (DVM) •... -
Page 126: Remove Shipping Packaging
Remove Shipping Packaging Remove any packaging material from the control center, power panel, guide vane actuator, motor cooling and oil reclaim solenoids, motor and bearing temperature sensor covers, and the factory-mounted starter. Open Drive Motor CAUTION The motor may be provided with a shipping brace or shipping bolt (normally painted yellow) to prevent shaft movement during transit. -
Page 127: Open-Drive Motor Electrical Connection
slushing compound on the shaft or other parts must be removed using a petroleum type solvent and observing proper safety precautions. Note: If the motor utilized a shipping bolt for restraining the rotor, the Westinghouse logo must be installed over the hole in the endcover. The logo, the gasket, and hardware can be found with the parts that have been shipped loose. -
Page 128: Open-Drive Motor Auxiliary Devices
also be stated. If either is unknown, the correct sequence can be determined in the following manner: While the motor is uncoupled from the load, start the motor and observe the direction of rotation. Allow the motor to achieve full speed before disconnecting it from the power source. Refer to Open-Drive Motor Pre-Start Checks resulting rotation is incorrect, it can be reversed by interchanging any 2 incoming cables. -
Page 129: Open Oil Circuit Valves
Figure 28 outlines the proper sequence and procedures for leak testing. 17/19EX chillers are shipped with the refrigerant contained in the utility vessel and the oil charge shipped in the compressor. The cooler/condenser vessels will have a 15 psig (103 kPa) refrigerant charge. -
Page 130: Refrigerant Tracer
Refrigerant Tracer Carrier recommends the use of an environmentally acceptable refrigerant tracer for leak testing with an electronic detector or halide torch. Ultrasonic leak detectors also can be used if the machine is under pressure. - Page 131 1. If the pressure readings are normal for machine condition: a. Evacuate the nitrogen holding charge from the vessels, if present. b. Raise the machine pressure, if necessary, by adding refrigerant until pressure is at equivalent saturated pressure for the surrounding temperature. Follow the pumpout procedures in the Pumpout and Refrigerant Transfer Procedures WARNING...
- Page 132 c. Plainly mark any leaks which are found. d. Release the pressure in the system. e. Repair all leaks. f. Retest the joints that were repaired. g. After successfully completing the test for large leaks, remove as much nitrogen, air, and moisture as possible, given the fact that small leaks may be present in the system.
- Page 133 5. If no leak is found during initial start-up procedures, complete the transfer of refrigerant gas (see Pumpout and Refrigerant Transfer Procedures 6. If no leak is found after a retest: a. Transfer the refrigerant to the utility vessel or other storage tank and perform a standing vacuum test as outlined in the b.
-
Page 134: Standing Vacuum Test
Standing Vacuum Test When performing the standing vacuum test, or machine dehydration, use a manometer or a wet bulb indicator. Dial gages cannot indicate the small amount of acceptable leakage during a short period of time. 1. Attach an absolute pressure manometer or wet bulb indicator to the machine. 2. -
Page 135: Machine Dehydration
Click here for Table 5A — HFC-134a Pressure — Temperature (F) Click here for Figure 28 — 17/19EX Leak Test Procedures Click here for Table 5B — HFC-134a Pressure — Temperature (C) Machine Dehydration Dehydration is recommended if the machine has been open for a considerable period of time, if the machine is known to contain moisture, or if there has been a complete loss of machine holding charge or refrigerant pressure. - Page 136 Dehydration is readily accomplished at room temperatures. Use of a cold trap may substantially reduce the time required to complete the dehydration. The higher the room temperature, the faster dehydration takes place. At low room temperatures, a very deep vacuum is required for boiling off any moisture. If low ambient temperatures are involved, contact a qualified service representative for the dehydration techniques required.
-
Page 137: Inspect Water Piping
Refer to piping diagrams provided in the certified drawings, and the piping instructions in the 17/19EX Installation Instructions manual. Inspect the piping to the cooler and condenser. Be sure that flow directions are correct and that all piping specifications have been met. -
Page 138: Check Optional Pumpout Compressor Water Piping
Water must be within design limits, clean, and treated to ensure proper machine performance and reduce the potential of tubing damage due to corrosion, scal- ing, or erosion. Carrier assumes no responsibility for chiller damage resulting from untreated or improperly treated water. -
Page 139: Inspect Wiring
Inspect Wiring WARNING Do not check voltage supply without proper equipment and precautions. Serious injury may result. Follow power company recommendations. CAUTION Do not apply any kind of test voltage, even for a rotation check, if the machine is under a dehydration vacuum. Insulation breakdown and serious damage may result. - Page 140 4. The starter for a centrifugal compressor motor must contain the components and terminals required for PIC refrigeration control. Check certified drawings. 5. Check the voltage to the following components and compare to the nameplate values: oil pump contact, pumpout compressor starter, and power panel. 6.
- Page 141 Check Insulation Resistance (Hermetic Motor) Test the machine compressor motor and its power lead insulation resistance with a 500-v insulation tester such as a megohmmeter. (Use a 5000-v tester for motors rated over 600 v.) Factory-mounted starters do not require a megohm test. 1.
- Page 142 If the readings on a field-installed starter are unsatisfactory, repeat the test at the motor with the power leads disconnected. Satisfactory readings in this second test indicate the fault is in the power leads. Note: Unit-mounted starters do not have to be megohm tested. Check Insulation Resistance (Open-Drive Motor) Before operating voltages is applied to the motor, whether for checking rotation direction or for actual operation, the resistance of the stator winding insulation should be measured.
- Page 143 RM = KV + 1 Where RM = Recommended minimum insulation resistance in megohms at 104° F (40° C) of the entire winding. KV = Rated motor terminal to terminal voltage in kilovolts (1000 volts = 1 KV). On a new winding, where the contaminant causing low insulation resistance is generally moisture, drying the winding through the proper application of heat will normally increase the insulation resistance to an acceptable level.
- Page 144 32 ISO (150 SSU) at 100 F (37.7 C). Oil capacity in each of the two bearings is 0.6 gal. (2.3 L) per bearing. Use of Carrier Oil Specification PP16-0 is approved (Mobil DTE Light or Sun Oil SUNVIS 916).
-
Page 145: Carrier Comfort Network Interface
Click here for Table 6 — Recommended Torque Carrier Comfort Network Interface The Carrier Comfort Network (CCN) communication bus wiring is supplied and installed by the electrical contractor. It consists of shielded, 3-conductor cable with drain wire. The system elements are connected to the communication bus in a daisy chain arrangement. - Page 146 Note: Conductors and drain wire must be 20 AWG (American Wire Gage) minimum stranded, tinned copper. Individual conductors must be insulated with PVC, PVC/nylon, vinyl, Teflon, or polyethylene. An aluminum/polyester 100% foil shield and an outer jacket of PVC, PVC/nylon, chrome vinyl or Teflon with a minimum operating temperature range of –20 C to 60 C is required.
-
Page 147: Check Starter
Check Starter CAUTION BE AWARE that certain automatic start arrangements can engage the starter . Open the disconnect ahead of the starter in addition to shutting off the machine or pump. Use the instruction and service manual supplied by the starter manufacturer to verify that the starter has been installed correctly. - Page 148 Mechanical-Type Starters 1. Check all field wiring connections for tightness, clearance from moving parts, and correct connection. 2. Check the contactor(s) to be sure they move freely. Check the mechanical interlock between contactors to ensure that 1S and 2M contactors cannot be closed at the same time.
- Page 149 seconds may be chosen as needed (typically 20 to 30 seconds are used). When the timer has been set, check that the starter (with relay 1CR closed) goes through a complete and proper start cycle. Solid-State Starters WARNING This equipment is at line voltage when AC power is connected. Pressing the Stop button does not remove voltage.
-
Page 150: Oil Charge
Oil Charge If oil is added, it must meet Carrier’s specification for centrifugal compressor usage as described in the Scheduled Maintenance, On hermetic machines, add oil through the oil drain charging valve pump is required for adding oil against refrigerant pressure. The pumping device must be able to lift from 0 to 150 psig (0 to 1034 kPa) or above unit pressure. - Page 151 Control Test has been satisfactorily completed. Protection by safety con- trols cannot be assumed until all control configurations have been confirmed. As configuration of the 17/19EX unit is performed, write down all configuration settings. A log, such as the one shown in figuration values.
-
Page 152: Input The Design Set Points
Input the Design Set Points Access the LID set point screen and view/modify the base demand limit set point, and either the LCW set point or the ECW set point. The PIC can control a set point to either the leaving or entering chilled water. -
Page 153: Input Service Configurations
Input Service Configurations The following configurations require the LID screen to be in the Service portion of the menu. • password • input time and date • LID configuration • controller identification • service parameters • equipment configuration • automated control test Password When accessing the Service tables, a password must be entered. - Page 154 Change LID Configuration If Necessary The LID Configuration screen is used to view or modify the LID CCN address, change to English or SI units, and to change the password. If there is more than one machine at the job- site, change the LID address on each machine so that each machine has its own address.
- Page 155 Configure SERVICE1 Table Access Service1 table to modify/view the following to jobsite parameters: Chilled Medium Brine Refrigerant Trippoint Surge Limiting or Hot Gas Bypass Option Minimum Load Points (T1/P1) Maximum Load Points (T2/P2) Motor Rated Load Amps Motor Rated Line Voltage Motor Rated Line kW Line Frequency Compressor Starter Type...
- Page 156 If, after configuring a value for these points, surge prevention is operating too soon or too late for conditions, these parameters should be changed by the operator. Example of configuration: Machine operating parameters Refrigerant used: HFC-134a Estimated Minimum Load Conditions: 44 F (6.7 C) LCW 45.5 F (7.5 C) EWC 43 F (6.1 C) Suction Temperature...
- Page 157 Suction Temperature: 42 F (5.6 C) = 37 psig (255 kPa) saturated refrigerant pressure (HFC-134a) Condensing Temperature: 98 F (36.7 C) = 120 psig (1827 kPa) saturated refrigerant pressure (HFC-134a) Maximum Load T2: 54 – 44 = 10° F (12.2 – 6.7 = 5.5° C) Maximum Load P2: 120 –...
- Page 158 Calculate Minimum Load To calculate minimum load conditions, estimate the temperature difference that the cooler will have at 20% load, then estimate what the suction and condensing temperatures will be at this point. Use the proper saturated pressure and temperature for the particular refrigerant used.
- Page 159 Increase P2 by 10 psid (70 kPad) Modify Equipment Configuration If Necessary The Equipment Configuration table has tables to select and view or modify. Carrier’s certified drawings will have the configuration values required for the jobsite. Modify these tables only if requested.
- Page 160 Owner-Modified CCN Tables The following tables are described for reference only. Occdef Table Modifications — The Occdef tables contain the Local and CCN time schedules, which can be modified here, or in the Schedule screen as described previously. Holidef Table Modifications — The Holidef tables configure the days of the year that holidays are in effect.
- Page 161 that the value appearing on the LID is calibrated to the incoming power voltage reading. Voltage can be calibrated only to between 90 and 100 percent of rated line voltage. Perform an Automated Control Test Check the safety controls status by performing an automated controls test. Access the Control Test table and select the Automated Tests function The Automated Control Test will check all outputs and inputs for function.
- Page 162 When the test is finished, or the EXIT softkey is pressed, the test will be stopped and the Control Test menu will be displayed. If a specific automated test procedure is not completed, access the particular control test to test the function when ready. The Control Test menu is described as follows.
-
Page 163: High Altitude Locations
Check Pumpout System Controls and Optional Pumpout Compressor Controls include an on/off switch, a 3-amp fuse, the compressor overloads, an internal thermostat, a compressor contactor, and a refrigerant high pressure cutout. The high pressure cutout is factory set to open at 161 psig (1110 kPa) and reset at 130 psig (896 kPa). Check that the water-cooled condenser has been connected. -
Page 164: Charge Refrigerant Into Machine
The 17/19EX machine may have the refrigerant already charged in the utility vessels. If machine is not shipped fully charged, refrigerant is shipped separately to conform with transportation regulations. - Page 165 Trimming Refrigerant Charge The 17/19EX is shipped with the correct charge for the design duty of the machine. Trimming the charge can be best accomplished when design load is available. To trim, check the temperature difference between leaving chilled water temperature and cooler refrigerant temperature at full load design conditions.
-
Page 166: Initial Start-Up
Preparation Before starting the machine, check that the: 1. Power is on to the main starter, oil pump relay, tower fan starter, oil heater relay, and the machine control center. 2. Cooling tower water is at proper level, and at or below design entering temperature. 3. -
Page 167: Manual Operation Of The Guide Vanes
WARNING Do not permit water or brine that is warmer than 110 F (43 C) to flow through the cooler or condenser. Refrigerant overpressure may discharge through the relief devices and result in the loss of refrigerant charge. 8. Press RELEASE to automate the chiller start/stop value on the Status01 screen to enable the chiller to start. -
Page 168: Dry Run To Test Start-Up Sequence
3. Press ENTER to override the automatic target. The screen will now read a value of zero, and the word ‘‘SUPVSR!’’ will flash. 4. Press the SELECT softkey, and then press RELEASE softkey to release the vanes to AUTOMATIC mode. After a few seconds the ‘‘SUPVSR!’’ will disappear. Dry Run to Test Start-Up Sequence 1. -
Page 169: Check Rotation (Open-Drive Motor)
Check Rotation (Open-Drive Motor) Open Drive Motor Initial Start-Up Initial Uncoupled Start-Up The initial start-up of the motor should be made with the motor uncoupled. Verify that oil has been added to each bearing housing to the correct level. 1. If the motor is equipped with unidirectional fans (refer to the certified drawing) and verification of rotation direction is required, the following procedure should be followed: a. - Page 170 If the bearing temperature rises and motor operation appears to be normal, operation should continue until the bearing temperatures stabilize. Recommended limits on bearing temperature rises over ambient temperature are as follows: Sleeve Bearings By permanently installed detector By temporary detector on top of the bearing sleeve near the oil ring Note: When operating flood-lubricated sleeve bearings, the bearing temperature must not be allowed to exceed 185 F (85 C) total temperature.
- Page 171 CAUTION When the rate of bearing temperature rise is less than 2° F (1.1° C) per half-hour, the bearing temperature is considered to be stabilized. CAUTION If the total bearing temperature exceeds 195 F (91 C), the motor should be shut down immediately.
- Page 172 Initial Coupled Start-Up After initial uncoupled start-up, the following steps should be taken to ensure safe coupled operation: 1. Follow the procedure stated in General Maintenance, Machine Alignment section to align the motor to the driven machine. 2. Prepare the coupling for operation in accordance with the coupling manufacturer’s instructions.
- Page 173 5. Carefully observe the vibration of the bearing housing and any abnormal noise generator. Note that motor vibration may not be identical to the uncoupled values. If coupled vibration is excessive, recheck the mounting and alignment. 6. Carefully observe the bearing temperature rise and the movement of the oil ring. If the bearing temperature rise and motor operation appear normal, operation should con- tinue until the bearing temperatures stabilize.
-
Page 174: Check Rotation (Hermetic Motor)
If the motor is of TEWAC (Totally Enclosed Water-to-Air Cooled) design, the maximum inlet water temperature and the water flow rate (GPM) at the air cooler must be as shown by the certified drawing. Otherwise, the discharge air temperature from the cooler (actually the ambient air for the motor as shown by the main nameplate) could be too high for the motor to properly cool. -
Page 175: Check Oil Pressure And Compressor Stop
CAUTION Do not check motor rotation during coastdown. Rotation may have reversed dur- ing equalization of vessel pressures. Check Oil Pressure and Compressor Stop 1. When the motor is up to full speed, note the differential oil pressure reading on the LID default screen. -
Page 176: To Prevent Accidental Start-Up
RLA by manually overriding the guide vane target value on the LID and setting the chilled water set point to a low value. Do not exceed 105% of the nameplate RLA. 3. When a steady motor current value in the desired range is met, compare the compressor motor amps value on the Status01 screen to the actual amps shown on the ammeter on the starter. -
Page 177: Hot Alignment Check For Open-Drive Machines
The procedures are detailed in the Maintenance section. A clamping tool, Part No. TS-170, is available for checking alignment without disassembling the couplings. Check with your local Carrier representative. WARNING Never operate compressor or drive with coupling guards removed. Serious injury can result from contact with rotating equipment. -
Page 178: Check Machine Operating Condition
Check Machine Operating Condition Check to be sure that machine temperatures, pressures, water flows, and oil and refrigerant levels indicate that the system is functioning properly. Instruct the Customer Operator Check to be sure that the operator(s) understands all operating and maintenance procedures. - Page 179 Motor Compressor Assembly Guide vane actuator, transmission, motor cooling system, oil cooling system, temperature and pressure sensors, oil sight glasses, integral oil pump, isolatable oil filter, extra oil and motor temperature sensors, synthetic oil, and compressor serviceability. Motor Compressor Lubrication System Oil pump, cooler filter, oil heater, oil charge and specification, operating and shutdown oil level, temperature and pressure, oil charging connections, and seal oil chambers.
-
Page 180: Operating Instructions
Safety Devices and Procedures Electrical disconnects, relief device inspection, and handling refrigerant. Check Operator Knowledge Start, stop, and shutdown procedures, safety and operating controls, refrigerant and oil charging, and job safety. Review the Start-Up, Operation, and Maintenance Manual Operator Duties 1. -
Page 181: Check The Running System
Prepare the Machine for Start-Up Follow the steps described in the To Start the Machine 1. Start the water pumps, if they are not automatic. 2. On the LID default screen, press the LOCAL or CCN softkey to start the system. If the machine is in the OCCUPIED mode, and the 3- and 15-minute start timers have expired, the start sequence will start. - Page 182 At shutdown, oil level should be halfway in the lower sight glass. 4. The oil pressure should be between 18 and 30 psi (124 to 207 kPa) differential, as seen on the LID default screen. Typically the reading will be 18 to 25 psi (124 to 172 kPa) at initial start-up.
-
Page 183: To Stop The Machine
based on kW rate or temperature rate. It is accessed on the Equipment Configuration menu Config screen (Table 2, Example 9. On open-drive machines, the oil pump will be energized once every 12 hours during shutdown periods to ensure that the shaft seal is filled with oil. To Stop the Machine 1. -
Page 184: After Extended Shutdown
After Limited Shutdown No special preparations should be necessary. Follow the regular preliminary checks and starting procedures. Control Power must be maintained in order to keep oil temperature hot and all control safeties operational. The oil pump on open-drive machines will operate occasionally to keep the contact seal filled with oil to prevent refrigerant loss. -
Page 185: Manual Guide Vane Operation
Check the cooler pressure on the LID default screen, and compare to the original holding charge that was left in the machine. If (after adjusting for ambient temperature changes) any loss in pressure is indicated, check for refrigerant leaks. See Recharge the machine by transferring refrigerant from the utility vessel. -
Page 186: Refrigeration Log
Keep a record of the machine pressures, temperatures, and liquid levels on a sheet similar to that shown. Automatic recording of PIC data is possible through the use of CCN devices such as the Data Collection module and a Building Supervisor. Contact your Carrier representative for more information. -
Page 187: Pumpout And Refrigerant Transfer Procedures
Pumpout and Refrigerant Transfer Procedures Preparation The 17/19EX may come equipped with an optional pumpout compressor. The refrigerant can be pumped for service work to either the cooler/condenser/compressor sections or the utility vessel by using the pumpout system. The following procedures are used to describe how to transfer refrigerant from vessel to vessel and perform machine evacuations. - Page 188 To Read Refrigerant Pressures 1. The LID display on the machine control center is suitable for determining refrigerant-side pressures and low (soft) vacuum. For evacuation or dehydration measurement, use a quality vacuum indicator or manometer to ensure the desired range and accuracy. This can be placed on the Schrader connections on each vessel the pressure transducer.
- Page 189 Click here for Figure 33 — Pumpout Unit Wiring Schematic (19EX Shown) Click here for Figure 34 — Optional Pumpout Compressor Transferring Refrigerant from Normal Operation into the Utility Vessel These steps describe the method of moving refrigerant from the cooler/condenser/ compressor sections into the utility vessel.
- Page 190 d. When all liquid has been pushed into the utility vessel, close the cooler isolation valve 7. e. Access the Control Test, Pumpdown function on the LID display to turn on the machine water pumps and view the machine pressures. f.
- Page 191 Transferring Refrigerant from Normal Operation into the Cooler/Condenser/ Compressor Section These steps describe the method of moving refrigerant from the utility vessel into the cooler/ condenser/compressor section. This is normally performed for service work on the utility vessel. 1. Isolate and push refrigerant into the cooler/condenser/compressor section: a.
- Page 192 b. Valve positions: Close valves 3 and 4, open valves 2 and 5. Valve Condition c. Turn on pumpout condenser water. d. Run the pumpout compressor until the suction reaches 15 in. Hg (50 kPa abs). Monitor pressures on the LID and on refrigerant gages. e.
- Page 193 Return Refrigerant to Normal Operating Conditions 1. Be sure that the vessel that was opened has been evacuated and dehydrated. 2. Access the Control Test, terminate lockout function to view vessel pressures and to turn on machine water pumps. 3. Open valves 1, 3, and 6. Valve Condition 4.
- Page 194 9. Close valves 1, 3, 5, and 6. Valve Condition 10. Continue on with the terminate lockout function on the LID to turn off water pumps and enable the compressor for operation.
-
Page 195: General Maintenance
Refrigerant Properties HFC-134a is the standard refrigerant in the 17/19EX. At normal atmospheric pressure, HFC-134a will boil at -14 F (-25 C) and must, therefore, be kept in pressurized containers or storage tanks. The refrigerant is practically odorless when mixed with air. This refrigerant is non-combustible at atmospheric pressure. -
Page 196: Adding Refrigerant
30 psig (207 kPa) for HFC-134a. Removing Refrigerant When the optional pumpout system is used, the 17/19EX refrigerant charge may be transferred to a storage vessel, or within the utility vessel. Follow procedures in the and Refrigerant Transfer Procedures... -
Page 197: Refrigerant Leak Testing
10% of the operating refrigerant charge per year. Additionally, Carrier recommends that leaks totalling less than the above rate but more than a rate of 1 lb (0.5 kg) per year should be repaired during annual maintenance or whenever the refrigerant is pumped over for other service work. - Page 198 WARNING HFC-134a MUST NOT be mixed with air or oxygen and pressurized for leak test- ing. In general, this refrigerant should not be allowed to be present with high con- centrations of air or oxygen above atmospheric pressures, as the mixture can undergo combustion.
-
Page 199: Repair The Leak, Retest, And Apply Standing Vacuum Test
pressure reaches test level. Do not exceed 140 psig (965 kPa). 5. Close the charging valve on the machine. Remove the copper tube if no longer required. Repair the Leak, Retest, and Apply Standing Vacuum Test After pressurizing the machine, test for leaks with an electronic leak detector, soap bubble solution, or an ultrasonic leak detector. - Page 200 Click here for Figure 35 — Electronic Vane Actuator Linkage Contact Seal Maintenance (Open-Drive Machines) (Refer to During machine operation, a few drops of oil per minute normally seeps through the space between the contact sleeve (Item 16) and the shaft locknut (Item 8). This oil slowly accumulates in an atmospheric oil chamber and is automatically returned to the system by a seal oil return pump.
- Page 201 Seal Disassembly (Figure Contact seal disassembly and repair should be performed only by well qualified compressor maintenance personnel. These disassembly instructions are included only as a convenient reference for the authorized serviceman. For ease of disassembly, refer to 1. Remove refrigerant. 2.
- Page 202 11. Place contact sleeve in a protected area to avoid damage to lapped face. 12. Remove outer carbon ring (Item 17). Handle carefully . 13. Remove spray header (Item 3). 14. Use a spanner wrench to remove shaft nut (Item 8). 15.
- Page 203 Seal Reassembly (Figure Be sure that all gasket surfaces are clean and that all holes, including oil holes, are properly aligned between gasket and mating flange. Coat gasket with oil-graphite mixture to prevent sticking. 1. Assembly guide-ring spring (Item 26) and guide-ring assembly (Items 20, 24 and 25). Check that travel of inner carbon seal ring (Item 20) is .06 in.
- Page 204 9. Place outer spring (Item 15) over sleeve. 10. Separately assemble seal housing cover (Item 2), packing gland gasket (Item 13), packing gland (Item 14), and O-ring (Item 12). 11. Oil the contact sleeve and the O-ring and place the housing and gland assembly over the sleeve.
-
Page 205: Machine Alignment (Open-Drive Machines)
Machine Alignment (Open-Drive Machines) Alignment Methods There are several established procedures for aligning shafts. The dial indicator method is presented here since it is considered to be one of the most accurate and reliable. Another faster and easier method for alignment involves the use of laser alignment tools and computers. Follow the laser tool manufacturer’s guidelines when using the laser technique. - Page 206 2. Follow the alignment sequence specified in the 3. All alignment work is performed on gear and drive equipment. Once the compressor is bolted in a perfectly level position and is piped to cooler and condenser, it must not be moved prior to hot check.
- Page 207 Note: Drive shaft end-float at final drive position must not allow coupling hub faces to contact, or the coupling shroud to bind. Preliminary Alignment To get within dial indicator range, roughly align the equipment as shown in described below. Place a straight edge across the OD of one coupling to the OD of the other. Measure the gap between the straight edge and the OD of the second coupling with a feeler gage.
- Page 208 Near Final Alignment Once the machine components are within dial indicator range, the adjustments for misalignment should be made in a specific sequence. The four positions of alignment described below are arranged in the recommended order. 1. Angular in elevation — This alignment is adjusted with shims and is not readily lost in making the other adjustments.
- Page 209 3. Angular in plan —This position can easily be lost if placed ahead of the two adjustments in elevation. 4. Parallel in plan — This adjustment cannot be made while there is still angular misalignment in plan, and can easily be lost if elevation adjustments are made.
- Page 210 Correcting Angular Misalignment Preparation — Shaft angular misalignment is measured on the face of the coupling hubs or on brackets attached to each shaft (see they extend the diameter of the face readings. Attach a dial indicator to one coupling hub or shaft and place the indicator button against the face of the opposite hub.
- Page 211 Click here for Figure 39 — Measuring Angular Misalignment on Brackets Measurement — Occasionally, coupling faces may not be perfectly true, or may have been damaged in handling. To compensate for any such runout, determine the actual or ‘‘net’’ shaft misalignment as follows: Check the opening at the top and at the bottom of the coupling faces (or at each side when making plan adjustment).
- Page 212 or to a burr or other damage to the coupling face. If the larger opening remains the same, and remains on the same side, the amount is entirely shaft (net) misalignment. If the larger opening remains on the same side but changes amount, misalignment and runout are present.
- Page 213 Adjustment — Having obtained the net misalignment, the amount by which the equipment must be moved can now be calculated. To determine: S — amount of movement (in plan) or the thickness of shim (in elevation) required. Obtain: D — coupling face diameter in inches (or indicator button circle) L —...
- Page 214 If the larger opening between coupling faces is at the top, place .072 in. of shim under each rear foot or remove .072 in. from the front footings to bring the couplings into angular alignment in elevation. Tighten the holddown bolts and recheck the net misalignment. The height of the shaft above the footings and the distance the shaft extends beyond the equipment will not affect the calculations.
- Page 215 Click here for Figure 41 — Adjusting Angular Misalignment in Plan 5. Tighten the holddown bolts and recheck the indicator. If the reading has changed, loosen the three bolts and readjust. It may be necessary to over or undershoot the desired reading to allow for the effect of bolt tightening.
- Page 216 points side to side in a similar manner when checking for misalignment in plan. Measurement — With dial set at zero in the top position, rotate the shaft to which the indicator is attached 180 degrees. If the dial reading is plus, the shaft on which the button rests is low.
- Page 217 Final Alignment The procedures and tolerance requirements for final alignment are the same as those de- scribed in the Near Final Alignment and machine hot check. All piping, including water and steam, must be completed, but the water and refrigerant charges need not be in place. Hot Alignment Check General When all machine components have reached operating temperature (after running near full...
- Page 218 Disassembled Couplings 1. Shut down machine. 2. With machine hot, quickly disassemble couplings. 3. Check angular and parallel alignment in plan and elevation as described in the Alignment section. Record the indicator readings (see necessary adjustments to bring alignment within .002 TIR and .00033 inches per in. of coupling face traverse (or in.
- Page 219 Assembled Couplings If there is room on the shaft between coupling and component to clamp a sturdy bracket, the arrangement illustrated in Figure 43 the shaft. This method is quicker because the couplings do not have to be disassembled. In addition, eccentricity or coupling face runout are not problems since both shafts rotate together.
- Page 220 Doweling Techniques After hot alignment check has been completed, the compressor, gear and drive must be doweled to their soleplates. Doweling permits exact repositioning of components if they have to be moved. 1. Doweling must be completed with equipment at maximum operating temperature (full load). 2.
-
Page 221: Check The Lubrication System
The oil charge is approximately 15 gallons (57 L) for EX and FA (size 421-469) style compressors; 20 gallons (76 L) for EA (size 531-599) style compressors. The added oil must meet Carrier’s specifications. Refer to Changing Oil Filter Oil Changes by noting the amount and date. - Page 222 off. The LID Status02 screen displays whether the heater is energized or not. If the PIC shows that the heater is energized, but the sump is not heating up, the power to the oil heater may be off or the oil level may be too low. Check the oil level, the oil heater contactor voltage, and oil heater resistance.
-
Page 223: Scheduled Maintenance
Establish a regular maintenance schedule based on the actual machine requirements such as machine load, run hours, and water quality. The time intervals listed in this section are offered as guides to service only. Service Ontime The LID will display a SERVICE ONTIME value on the Status01 screen. This value should be reset to zero by the service person or the operator each time major service work is completed so that time between service can be viewed. -
Page 224: Changing Oil Filter
Check Safety and Operating Controls Monthly To ensure machine protection, the Control Test Automated Test should be done at least once per month. See Table 3 Changing Oil Filter 19EX Compressors Change the oil filter on an annual basis or when the machine is opened for repairs. The 19EX compressor has an isolatable oil filter so that the filter may be changed with the refrigerant remaining in the machine. - Page 225 indicated. Screw the assembly into the locking ring. 8. Evacuate the filter/piping assembly. 9. Open the isolation valves. FA Style Compressors 1. Turn off oil heater. 2. Close the line valve (Figure Note: FA STYLE COMPRESSORS DO NOT HAVE ISOLATION VALVE NO. 2, ONLY A CHECK VALVE.
-
Page 226: Oil Specification
Part No. PP23B2103). Oil Changes Carrier recommends changing the oil after the first year of operation and every three to five years thereafter as a minimum along with a yearly oil analysis. However, if a continuous oil monitoring system is functioning and a yearly oil analysis is performed, time between oil... -
Page 227: Refrigerant Filter
To Change the Oil 1. Open the control and oil heater circuit breaker. 2. Drain the oil reservoir by opening the oil charging valve, 26). Slowly open the valve against refrigerant pressure. 3. Change the oil filter at this time. See 4. -
Page 228: Inspect Refrigerant Float System
Transfer the refrigerant into the cooler vessel, or into a storage tank. There are two floats on the 17/19EX, one on each side of the utility vessel. Remove the float access covers. Clean the chambers and valve assembly thoroughly. Be sure that the valves move freely. Make sure that all openings are free of obstructions. -
Page 229: Coupling Maintenance (Open-Drive Machines)
effects of overpressure. To ensure against damage to the equipment and possible injury to personnel, these devices must be kept in peak operating condition. As a minimum, the following maintenance is required. 1. At least once a year, disconnect the vent piping at the valve outlet and carefully inspect the valve body and mechanism for any evidence of internal corrosion or rust, dirt, scale, leakage, etc. -
Page 230: Motor Maintenance (Open-Drive Machines)
8 oz. of Kop-Flex KHP high performance coupling grease (Carrier Part No. 17DK 680 001). Install new gaskets. When the coupling assembly is removed for scheduled service of the carbon seal, replace the O-ring, spacer gaskets, and hex bolts. - Page 231 repair, recondition, or rebuild the motor, it is recommended that the nearest Westinghouse apparatus repair facility be consulted. In addition to a daily observation of the appearance and operation of the motor, it is recommended that a general inspection procedure be established to periodically check the following items: 1.
- Page 232 air-to-air heat exchanger of TEAAC motors should be cleaned using a supplied tube brush having synthetic fiber bristles (not wire of any type). The standard cooler is equipped with steel tubes, however, in special cases aluminum tubes may be used and wire brushes can seriously erode the tube interiors over several cleanings.
- Page 233 ducts through the stator core and by reducing heat transfer from the winding insulation surfaces to the cooling air. Conducting contaminants can change or increase electrical stresses on the insulation and corrosive contaminants can chemically attack and degrade the insulation. This may lead to shortened insulation life and failure.
- Page 234 solvent such as inhibited methyl chloroform may be used, but must be used sparingly and immediately removed. While this solvent is non-flammable under ordinary conditions, it is toxic and proper health and safety precautions should be followed while using it. Solvents of any type should never be used on windings provided with abrasion protection.
- Page 235 The viscosity of the oil must be 32 ISO (150 SSU) at 100 F (37.7 C). Oil capacity in each of the 2 bearings is 0.6 gal. (2 l) per bearing. Use of Carrier Oil Specification PP16-0 is approved (Mobil DTE Light or Sun Oil SUNVIS 916).
- Page 236 The following is the recommended procedure for removing the bearing sleeve: 1. Remove the oil drain plug in the housing bottom and drain the oil sump. 2. Remove all instrumentation sensors that are in contact with the bearing sleeve. These would include resistance temperature detectors, thermocouples, temperature relay bulbs, thermometers, etc.
- Page 237 reassemble them to avoid any mix up in parts or damage to the surfaces at the partings. 7. When removing the labyrinth seals, make note of the position of the anti-rotation button located on the inside of the top half of the seal. Pull up the garter spring surrounding the floating labyrinth seal and carefully slip out the top half.
- Page 238 WARNING Use extreme care when rolling out the lower bearing half. Keep the hands and fin- gers well clear of any position where they might be caught by the bearing half if it were accidentally released and rotated back to its bottom position. Serious per- sonal injury could result.
- Page 239 CAUTION During the reassembly of the bearing parts, a thin layer of Curil-T should be applied to all gasketed and machined interface surfaces. This suggestion does not apply to the machined surfaces of the bearing liner halves. CAUTION When seating the bearing shell, apply a thin layer of lube oil at the spherical sur- face of the liner.
- Page 240 3. All parts should be carefully inspected for nicks, scratches, etc., in any contact surfaces. Such imperfections should be removed by an appropriate method such as stoning, scraping, filing, etc., followed by thorough cleaning. 4. Apply a few drops of oil to the journal and bearing saddles. 5.
- Page 241 straightness and make any corrections required. Do not force the ring halves together. Excessive force may alter the roundness or flatness of the ring which can change its oil delivery performance. Apply locking compound to the oil ring screws prior to reassembly. 10.
- Page 242 CAUTION Do not force bearing cap down. Damage could occur to the labyrinth seals. If the bearing cap does not seat completely, remove and reset the floating labyrinth seal position. When installing upper bearing cap the floating labyrinth seals sometimes rotate and the anti-rotation ‘‘tab’’...
-
Page 243: Open-Drive Motor Handling/Rigging
Open-Drive Motor Handling/Rigging Each motor is provided with lifting lugs, welded to the four corners of the motor frame, for lifting the assembled machine. The motor should always be lifted by using the lifting lugs located on all four corners of the motor frame. (See CAUTION Spreader bars of adequate capacity and number must be used to avoid applying any pressure against the top air housing with the lifting plugs. -
Page 244: Open-Drive Motor Storage
CAUTION Uneven lifting must always be avoided. When single point lifting is to be used, slings of equal lengths must always be used to avoid uneven lifting. CAUTION Under no circumstances should the motor be lifted using the shaft as an attach- ment point. - Page 245 should be energized at the voltage shown by the space heater nameplate attached to the motor. Incandescent light bulbs can be placed within the motor to provide heat. However, if used, they must not be allowed to come in contact with any parts of the motor because of the concentrated hot spot that could result.
-
Page 246: Inspect The Heat Exchanger Tubes
Compressor Bearing and Gear Maintenance The key to good bearing and gear maintenance is proper lubrication. Use the proper grade of oil, maintained at recommended level, temperature, and pressure. Inspect the lubrication system regularly and thoroughly. Only a trained service technician should remove and examine the bearings. The bearings and gears should be examined on a scheduled basis for signs of wear. - Page 247 Because HFC134-a is a high-pressure refrigerant, air usually does not enter the machine, rather, the refrigerant leaks out. During the tube cleaning process, use brushes especially designed to avoid scraping and scratching the tube wall. Contact your Carrier representative to obtain these brushes. Do not use wire brushes.
-
Page 248: Water Leaks
CAUTION Hard scale may require chemical treatment for its prevention or removal. Consult a water treatment specialist for proper treatment. Water Leaks Water is indicated during machine operation by the refrigerant moisture indicator on the refrigerant motor cooling line. Water leaks should be repaired immediately. CAUTION Machine must be dehydrated after repair of water leaks. -
Page 249: Inspect The Starting Equipment
Water must be within design flow limits, clean, and treated to ensure proper machine performance and reduce the potential of tubing damage due to corro- sion, scaling, erosion, and algae. Carrier assumes no responsibility for chiller damage resulting from untreated or improperly treated water. - Page 250 WARNING Never open isolating knife switches while equipment is operating. Electrical arc- ing can cause serious injury. Inspect starter contact surfaces for wear or pitting on mechanical-type starters. Do not sandpaper or file silver-plated contacts. Follow the starter manufacturer’s instructions for contact replacement, lubrication, spare parts ordering, and other maintenance requirements.
-
Page 251: Check Pressure Transducers
Pumpout System Maintenance For compressor maintenance details, refer to the 06D, 07D Installation, Start-Up, and Service Instructions. Optional Pumpout Compressor Oil Charge Use oil conforming to Carrier specifications for reciprocating compressor usage. Oil requirements are as follows: • HFC-134a ISO Viscosity ...68 Carrier Part Number ...PP23BZ103... - Page 252 Oil should be visible in the compressor sight glass both during operation and at shutdown. Always check the oil level before operating the compressor. Before adding or changing oil, relieve the refrigerant pressure as follows: 1. Attach a pressure gage to the gage port of either compressor service valve 2.
-
Page 253: Ordering Replacement Chiller Parts
Ordering Replacement Chiller Parts When ordering Carrier specified parts, the following information must accompany an order: • machine model number and serial number • name, quantity, and part number of the part required • delivery address and method of shipment... -
Page 254: Troubleshooting Guide
Overview The PIC has many features to aid the operator and the technician in troubleshooting a 17/19EX machine. • By using the LID display, the chiller actual operating conditions can be viewed while the unit is running. • The Control Algorithm Status screens will display various screens of information in... -
Page 255: Checking The Display Messages
Checking the Display Messages The first area to check when troubleshooting the 17/19EX is the LID display. If the alarm light is flashing, check the primary and secondary message lines on the LID default screen 14). These messages will indicate where the fault is occurring. The Alarm History table on the LID Service menu will also carry an alarm message to further expand on this alarm. - Page 256 Resistance Check Turn off the control power and disconnect the terminal plug of the sensor in question from the module. Measure sensor resistance between receptacles designated by the wiring diagram with a digital ohmmeter. The resistance and corresponding temperature is listed in Table 9B.
- Page 257 Check Sensor Accuracy Place the sensor in a medium of a known temperature and compare that temperature to the measured reading. The thermometer used to determine the temperature of the medium should be of laboratory quality with 0.5° F (.25° C) graduations. The sensor in question should be accurate to within 2°...
-
Page 258: Checking Pressure Transducers
Checking Pressure Transducers There are 3 pressure transducers on hermetic machines. These determine cooler, condenser, and oil pressure. Open-drive machines have 4 transducers. These transducers sense cooler pressure, condenser pressure, oil supply pressure, and oil sump pressure. The oil supply pressure and the oil transmission sump pressure difference is calculated by a differential pressure power supply module on open-drive machines. - Page 259 To calibrate oil pressure differential on open-drive machines, refer to Calibration at the end of this section. Calibration can be checked by comparing the pressure readings from the transducer against an accurate refrigeration gage. These readings are all viewed or calibrated from the Status01 table on the LID.
- Page 260 from the transducer by the supply voltage signal, measured at the PSIO terminals J7-J34 and J7-J35. For example, the condenser transducer voltage input is measured at PSIO ter- minals J7-1 and J7-2. The voltage ratio must be between 0.80 vdc and 0.11 vdc for the soft- ware to allow calibration.
- Page 261 Oil Differential Pressure/Power Supply Module Calibration (See The oil reservoir in the 17EX machine is not common to cooler pressure. Therefore, a comparison of pump output to cooler pressure could not be used to provide differential oil pressure information. A different method has been developed. Oil transmission sump pressure and oil supply pressure are fed to a comparator circuit on a 5V power supply board.
- Page 262 Troubleshooting Transducers When troubleshooting transducers, keep the negative lead of your voltohmmeter on terminal U4 of the power supply (or terminal 4 on power supplies without the comparator circuit). voltage VO1 = (VH1-VL1) + .467 ± .1 V For all PIC transducers: Measured pressure = (507.97 ×...
-
Page 263: Control Algorithms Checkout Procedure
Control Algorithms Checkout Procedure In the LID Service menu, one of the tables is Control Algorithm Status. This table contains 6 tables that may be viewed in order to see how the particular control algorithm is operating. MAINT01 Capacity Control MAINT02 Override Status MAINT03... - Page 264 Control Test The Control Test feature can check all of the thermistor temperature sensors, including those on the Options modules, pressure transducers, pumps and their associated flow switches, the guide vane actuator, and other control outputs, such as hot gas bypass. The tests can help to determine whether a switch is defective, or a pump relay is not operating, among other useful troubleshooting tests.
- Page 265 Click here for Table 8C — In Recycle Shutdown Click here for Table 8D — Pre-Start Alerts Click here for Table 8E — Normal or Auto.-Restart Click here for Table 8F — Start-Up Failures Click here for Table 8G — Compressor Jumpstart and Refrigerant Protection Click here for Table 8H —...
- Page 266 Click here for Table 8I — Normal Run Overrides Active (Alerts) Click here for Table 8J — Out-of-Range Sensor Failures Click here for Table 8K — Machine Protect Limit Faults Click here for Table 8L — Machine Alerts Click here for Table 8M — Spare Sensor Alert Messages Click here for Table 8N —...
-
Page 267: Control Modules
Click here for Table 9A — Thermistor Temperature (F) vs Resistance/Voltage Drop Click here for Table 9B — Thermistor Temperature (C) vs Resistance/Voltage Drop Control Modules CAUTION Turn controller power off before servicing controls. This ensures safety and pre- vents damage to controller. The Processor module (PSIO), 8-input (Options) modules, Starter Management Module (SMM), and the Local Interface Device (LID) module perform continuous diagnostic evaluations of the hardware to determine its condition. - Page 268 Red LED If the LED is blinking continuously at a 2-second rate, it is indicating proper operation. If it is lit continuously it indicates a problem requiring replacement of the module. Off continuously indicates that the power should be checked. If the red LED blinks 3 times per second, a software error has been discovered and the module must be replaced.
- Page 269 PSIO Module Green LED Closest to Communications Connection — Communication with SMM and 8- input module; must blink continuously. Other Green LED — Communication with LID; must blink every 3 to 5 seconds. 8-Input Modules and SMM Green LED — Communication with PSIO module; will blink continuously.
-
Page 270: Notes On Module Operation
Notes on Module Operation 1. The machine operator monitors and modifies configurations in the microprocessor through the 4 softkeys and the LID. Communication with the LID and the PSIO is accomplished through the CCN bus. The communication between the PSIO, SMM, and both 8-input modules is accomplished through the sensor bus, which is a 3-wire cable. - Page 271 If all modules indicate communications failure, check communications plug on the PSIO module for proper seating. Also check the wiring (CCN bus — 1:red, 2:wht, 3:blk; Sensor bus — 1:red, 2:blk, 3:clr/wht). If a good connection is assured and the condition persists, replace the PSIO module.
-
Page 272: Processor Module (Psio)
Processor Module (PSIO) Inputs Each input channel has 3 terminals; only 2 of the terminals are used. Application of machine determines which terminals are normally used. Always refer to individual unit wiring for terminal numbers. Outputs Output is 20 vdc. There are 3 terminals per output, only 2 of which are used, depending on the application. -
Page 273: Starter Management Module (Smm)
Starter Management Module (SMM) Inputs Inputs on strips J2 and J3 are a mix of analog and discrete (on/off) inputs. Application of the machine determines which terminals are used. Always refer to the individual unit wiring diagram for terminal numbers. Outputs Outputs are 24 vdc and wired to strip J1. -
Page 274: Options Modules (8-Input)
Options Modules (8-Input) The options modules are optional additions to the PIC, and are used to add temperature reset inputs, spare sensor inputs, and demand limit inputs. Each option module contains 8 inputs, each input meant for a specific duty. See the wiring diagram for exact module wire terminations. -
Page 275: Replacing Defective Processor Modules
The proper software is factory-installed by Carrier in the replacement module. When ordering a replacement processor module (PSIO), specify complete replacement part number, full unit model number, and serial number. - Page 276 Installation of New PSIO Module 1. Verify if the existing PSIO module is defective, by using the procedure described in the Notes on Module Operation to Network Device table if the LID displays communication failure. 2. Data regarding the PSIO configuration should have been recorded and saved. This data will have to be reconfigured into the LID.
- Page 277 5. Package the defective module in the carton of the new module for return to Carrier. 6. Restore control system power (LID will show ‘‘COMMUNICATION FAILURE’’ at bottom of screen). 7. Access the SERVICE menu. Highlight and select ‘‘ATTACH TO NETWORK DEVICE.’’...
- Page 278 14. After the PSIO tables have been uploaded into the LID, access the STATUS01 screen. Move the highlight bar to the ‘‘TOTAL COMPRESSOR STARTS’’ value. Select this value and increase the value until it is the same as the value from the old module. Press ENTER to save this value.
-
Page 279: 17/19Ex Physical Data And Wiring Schematics
Click here for Figure 54 — Model Number Nomenclature for Compressor Size (See Figure 1 also) Click here for Table 10 — 17/19EX Heat Exchanger, Economizer/Storage Vessel, Piping, and Pumpout Unit Weights Click here for Table 11 — Additional Condenser Weights Click here for Table 12 —... - Page 280 Click here for Table 16 — Auxiliary Systems, Electrical Data Compressor Fits and Clearances Service and repair of Carrier centrifugal compressors should be performed only by fully trained and qualified service personnel.The information in this section is included as a reference for such personnel only.
- Page 281 Click here for Table 17 — Open-Drive Compressor Fits and Clearances Click here for Figure 56 — Hermetic Compressor Fits and Clearances Click here for Table 18 — Hermetic Compressor Fits and Clearances Click here for Figure 57 — Electronic PIC Controls Wiring Schematic — Hermetic Machine Click here for Figure 58 —...
- Page 282 Click here for Figure 60 — Hermetic Drive — Power Panel With Water-Cooled Oil Cooler Click here for Figure 61 — Hermetic Drive — Power Panel With Motor Cooling Solenoid Click here for Figure 62 — Open Drive — Power Panel Click here for Initial Start-Up Checklist for 17/19EX Centrifugal Liquid Chiller...
- Page 283 Table 1 — Major PIC Components and Panel Locations* PIC Component Processor Sensor Input/Output Module (PSIO) Starter Management Module (SMM) Local Interface Device (LID) 6-Pack Relay Board 8-Input Modules (Optional) Oil Differential Pressure/Power Supply Module Oil Heater Contactor (1C) Oil Pump Contactor (2C) Hot Gas Bypass Relay (3C) (Optional) Control Transformers (T1-T4) Control and Oil Heater Voltage Selector...
- Page 284 Table 2 — LID Screens Notes: 1. Only 12 lines of information appear on the LID screen at any given time. Press NEXT or PREVIOUS to highlight a point or to view points below or above the current screen. 2. The LID may be configured in English or SI units, as required, through the LID configuration screen. 3.
- Page 285 Table 2, Example 1 — Status01 Display Screen (Continued) Description Entering Chilled Water Leaving Chilled Water Entering Condenser Water Leaving Condenser Water Evaporator Refrig Temp Evaporator Pressure Condenser Refrig Temp Condenser Pressure Discharge Temperature Bearing Temperature † Motor Winding Temp Motor Winding Hi Temp Cutout** Oil Sump Temperature...
- Page 286 Example 2 — Status02 Display Screen To access this display from the LID default screen: 1. Press MENU. 2. Press STATUS. 3. Scroll down to highlight STATUS02. 4. Press SELECT. Table 2, Example 2 — Status02 Display Screen Description Hot Gas Bypass Relay *Chilled Water Pump Chilled Water Flow *Condenser Water Pump...
- Page 287 Example 3 — Status03 Display Screen To access this display from the LID default screen: 1. Press MENU. 2. Press STATUS. 3. Scroll down to highlight STATUS03. 4. Press SELECT. Table 2, Example 3 — Status03 Display Screen Description OPTIONS BOARD 1 *Demand Limit 4-20 mA *Temp Reset 4-20 mA *Common CHWS Sensor...
- Page 288 Example 4 — Setpoint Display Screen To access this display from the LID default screen: 1. Press MENU. 2. Press SETPOINT. Table 2, Example 4 — Setpoint Display Screen Configurable Description Range Base Demand Limit 40-100 LCW Setpoint 20-120 (–6.7-48.9) 20-120 (–6.7-48.9) ECW Setpoint 20-60 (–6.7-15.6)
- Page 289 Example 5 — Configuration (Config) Display Screen To access this display from the LID default screen: 1. Press MENU. 2. Press SERVICE. 3. Scroll down to highlight EQUIPMENT CONFIGURATION. 4. Press SELECT. 5. Scroll down to highlight CONFIG. 6. Press SELECT. Table 2, Example 5 —...
- Page 290 Example 6 — Lead/Lag Configuration Display Screen To access this display from the LID default screen: 1. Press MENU. 2. Press SERVICE. 3. Scroll down to highlight EQUIPMENT CONFIGURATION. 4. Press SELECT. 5. Scroll down to highlight Lead/Lag. 6. Press SELECT. Table 2, Example 6 —...
- Page 291 Example 7 — Service1 Display Screen To access this display from the LID default screen: 1. Press MENU. 2. Press SERVICE. 3. Scroll down to highlight EQUIPMENT SERVICE. 4. Press SELECT. 5. Scroll down to highlight SERVICE1. 6. Press SELECT. Table 2, Example 7 —...
- Page 292 Table 2, Example 7 — Service1 Display Screen (Continued) Description Demand Limit Source Select: Amps=0, Load=1 Amps Correction Factor Motor Rated Load Amps Motor Rated Line Voltage Meter Rated Line KW Line Frequency Select: 0=60 Hz, 1=50 Hz Compr Starter Type Condenser Freeze Point Soft Stop Amps Threshold †...
- Page 293 Example 8 — Service2 Display Screen To access this display from the LID default screen: 1. Press MENU. 2. Press SERVICE. 3. Scroll down to highlight EQUIPMENT SERVICE. 4. Press SELECT. 5. Scroll down to highlight SERVICE2. 6. Press SELECT. Table 2, Example 8 —...
- Page 294 Table 2, Example 8 — Service2 Display Screen (Continued) Description OPTIONS BOARD 2 20 mA POWER CONFIGURATION External = 0, Internal = 1 SPARE 1 20 mA Power Source SPARE 2 20 mA Power Source SPARE ALERT ENABLE Disable = 0, 1 = High Alert, 2 = Low Alert, 3 = High Alarm, 4 = Low Alarm Temp = Alert Threshold Spare Temp 4 Enable...
- Page 295 Example 9 — Service3 Display Screen To access this display from the LID default screen: 1. Press MENU. 2. Press SERVICE. 3. Scroll down to highlight EQUIPMENT SERVICE. 4. Press SELECT. 5. Scroll down to highlight SERVICE3. Table 2, Example 9 — Service3 Display Screen Description Proportional Inc Band Proportional Dec Band...
- Page 296 Example 10 — Maintenance (Maint01) Display Screen To access this display from the LID default screen: 1. Press MENU. 2. Press SERVICE. 3. Scroll down to highlight ALGORITHM STATUS. 4. Press SELECT. 5. Scroll down to highlight MAINT01. Table 2, Example 10 — Maintenance (Maint01) Display Screen Description CAPACITY CONTROL Control Point...
- Page 297 Example 11 — Maintenance (Maint02) Display Screen To access this display from the LID default screen: 1. Press MENU. 2. Press SERVICE. 3. Scroll down to highlight CONTROL ALGORITHM STATUS. 4. Press SELECT. 5. Scroll down to highlight MAINT02. 6. Press SELECT. Table 2, Example 11 —...
- Page 298 Example 12 — Maintenance (Maint03) Display Screen To access this display from the LID default screen: 1. Press MENU. 2. Press SERVICE. 3. Scroll down to highlight CONTROL ALGORITHM STATUS. 4. Press SELECT. 5. Scroll down to highlight MAINT03. 6. Press SELECT. Table 2, Example 12 —...
- Page 299 Example 13 — Maintenance (Maint04) Display Screen To access this display from the LID default screen: 1. Press MENU. 2. Press SERVICE. 3. Scroll down to highlight CONTROL ALGORITHM STATUS. 4. Press SELECT. 5. Scroll down to highlight MAINT04. 6. Press SELECT. Table 2, Example 13 —...
- Page 300 Table 3 — Protective Safety Limits and Control Settings Monitored Parameter Temperature Sensors Out Of Range Pressure Transducers Out Of Range Compressor Discharge Temperature Motor Winding Temperature Bearing Temperature Evaporator Refrigerant Temperature (Temp converted from Pressure Reading) Transducer Voltage Condenser Pressure – Switch –...
- Page 301 Operate water pumps with machine off. Manually reduce water flow and observe switch for proper cutout. Safety shutdown occurs when cutout time exceeds 3 seconds. NO ADJUSTMENTS ARE TO BE MADE ON THIS SETSCREW! (FACTORY ADJUSTED ONLY) Carrier Part No. HK06ZC033 * Applicable to open drive machines only. Limit 45 seconds...
- Page 302 Table 4 — Capacity Overrides First Stage Setpoint Override Capacity View/ Control Modify on LID Screen Equip- High ment Condenser Service1 Pressure Equip- High Motor ment Temperature* Service1 Equip- ment Refrigerant Service1 Temperature (Refrigerant Override Delta Temperature) Equip- ment High Service1 Compressor LIft (Surge...
- Page 303 Table 5A — HFC-134a Pressure — Temperature (F) Temperature (F) Pressure (psi) 6.50 7.52 8.60 9.66 10.79 11.96 13.17 14.42 15.72 17.06 18.45 19.88 21.37 22.90 24.48 26.11 27.80 29.53 31.32 33.17 35.08 37.04 39.06 41.14 43.28 45.48 47.74 50.07 52.47 54.93 57.46...
- Page 304 Table 5A — HFC-134a Pressure — Temperature (F) (Continued) Temperature (F) Pressure (psi) 104.40 108.18 112.06 116.02 120.08 124.23 128.47 132.81 137.25 141.79 146.43 151.17 156.01 160.96 166.01 171.17 176.45 181.83 187.32 192.93 198.66 204.50 210.47 216.55 222.76 229.09...
- Page 305 Table 5B — HFC-134a Pressure — Temperature (C) Temperature (C) Pressure (kPa) -18.0 -16.7 -15.6 -14.4 -13.3 -12.2 -11.1 -10.0 -8.9 -7.8 -6.7 -5.6 -4.4 -3.3 -2.2 -1.1 10.0 11.1 12.2 13.3 14.4 15.6 16.7 17.8 18.9 20.0 21.1 22.2 23.3 24.4 25.6...
- Page 306 Table 5B — HFC-134a Pressure — Temperature (C) (Continued) Temperature (C) Pressure (kPa) 26.7 27.8 28.9 30.0 31.1 32.2 33.3 34.4 35.6 36.7 37.8 38.9 40.0 41.1 42.2 43.3 44.4 45.6 46.7 47.8 48.9 50.0 51.1 52.2 53.3 54.4 55.6 56.7 57.8 58.9...
- Page 307 Table 6 — Recommended Torque Bolt size 1/4” Grade Ft-lbs Torque* N•m Bolt size Grade Ft-lbs Torque* N•m * Torque values based upon dry friction. 5/16” 3/8” 1/2” 5/8” SAE GR 5 DIN 8.8 3/4” 7/8” 1” 1 1/3” DIN 12.9 1 1/2”...
- Page 308 Table 7 — Control Test Menu Functions Tests To Be Performed 1. Automated Tests* 2. PSIO Thermistors 3. Options Thermistors 4. Transducers 5. Guide Vane Actuator 6. Pumps Devices Tested Operates the second through seventh tests Entering chilled water Leaving chilled water Entering condenser water Leaving condenser water Discharge temperature...
- Page 309 Table 7 — Control Test Menu Functions (Continued) Tests To Be Performed 7. Discrete Outputs 8. Pumpdown/Lockout 9. Terminate Lockout * During any of the tests that are not automated, an out-of-range reading will have an asterisk (*) next to the reading and a message will be displayed.
- Page 310 LEGEND For Table 8, A - N 1CR AUX — Compressor Start Contact CA P — Compressor Current CDFL — Condenser Water Flow CHIL S S — Chiller Start/Stop CMPD — Discharge Temperature — Condenser Pressure — Evaporator Refrigerant Temperature EVFL —...
- Page 311 Table 8 — LID Primary and Secondary Messages and Custom Alarm/Alert Messages with Troubleshooting Guides B. Timing Out or Timed Out Primary Message Secondary Message Unoccupied Mode Ready To Start In XX Remote Contacts Open Ready To Start In XX Stop Command In Effect Ready To Start In XX Recycle Restart Pending...
- Page 312 Table 8 — LID Primary and Secondary Messages and Custom Alarm/Alert Messages with Troubleshooting Guides C. In Recycle Shutdown Primary Message Secondary Message Occupied Mode Recycle Restart Pending Remote Contact Closed Recycle Restart Pending Start Command In Recycle Restart Effect Pending Ice Build Mode Recycle Restart...
- Page 313 Table 8 — LID Primary and Secondary Messages and Custom Alarm/Alert Messages with Troubleshooting Guides D. Pre-Start Alerts: These alerts only delay start-up. When alert is corrected, the start-up will continue. No reset is necessary. Primary Secondary Message Message Starts Limit Exceeded Prestart Alert High Motor Tempera- Prestart Alert...
- Page 314 Table 8 — LID Primary and Secondary Messages and Custom Alarm/Alert Messages with Troubleshooting Guides E. Normal or AUTO.-RESTART Primary Message Startup in Progress Startup in Progress Startup in Progress AutoRestart in Progress AutoRestart in Progress AutoRestart in Progress Secondary Message Probable Cause/Remedy Occupied Mode Machine starting.
-
Page 315: Start-Up Failures
Table 8 — LID Primary and Secondary Messages and Custom Alarm/Alert Messages with Troubleshooting Guides F. Start-Up Failures: This is an alarm condition. A manual reset is required to clear. Primary Secondary Message Message Low Oil Pressure Failure To Start Oil Press Sensor Fault Failure To... - Page 316 Table 8 — LID Primary and Secondary Messages and Custom Alarm/Alert Messages with Troubleshooting Guides F. Start-Up Failures: This is an alarm condition. A manual reset is required to clear. Primary Secondary Message Message Starter Transi- Failure To tion Fault Start 1CR AUX Con- Failure To...
- Page 317 Table 8 — LID Primary and Secondary Messages and Custom Alarm/Alert Messages with Troubleshooting Guides G. Compressor Jumpstart and Refrigerant Protection Secondary Primary Message Message Unit Should Be Stopped Unauthorized Operation Evap Press/Temp Potential Freeze- Too Low Disconnect Power Failure To Stop With Starter Loss Of Communciation...
- Page 318 Table 8 — LID Primary and Secondary Messages and Custom Alarm/Alert Messages with Troubleshooting Guides H. Normal Run with Reset, Temperature, Or Demand Primary Message Running — Reset Active Running — Reset Active Running — Reset Active Running — Temp Control Running —...
- Page 319 Table 8 — LID Primary and Secondary Messages and Custom Alarm/Alert Messages with Troubleshooting Guides I. Normal Run Overrides Active (Alerts) Primary Message Secondary Message High Condenser Pres- Run Capacity sure Limited High Motor Temperature Run Capacity Limited Low Evap Refrig Temp Run Capacity Limited High Compressor Lift...
- Page 320 Table 8 — LID Primary and Secondary Messages and Custom Alarm/Alert Messages with Troubleshooting Guides J. Out-of-Range Sensor Failures Primary Message Secondary Message Leaving CHW Tempera- Sensor Fault ture Entering CHW Tempera- Sensor Fault ture Condenser Pressure Sensor Fault Evaporator Pressure Sensor Fault Bearing Temperature Sensor Fault...
- Page 321 Table 8 — LID Primary and Secondary Messages and Custom Alarm/Alert Messages with Troubleshooting Guides K. Machine Protect Limit Faults WARNING Excessive numbers of the same fault can lead to severe machine damage. Seek service expertise. Primary Secondary Message Message High Discharge Temp Protective...
- Page 322 Table 8 — LID Primary and Secondary Messages and Custom Alarm/Alert Messages with Troubleshooting Guides K. Machine Protect Limit Faults (Continued) WARNING Excessive numbers of the same fault can lead to severe machine damage. Seek service expertise. Primary Secondary Message Message No Motor Current Protective...
- Page 323 Table 8 — LID Primary and Secondary Messages and Custom Alarm/Alert Messages with Troubleshooting Guides K. Machine Protect Limit Faults (Continued) WARNING Excessive numbers of the same fault can lead to severe machine damage. Seek service expertise. Primary Secondary Message Message Run AUX Contact Protective...
- Page 324 Table 8 — LID Primary and Secondary Messages and Custom Alarm/Alert Messages with Troubleshooting Guides L. Machine Alerts Primary Secondary Message Message High Amps at Shut- down Recycle Alert Leaving Cond Water Sensor Fault Temp Alert Entering Cond Water Sensor Fault Temp Alert Check Oil Filter...
- Page 325 Table 8 — LID Primary and Secondary Messages and Custom Alarm/Alert Messages with Troubleshooting Guides L. Machine Alerts (Continued) Primary Secondary Message Message Excessive Recycle Starts Recycle Alert * [LIMIT] is shown on the LID as the temperature, pressure, voltage, etc., set point predefined or selected by the operator as an override, alert, or alarm contition.
- Page 326 Table 8 — LID Primary and Secondary Messages and Custom Alarm/Alert Messages with Troubleshooting Guides M. Spare Sensor Alert Messages Secondary Primary Message Message Common CHWS Sen- Spare Sensor Alert Common CHWR Sen- Spare Sensor Alert Remote Reset Sensor Spare Sensor Alert Temp Sensor —...
- Page 327 Table 8 — LID Primary and Secondary Messages and Custom Alarm/Alert Messages with Troubleshooting Guides N. Other Problems/Malfunctions Description Remedy Chilled water set point set too high. Access set point on LID and verify. Capacity override or excessive cooling load (machine at design capacity). Check LID status messages.
-
Page 328: Troubleshooting
Table 8 — LID Primary and Secondary Messages and Custom Alarm/Alert Messages with Troubleshooting Guides N. Other Problems/Malfunctions (Continued) Description Remedy Check that PSIO communication plugs are connected correctly. Check SMM communi- cation plug. Check for proper SMM power supply. See Communications Failure Check for proper oil level (too much oil). - Page 329 Table 9A — Thermistor Temperature (F) vs Resistance/Voltage Drop Voltage Temperature Resistance Drop (Ohms) -25.0 4.821 98010 -24.0 4.818 94707 -23.0 4.814 91522 -22.0 4.806 88449 -21.0 4.800 85486 -20.0 4.793 82627 -19.0 4.786 79871 -18.0 4.779 77212 -17.0 4.772 74648 -16.0 4.764...
- Page 330 Table 9A — Thermistor Temperature (F) vs Resistance/Voltage Drop (Continued) Voltage Temperature Resistance Drop (Ohms) 1.607 1715 1.585 1680 1.562 1647 1.538 1614 1.517 1582 1.496 1550 1.474 1519 1.453 1489 1.431 1459 1.408 1430 1.389 1401 1.369 1373 1.348 1345 1.327 1318...
- Page 331 Table 9B — Thermistor Temperature (C) vs Resistance/Voltage Drop Voltage Temperature (C) Drop (V) 4.896 4.889 4.882 4.874 4.866 4.857 4.848 4.838 4.828 4.817 4.806 4.794 4.782 4.769 4.755 4.740 4.725 4.710 4.693 4.676 4.657 4.639 4.619 4.598 4.577 4.554 4.531 4.507 4.482...
- Page 332 Table 9B — Thermistor Temperature (C) vs Resistance/Voltage Drop (Continued) Voltage Temperature (C) Drop (V) 1.594 1.553 1.513 1.474 1.436 1.399 1.363 1.327 1.291 1.258 1.225 1.192 1.160 1.129 1.099 1.069 1.040 1.012 0.984 0.949 0.920 0.892 0.865 0.838 0.813 0.789 0.765 0.743...
- Page 333 Table 10 — 17/19EX Heat Exchanger, Economizer/Storage Vessel, Piping, and Pumpout Unit Weights* (Page 1 of 2) Cooler Total Weight Cooler Size† Dry** Operating†† 21,674 9 831 26,120 11 848 22,019 9 988 26,736 12 127 22,364 10 144 27,322...
- Page 334 Table 10 — 17/19EX Heat Exchanger, Economizer/Storage Vessel, Piping, and Pumpout Unit Weights* (Continued) Condenser Total Weight Condenser Dry** Size† 13,768 14,118 14,468 16,676 17,172 17,669 17,188 17,848 18,400 20,725 21,663 22,446 * If a machine configuration other than 2-pass, 150 psig (1034 kPa), NIH waterbox configuration is used, refer to the Additional Cooler Weights or Additional Condenser Weights tables, obtain the additional dry and water weights that must be added to the values shown in this table.
- Page 335 Table 11 — Additional Condenser Weights* Heat Exchanger Component Size 41 – 43 45 – 47 Condenser 51 – 53 55 – 57 NIH — Nozzle-In-Head † Subtract 228 lb (103 kg) from the rigging weight shown in * When using a machine configuration other than 2-pass, NIH waterboxes with 150 psig (1034 kPa) covers, add the weights listed in this table to the appropriate weights in condenser weight.
- Page 336 Table 12 — Compressor/Motor/Suction Elbow Weights Compressor/Motor/Suction Elbow 17 Series, All Compressor Sizes* 19 Series, 51-89 Compressor Sizes† 19 Series, 421-469 Compressor Sizes** 19 Series, 531-599 Compressor Sizes†† Based on 4160 v, FD motor. † Based on 6900 v, DQ motor. ** Based on 6900 v, DP motor.
- Page 337 Table 13 — Additional Cooler Weights* Waterbox Component Type Condenser Marine Marine Marine Marine NIH — Nozzle-In-Head * When using a machine configuration other than 2-pass, NIH waterboxes with 150 psig (1038 kPa) covers, add the weights listed in this table to the appropriate weights in cooler weight.
- Page 338 Table 14 — Marine Waterbox Cover Weights* Heat Exchanger Size 41 – 48 51 – 57 * Heat exchangers with marine waterboxes have heavier dry and operating weights than heat exchangers with nozzle-in-head waterboxes. Design Maximum Cooler Water Pressure 1034 2236 2068 3060...
- Page 339 Table 15 — NIH Waterbox Cover Weights* Heat Exchanger Passes Size † 41 – 48 † 51 – 57 NIH — Nozzle-in-Head * The 150 psig (1034 kPa) waterbox cover weights are included in the dry weight shown in † Two different waterbox covers are present on 2-pass machines. The weight shown in this table represents the weight of the waterbox cover that contains the nozzles.
- Page 340 Table 16 — Auxiliary Systems, Electrical Data Power Source 3 (Optional) Legend — Full Load Amps — Locked Rotor Amps Notes: 1. The oil pump is powered through a field wiring terminal into the power panel. 2. Power to the controls and oil heater via the power panel must be on circuits that can provide continuous service when the compressor starter is disconnected.
- Page 341 Table 17 — Open-Drive Compressor Fits and Clearances Clearance 17FA4 Description Item 1st stage impeller to diaphragm 2nd stage impeller to discharge wall 1st stage labyrinth .016 Interstage labyrinth .012 2nd stage labyrinth .008 Balancing piston lab- .008 yrinth Impeller shaft jour- .0020 nal bearing Thrust-end float...
- Page 342 Table 17 — Open-Drive Compressor Fits and Clearances (Continued) Clearance 17FA4 Description Item Drive-end journal .003 bearing Windage baffle to .083 shaft Inner carbon ring .06 MIN Each Direction travel Figure 55 for item callouts. 17FA5 .0762 .005 .1270 .0035 2.108 .104 2.642...
- Page 343 Table 17 — Open-Drive Compressor Fits and Clearances (Continued) Tabulation — Impeller Clearances (Open-Drive Compressors) Compressor Diam Shroud Size Code 17FA5 * Measured with shaft in thrust position (towards suction end); tolerance = ± .005 in. (± .127 mm). Impeller Diameter 12.00 304.8 12.38...
- Page 344 Table 18 — Hermetic Compressor Fits and Clearances Item* Description 1st Stage Impeller to Diaphragm 2nd Stage Impeller to Discharge Wall 1st Stage Labyrinth Interstage Labyrinth 2nd Stage Labyrinth Balancing Piston Labyrinth Impeller Shaft Journal Bearing Thrust-end Float Counterthrust Bearing Seal Ring Gear Bearing to Gear Gear Bearing to Gear Gear Bearing to Bearing Housing...
- Page 345 Table 18 — Hermetic Compressor Fits and Clearances (Continued) Tabulation — Impeller Clearances (Hermetic Compressors) 19EX FA Shroud Shroud Code Code — — Measured with shaft in thrust position (towards suction end); tolerance = ± .005 in. (± .127 mm). †...
- Page 346 Figure 1 — 17/19EX Identification...
- Page 347 Figure 2 — Typical 17EX Installation...
- Page 348 Figure 3 — Typical 19EX Installation...
- Page 349 Figure 4 — Refrigerant, Motor Cooling, and Oil Cooling Cycles...
- Page 350 Figure 5 — Hermetic Compressor Lubrication System (EX Compressor Shown)
- Page 351 Figure 6 — Open-Drive (17 Series) Lubrication Cycle...
- Page 352 Machine Rear; Compressor Side View Figure 7 — 17EX Controls and Sensor Locations (Figure 7 continued on next page)
- Page 353 Compressor End View Figure 7 — 17EX Controls and Sensor Locations (Figure 7 continued on next page)
- Page 354 Machine Front View Figure 7 — 17EX Controls and Sensor Locations (Figure 7 continued on next page)
- Page 355 Motor End View Figure 7 — 17EX Controls and Sensor Locations (Figure 7 continued on next page)
- Page 356 Figure 7 — 17EX Controls and Sensor Locations...
- Page 357 Machine Rear; Compressor Side View Figure 8 — 19EX Controls and Sensor Locations (Figure 8 continued on next page)
- Page 358 Compressor End View Figure 8 — 19EX Controls and Sensor Locations (Figure 8 continued on next page)
- Page 359 Machine Rear View Figure 8 — 19EX Controls and Sensor Locations (Figure 8 continued on next page)
- Page 360 Motor End View Figure 8 — 19EX Controls and Sensor Locations (Figure 8 continued on next page)
- Page 361 Figure 8 — 19EX Controls and Sensor Locations...
- Page 362 Figure 9 — Control Center (Front View); Shown with Options Module...
- Page 363 Figure 10 — Control Sensors (Temperature)
- Page 364 Figure 11 — Control Sensors (Pressure Transducer, Typical)
- Page 365 Figure 12 — Power Panel without Options (Open-Drive Machine Shown)
- Page 366 Figure 13 — Power Panel with Options (Hermetic Machine Shown)
- Page 367 Figure 14 — LID Default Screen...
- Page 368 Figure 15 — LID Service Screen...
- Page 369 Figure 16 — 17/19EX Menu Structure...
- Page 370 Figure 17 — 17/19EX Service Menu Structure...
- Page 371 Figure 18 — Example of Point Status Screen (Status01)
- Page 372 Figure 19 — Example of Time Schedule Operation Screen...
- Page 373 Figure 20 — Example of Set Point Screen...
- Page 374 Figure 21 — 17/19EX Hot Gas Bypass/Surge Prevention...
- Page 375 Figure 22 — 17/19EX with Default Metric Settings...
- Page 376 Figure 23 — Example of Attach to Network Device Screen...
- Page 377 Figure 24 — Example of Holiday Period Screen...
- Page 378 Figure 25 — Control Sequence...
- Page 379 Figure 26 — Typical Wet-Bulb Type Vacuum Indicator...
- Page 380 Figure 27 — Shipping Bolt on Open Drive Motor...
- Page 381 Figure 28 — 17/19EX Leak Test Procedures...
- Page 382 Figure 29 — Dehydration Cold Trap...
- Page 383 Figure 30 — Correct Motor Rotation...
- Page 384 Figure 31 — Refrigeration Log...
- Page 385 Figure 32 — Pumpout Arrangement and Valve Number Locations (12-ft Vessel Shown) (Figure 32 continued on next page)
- Page 386 Figure 32 — Pumpout Arrangement and Valve Number Locations (12-ft Vessel Shown) (Continued)
- Page 387 Figure 33 — Pumpout Unit Wiring Schematic (19EX Shown)
- Page 388 Figure 34 — Optional Pumpout Compressor...
- Page 389 Figure 35 — Electronic Vane Actuator Linkage...
- Page 390 Figure 36 — Compressor Contact Seal (Open-Drive Machines)
- Page 391 Figure 37 — Checking Preliminary Alignment...
- Page 392 Figure 38 — Measuring Angular Misalignment in Elevation...
- Page 393 Figure 39 — Measuring Angular Misalignment on Brackets...
- Page 394 Figure 40 — Alignment Formula...
- Page 395 Figure 41 — Adjusting Angular Misalignment in Plan...
- Page 396 Preparation Figure 42 — Correcting Parallel Misalignment (Figure 42 continued on next page)
- Page 397 Measurement Figure 42 — Correcting Parallel Misalignment (Figure 42 continued on next page)
- Page 398 Adjustment Figure 42 — Correcting Parallel Misalignment...
- Page 399 To Check Angular Alignment Figure 43 — Alignment Check — Assembled Coupling (Figure 43 continued on next page)
- Page 400 To Check Parallel Alignment Figure 43 — Alignment Check — Assembled Coupling...
- Page 401 Figure 44 — Removing the Oil Filter...
- Page 402 Figure 45 — Typical Float Valve Arrangement...
- Page 403 Figure 46 — Lifting Open-Drive Motor...
- Page 404 Figure 47 — Controls for Optional Pumpout Compressor...
- Page 405 Figure 48 — Oil Differential Pressure/Power Supply Module...
- Page 406 Figure 49 — PSIO Module LED Locations...
- Page 407 Figure 50 — LID Module (Rear View) and LED Locations...
- Page 408 Figure 51 — Processor (PSIO) Module...
- Page 409 Figure 52 — Starter Management Module (SMM)
- Page 410 Switch Setting Options Module 1 Figure 53 — Options Module Options Module 2...
- Page 411 Figure 54 — Model Number Nomenclature for Compressor Size (See Figure 1 Also)
- Page 412 Note: See Table 17 for dimensions Figure 55 — Open-Drive Compressor Fits and Clearances (Figure 55 continued on next page)
- Page 413 Note: See Table 17 for dimensions Figure 55 — Open-Drive Compressor Fits and Clearances (Figure 55 continued on next page)
- Page 414 Note: See Table 17 for dimensions Figure 55 — Open-Drive Compressor Fits and Clearances...
- Page 415 View B View A Refer to Table 18 for dimensions Figure 56 — Hermetic Compressor Fits and Clearances (Figure 56 continued on next page)
- Page 416 Figure 56 — Hermetic Compressor Fits and Clearances...
- Page 417 Figure 57 — Electronic PIC Controls Wiring Schematic — Hermetic Machine (Figure 57 continued on next page)
- Page 418 Figure 57 — Electronic PIC Controls Wiring Schematic — Hermetic Machine...
- Page 419 Figure 58 — Electronic PIC Controls Wiring Schematic — Open Drive Machine (Figure 58 continued on next page)
- Page 420 Figure 58 — Electronic PIC Controls Wiring Schematic — Open Drive Machine...
- Page 421 Figure 59 — Machine Power Panel, Starter Assembly, and Motor Wiring Schematic (Figure 59 continued on next page)
- Page 422 Figure 59 — Machine Power Panel, Starter Assembly, and Motor Wiring Schematic...
- Page 423 Figure 60 — Hermetic Drive — Power Panel with Water-Cooled Oil Cooler...
- Page 424 Figure 61 — Hermetic Drive — Power Panel with Motor Cooling Solenoid...
- Page 425 Figure 62 — Open-Drive — Power Panel...
- Page 426 17/19EX CENTRIFUGAL LIQUID CHILLER MACHINE INFORMATION: NAME ADDRESS CITY DESIGN CONDITIONS: FLOW TONS BRINE RATE COOLER CONDENSER COMPRESSOR: Volts STARTER: OIL PUMP: Volts REFRIGERANT: Charge CARRIER OBLIGATIONS: Assemble ....Yes Leak Test .
- Page 427 E: After Machine Has Been Successfully Run and Set Up, Shut Down and Mark Shutdown Oil and Refrigerant Levels. F: Give Operating Instructions to Owner’s Operating Personnel. G: Perform Hot Alignment (Open Drive Machines Only) SIGNATURES: CARRIER TECHNICIAN Oil Pump Voltage Oil Pump Controls/Oil Heater ‘‘PHASE TO PHASE’’...
- Page 428 LCW Setpoint ECW Setpoint ICE BUILD Setpoint PSIO Software Version Number: LID Software Version Number: PSIO Controller Identification: BUS LID Identification: 17/19EX CENTRIFUGAL LIQUID CHILLER CONFIGURATION SETTINGS LOG (Remove and use for job file.) RANGE UNITS 40 to 100 20 to 120 DEG F (–6.7 to 48.9)
- Page 429 LOCAL MODE TIME SCHEDULE CONFIGURATION SHEET OCCPC01S Period 1: Period 2: Period 3: Period 4: Period 5: Period 6: Period 7: Period 8: NOTE: Default setting is OCCUPIED 24 hours/day. ICE BUILD MODE TIME SCHEDULE CONFIGURATION SHEET OCCPC02S Period 1: Period 2: Period 3: Period 4:...
- Page 430 CONFIG TABLE CONFIGURATION SHEET DESCRIPTION RESET TYPE 1 Degrees Reset at 20 mA RESET TYPE 2 Remote Temp (No Reset) Remote Temp (Full Reset) Degrees Reset RESET TYPE 3 CHW Temp (No Reset) CHW Temp (Full Reset) Degrees Reset Select/Enable Reset Type ECW Control Option Demand Limit at 20 mA 20 mA Demand Limit Option...
- Page 431 LEAD/LAG TABLE CONFIGURATION SHEET DESCRIPTION LEAD/LAG SELECT DISABLE =0, LEAD =1, LAG =2, STANDBY =3 Load Balance Option Common Sensor Option LAG Percent Capacity LAG Address LAG START Timer LAG STOP Timer PRESTART FAULT Timer STANDBY Chiller Option STANDBY Percent Capacity STANDBY Address RANGE UNITS...
- Page 432 SERVICE1 TABLE CONFIGURATION SHEET DESCRIPTION Motor Temp Override Cond Pressure Override Refrig Override Delta T Chilled Medium Brine Refrig Trippoint Compr Discharge Alert Bearing Temp Alert Water Flow Verify Time Oil Press Verify Time Water/Brine Deadband Recycle Restart Delta T Recycle Shutdown Delta T Surge Limit/HGBP Option Surge=0/HGBP=1...
- Page 433 DESCRIPTION Motor Rated Load Amps Motor Rated Line Voltage Meter Rated Line kW Line Frequency 0=60 Hz/1=50 Hz Compressor Starter Type Condenser Freeze Point Soft Stop Amps Threshold Stop-to-Start Timer* *Open-drive machines only. Standard stop-to-start time for hermetic machines is 3 minutes. SERVICE1 TABLE CONFIGURATION SHEET RANGE UNITS...
- Page 434 DESCRIPTION RANGE RESET 20 mA Power Source DEMAND 20 mA Power Source CHWS Temp Enable 0 to 4 –40 to 245 CHWS Temp Alert (–40 to 118) CHWR Temp Enable 0 to 4 –40 to 245 CHWR Temp Alert (–40 to 118) Reset Temp Enable 0 to 4 –40 to 245...
- Page 435 DESCRIPTION Proportional Inc Band Proportional Dec Band Proportional ECW Gain Guide Vane Travel Limit HOLIDAY (HOLIDEF) CONFIGURATION SHEET HOLIDEF DESCRIPTION Holiday Start Month Start Day Duration HOLIDAY (HOLIDEF) CONFIGURATION SHEET DESCRIPTION Holiday Start Month Start Day Duration HOLIDAY (HOLIDEF) CONFIGURATION SHEET DESCRIPTION Holiday Start Month Start Day...
- Page 436 BROADCAST (BRODEFS) CONFIGURATION SHEET DESCRIPTION Activate Yes/No OAT Broadcast Controller Name 8 characters Bus Number 0 to 239 Element Number 0 to 239 OARH Broadcast Controller Name 8 characters Bus Number 0 to 239 Element Number 0 to 239 Daylight Savings Start Month 1 to 12 1 to 31...
- Page 437 In — Side toward compressor discharge (side next to cooler). Out — Side opposite compressor discharge (side furthest from cooler). Copyright 1995 Carrier Corporation Manufacturer reserves the right to discontinue, or change at any time, specifications or designs without notice and without incurring obligations.
Need help?
Do you have a question about the 17/19EX and is the answer not in the manual?
Questions and answers