Quantum QN-I-220 Quick Setup Manual
Hide thumbs
Also See for QN-I-220:
- Quick setup manual (18 pages) ,
- Command line interface manual (21 pages)
Table of Contents
Advertisement
Quick Links
Advertisement
Table of Contents

Subscribe to Our Youtube Channel
Related Manuals for Quantum QN-I-220


Summary of Contents for Quantum QN-I-220
- Page 1 Quick Setup Guide Model: QN-I-220...
- Page 2 Copyright Information Copyright & trademark specifications are subject to change without prior notice. Copyright © 2018 Quantum Networks (SG) Pte. Ltd. All Rights Reserved. Quantum ® Networks & the logo are trademarks of Quantum Networks (SG) Pte. Ltd. Other brands or products mentioned may be trademarks or registered trademarks of their respective owners.
-
Page 3: Table Of Contents
Prerequisites ..........................5 Network requisites ........................5 Connect Access Point ......................5 Step 1 – Create new account on Quantum RUDDER© ............ 6 Step 2 - Basic setup ........................ 7 Step 3 - Setting up device IP address ................. 8 Step 4 –... -
Page 4: Glossary
This Quick Setup Guide provides step-by-step instructions on how to set up Quantum Networks Access Point. After completing the steps described in this Guide, you will be able to install the Access Point (AP) on-site and provide wireless network access to users. -
Page 5: Before You Begin
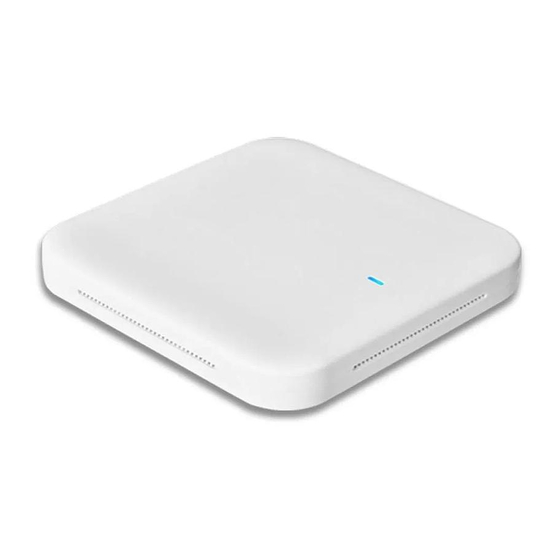
Before you begin Your Quantum Networks’ Access Point can work in “Standalone Mode” or can be managed by “RUDDER”. Package contents Access Point. Prerequisites Internet access. Desktop / Laptop / Handheld device. 802.3af / 802.3at PoE Switch / PoE Injector. -
Page 6: Step 1 - Create New Account On Quantum Rudder
Once the account gets validated, it turns the page to “Add License Key” (User will get the license key from respective (Partner / Resource) ) Account on Quantum RUDDER© (Quantum Networks’ Cloud Controller) is now ready to use. -
Page 7: Step 2 - Basic Setup
Step 2 - Basic setup Connect the WAN port of the Access Point to the network with Internet access. You should see a new wireless network with SSID QN_XX:XX (where XX:XX are the last four digits of Access Point MAC Address). ... -
Page 8: Step 3 - Setting Up Device Ip Address
Click “Proceed” to apply configuration and turn to the next page. Step 4 – Set the management mode Management Mode Quantum Networks’ Access Point can be configured in two modes: RUDDER (on cloud / on-premise) Centralized management of Access Points using Quantum RUDDER©... -
Page 9: Step 5 - Access Point Quick Setup In Rudder Mode
Figure 4 Step 5 - Access Point quick setup in RUDDER Mode Select “Management Mode” as “RUDDER”, enter Quantum RUDDER© login credentials and click “Proceed”. In the case of on-premise RUDDER, mention the local server IP Address/URL assigned to RUDDER, here. - Page 10 It will verify the credentials, and turn to a next page. Figure 6 Upgrade QNOS version by either downloading from the cloud or by selecting manually from respective location and upgrade or click “Skip Upgrade” to move further. ...
- Page 11 o If the selected site is already having another Access Point, it will automatically configure AP in a bridge mode and will turn the user on the summary page after clicking “Proceed”. (Figure 8) o If this is the first Access Point for the selected site – the user will turn on the page, where the user can select Access Point Operation mode as Bridge or Router.
- Page 12 Figure 11 Review the Configuration Summary. Click “Reconfigure” if any changes are required or click “Proceed” to complete the configuration. Router Select option Router and click “Proceed”. Configure WLAN (SSID) and Local subnet parameters and click “Proceed”. Parameter Value WLAN...
- Page 13 Figure 12 Figure 13 Note: If you do not want to create WLAN (SSID)/LAN now, click the Skip option. It will to Configuration Summary. turn Review the Configuration Summary. Click “Reconfigure” if any changes are required or click “Proceed” to complete the configuration.
-
Page 14: Step 6 - Access Point Quick Setup In Standalone Mode
Step 6 - Access Point quick setup in standalone mode Figure 14 Select “Management Mode” as “Standalone” if each Access Point is to be configured and managed individually. Define username and password for the device and click “Proceed”. User can select Access Point Operation mode as Bridge or Router. - Page 15 Bridge Select option Bridge and click “Proceed”. Configure WLAN (SSID) parameters and click “Proceed”. Parameter Value Country Select country for radio management. Timezone Select timezone for RUDDER management. WLAN Name Define a name for the network. SSID Define visible wireless network name. Passphrase Configure a passphrase for SSID.
- Page 16 Router Select option Router and click “Proceed”. Configure WLAN (SSID) and Local subnet parameters and click “Proceed”. Parameter Value WLAN Country Select country for radio management. Timezone Select timezone for RUDDER management. WLAN Name Define a name for the network. SSID Define visible wireless network name.
-
Page 17: Reset Access Point To Factory Defaults
Reset Access Point to factory defaults o Power on the Access Point o Push the reset button on the back panel and hold it for 10 seconds. o Access Point would restart with factory defaults Access Point default login detail With standalone mode: User Name: Created while doing "Quick Setup"... -
Page 18: Fcc Statement
FCC statement This device complies with part 15 of the FCC rules. Operation is subject to the following two conditions: (1) this device may not cause harmful interference, and (2) this device must accept any interference received, including interference that cause undesired operation.
Need help?
Do you have a question about the QN-I-220 and is the answer not in the manual?
Questions and answers