Table of Contents
Advertisement
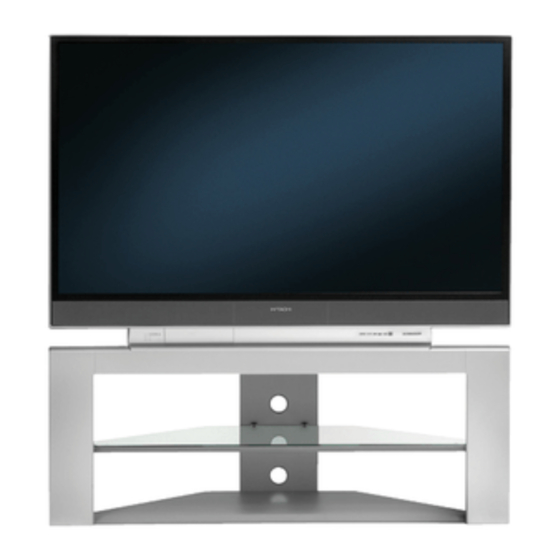
LCD REAR PROJECTION
TELEVISION
Operating Guide for
55VS69 and 62VS69
IMPORTANT SAFETY INSTRUCTIONS ....................................................................................... 2-3
FIRST TIME USE ....................................................................................................................... 4-19
THE REMOTE CONTROL ........................................................................................................ 20-31
ON-SCREEN DISPLAY ............................................................................................................ 32-55
LAMP REPLACEMENT .............................................................................................................56-59
USEFUL INFORMATION.......................................................................................................... 60-63
LICENSE AGREEMENT..................................................................................................................64
APPENDIXES .................................................................................................................................65
INDEX .............................................................................................................................................66
®
As an Energy Star
Partner,
Hitachi, Ltd. has determined
that this product meets the
®
Energy Star
guidelines for
energy efficiency.
Advertisement
Table of Contents

Subscribe to Our Youtube Channel
Related Manuals for Hitachi 62VS69


Summary of Contents for Hitachi 62VS69
-
Page 1: Table Of Contents
LCD REAR PROJECTION TELEVISION Operating Guide for 55VS69 and 62VS69 IMPORTANT SAFETY INSTRUCTIONS ... 2-3 FIRST TIME USE ... 4-19 THE REMOTE CONTROL ... 20-31 ON-SCREEN DISPLAY ... 32-55 LAMP REPLACEMENT ...56-59 USEFUL INFORMATION... 60-63 LICENSE AGREEMENT...64 APPENDIXES ...65 INDEX ...66 ®... -
Page 2: Important Safety Instructions
HITACHI television. Please fill out your warranty card and mail it to HITACHI. This will enable HITACHI to notify you promptly in the improbable event that a safety problem should be discovered in your product model. - Page 3 Caution Adjust only those controls that are covered in the instructions, as improper changes or modifications not expressly approved by HITACHI could void the user’s warranty. Warning • To reduce the risk of fire or electric shock, do not expose this apparatus to rain or moisture.
-
Page 4: First Time Use
Two “AA” size, 1.5V batteries For US models: For optional accessories, please access our website at www.hitachi.us/tv Bottom View (Remote Control) Lift up on tab to remove back cover. polarities reversed as this may cause the batteries... - Page 5 The sound of moving air from the fan is normal and may be noticeable in very quiet environments. VIEWING The major benefit of the HITACHI LCD Rear PTV is its large viewing screen. To see this large screen at its best, test various locations in the room to find the optimum spot for viewing.
- Page 6 Hook-up Cables and Connectors Most video/audio connections between components can be made with shielded video and audio cables that have phono connectors. For best performance, video cables should use 75-Ohm coaxial shielded wire. Cables can be purchased from most stores that sell audio/video products. Below are illustrations and names of common connectors.
- Page 7 Quick Reference Remote Control Buttons and Functions In addition to controlling all of the functions on your HITACHI LCD Rear Projection TV, the new remote control is designed to operate different types of devices, such as, DVD Players, CBL (Cable Boxes), set-top-boxes, satellite receivers, and VCRs.
-
Page 8: Front Panel Controls
Front Panel Controls Push to open the Front Control Panel Door Front Control Panel Buttons & Connections MENU/SELECT button This button allows you to enter the MENU, making it possible to set TV features to your preference without using the remote. This button also serves as the SELECT button when in MENU mode. INPUT/EXIT button Press this button to display the input menu selections of CABLE, AIR, INPUT: 1, 2, 3, 4 and 5. - Page 9 LAMP 3. Your Hitachi LCD Rear Projection Television may appear to be OFF when it is set to input 1 ~ input 5 and the video signal is not received from the input jacks. Please make sure the Blue Power light indicator is not lit (OFF) when you are not watching for long lasting performance.
-
Page 10: Front Panel Jacks And Connections
Front Panel Jacks and Connections The front panel jacks are provided as a convenience to allow you to easily connect a camcorder or VCR as shown in the following examples: 1) Example of how to connect a VCR : 2) Example of how to connect a CAMCORDER : NOTE: 1. -
Page 11: Rear Panel Connections
Dolby Laboratories. Upgrade Card This card slot is for future software upgrades. Hitachi will notify you if a software upgrade is required for your TV. In order to receive written notification, please complete and return your warranty card. - Page 12 Rear Panel Connections TV AS CENTER (INPUTS 1-4) These jacks are for stereo amplifiers with center signal output capability. This feature allows the TV speakers to be used as a center speaker. The TV must be set as a center channel by selecting TV AS CENTER on the Internal Speakers Settings of the Audio Menu (see page 38).
- Page 13 Rear Panel Connections Additional CableCARD Information After the CableCARD has been successfully installed, a CableCARD Information menu appears in the SETUP menu of the On-Screen Display. Follow the instructions below to access the CableCARD Information menu. 1. Press the MENU button on the Remote Control to access the Main Menu screen.
- Page 14 Rear Panel Connections TIPS ON REAR PANEL CONNECTIONS • S-VIDEO, Y-P and HDMI connections are provided for high performance laserdisc players, VCRs etc. that have this feature. Use these connections in place of the standard video connection if your device has this feature. •...
-
Page 15: Connecting External Video Sources
Connecting External Video Sources Match the numbers below to the diagram for speaker placement. The television’s internal speakers will act as center speaker (select AUDIO - INTERNAL SPEAKERS - TV AS CENTER). These FRONT left and right speakers are connected to the FRONT output of a separate audio amplifier. - Page 16 Connecting External Video Sources The exact arrangement you use to connect the VCR, camcorder, laserdisc player, DVD player or HDTV Set Top Box to your TV set is dependent on the model and features of each component. Check the owner’s manual of each component for the location of video and audio inputs and outputs.
- Page 17 Connecting External Video Sources CONNECTING A COMPOSITE VIDEO AND STEREO AUDIO SOURCE TO INPUT1 – INPUT5 1. Connect the cable from the VIDEO OUT of the VCR or the laserdisc player to the INPUT (VIDEO) jack, as shown on the TV set on the right. 2.
- Page 18 Connecting External Video Sources CONNECTING A COMPONENT SOURCE WITH HDMI OR DVI CAPABILITY TO INPUT 1 1. Connect the HDMI or DVI to HDMI connection cable from the output of the HDTV set top box or DVD player to the HDMI input as shown on the TV set on the right.
- Page 19 Connecting External Video Sources CONNECTING A COMPONENT SOURCE TO INPUT 3 OR 4: Y-P 1. Connect the cable from the Y OUT of the Laserdisc/DVD player or HDTV set top box to the INPUT (Y) jack, as shown on the TV set on the right.
-
Page 20: The Remote Control
The Remote Control In addition to controlling all the functions on your HITACHI LCD Rear Projection TV, the new remote control is designed to operate different types of VCRs, CATV (Cable TV) converters, set-top-boxes, satellite receivers (SAT) and DVD players with one touch. Basic operation keys are grouped together in one area. -
Page 21: How To Use The Remote To Control Your Tv
How to Use the Remote to Control Your TV POWER button Press this button to turn the TV set on or off when the remote is in TV mode. MODE buttons These buttons allow the remote to control your TV, VCR, DVD, Cable box/Satellite box depending on which button is pressed. - Page 22 How to Use the Remote to Control Your TV ASPECT button Press this button to quickly change the picture format ASPECT ratio. Depending on the input signal format received, the picture format ratio allows you to adjust the images through the following options. 4:3 STANDARD Use this aspect mode to display conventional (4:3) images.
- Page 23 How to Use the Remote to Control Your TV INPUTS button When the remote control is in TV mode, press this button to access the INPUTS menu. Use the CURSOR and SELECT buttons to scroll and select the inputs that are being used. Pressing the INPUTS button repeatedly will also cycle through the Inputs menu items.
- Page 24 How to Use the Remote to Control Your TV VOLUME (VOL), MUTE button Press the VOLUME button ( obtain the desired sound level. To reduce the sound to one half of normal volume (SOFT MUTE) to answer the telephone, etc., press the MUTE button.
- Page 25 Picture-in-Picture (PIP) Your HITACHI LCD Rear Projection TV incorporates Two Tuner technology designed for improved viewing enjoyment. This Two Tuner feature allows you to view antenna inputs on both the main picture and sub-picture simultaneously, with separate tuning control for each.
- Page 26 Picture-in-Picture (PIP) PIP Mode Picture-in-Picture This feature is only available with a Digital 16:9, 720p and 1080i signal. To prevent a pattern burn, occasionally move the sub-picture using the CURSOR buttons. SPLIT Mode Picture-in-Picture Split Mode PIP displays the main picture and sub- picture evenly on the screen.
- Page 27 Picture-in-Picture (PIP) PAUSE button If you wish to freeze the sub-picture, press the PAUSE button. This is convenient when trying to write down the address for a mail order company, recording statistics for a sporting event, etc. To return the picture to motion, press the EXIT button. Press the PAUSE button repeatedly to toggle between FREEZE modes (Main Freeze, SPLIT and STROBE).
- Page 28 The Remote Control for Cable Box Functions OPERATING THE PRECODED FUNCTION FOR YOUR CABLE BOX. This remote is designed to operate different types of cable boxes. You must first program the remote to match the remote system of your cable box (refer below for pre-codes).
- Page 29 These buttons transmit the chosen pre-coded set- top-box/satellite codes. EXCLUSIVE TV buttons These buttons are for operating the TV. » » SATELLITE BRAND ECOSTAR ...03 HITACHI... 00 HUGHES ...04 RCA ...01 SONY ...02 SET TOP BOX BRAND PANASONIC ...05 RCA ... 06 SAMSUNG ...07 ZENITH ...08...
- Page 30 EXCLUSIVE TV Buttons These buttons are for operating the TV. » » DVD BRAND APEX ...10 GO VIDEO ... 09 HITACHI...00 KENWOOD ...11 PANASONIC ...02 PIONEER ... 03 RCA ... 04 SAMSUNG ...06 SANYO ...07 SONY ...01 TOSHIBA ...05...
- Page 31 » » VCR BRAND EMERSON ...20, 21, 22, 23 ,24 FISHER ... 34, 37, 38, 39 HITACHI ...00, 01, 02, 03, 04, 05, 06 JVC...49, 50, 51 MAGNAVOX ...12, 13 MITSUBISHI... 27, 28, 29, 30 NEC ... 40, 41 PANASONIC ...10, 11 SAMSUNG ...25, 26...
-
Page 32: On-Screen Display
On-Screen Display 1. Press MENU on the remote control to display the different features on your HITACHI LCD Rear Projection TV. 2. Press the CURSOR buttons to navigate and highlight a different feature of the On-Screen Display menu. Press the SELECT button to select. - Page 33 On-Screen Display Video Picture Mode Select between the two picture modes; Day and Night. Contrast Adjust contrast. Brightness Adjust brightness. Color Adjust color. Tint Adjust tint. Sharpness Adjust sharpness. Color Temperature Set this to High for less intense color with more blue, set to Medium for natural color, set to Standard for standard colors or Black and White for more...
- Page 34 Video Video Select VIDEO to adjust picture settings and improve picture quality. You can independently customize each of the Video Inputs to your preference to increase viewing performance and pleasure depending upon the video program being viewed. If RESET is selected, only the selected input will reset to initial conditions.
- Page 35 3:2 pulldown. When Auto Movie Mode is turned ON from the VIDEO menu, your Hitachi LCD Rear Projection Television will activate the circuitry for this special feature to improve video performance when watching film based sources.
- Page 36 Video Vertical Position This function allows you to select when aspect style is either 4:3 EXPANDED/ZOOM1/ZOOM2 or 16:9 ZOOM. Vertical position can be changed with these modes. For example, it will be useful for centering the picture area at both the top and bottom of the picture with 480i/480P signal. Adjustable range is -10 (video center is toward bottom of screen) to +10 (video center is toward top of screen).
-
Page 37: Audio Menu
Sound reproduction quality enhancement system. The BBE technology produces sound that is natural and crisp from just two speakers or the two internal speakers found in your HITACHI television. If your HITACHI television is connected to an external audio system, BBE will also create an incredible crisp sound experience from two speakers. - Page 38 Audio Audio Source Multi-Channel Television Sound will allow you to select STEREO (a stereo broadcast), MONO (monaural sound) used when receiving a weak stereo broadcast or SECOND AUDIO PROG (SA) which may be a secondary language, weather report, etc. The sources received will be displayed at the top left edge of the TV.
- Page 39 Audio Use the functions below if your TV is connected to an amplifier/receiver with OPTICAL DIGITAL INPUT with Dolby Digital or PCM decoder capabilities. 1. Use the CURSOR buttons to highlight the function to be adjusted. 2. Press the CURSOR buttons to adjust the function.
- Page 40 Channel Manager Channel Manager Select CHANNEL MANAGER to set your Antenna options, run Auto Channel Scan, Check Signal Meter and Set Channel List. 1. Use the CURSOR buttons function to be adjusted. 2. Press the SELECT button or CURSOR button select.
- Page 41 Channel Manager Auto Channel Scan This feature will automatically store active TV channels in Auto Channel Scan memory. 1. Use the CURSOR buttons to highlight CABLE or AIR. 2. Press the CURSOR buttons to highlight the START or RESET option. 3.
- Page 42 Locks Locks This function will block out the picture and sound of the selected channel or video input. It can also be used to keep the TV from being viewed for a scheduled time period that you set. The code to enter the Locks feature is a four digit access code number.
- Page 43 Locks Movie Ratings Use Movie Ratings to prevent viewing of any movie that you feel may be inappropriate due to its content. 1. Use the CURSOR buttons to select the MOVIE RATING category that you want to block. 2. Press SELECT to block the MOVIE RATING that you have selected.
- Page 44 Locks TV Ratings Use TV RATINGS to prevent the viewing of any TV program that you feel may be inappropriate due to its content. 1. Use the CURSOR buttons RATING category that you want to block. 2. Press SELECT to block the TV RATING that you have selected.
- Page 45 Locks Canadian Ratings (Eng) Use CANADIAN RATINGS (ENG) to block any type of movie and television program in Canada that you feel might be inappropriate in its content. 1. Use the CURSOR buttons to select the CANADIAN RATINGS (ENG) category that you want to block.
- Page 46 Locks Canadian Ratings (Frn) Use CANADIAN RATINGS (FRN) to block Canadian French programs according to various program ratings that you feel might be inappropriate in its content. 1. Use the CURSOR buttons CANADIAN RATINGS (FRN) category that you want to block. 2.
- Page 47 Timers Timers Select TIMERS to set your Clock, Sleep Timer, Event Timer and Day/Night Timer Recordings. 1. Use the CURSOR buttons to highlight the function to be adjusted. 2. Press the SELECT button or CURSOR button select. Set The Clock The Clock must be adjusted before you can use the SET EVENT TIMER or DAY/NIGHT TIMER feature.
- Page 48 Timers Set Sleep Timer Select this feature to set your SLEEP TIMER from 30 minutes to 3 hours (30 minute increments). 1. Press the CURSOR buttons set your Timer from 0:00, 0:30, 1:00, 1:30, 2:00, 2:30 and 3:00. Set Day/Night Timer Select this feature to activate and set your TV’s DAY/NIGHT PICTURE MODE automatically.
- Page 49 Timers Set Event Timer This function will automatically operate the Projection TV viewing reservation of a program. If the clock is not set, you can not use this function and the screen below will appear. The message on the screen will disappear after 3 seconds, then the screen automatically goes to the clock setup mode (see page 47).
- Page 50 Setup Setup Select SETUP when setting your TV up for the first time. 1. Use the CURSOR buttons function to be adjusted. 2. Press the SELECT button or CURSOR button to select. Menu Preference This feature will allow you to select any one of three different languages for all on-screen displays.
- Page 51 Setup Lamp Power Control Use this featureto have the TV turned OFF automatically when a video signal is not detected for 15 minutes. 1. Press the CURSOR buttons to highlight Yes or No. NOTE: Your new HDTV has a built-in Automatic Power Saving feature that shuts Off the TV if a video signal is not detected within 15 minutes.
- Page 52 Setup INPUT 4 Auto Link Use this function to automatically turn the TV on and tune to INPUT 4 when it detects a video signal to INPUT 4. 1. Use the CURSOR buttons AUTO LINK setting of your choice. 2. When AUTO is selected, the TV will turn on and tune to INPUT 4 automatically, when the Input 4 input device is turned on.
- Page 53 Setup Digital Captions Set captions for digital programs. This function will help choose and set available language, font, size and style of digital captions. 1. Use the CURSOR buttons highlight and select DIGITAL CAPTIONS feature. 2. Press EXIT to quit menu or CURSOR button return to previous menu.
- Page 54 Setup MONITOR: Available Monitor Out Signals Input Mode Digital No Macrovision S-Video (Air or Channel Macrovision S-Video Cable) Analog Channel Video Input 1 HDMI_1 S-Video_1 Video_1 Input 2 S-Video_2 Video_2 Input 3 Y-PbPr_3 Video_3 Input4 Y-PbPr_4 Video_4 Input5 S-Video_5 Video_5 TV TUNER OUT: Available Monitor Out Signals Input Mode Digital No Macrovision S-Video...
- Page 55 (MMC CARD). If a future software upgrade is required for your TV, HITACHI will notify and provide you with a flash card. In order to receive written notification and the flash card, please complete and return the warranty card.
-
Page 56: Lamp Replacement
30-45 minutes. If “LAMP” indicator is still lit, please contact your authorized service center (see page 63). NOTES: • Contact your Hitachi dealer for a new lamp unit. Using other lamps may cause damage to the TV Set. MODEL# LAMP TYPE... - Page 57 For product recycling and disposal information, contact your local government agency or the Electronic Industries Alliance at www.eiae.org (in the US) or the Electronic Product Stewardship Canada at www.epsc.ca (in Canada). For more information, call “1-800-HITACHI.” 120V LAMP COMPARTMENT Turn counterclockwise to loosen the lamp cover screw.
- Page 58 Lamp Replacement Loosen the screw securing the lamp unit with a Phillips head screw driver as shown. Remove the lamp unit by holding the lamp handle , then pulling outwards. LAMP UNIT Turn counterclockwise to loosen the lamp unit screw. CAUTION: The lamp is very hot and may cause fire or severe burns.
- Page 59 For product recycling and disposal information, contact your local government agency or eRecycle.org (in California), the Electronic Industries Alliance at www.eiae.org (in the US) or Electronic Product Stewardship Canada atwww.epsc.ca (in Canada). For more information, call “1-800-Hitachi”. LAMP COVER Turn clockwise to tighten the lamp cover screw.
-
Page 60: Useful Information
TROUBLESHOOTING HITACHI LCD Rear Projection Television incorporates advanced power surge protection technology designed to protect against component or circuit damage due to external or internal voltage power surges. IF YOUR TELEVISION SHOULD APPEAR TO HAVE A LOSS OF POWER, PLEASE FOLLOW THIS PROCEDURE: 1. -
Page 61: Reception Problems
Reception Problems IGNITION NOISE: Black spots or horizontal streaks may appear, picture may flutter or drift. Usually caused by interference from automobile ignition systems, neon lamps, electrical drills, and other electrical appliances. GHOSTS: Ghosts are caused by the television signal following two paths. One is the direct path and the other is reflected from tall buildings, hills or some other objects. - Page 62 Audio (Fixed) ...470mVrms, 1k Ohm • S-Video Luminance (Y) ...1.0Vp-p, 75 Ohm Chrominance (C) ...0.286Vp-p, 75 Ohm • Optical Out (Digital Audio) ...1 optical connector DIMENSIONS: 55VS69 62VS69 34 13/16 34 13/16 Hei g ht (in.) (mm) 884.0 885.0 Wid th (in.) 50 11/16...
- Page 63 (1-800-448-2244) HITACHI AMERICA, LTD. HOME ELECTRONICS DIVISION HITACHI has made every effort to assure you hours of trouble free operation from your unit. However, should you require service, a network of HITACHI Authorized Service Facilities has been established in all 50 states and Puerto Rico.
-
Page 64: License Agreement
IMPORTANT – READ CAREFULLY: This End User License Agreement for HITACHI DTV Software (this “Agreement”) is a legal agreement between you (“you” or “your”), in your capacity as the owner of a HITACHI brand digital television (the “DTV”), and HITACHI America, Ltd., Home Electronics Division ("HITACHI"). -
Page 65: Appendixes
Appendixes Appendix A: IMAGE INPUT INPUT TYPE FORMAT Air or Cable NTSC (Analog Channels) Input 1 HDMI 480i/480p Inputs 1-5 S-Video NTSC Video Inputs 3 & 4 Y-P b P r 480i/480p S-Video = Not available in Input 3 & 4 Appendix B: IMAGE INPUT INPUT... -
Page 66: Index
Index Accessories ...4 Antennas (Connecting) ...6 Aspect Ratio...22 Audio Languages ...39 Dolby Digital ...39 DRC (Dynamic Range Compression) ...39 SRS...37 BBE...37 Audio Settings ...37 Audio Source...38 Auto Noise Cancel ...38 Balance...37 Bass...37 Black Enhancement ...35 Brightness ...37 CableCARD ...12 Channel Manager ...40 Auto Channel Scan...41 Channel List...41 Signal Meter ...40... - Page 67 Notes...
- Page 68 Notes...
- Page 69 Notes...
- Page 70 Notes...
- Page 71 Notes...
- Page 72 QR66311...
Need help?
Do you have a question about the 62VS69 and is the answer not in the manual?
Questions and answers