Table of Contents
Advertisement
Quick Links
Advertisement
Table of Contents

Related Manuals for tryten Nova Go


Summary of Contents for tryten Nova Go
- Page 1 Nova Mobile Carts 1-800-860-4455 Tryten Nova Go/Pro/Neo Line Assembly Instructions For further instructions please visit Tryten.com/instructions. For additional questions or technical support contact us at Tryten.com/contact or 1-800-860-4455. Nova Go/Pro/Neo Assembly Instructions – Rev K Page 1...
-
Page 2: Table Of Contents
Supply Caddy Lockable Lid 14-15 Nova Go VESA Bracket and Monitor Installation Nova Neo Vertical Tablet Arm Installation Nova Go and Pro VESA Plate Installation Yeti-200 Battery Bracket Installation Wire Basket Installation Poly SY20 Speaker installation Butterfly Bracket Installation Speaker Bracket and Speaker Installation 22-23 Nova Go/Pro/Neo Assembly Instructions –... - Page 3 (up/down) when inserted into the extrusion channel. Once adjusted at the desired height, tighten the screw until it is fully locked to the extrusion. Always verify that the nut is aligned horizontally (left/right) when fully tightened. Nova Go/Pro/Neo Assembly Instructions – Rev K Page 3...
-
Page 4: Receiving The Shipping Box
1. RECEIVING THE SHIPPING BOX • Base. • Extract the Hardware pack. • Remove Pole Assembly from packaging. Nova Go/Pro/Neo Assembly Instructions – Rev K Page 4... -
Page 5: Assembling Pole To Base
2. ASSEMBLING POLE TO BASE • Assemble the Pole to the base with the four (4) screws and dome washers using the 3/16” Hex L-Key from the Hardware Pack. Nova Go/Pro/Neo Assembly Instructions – Rev K Page 5... -
Page 6: Universal Omnitab Adjustment
• Tighten the three (3) adjustment screws. • Insert tablet by sliding in from the top. • Insert the Top Slider until it locks in the tablet and push the locking button. Nova Go/Pro/Neo Assembly Instructions – Rev K Page 6... - Page 7 Universal Bracket using the 1/8” Hex L-Key from the front of the cover. • Remove cover and the three (3) screws holding the sliders using the 1/8” Hex L-Key from the front of the cover. Nova Go/Pro/Neo Assembly Instructions – Rev K Page 7...
- Page 8 1/8” Hex L-Key from the front of the cover. • Apply the set of felt pads supplied in the hardware pack on top of the screws. • Adjust sliders and install tablet, following the instructions from Step 3A. Nova Go/Pro/Neo Assembly Instructions – Rev K Page 8...
-
Page 9: Removing Channel Strips
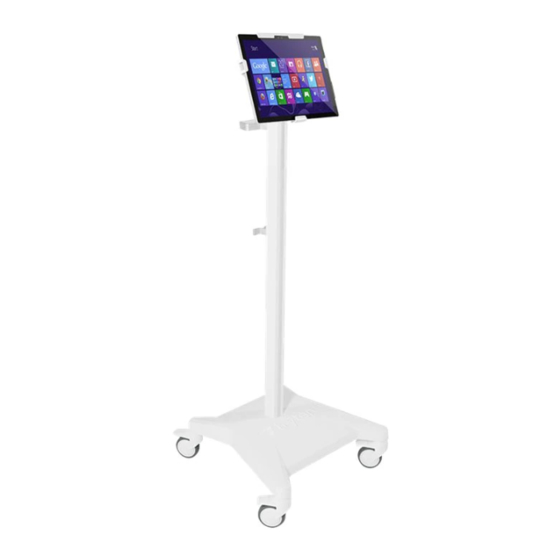
5. NOVA GO UNIVERSAL OMNITAB INSTALLATION • Extract the Nova Go head from packaging box and the Torx Security Button Head Screw from the Hardware Pack. • Assemble the Nova Go head as shown using the Torx Security L-Key provided in the Hardware Pack. -
Page 10: Power Box And Cabling Installation
Wrap the cable firmly around the upper handle and lower handle Cord Wraps located on the back of the unit pole. Nova Go/Pro/Neo Assembly Instructions – Rev K Page 10... -
Page 11: Device Height Adjustment
(image 1), rotate counterclockwise and release handle back in place (image 3) to tighten the assembly. Repeat process until device is fully tightened. • Work Surface adjustment • Keyboard Tray adjustment Nova Go/Pro/Neo Assembly Instructions – Rev K Page 11... -
Page 12: Work Surface Installation
• Remove extrusion adapter by removing two (2) 1/4” screws with 3/16” Hex L-Key provided. • Slide Work Surface down from top and secure at desired height (ref. point 7). • Reinstall Extrusion Adapter and Arm. Nova Go/Pro/Neo Assembly Instructions – Rev K Page 12... -
Page 13: Supply Caddy And Transducer Holder Installation
• Adjust bracket to desired height and tighten screws. • Slide the Supply Caddy or Transducer Holder onto the Mounting Bracket from above until it snaps in place. Nova Go/Pro/Neo Assembly Instructions – Rev K Page 13... -
Page 14: Supply Caddy Lockable Lid
• Rotate Z-Nut so it slides into the channel. • Lower entire lid until it rests on the Caddy. • Fasten lid to pole by using Torx Security L-Key (provided) and turn screw until tight. Nova Go/Pro/Neo Assembly Instructions – Rev K Page 14... - Page 15 • Set numbers to desired combination. • Release button and your new combination is set. To lock, rotate to ‘locked’ position, rotate one or more dials. To unlock, rotate dials to personal combination and ‘unlock’. Nova Go/Pro/Neo Assembly Instructions – Rev K Page 15...
-
Page 16: Installation
10. NOVA GO VESA – FIXED VESA BRACKET & MONITOR INSTALLATION • Remove channel cover strip (ref. point 4). • Install bracket to extrusion with two (2) screws and two (2) Z-Nuts. Note: Ensure the thicker section of the bracket is mounted at the top. -
Page 17: Nova Neo Vertical Tablet Arm Installation
12. NOVA PRO/GO VESA – VESA PLATE INSTALLATION • Install VESA Mount Plate to adapter with four (4) Button- Head Screws. • Install monitor or device to VESA Plate with four (4) mounting screws (not included). Nova Go/Pro/Neo Assembly Instructions – Rev K Page 17... -
Page 18: Yeti-200 Battery Bracket Installation
• Place battery on platform. • Place handle bracket around the green handle as the Z-Nut is inserted into the channel, place bracket on battery and tighten screw. Nova Go/Pro/Neo Assembly Instructions – Rev K Page 18... -
Page 19: Wire Basket Installation
• Loosen two (2) Z-Nuts but do not remove, place Z-Nuts into the extrusion channel, move basket to desired height. • Tighten wire basket to extrusion with two (2) screws and two (2) Z-Nuts. Nova Go/Pro/Neo Assembly Instructions – Rev K Page 19... -
Page 20: Poly Sy20 Speaker Installation
• Tighten bracket to extrusion with screw and T-Nut. • Slide speaker back ridge into the fixed bracket, slide clamp bracket onto speaker and align two (2) screw holes. • Install and tighten two (2) screws. Nova Go/Pro/Neo Assembly Instructions – Rev K Page 20... -
Page 21: Butterfly Bracket Installation
• Place Z-Nuts into the extrusion channel, move bracket up or down to desired height. • Tighten bracket to extrusion with two (2) screws and two (2) Z-Nuts. • Slide charger onto bracket until firmly in place. Nova Go/Pro/Neo Assembly Instructions – Rev K Page 21... -
Page 22: Speaker Bracket And Speaker Installation
• Install Jabra 410 and 510 Bracket to extrusion with screw and Z-Nut. • Install speaker by sliding speaker ledge into bracket lip with wire either at top or bottom. • Re-install cap and screw using Torx Security L-Key provided. Nova Go/Pro/Neo Assembly Instructions – Rev K Page 22... - Page 23 (2) Z-nuts. • Remove screws and cap using Torx Security L-Key provided. • Install speaker by sliding speaker ledge into bracket lip. • Re-install cap and screw using Torx Security L-Key provided. Nova Go/Pro/Neo Assembly Instructions – Rev K Page 23...
- Page 24 California Proposition 65 This product or its power cord may contain chemicals known to the state of California to cause cancer and birth defects or other reproductive harm. Wash hands after handling. Nova Go/Pro/Neo Assembly Instructions – Rev K Page 24...
Need help?
Do you have a question about the Nova Go and is the answer not in the manual?
Questions and answers