tryten NOVA PRO Manual
Modular medical tablet cart
Hide thumbs
Also See for NOVA PRO:
- Assembly instructions (2 pages) ,
- Assembly instructions manual (24 pages)
Table of Contents
Advertisement
Quick Links
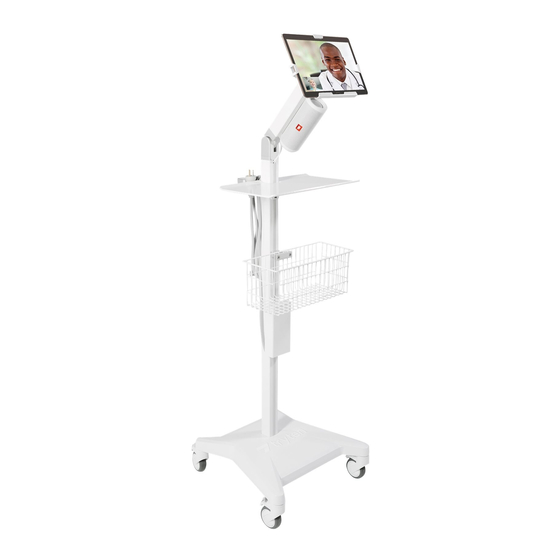
NOVA PRO Modular Medical Tablet Cart
ASSEMBLY KIT
Nova Pro HARDWARE PACKS
Nova Pro Pole Assembly Hardware Pack
• 1 of 3/32 Hex Key
• 1 of 5/16"-18 x 1 1/4" flange bolt
• 1 of 10-32 x 7/8" set screw
Nova Pro Bracket Assembly Hardware Pack
• 1 of ¼"-20 x 7/16" Toplock nut
• 2 of 10-32 x 3/8" Long flat-head socket cap screws
• 1 of 1/8" Hex Drive Key
• 1 thick swivel head washer
• 1 thin swivel head washer
• 1 Set of 2 keys
Nova Pro Wire Basket Hardware Pack
• 2 of 10-32 x 3/8" long flat-head socket cap screws
• 1 – ¼ turn ¼-20 Z-Nut
• 1 screw for 80/20 nut, socket head cap screw ¼"-20 x 1.5" long
ADDITIONAL TOOLS REQUIRED
• 7/16" Socket, ½" Socket
ASSEMBLY INSTRUCTIONS
1. OPEN THE SHIPPING BOX
•
Open shipping box and remove base assembly.
BASE ASSEMBLY
•
Extract hardware pack.
HARDWARE PACK
•
Remove Pole assembly from packaging.
POLE ASSEMBLY
2. PREP THE POLE ASSEMBLY
•
Remove 4 screws and split washers from Pole
assembly using the 3/16-inch hex L key from
the hardware pack.
3. ASSEMBLE THE POLE ASSEMBLY
•
Assemble the Pole assembly to the base using the 4 screws and split washers that came with the
Pole assembly using the 3/16-inch hex L key from the hardware pack.
4. ADJUST UNIVERSAL BRACKET TO FIT THE SIZE OF THE TABLET
The Universal bracket comes adjusted to fit the standard iPad 9.7.
•
Unlock the top slider using the set of keys from the hardware pack.
•
Remove the top slider from the OmniTab.
•
Loosen the 3 screws using the 1/8-inch hex L key from the hardware pack.
ADJUSTMENT SCREWS
•
Pull sliders to the appropriate size tablet.
•
Tight back the three adjustment screws.
•
Slide the tablet into place.
•
Insert the Top slider and push the locking button.
LOCK BUTTON
5. WHEN A TABLET HAS A CASE, INSTALL 2ND SET OF SLIDERS
a) Remove 4 felt pads from Universal bracket.
FELT PADS
b) Remove 4 screws holding the cover of the Universal bracket using the 1/8-inch hex L key from
the hardware pack.
COVER
HOLDING SCREWS
Remove cover and the 3 screws
c)
holding the sliders using the 1/8-inch
hex L key from the hardware pack.
d) Remove for sliders and replace with the set of sliders from hardware pack.
e) Install the 3 screws holding the sliders using the 1/8-inch hex L key from the hardware pack.
SLIDERS
HOLDING SCREWS
f) Put back the cover and install the 4 screws removed at step b) using the 1/8-inch hex L key from
the hardware pack.
COVER
HOLDING SCREWS
g)
Apply the set of felt pads supplied
in the hardware pack on top of the
screws.
Adjust sliders and install tablet
h)
following the instructions from
Step 4.
Advertisement
Table of Contents

Related Manuals for tryten NOVA PRO


Summary of Contents for tryten NOVA PRO
- Page 1 • Remove 4 screws and split washers from Pole assembly using the 3/16-inch hex L key from the hardware pack. NOVA PRO Modular Medical Tablet Cart ASSEMBLY KIT FELT PADS Nova Pro HARDWARE PACKS Nova Pro Pole Assembly Hardware Pack •...
- Page 2 • The tray comes with 2 screws and 2 Z-nuts. • NOVA PRO Modular Medical Tablet Cart Loosen Z-nuts from screws but do not remove; align Z-nuts so they slide into pole channel. • Use 5/32” allen key to tighten screws. Before tightening completely, adjust height of tray to desired position and then tighten screws.
Need help?
Do you have a question about the NOVA PRO and is the answer not in the manual?
Questions and answers