Advertisement
Advertisement

Related Manuals for TEFAL Turbo Cuisine Maxi


Summary of Contents for TEFAL Turbo Cuisine Maxi
- Page 1 Turbo Cuisine Maxi www.tefal.com...
- Page 2 THANKS FOR CHOOSING TEFAL Welcome to the world of fast & delicious cooking! With Turbo Cuisine, we took up the challenge of reinventing the pot: Easier. Tastier. Just better! Designed with this guiding principle, Turbo Cuisine allows you to save time and cook homemade delicious meals in total simplicity and convenience.
-
Page 3: Table Of Contents
CONTENTS Quick Start Guide in Images ----------------------------------------------------------------------------------4 Tefal Recommends Safety First ------------------------------------------------------------------------------8 All Parts of Your Product -----------------------------------------------------------------------------------------6 Getting Familiar with the Control Panel ------------------------------------------------------------------7 How To Use & Clean Guide ------------------------------------------------------------------------------------8 Technical Troubleshooting Guide ---------------------------------------------------------------------------34 Tefal International Limited Guarantee--------------------------------------------------------------------37... - Page 7 Bang!
-
Page 10: Tefal Recommends Safety First
TEFAL RECOMMENDS SAFETY FIRST Safety is our number one priority. We design and manufacture our product with high safety and technology standards. However, as with any electric appliance there are some potential risks, we therefore invite you to exercise a degree of care and to adhere to the following instructions. - Page 11 − farm houses; − by clients in hotels, motels and other residential type environments; − bed and breakfast type environments. • Do not place the appliance in a heated oven or on a hot hob. Do not place the appliance close to an open flame or a flammable object.
- Page 12 3. How to use safely – general usage? • Do not use appliance for other than the intended purpose. • Do not use the appliance to fry food in oil. Only browning is allowed. • This appliance is not a steriliser. Do not use it to sterilise jars. •...
- Page 13 • Do not use the appliance empty, without its cooking pot or without ingredients inside the cooking pot. This could cause serious damage to the appliance. • Do not fill up your appliance without its cooking pot. • Do not work the appliance under pressure without adding water, which would seriously damage it.
- Page 14 4. How to use safely – before cooking? • Before using your appliance, check that the float valve and the pressure limit valve are clean. • Before using your appliance, check that the sealing gasket has been correctly installed on the lid. •...
- Page 15 • Do not remove the cooking pot while the appliance is working. • In browning mode, be careful of risks of burns caused by spattering when you add food or ingredients into the hot cooking pot. 6. How to use safely – after cooking? •...
- Page 16 8. What to do in case of damage? • Do not operate any appliance with a damaged power cord or plug or after the appliance malfunctions or has been damaged in any manner. Return appliance to the nearest Approved Service Centre for examination, repair or adjustment.
- Page 17 Environment protection first! Your appliance contains valuable materials which can be recovered or recycled. Leave it at a local civic waste collection point. 9. When does warranty apply? • The warranty does not cover the abnormal wear and tear of the cooking pot. •...
-
Page 18: All Parts Of Your Product
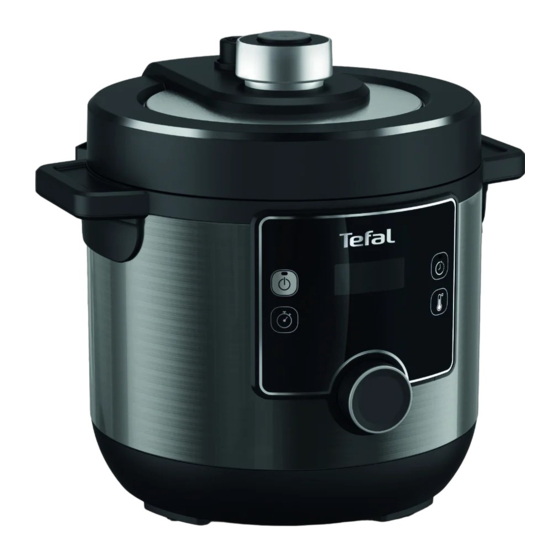
ALL PARTS OF YOUR PRODUCT Pressure limit Float valve valve Pressure release button Lid knob Steam trivet * accessories depending on models Sealing gasket Cooking pot Pressure limit valve cover Float valve Handles Power cord Screen Control panel Housing Control panel knob Measuring Heating plate... -
Page 19: Getting Familiar With The Control Panel
GETTING FAMILIAR WITH THE CONTROL PANEL Cooking phase indicators Pre- Under heating pressure Keeping Cooking in progress warm Functions Functions Delayed start Start/Stop button Temperature Timer button Stir Yogurt & Stew Soup Steam Bake Sous vide Oatmeal Rice Manual Ferment Cooking programs STATUS MESSAGES Welcome message when appliance is turned on. -
Page 20: How To Use & Clean Guide
HOW TO USE & CLEAN GUIDE Feel free to refer to the figures indicated as (Fig.x) from Quick Start Guide part. BEFORE FIRST USE 1. Remove packaging • Take your appliance out of its packaging and please take time to read the instruction manual before first use. •... - Page 21 • Do not use a scourer or abrasive sponge to clean the cooking pot as it could damage the non-stick coating in the cooking pot (Fig.40). • Do not immerse the appliance in water (Fig.41). • If you inadvertently immerse your appliance in water or spill water directly on the heating plate, take it to an Approved Service Centre for repair.
- Page 22 3c. Clean the valves • To clean the pressure limit valve, remove the pressure limit valve from the pipe on top of the lid (Fig.10). Clean it with a soft sponge and soapy hot water (Fig.11). Once dry, take care that the duct of the pipe is clean before plugging the pressure limit valve back on the pipe on top of the lid (Fig.12).
- Page 23 INSTRUCTIONS FOR USE 1. Place ingredients in the cooking pot • Remove the cooking pot from the housing. • Put ingredients into the cooking pot. • Please note that the level of food and liquids should never exceed the max level marking on the cooking pot (Fig.19). •...
- Page 24 COOKING PROGRAMS TABLE Lid status from • Stew 30min 1min 114C 70Kpa to 2h from • Soup 12min 1min 114C 70Kpa to 2h from Yes from • Stir Fry 20min 1min 160C 100C to to 1h 160C from • Steam 10min 1min 114C...
- Page 25 Please refer to the figures from Quick Start Guide (from Fig.25 to Fig.36) Stew program • Place the ingredients in the cooking pot and completely close and lock the lid. • Turn the control panel knob to the right to reach Stew program .
- Page 26 Soup program • Place the ingredients in the cooking pot and completely close and lock the lid. • Turn the control panel knob to the right to reach Soup program . The screen displays the default cooking time. • Optional: Press and set the desired time by turning the control panel knob to the right (to increase time) or to the left (to decrease time).
- Page 27 • Optional: Press and set the desired time by turning the control panel knob to the right (to increase time) or to the left (to decrease time). • Optional: Press and set the desired temperature by turning the control panel knob to the right (to increase temperature) or to the left (to decrease temperature).
- Page 28 control panel knob to the right (to increase time) or to the left (to decrease time). • Press to start the cooking program. • The appliance starts the pre-heating phase. The screen displays alternatively & and the pre-heating light indicator turns on.
- Page 29 • Optional: Press and set the desired temperature by turning the control panel knob to the right (to increase temperature) or to the left (to decrease temperature). • Press to start the cooking program. • The appliance starts the pre-heating phase. The screen displays alternatively &...
- Page 30 • The appliance starts the pre-heating phase. The screen displays alternatively & and the pre-heating light indicator turns on. • When the pre-heating phase is completed, the appliance switches automatically to cooking phase. The screen displays the count down and the cooking in progress light indicator turns on.
- Page 31 • At the end of the count down, the appliance beeps and the screen displays • After a few seconds, the appliance will automatically switch to keep warm phase. The screen displays and the keeping warm light indicator turns on. •...
- Page 32 • After a few seconds, the appliance will automatically switch to standby mode. The screen displays • Press for 3 seconds to stop the program at any time. Oatmeal program • Place the ingredients in the cooking pot and completely close and lock the lid.
- Page 33 Adjustable Chef mode • Place the ingredients in the cooking pot and close the lid or not depending on your recipe. • Turn the control panel knob to the right to reach Adjustable Chef mode . The screen displays the default cooking time. •...
- Page 34 7. Use the delayed start function Delayed start can be useful to preset the appliance to start cooking later. • First select a program following the steps described above in part 6. • Before starting the selected program, press . The screen displays the default time for delayed start.
- Page 35 WARNING: Be careful of the hot steam coming out from the cooking pot. 9. Unplug the appliance • After usage, unplug the appliance and let it cool down for at least 2 hours before cleaning. 10. Clean after use • Clean your appliance after each use. •...
-
Page 36: Technical Troubleshooting Guide
TECHNICAL TROUBLESHOOTING GUIDE Problem Possible reasons Solutions Press continuously the pressure release button to remove the Unable to open because of pressure inside of the cooking pot. pressure in the cooking pot. It can take a few minutes until the pressure is fully released. - Page 37 Solutions Problem Possible reasons Clean pressure limit valve, float valve and lid thoroughly. The inner pressure exceeds If float valve still has steam working pressure, or the inner coming out, please return appliance to the nearest. pressure exceeds the safety Approved Service Center pressure.
- Page 38 Solutions Problem Possible reasons Remove the sealing gasket, The sealing gasket is not clean it and reinstall it in the properly installed. correct position. Remove the sealing gasket, clean it and reinstall it in the The sealing gasket is dirty. Steam leakage from lid.
- Page 39 The repair process may require a longer time if the product is not locally sold by TEFAL/T-FAL in the country of usage. If the product is not repairable in the new country of usage, the international TEFAL/T-FAL guarantee is limited to a replacement by a similar or alternative product at similar cost, where possible.
- Page 40 INTERNATIONAL GUARANTEE www.tefal.com Date of purchase / Date d’achat / Fecha de compra / Købsdato / Ostopäivä / Kjøpsdato / Inköpsda- tum / Ostukuupäev / Pirkuma datums / Įsigijimo data / Data zakupu / Datum izročitve blaga / Datum kupovine / Vásárlás dátuma / Data achiziţiei / Дата на закупуване / Дата продажу / Վաճառքի օր. / Дата...
- Page 41 TEFAL/T-FAL INTERNATIONAL GUARANTEE: COUNTRY LIST SMALL HOUSEHOLD APPLIANCES EESTI ESTON www.tefal.com SUOM GROUPE SEB ARGENTINA S.A. FINLAN 2 años Billinghurst 1833 3° ARGENTINA 0800-122-2732 FRANCE Contin 2 years C1425DTK Guadeloupe, Ma Capital Federal Buenos Aires Réunion, St- SEB Ուկրանիա...
- Page 42 FINLAND 2 years Pakkalankuja 6 01510 Vantaa ° GROUPE SEB France FRANCE Continentale + 2 ans Service Consommateur Tefal 09 74 50 47 74 Guadeloupe, Martinique, os Aires 2 years 112 Ch. Moulin Carron, TSA 92002 Réunion, St-Martin կերություն 69134 ECULLY Cedex...
- Page 43 22 96 39 30 NORWAY 2 years Lilleakerveien 6d, 5 etg 0283, Oslo UNITED KIN سلطنة ع ُمان 24703471 1 year www.tefal-me.com OMAN U.S.A Groupe SEB Polska Sp. z o.o. 801 300 420 2 lata Gdański Business Center II D POLSKA...
- Page 44 2 años ESPAÑA 933 06 37 65 C/ Almogàvers, 119-123, Complejo Ecourban офис 30 SPAIN 2 years 08018 Barcelona TEFAL - OBH Nordica Group AB SDN. BHD 2 år SVERIGE 08 629 25 00 Löfströms Allé 5 Uptown 2, SWEDEN...
- Page 48 • Type: SERIE EPC52 • Model: CY77 • Capacity: 7.6L • Voltage: 220-240V • Frequency: 50-60Hz • Power: 1000-1200W 3206000527/02...
Need help?
Do you have a question about the Turbo Cuisine Maxi and is the answer not in the manual?
Questions and answers