
Related Manuals for Hercules HE32


Summary of Contents for Hercules HE32
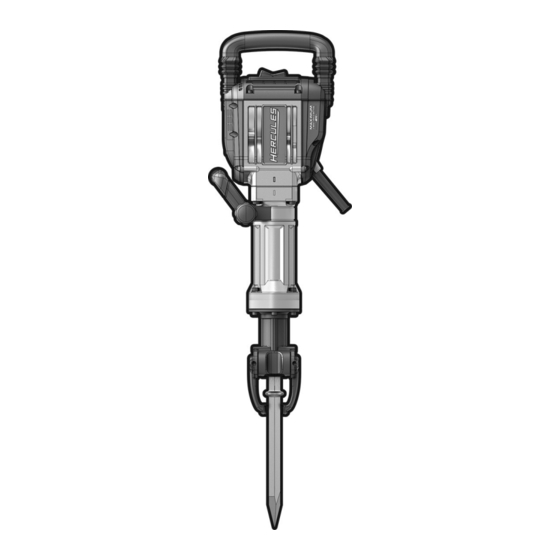
- Page 1 Owner’s Manual & Safety Instructions WARNING: When unpacking, make sure that the product is intact and undamaged. If any parts are missing or broken, please call 1-888-866-5797 as soon as possible. Reference 57150...
-
Page 2: Important Safety Information
IMPORTANT SA FETY INFORMATION GENERAL POWER TOOL SAFETY WARNINGS such as dust mask, non-skid safety shoes, hard Failure to follow the warnings and instructions may result in electric shock, fire and/or serious injury. your Work area safety tools that have the switch on invites accidents. A wrench Cluttered or dark areas invite accidents. -
Page 3: Vibration Safety
15. People with pacemakers should consult their physician(s) before use. Electromagnetic fields in close proximity to heart pacemaker could cause pacemaker interference or pacemaker failure. Many accidents In addition, people with pacemakers should: • Avoid operating alone. • Properly maintain and inspect to avoid electrical shock. •... -
Page 4: Grounding Instructions
Extension Cords GROUNDING INSTRUCTIONS 1. Grounded tools require a three wire extension cord. Double Insulated tools can use either a two or three wire extension cord. 2. As the distance from the supply outlet increases, you must use a heavier gauge extension cord. Using extension cords with inadequately sized wire causes a serious drop in voltage, resulting in loss of power and possible tool damage. -
Page 5: Specifications
Warning Symbols and Definitions Specifications Electrical Rating 120VAC / 60Hz / 15A 1 Bull Nose Bit Bits 1 Narrow Tile Bit Functional Description Symbology Double Insulated Volts Alternating Current Amperes n 0 xxxx/min. No Load Revolutions per Minute (RPM) WARNING marking concerning Risk of Eye Injury. -
Page 6: Operation
Install Collared Bit OPERATION 1. Pull the Lock Lever open about 70-80° to the second engaging position. Tool Set Up 2. Insert the collared Bit. 3. Slide the Bit in as far as it will go. Clean the loading end of the bit to remove any debris, then lubricate the bit with grease. -
Page 7: General Operation
General Operation MAINTENANCE AND SERVICING 1. Check Bit for dullness, cracks, or other damage. Cleaning, Maintenance, Dull tipped bits can cause unnecessary and Lubrication bit movement, resulting in tool wear and possible injury. Use only sharp tipped bits. inspect the general 2. -
Page 8: Troubleshooting
Troubleshooting Tool will 1. Cord not connected. 1. Check that cord is plugged in. not start. 2. No power at outlet. 2. Check power at outlet. If outlet is unpowered, turn off tool and check circuit breaker. If breaker is tripped, make sure circuit is right capacity for tool and circuit has no other loads. -
Page 9: Please Read The Following Carefully
PLEASE READ THE FOLLOWING CAREFULLY THE MANUFACTURER AND/OR DISTRIBUTOR HAS PROVIDED THE PARTS LIST AND ASSEMBLY DIAGRAM IN THIS MANUAL AS A REFERENCE TOOL ONLY. NEITHER THE MANUFACTURER OR DISTRIBUTOR MAKES ANY REPRESENTATION OR WARRANTY OF ANY KIND TO THE BUYER THAT HE OR SHE IS QUALIFIED TO MAKE ANY REPAIRS TO THE PRODUCT, OR THAT HE OR SHE IS QUALIFIED TO REPLACE ANY PARTS OF THE PRODUCT. -
Page 10: Parts List And Diagram
PARTS LIST AND DIAGRAM Parts List Chisel Chuck Armature 110-120V ST4.8x65 Tapping Screw Locking Lever Stator 110-120V Clamp ring Stator Asm. Front Cover Assembly Helical spring Hex .Socket Bolt M8x55(12.9) Carbon brush wire Carbon Brush Impact Hammer ST4.2x10 Tapping Screw Hex .Socket Bolt M6x25 Limit ring Fan Cover... -
Page 11: Assembly Diagram
Assembly Diagram Item 57150 Page 11... -
Page 12: Limited 90-Day Warranty
LIMITED 90 DAY WARRANTY Harbor Freight Tools Co. makes every effort to assure that its products meet high quality and durability standards, and warrants to the original purchaser that this product is free from defects in materials and workmanship for the period of one year from the date of purchase.
Need help?
Do you have a question about the HE32 and is the answer not in the manual?
Questions and answers
I m looking for this part can you help? For heroes jack hammer HE32 the call Bearing cover
The bearing cover for the Hercules jack hammer HE32 is listed as item 39 in the assembly diagram and is labeled as "Cover plate."
This answer is automatically generated