
Related Manuals for Boyd C300 Series


Summary of Contents for Boyd C300 Series
- Page 1 Product Installation Guide C300 & C500 Series LED Exam Light Installation and Operation C500 C300 12900 44th Street North Clearwater, Florida 33762 800-255-2693 or 727-561-9292 FAX: 727-561-9393 SALES FAX: 727-573-1682 SERVICE IG-001 Rev 1 www.boydindustries.com...
-
Page 2: Table Of Contents
Table of Contents Title Page Table of Contents Introduction Application of Product Warranty Information Safety Tips / Precautions 5-14 About Your LED Light Components Product Installation Product Operation Tension Adjustment General Maintenance and Repair 15-17 Lens Removal C300 and C500 Cleaning / Infection Control / Technical Service Information Authorized Representative (Europe Only) IG-001... -
Page 3: Introduction
LED Exam Light Boyd Industries, Inc. is proud of this product. We are sure that you will enjoy its ease of use and adjustability for many years to come. It is our goal to please our customers with the best product quality in the market today. -
Page 4: Safety Tips / Precautions
Please read the installation guide before use. Warnings & Cautions 1. The Boyd LED Exam Light has been designed to be safe and effective when used for patient dental examination when properly installed, used, monitored and maintained. 2. Prior to installation, visually examine the light head, lens, arms, power cords, video cables, transformer and plugs for any sign of damage or deterioration. -
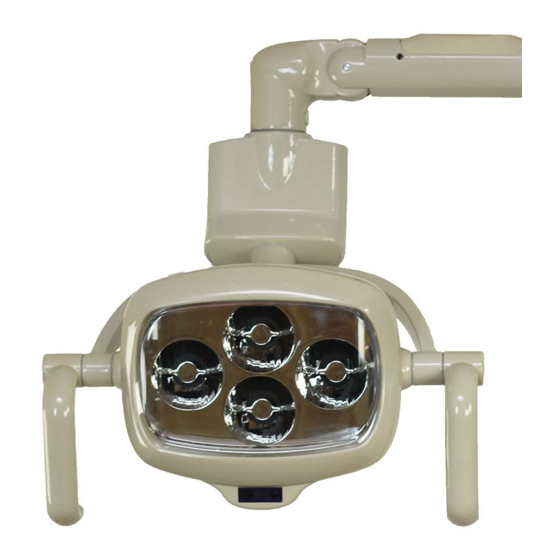
Page 5: About Your Led Light
About Your LED Light Components C300 / C500 C500 C500 C500 C300 C300 C500 C500 C500 Description Putty Black White Putty Black Putty Black White Camera Camera Camera Primary Arm 60-7923 60-7923B 60-7924 60-7924B 60-7924W 60-7925 60-7925B 60-7925W Secondary Arm 60-7926 60-7926B 60-7927... - Page 6 About Your LED Light (Continued) Components C300 / C500 C500 C500 C500 C300 C300 C500 C500 C500 Description Putty Black White Putty Black Putty Black White Camera Camera Camera Hand Grips 60-7915 60-7915B 60-7915 60-7915B 60-7915W 60-7915 60-7915B 60-7915W (Pair) Lens Cover 60-7920 C300...
-
Page 7: Product Installation
About Your LED Light (Continued) Product Installation 1. Inspect Light components upon receipt. 2. Insert Electrical Lead Head Unit attached to Primary Arm, Secondary through Mounting Post until it comes out the Arm, Transformer & 2x Hand Grips. (C500 with bottom. - Page 8 About Your LED Light (continued) Product Installation Video Cable (C500 with camera) Only 7. Route Electrical Lead and video cable (C500 with camera) from bottom of Light Post into Bottom Cover of Chair. 8. Plug Transformer into duplex outlet as 9.
- Page 9 About Your LED Light (continued) Product Installation Chair Mounted C500 Light Connecting SDI Video Capture to Monitoring Device (PC, Tablet, MAC or Notebook) Maximum USB 3.0 cable routing distance from HD-SDI capture device located in the chair electrical enclosure to USB port on monitor devices is 15 feet.
-
Page 10: Product Operation
When properly connected to the chair the Light may be turned ON/OFF using the Toggle Switch on the Head Unit or the Foot Switch on the Foot Control where available on Boyd Chairs. • The Handle Grips are retained by magnets in the mounting connector. They may be removed for cleaning by simply pulling them off. - Page 11 About Your LED Light (continued) Product Operation Control Panel C500 Light Illumination Functions - Dial type (option, remote controllable) - Clockwise rotation - Brightness Up Brightness Control - Counter clockwise rotation - Brightness Down - 6 ~ 100% of Control Range Color Temperature - 3 Settings 4000K / 4500K / 5000K Camera Functions (Optional)
-
Page 12: Tension Adjustment
About Your LED Light (continued) Tension Adjustment #1 Axis Tension Adjustment #3 Axis 1. Check #1 Axis tension position • Check the 2 handles connected #2 Axis R/L side of first head arm. (neodymium magnet) #1 Axis 2. Remove Handles that are magnetically held in place by pulling them straight out. - Page 13 About Your LED Light (continued) Tension Adjustment #2 Axis Tension Adjustment 2. Close up view of Adjustment 1. #2 Axis Adjustment location. location. 3. Head tension control Tool: Allen wrench (2.5mm) Working method: Adjust tension with Allen wrench. IG-001 Rev 1...
- Page 14 About Your LED Light (continued) Tension Adjustment Arm Adjustment 1. Remove cover from Arm Assembly using small pry tool. Caution: Do not scratch or damage paint. 2. Relieve tension control assembly. 4. Tighten tension control assembly to lock 3. Adjust tension by adjusting nut. position.
-
Page 15: General Maintenance And Repair
General Maintenance and Repair C300 Lens Removal Tools: Small Phillips Head Screwdriver Slot Head Screwdriver Caution: Always de-energize power at breaker prior to performing any procedure on light assembly. C300 C300 1. Plastic Plug Removal. Using a small Slot Screwdriver, remove the plastic plug located on the rear side of the light head. Pry the plastic plugs off with care to avoid scratching paint on the light head or damaging plugs. - Page 16 General Maintenance and Repair (continued) C500 Lens Removal Tools: Small Phillips Head Screwdriver Slot Head Screwdriver Caution: Always de-energize power at breaker prior to performing any procedure on light assembly. C500 C500 1. Plastic Plug Removal. Using a small Slot Screwdriver, remove the plastic plug located on the rear side of the light head. Pry the plastic plugs off with care to avoid scratching paint on the light head or cutting plugs.
- Page 17 EPA registered as ‘hospital disinfectant’ and labeled for ‘tuberculocidal’ activity. Two (2) such products are: Tri-cide (800)342-3096 Medocadcio (800)777-7072 Technical Service For parts, service, or technical information contact: U.S.A. / Canada: Boyd Industries, Inc. 12900 44th Street North Clearwater, Florida USA 33762 tel: 1-727-471-5071 (direct service line) 1-800-255-2693...
- Page 18 Boyd Industries, Inc 12900 44th Street N Clearwater, FL 33762 U.S.A Prinsessegracht 20 2514 AP The Hague The Netherlands IG-001 Rev 1...
Need help?
Do you have a question about the C300 Series and is the answer not in the manual?
Questions and answers