Table of Contents
Advertisement
MODEL G1033X
20" 5HP SPIRAL CUTTERHEAD
PLANER
OWNER'S MANUAL
(For models manufactured since 4/12)
Copyright © FEBrUAry, 2006 By grizzly indUstriAl, inC., rEvisEd MAy, 2012 (Bl)
WARNING: NO PORTION Of THIS MANUAL MAy bE REPRODUCED IN ANy SHAPE
OR fORM WITHOUT THE WRITTEN APPROvAL Of GRIzzLy INDUSTRIAL, INC.
#Bl7969 printEd in tAiWAn
Advertisement
Table of Contents

Related Manuals for Grizzly G1033X


Summary of Contents for Grizzly G1033X
- Page 1 OWNER'S MANUAL (For models manufactured since 4/12) Copyright © FEBrUAry, 2006 By grizzly indUstriAl, inC., rEvisEd MAy, 2012 (Bl) WARNING: NO PORTION Of THIS MANUAL MAy bE REPRODUCED IN ANy SHAPE OR fORM WITHOUT THE WRITTEN APPROvAL Of GRIzzLy INDUSTRIAL, INC.
- Page 2 This manual provides critical safety instructions on the proper setup, operation, maintenance, and service of this machine/tool. Save this document, refer to it often, and use it to instruct other operators. Failure to read, understand and follow the instructions in this manual may result in fire or serious personal injury—including amputation, electrocution, or death.
-
Page 3: Table Of Contents
... 11 inventory ... 12 hardware recognition Chart ... 13 Cleanup ... 14 site Considerations ... 15 Moving & placing planer... 16 Extension Wings ... 16 handwheel ... 17 dust hood ... 17 dust Collection ... 17 gearbox oil level ... -
Page 4: Introduction
INTRODUCTION Manual Accuracy Contact Info your machine may not exactly match the manual www.grizzly.com Model g1033X (Mfg. since 4/12) -
Page 5: Identification
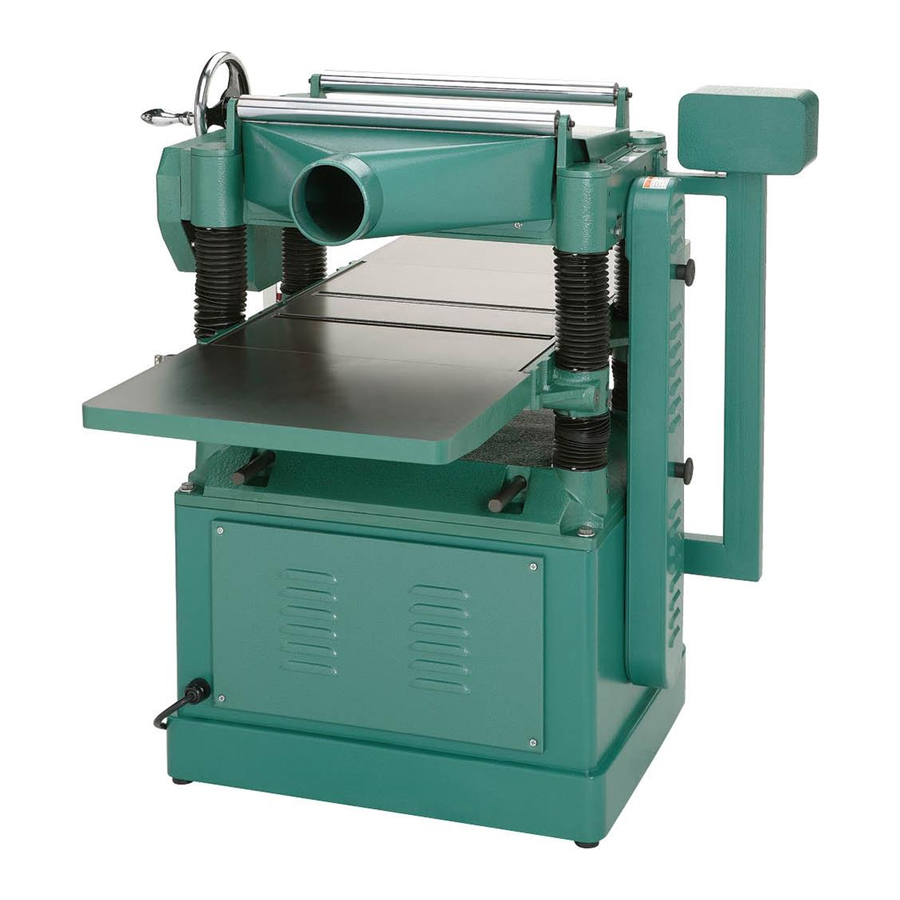
C. table height handwheel D. gearbox E. table height scale G. table locks H. lifting Bar K. v-Belt Cover Model g1033X (Mfg. since 4/12) Identification figure 1. g1033X identification. speed Control Knob Extension Wing dust hood Motor and Magnetic switch Access panel... -
Page 6: Machine Data Sheet
The information contained herein is deemed accurate as of 5/21/2012 and represents our most recent product specifications. Model G1033X Due to our ongoing improvement efforts, this information may not accurately describe items previously purchased. PAGE 1 OF 2 Model g1033X (Mfg. since 4/12) - Page 7 The information contained herein is deemed accurate as of 5/21/2012 and represents our most recent product specifications. Model G1033X Due to our ongoing improvement efforts, this information may not accurately describe items previously purchased. Model g1033X (Mfg. since 4/12) PAGE 2 OF 2...
-
Page 8: Section 1: Safety
NOTICE This symbol is used to alert the user to useful information about proper operation of the machine. Safety Instructions for Machinery OWNER’S MANUAL. EYE PROTECTION. HAZARDOUS DUST. WEARING PROPER APPAREL. HEARING PROTECTION. MENTAL ALERTNESS. Model g1033X (Mfg. since 4/12) - Page 9 ONLY USE AS INTENDED. USE RECOMMENDED ACCESSORIES. CHILDREN & BYSTANDERS. REMOVE ADJUSTING TOOLS. SECURING WORKPIECE. FEED DIRECTION. FORCING MACHINERY. Model g1033X (Mfg. since 4/12) GUARDS & COVERS. NEVER STAND ON MACHINE. STABLE MACHINE. AWKWARD POSITIONS. UNATTENDED OPERATION. MAINTAIN WITH CARE.
-
Page 10: Additional Safety Instructions For Planers
DISCONNECT bEfORE ADJUSTMENTS. to avoid unexpected start-up and serious personal injury, always disconnect the planer from power before performing adjustments, maintenance, or service. Model g1033X (Mfg. since 4/12) -
Page 11: Section 2: Power Supply
Current Rating full-Load Current Rating at 220v ... 23 Amps Model g1033X (Mfg. since 4/12) Circuit Requirements for 220v Circuit Type ... 220v, 60 Hz, 1-Phase Power Supply Circuit ... 30 Amps Plug/Receptacle ...NEMA L6-30... -
Page 12: Grounding Instructions
Serious injury could occur if you connect the machine to power before completing the setup process. DO NOT connect to power until instructed later in this manual. Extension Cords Minimum Gauge Size ...10 AWG Maximum Length (Shorter is better)...50 ft. Model g1033X (Mfg. since 4/12) -
Page 13: Section 3: Set Up
(570) 546-9663 for advice. Otherwise, filing a freight claim can be difficult. Model g1033X (Mfg. since 4/12) Needed for Setup the following are needed to complete the setup process, but are not included with your machine. -
Page 14: Inventory
⁄ " ... 20 Some hardware/fasteners on the inventory list may arrive pre-installed on the machine. Check these locations before assuming that any items from the inventory list are miss- ing. NOTICE Model g1033X (Mfg. since 4/12) -
Page 15: Hardware Recognition Chart
Hardware Recognition Chart -13- Model g1033X (Mfg. since 4/12) -
Page 16: Cleanup
T23692—Orange Power Degreaser A great product for removing the waxy shipping grease from your machine during clean up. figure 4. t23692 orange power degreaser. Model g1033X (Mfg. since 4/12) -
Page 17: Site Considerations
See below for required space allocation. Children or untrained people may be seriously injured by this machine. Only install in an access restricted location. 39" Model g1033X (Mfg. since 4/12) Physical Environment Electrical Installation Lighting 58" figure 5. Minimum working clearances. -
Page 18: Moving & Placing Planer
Model g1033X is equipped with lifting bars (see Page 3) to lift and place the planer. When lifting the planer with a forklift, we recom-... -
Page 19: Handwheel
M12-1.75 hex nut and flat washer, as shown in figure 9. figure 9. installing handwheel on shaft. Model g1033X (Mfg. since 4/12) Dust Hood Components and Hardware Needed: dust hood ... 1 Flange Bolts M6-1 x 12 ... -
Page 20: Gearbox Oil Level
Page 28, "gearbox" for instruc- tions on how to do this. Note: Replace the gearbox oil after the first 20 hours of operation. This is a normal break-in pro- cedure. Model g1033X (Mfg. since 4/12) -
Page 21: Test Run
(refer to Gearbox Oil Level on Page 18 for detailed instructions). Connect the machine to power. Model g1033X (Mfg. since 4/12) push the stop button in, then twist it clock- wise so it pops out. When the stop button pops out, the switch is reset and ready for operation (see figure 12). -
Page 22: Tighten V-Belts
SECTION 7: SERvICE ADJUSTMENTS. table parallelism (Page 32). Chain drive tension (Page 32). infeed/outfeed roller height (Page 34). spring tension (Page 37). Chip Breaker height (Page 34). pressure Bar height (Page 34). Chip deflector positioning (Page 37). Model g1033X (Mfg. since 4/12) -
Page 23: Section 4: Operations
OMMEND that you read books, review industry trade magazines, or get formal training before beginning any projects. Regardless of the content in this section, Grizzly Industrial will not be held liable for accidents caused by lack of training. Model g1033X (Mfg. since 4/12) basic Controls... -
Page 24: Operation Overview
• When possible, plane both faces of the workpiece so that they will be parallel with one another. Model g1033X (Mfg. since 4/12) -
Page 25: Workpiece Inspection
Model g1033X (Mfg. since 4/12) Wood Hardness the species of wood, as well as its condition, greatly affects the depth of cut the planer can effectively take with each pass. -
Page 26: Feed Rate
Use this and other machinery with caution and respect. failure to do so could result in serious per- sonal injury, damage to equipment, or poor work results. Model g1033X (Mfg. since 4/12) table height handwheel depth of Cut indicator &... -
Page 27: Bed Rollers
Note: Misaligned bed rollers can cause workpiece chatter, a washboard surface, uneven workpiece feeding, or binding. Model g1033X (Mfg. since 4/12) To adjust the bed rollers: disConnECt plAnEr FroM poWEr! lower the table to give yourself at least 4" of working room below the cutterhead. -
Page 28: Section 5: Accessories
To minimize this risk, only install accessories recommended for this machine by Grizzly. NOTICE Refer to the newest copy of the Grizzly Catalog for other accessories available for this machine. G1738—Rotacator™ Precision Planer Tool the rotacator is a dial indicator on a magnetic... -
Page 29: Section 6: Maintenance
We recommend products like slipit gun treatment, or Boeshield ® Model g1033X (Mfg. since 4/12) v-belt removal and replacement is simply a mat- ter of loosening the v-belts, rolling them off of the pulleys, replacing them with new belts, then retensioning them. -
Page 30: Lubrication
Lubrication the Model g1033X features factory-sealed bear- ings. A sealed bearing requires no lubrication dur- ing its lifetime. should a bearing fail, your planer will probably develop a noticeable rumble/vibra- tion, which will increase when the machine is put under load. -
Page 31: Section 7: Service
1. loose or damaged blade. running or cutting. 2. damaged v-belt. 3. Worn cutterhead bearings. Model g1033X (Mfg. since 4/12) Troubleshooting possible solution 1. press the rEsEt button on the thermal overload relay; investigate reason it tripped to prevent future problems. - Page 32 1. rotate/replace the cutters (Page 31). 2. increase the feed rate (Page 24). 3. increase the depth of cut. 1. Use a dust collection system; adjust the chip deflector in or out depending on your setup (Page 37). Model g1033X (Mfg. since 4/12)
-
Page 33: Rotating/Changing Carbide Cutters
25. Cutter rotating sequence. Model g1033X (Mfg. since 4/12) To rotate or change a carbide cutter: 1. disConnECt thE plAnEr FroM thE poWEr soUrCE! 2. -
Page 34: Chain Tension
As such, it is essential that the table is parallel with the cutterhead (within 0.002") from side-to-side, as illustrated in figure 27. figure 27. side-to-side parallelism of table and cutterhead. Model g1033X (Mfg. since 4/12) - Page 35 0.016" or by adjusting how the table is mounted on the columns for movements under 0.016". Model g1033X (Mfg. since 4/12) NOTICE When making adjustments, tighten fasten- ers after each step to ensure the accuracy of your tests.
-
Page 36: Internal Component Heights
To set the height of the infeed and outfeed rollers, chip breaker, and pressure bar using a Rotacator: disConnECt thE plAnEr FroM thE poWEr soUrCE! Model g1033X (Mfg. since 4/12) - Page 37 Steps 6–7 on the left-hand side of the infeed roller. double-check and micro-adjust both sides of the infeed roller, then carefully lock both sides in place. Model g1033X (Mfg. since 4/12) infeed roller nuts set screws figure 32. infeed and outfeed height adjustment controls (one side shown).
- Page 38 33), and outfeed roller (figure 32) in the same manner, using the wood blocks as your reference point. 11. When you are finished with the adjustments, replace the top cover, dust port, and belt cover. Model g1033X (Mfg. since 4/12)
-
Page 39: Spring Tension
" tension screw #4 Adjust to ⁄ figure 36. tension screw locations and adjustments. Model g1033X (Mfg. since 4/12) Chip Deflector Chip Deflector Gap Setting if planer Used w/dust Collector ... if planer Used w/o dust Collector ... Tools Needed: Wrench or socket 10mm ... -
Page 40: Scale Calibration
38. depth scale adjustment screws. -38- Anti-Kickback fingers the Model g1033X provides an anti-kickback system as a safety feature. the anti-kickback fingers hang from a rod suspended across the cutterhead casting. the anti-kickback fingers should be inspected regularly. -
Page 41: Pulley Alignment
(Page 27). Model g1033X (Mfg. since 4/12) loosen the fasteners that hold the motor to the brackets shown in figure 41 just enough to allow the motor to be repositioned. -
Page 42: Section 8: Wiring
You can view these pages in color at www.grizzly.com. -40- Note: Please gather the serial number and manufacture date of your WIRE/COMPONENT DAMAGE. MOTOR WIRING. CAPACITORS/INVERTERS. EXPERIENCING DIFFICULTIES. Model g1033X (Mfg. since 4/12) -
Page 43: Electrical Components
Electrical Components Control Panel Motor Junction box Magnetic Switch READ ELECTRICAL SAFETY -41- Model g1033X (Mfg. since 4/12) ON PAGE 40! -
Page 44: Wiring Diagram
-42- ON PAGE 40! Wiring Diagram The motor wiring shown here is current at the time of printing, but it match your machine. Always use the wiring diagram inside the motor junction box. 220V MOTOR Model g1033X (Mfg. since 4/12) -
Page 45: Section 9: Parts
SECTION 9: PARTS Headstock Parts breakdown -43- Model g1033X (Mfg. since 4/12) -
Page 46: Headstock Parts List
BUSHING BLOCK P1033X055 PLATE PLW04M LOCK WASHER 8MM P1033X057 PRESSURE BAR P1033X058 OUTFEED ROLLER PK01M KEY 5 X 5 X 22 P1033X060 SPROCKET PW03M FLAT WASHER 6MM PB83M HEX BOLT M6-1 X 16 P1033X063 BRACKET Model g1033X (Mfg. since 4/12) - Page 47 91-4 P1033X091-4 SHAFT 19.05 X 21 91-5 P1033X091-5 BRACKET 91-6 PSB48M CAP SCREW M6-1 x 35 Model g1033X (Mfg. since 4/12) PART # DESCRIPTION 91-7 PW03M FLAT WASHER 6MM P1033X093 OIL PLUG P1033X094 OIL SEAL 28 X 40 X 8...
-
Page 48: Table Parts Breakdown
Table Parts breakdown -46- Model g1033X (Mfg. since 4/12) - Page 49 LEADSCREW M10-1.25 X 400 P1033X137 COLUMN P1033X138 BASE P1033X139 CHAIN P1033X140 IDLER BRACKET P1033X141 SHAFT 15 X 34 P1033X142 SPROCKET Model g1033X (Mfg. since 4/12) Table Parts List REF PART # PR05M P6202ZZ PR21M P1033X146 PW04M PN08M P1033X149 PS09M P1033X151 P1033X152...
-
Page 50: Stand/Motor Parts Breakdown
Stand/Motor Parts breakdown -48- Model g1033X (Mfg. since 4/12) - Page 51 MOTOR BRACKET P1033X163 COLLAR PB15M HEX BOLT M8-1.25 X 40 PN03M HEX NUT M8-1.25 PW01M FLAT WASHER 8MM Model g1033X (Mfg. since 4/12) PART # DESCRIPTION PN09M HEX NUT M12-1.75 P1033X168 ADJUSTABLE BOLT 25.4 X 120 169V2 P1033X169V2 MOTOR 5HP 220V 1-PH V2.04.10...
-
Page 52: Labels & Cosmetic
MUST maintain the original location and readability of the labels on the machine. If any label is removed or becomes unreadable, REPLACE that label before using the machine again. Contact Grizzly at (800) 523-4777 or www.grizzly.com to order new labels. -50-... -
Page 53: Warranty Card
The following information is given on a voluntary basis. It will be used for marketing purposes to help us develop better products and services. Of course, all information is strictly confidential. Note: We never use names more than 3 times. _____________________________________________________________________ _________________________________________________________________________________ _________________________________________________________________________________... -
Page 55: Warranty And Returns
WARRANTy AND RETURNS... - Page 56 Buy Direct and Save with Grizzly – Trusted, Proven and a Great Value! ® ~Since 1983~ Visit Our Website Today For Current Specials! ORDER 24 HOURS A DAY! 1-800-523-4777...
Need help?
Do you have a question about the G1033X and is the answer not in the manual?
Questions and answers