Table of Contents
Advertisement
Advertisement
Table of Contents

Related Manuals for Grizzly G1037Z


Summary of Contents for Grizzly G1037Z
- Page 1 13" PLANER/MOULDER MODEL G1037Z INSTRUCTION MANUAL COPYRIGHT © JANUARY 2004 BY GRIZZLY INDUSTRIAL, INC. WARNING: NO PORTION OF THIS MANUAL MAY BE REPRODUCED IN ANY SHAPE OR FORM WITHOUT THE WRITTEN APPROVAL OF GRIZZLY INDUSTRIAL, INC. #5698 PRINTED IN TAIWAN...
- Page 2 WARNING Some dust created by power sanding, sawing, grind- ing, drilling, and other construction activities contains chemicals known to the State of California to cause cancer, birth defects or other reproductive harm. Some examples of these chemicals are: • Lead from lead-based paints. •...
-
Page 3: Table Of Contents
SECTION 1: SAFETY ...3 Safety Instructions For Power Tools ...3 Additional Safety Instructions For Planer/Moulders ...5 SECTION 2: INTRODUCTION...6 SECTION 3: CIRCUIT REQUIREMENTS ...7 Amperage Draw ...7 Circuit Breaker...7 Plug-Type ...7 Circuit Capacity ...8 Grounding ...8 Extension Cords ...8 Rewiring To 220V ...8 SECTION 4: MACHINE FEATURES ...9 Common Terms &... - Page 4 Feed Roller Pressure ...36 Thickness Scale ...36 Chip Deflector ...37 SECTION 9: REFERENCE INFO ...38 General ...38 Aftermarket Accessories ...39 Machine Data Sheet ...40 G1037Z Parts Breakdown...41 Parts List ...42 Troubleshooting Planer ...44 Gauge Block Measurements...45 Warranty and Returns ...46...
-
Page 5: Section 1: Safety
Keep work area well lighted. G1037Z 13" Planer/Moulder Indicates an imminently hazardous situation which, if not avoided, WILL result in death or serious injury. Indicates a potentially hazardous situation which, if not avoided, COULD result in death or serious injury. - Page 6 ING DIFFICULTIES performing the intend- ed operation, stop using the machine! Then contact our service department or ask a qualified expert how the operation should be performed. G1037Z 13" Planer/Moulder...
-
Page 7: Additional Safety Instructions For Planer/Moulders
FROM THE SURFACE OF THE WOOD STOCK IN A SINGLE PASS. Like all machines there is danger associated with the Model G1037Z. Accidents are fre- quently caused by lack of familiarity or fail- ure to pay attention. Use this machine with respect and caution to lessen the possibility of operator injury. -
Page 8: Section 2: Introduction
We are proud to offer the Model G1037Z 13" Planer/Moulder. This machine is part of a growing Grizzly family of fine woodworking machinery. When used according to the guidelines set forth in this manual, you can expect years of trouble- free, enjoyable operation and proof of Grizzly’s... -
Page 9: Section 3: Circuit Requirements
SECTION 3: CIRCUIT REQUIREMENTS Amperage Draw The Model G1037Z features a 110V/220V motor that is prewired at 110V. Amperage Draw 110V (prewired) ... 18 Amps 220V ... 9 Amps Circuit Breaker Use the following guidelines when choosing a cir- cuit breaker (circuit breakers rated any higher are... -
Page 10: Circuit Capacity
Figure 2, as well as on the inside of the motor wire cover. Figure 2. 220V wiring diagram. This procedure takes moderate electrical skill and the rewiring job should be inspected by a licensed electrician before turning the machine ON. G1037Z 13" Planer/Moulder... -
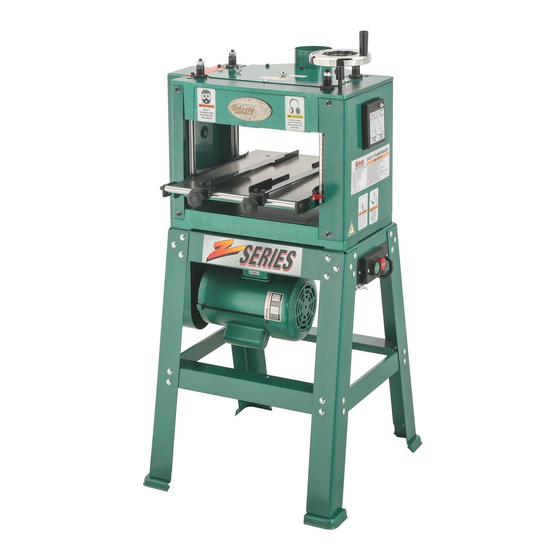
Page 11: Section 4: Machine Features
Cutterhead: The cutterhead holds the knives and spins at 5000 rpm. G1037Z 13" Planer/Moulder Dust Hood Figure 3. Machine features. Dust Hood: Funnels wood dust and chips into an attached dust collection system. -
Page 12: Section 5: Set Up
-10- Unpacking The Model G1037Z was carefully packed when it left our warehouse. If you discover the machine is damaged after you have signed for delivery, please immediately call Customer Service at (570) 546-9663 for advice. -
Page 13: Parts Inventory
Parts Inventory The following is an inventory of the loose parts for your new Model G1037Z Planer/Moulder. Figure 4. Stand parts. DESCRIPTION A. Upper Side Brace ...2 B. Lower Side Brace ...2 C. Upper End Brace ...2 D. Lower End Brace ...2 E. -
Page 14: Hardware Recognition Chart
Hardware Recognition Chart -12- G1037Z 13" Planer/Moulder... -
Page 15: Site Considerations
Site Considerations Floor Load The Model G1037Z weighs 240 lbs and has a ⁄ " x 22 ⁄ " footprint. Most commercial floors are suitable for this machine. Some residential floors may require additional reinforcement to support both the machine and operator. -
Page 16: Beginning Assembly
Motor ...1 caught Tools Needed: 10/12mm Combo Wrench ...1 loose clothing assembly Stand ⁄ "-18 x ⁄ " ...44 ⁄ "-18 x ⁄ " ...4 ⁄ "-18 ...48 ⁄ " ...48 ⁄ "...4 Figure 6. Stand Components. G1037Z 13" Planer/Moulder... - Page 17 Bolt the stand assemblies together using 10 carriage bolts, 10 flat washers and 10 hex nuts. Do not fully tighten the bolts. G1037Z 13" Planer/Moulder Attach the motor mount on the end that does not have a Z series label as shown in Figure 9.
-
Page 18: Mounting Planer/Moulder
8mm wrench and tighten with the screwdriver as shown in Figure 11. Figure 11. Switch installation. Connect the male plug from the motor to the female plug from the switch. G1037Z 13" Planer/Moulder... -
Page 19: V-Belts
Figure 12. Tensioning belts. Hold the tension with the wooden bar and tighten the motor bolts. Check the tension and repeat steps 2 & 3 if necessary. G1037Z 13" Planer/Moulder Components and Hardware Needed: Knob (Female) ...2 Stud...2 Flat Washer Hex Nut ⁄... -
Page 20: Dust Hood
Figure 15. Rotate the handwheel until the pin in the shaft slides into the groove in the handwheel. Figure 15. Installing handwheel. Place the handle shaft through the handle and screw it into the handwheel with the screwdriver. G1037Z 13" Planer/Moulder... -
Page 21: Test Run
G1037Z 13" Planer/Moulder For your convenience, the adjustments listed below have been performed at the factory and no further setup is required to operate your machine. However, because of the many variables... -
Page 22: Section 6: Operations
Use the entire width of the planer to wear knives evenly. Always plane WITH the grain direction of the wood. Never plain cross-grain or end-grain. Always feed multiple pieces of stock end to end to reduce snipe. G1037Z 13" Planer/Moulder ⁄ '' (3.2mm) of... -
Page 23: Wood Species
Redwood (OG) Red Cedar White Pine Balsam Fir G1037Z 13" Planer/Moulder The depth of cut is controlled by the handwheel on top of the planer. Turning the handle clockwise raises the work table and turning it counterclock- wise lowers the work table. Depth-of-cut is read directly from the inch/millimeter scale located on the right-hand side of the planer. -
Page 24: Power Feed
Flip the stock end for end and feed into the planer upside down. Note—This ensures the other side of the board is planed with the grain. Measure the thickness of the board. Repeat steps 2-5 until the desired thickness is reached. G1037Z 13" Planer/Moulder ⁄ ". -
Page 25: Moulding Fences
Screw the locking knobs into the clamping blocks. G1037Z 13" Planer/Moulder Install the fence rod guide brackets onto the edge of the work table with 4 cap screws and flat washers as shown in Figure 18. Do not tighten the cap screws at this time. -
Page 26: Bedboard
Drift ...1 “L” Gauge...1 Moulding cutter knives are available in many sizes and profiles in the Grizzly catalog. Knives that are larger than 2" wide are generally and come with their own set of gibs. The knives that are less than 2" wide will be the included gibs. - Page 27 Make sure the knives are set to the bot- tom of the cutterhead slot and face the direction shown in Figure 21. G1037Z 13" Planer/Moulder 10. Attach the orange “L” gauge to the top of the planer as shown in Figure 22. Adjust it to touch the edge of the moulding knife and tighten the hex bolt.
-
Page 28: Moulding
Clamp the wooden fence rails to the table with C-clamps, or screw the wooden fence rails to the bedboard. Adjust the feed rollers as described in steps 15-17 on page 25. Operate as described in the Moulding sec- tion. G1037Z 13" Planer/Moulder ⁄ " shorter... -
Page 29: Section 7: Maintenance
G1037Z 13" Planer/Moulder Regular periodic maintenance on the Model G1037Z will ensure optimum performance. Make a habit of inspecting the machine each time you use it. Before each use, look for the following condi- disconnect... -
Page 30: Cleaning
Feed Roller Chain and Gears—The drive chain should be inspected and lubricated monthly. Use a general purpose grease. Check the sprocket, the chain and the cotter pin during inspection. Some chains will have master links instead of cot- ter pins. G1037Z 13" Planer/Moulder... -
Page 31: V-Belts
2. Squeeze the belts to check the tension and repeat steps 2-5 if necessary. Replace the pulley cover. G1037Z 13" Planer/Moulder Anti-Kickback The anti-kickback fingers hang from a rod sus- pended across the front of the cutterhead casting. -
Page 32: Maintenance Notes
Maintenance Notes Maintenance Performed Date Approximate Hours Of Use -30- G1037Z 13" Planer/Moulder... -
Page 33: Section 8: Service Adjustments
A better option is to use a Rotocator the one in Figure 29. Use the Rotocator whenev- er the instructions call for use of the gauge block or feeler gauge. Refer to the current Grizzly cata- log for Rotocators. ®... -
Page 34: Knife Inspection
Tools Needed: Gauge Block (Not included) ...1 Feeler Gauge (Not included)...1 The Model G1037Z Planer/Moulder has a three- knife cutterhead. The cutterhead is located in the head casting and rotates on two sealed bearings. Because of normal use and wear, the knives must be periodically sharpened, replaced or adjusted. -
Page 35: Knife Sharpening
Your planer/moulder knives can be sharpened by a blade hone. See the “Aftermarket Accessories” sub-section at the back of this manual for more information. G1037Z 13" Planer/Moulder Knife Setting Jig Components and Hardware Needed: Knife Jig Shaft...1 Knife Jig Feet ...2 E-Clips 9mm ...4... -
Page 36: Knife Setting
Repeat these steps for the other two knives. Tighten all of the gib set screws sequentially 3 times to reach their final torque. the gib set screws. Tighten the set screws if they are loose. G1037Z 13" Planer/Moulder... -
Page 37: Feed Roller Height
0.08" . Repeat steps 1-5 for the opposite side of the roller. Repeat all steps for the outfeed roller. G1037Z 13" Planer/Moulder If the infeed and outfeed rollers are not 0.08" below the cutterhead knife edge at bottom dead center, or if the rollers are not the same height on both sides, the roller height must be adjusted. -
Page 38: Feed Roller Pressure
Measure the board again and compare your results with the scale. If there is a discrepan- cy, loosen the scale pointer screw shown in Figure 36 and correct the position of the pointer. Figure 36. Scale pointer screw. G1037Z 13" Planer/Moulder " under the thick-... -
Page 39: Chip Deflector
Chip Guide Wing Nuts Figure 37. Removing the dust hood. Loosen the bolts holding the chip deflector. G1037Z 13" Planer/Moulder Position the chip deflector with a between the knives and the deflector if the planer/moulder is attached to a dust collec- tion system. -
Page 40: Section 9: Reference Info
(570) 546-9663. Trained service technicians will be glad to help you. If you have any comments regarding this manual, please write to Grizzly at the address below: Grizzly Industrial, Inc. Technical Documentation P.O. Box 2069... -
Page 41: Aftermarket Accessories
24 hours a day at 1-800-523-4777. Moulding Knives— available from the current Grizzly catalog or online at grizzly.com. Replacement Knives— Model G4517 Replace your old plan- er/moulder knives and... -
Page 42: Machine Data Sheet
Customer Service #: (570) 546-9663 • To Order Call: (800) 523-4777 • Fax #: (800) 438-5901 GRIZZLY MODEL G1037Z 13" PLANER/MOULDER Design Type... Floor Model Overall Dimensions: Table Size ...14 Overall Height ...44 Overall Depth ...23" Overall Width ...23 Shipping Weight ...240 lbs. -
Page 43: G1037Z Parts Breakdown
G1037Z 13" Planer/Moulder -41-... -
Page 44: Parts List
Lock Washer 8mm PSB31M Cap Screw M8-1.25 x 25 PSB68M Cap Screw M6-1 x 8 PW03M Flat Washer 6mm P1037Z101 Chain P1037Z102 Sprocket P1037Z103 Sprocket P1037Z104 Idler Bracket PW01M Flat Washer 8mm PSB14M Cap Screw M8-1.25 x 20 G1037Z 13" Planer/Moulder... - Page 45 P1037Z121-5 Upper End Brace 121-6 P1037Z121-6 Upper Side Brace, L 121-7 P1037Z121-7 Upper Side Brace, R PCB02 Carriage Bolt PW01M Flat Washer 8mm G1037Z 13" Planer/Moulder PART # PN02 P1037Z125 ⁄ -18 x ⁄ P1037Z128 P1037Z129 P1037Z130 130-1 PEC10M 130-2...
-
Page 46: Troubleshooting Planer
1. If moisture content is higher than 20%, sticker and allow to dry. 2. Sharpen or replace knives. See Section 8: Adjustments. 1. Feed lumber through the center of the cutterhead. 2. Reset the knives. See Section 8: Adjustments. G1037Z 13" Planer/Moulder... -
Page 47: Gauge Block Measurements
G1037Z 13" Planer/Moulder -45-... -
Page 48: Warranty And Returns
Warranty and Returns Grizzly Industrial, Inc. warrants every product it sells for a period of 1 year to the original purchaser from the date of purchase. This warranty does not apply to defects due directly or indirectly to misuse, abuse, negligence, accidents, repairs or alterations or lack of maintenance. -
Page 49: Warranty Card
Do you think your purchase represents good value? ___Yes Would you recommend Grizzly Industrial to a friend? ___Yes Would you allow us to use your name as a reference for Grizzly customers in your area? Note: We never use names more than three times. ___Yes Comments:_________________________________________________... - Page 50 FOLD ALONG DOTTED LINE FOLD ALONG DOTTED LINE Send a Grizzly Catalog to a friend: Name_______________________________ Street_______________________________ City______________State______Zip______ GRIZZLY INDUSTRIAL, INC. P.O. BOX 2069 BELLINGHAM, WA 98227-2069 TAPE ALONG EDGES--PLEASE DO NOT STAPLE Place Stamp Here...
- Page 52 Buy Direct and Save with Grizzly Visit Our Website Today And Discover Why • • • ® – Trusted, Proven and a Great Value! Grizzly ® Is The Industry Leader! SECURE ORDERING ORDERS SHIPPED WITHIN 24 HOURS E-MAIL RESPONSE WITHIN ONE HOUR...
Need help?
Do you have a question about the G1037Z and is the answer not in the manual?
Questions and answers