
Related Manuals for KitchenAid KEA26 Series


Summary of Contents for KitchenAid KEA26 Series
- Page 1 KEA26 Series KEA28 Series KEA30 Series KEA33 Series W11330574A.indd 1 2/19/2019 2:57:57 PM...
- Page 2 W11330574A.indd 2 2/19/2019 2:57:57 PM...
-
Page 3: Table Of Contents
TABLE OF CONTENTS PARTS AND FEATURES ����������������������������������������������������������������������������������� 4 Parts and accessories ��������������������������������������������������������������������������������������4 STAND MIXER SAFETY ����������������������������������������������������������������������������������� 5 Important safeguards �������������������������������������������������������������������������������������5 Electrical requirements for Brazil only ������������������������������������������������������������8 USING THE STAND MIXER ������������������������������������������������������������������������������ 9 Speed control guide ���������������������������������������������������������������������������������������9 Accessory guide �������������������������������������������������������������������������������������������10 Attaching/removing the bowl�����������������������������������������������������������������������10 Lifting/lowering the motor head ������������������������������������������������������������������11 Attaching/removing the flat beater, Flex Edge beater*, wire whip, or dough hook ����������������������������������������������������������������������������11... -
Page 4: Parts And Features
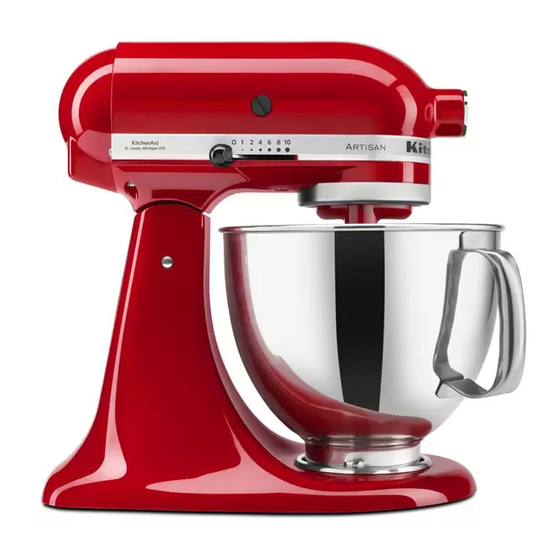
PARTS AND FEATURES PARTS AND ACCESSORIES Attachment hub Attachment knob Pouring shield* Motor head Motor head locking lever (not shown) Speed control lever Beater shaft 2.8 L stainless steel bowl* Beater height adjustment screw (not shown) Dough hook Bowl** Bowl clamping plate Flex Edge beater* Wire whip Flat beater... -
Page 5: Stand Mixer Safety
STAND MIXER SAFETY IMPORTANT SAFEGUARDS When using electrical appliances, basic safety precautions should always be followed, including the following: 1. Read all instructions. Misuse of appliance may result in personal injury. 2. This appliance is not intended for use by persons, (including children), with reduced physical, sensory, or mental capabilities, or lack of experience and knowledge, unless they have been given supervision... - Page 6 10. Do not let the cord hang over edge of table or counter. 11. The use of attachments not recommended or sold by KitchenAid may cause fire, electric shock, or injury. 12. Do not use the Stand Mixer outdoors. 13. Remove flat beater, wire whip, or dough hook from Stand Mixer before washing.
-
Page 7: Electrical Requirements For Brazil Only
STAND MIXER SAFETY ELECTRICAL REQUIREMENTS FOR BRAZIL ONLY Models: KEA26ABBNA, KEA26AEBNA Voltage: 220 V~ Frequency: 60 Hz Wattage: 275 W Models: KEA30 Series - KEA28AZBNA Voltage: 220 V~ Frequency: 60 Hz Wattage: 300 W Electrical Shock Hazard Models: KEA33 Series - KEA28AZANA, KEA26ABANA, KEA26AEANA Plug into an earthed outlet. -
Page 8: Using The Stand Mixer
1500 Watts between the appliance and the socket� • If the cord of this appliance is damaged, it must be replaced� Contact your nearest authorised KitchenAid Customer Care Centre� USING THE STAND MIXER SPEED CONTROL GUIDE... -
Page 9: Accessory Guide
USING THE STAND MIXER ACCESSORY GUIDE ACCESSORY USES Flat beater and Cakes, creamed frostings, Flex Edge beater* candies, cookies, pie pastry, for normal to heavy biscuits, meat loaf, mixtures: mashed potatoes Wire whip for Eggs, egg whites, heavy cream, mixtures that need boiled frostings, sponge cakes, air incorporated: mayonnaise, some candies... -
Page 10: Lifting/Lowering The Motor Head
USING THE STAND MIXER LIFTING/LOWERING THE MOTOR HEAD To lower motor head: Push the To lift motor head: Push the locking locking lever to unlock and gently lever to the unlock position and lift bring the head down� The locking the head�... - Page 11 USING THE STAND MIXER Slip accessory onto beater shaft and Hold the locking lever in the unlock press upward as far as possible� Then, position and tilt motor head back� turn accessory to the right, hooking accessory over the pin on the shaft� To remove accessory: Repeat steps 1 and 2�...
-
Page 12: Beater To Bowl Clearance
USING THE STAND MIXER BEATER TO BOWL CLEARANCE Your Stand Mixer is adjusted at the factory so the flat beater just clears the bottom of the bowl� If for any reason the flat beater hits the bottom of the bowl or is too far away from the bowl, you can correct the clearance easily�... -
Page 13: Using The Pouring Shield
USING THE STAND MIXER To remove pouring shield: Lift the front of the pouring shield Turn speed control to “0”� clear of the bowl rim and pull forward� Unplug Stand Mixer� Remove attachment and bowl� USING THE POURING SHIELD* Use the pouring shield to avoid having ingredients splashing out of the bowl when mixing, as well as to easily pour ingredients into the bowl while mixing�... -
Page 14: Operating The Speed Control
“Speed control guide” chart� sufficient� OPTIONAL ATTACHMENTS KitchenAid offers a wide range of optional attachments such as food grinders or pasta makers� They may be attached to the Stand Mixer attachment power shaft, as shown here� Loosen attachment knob by turning To attach: Turn speed control it counterclockwise�... - Page 15 USING THE STAND MIXER Insert attachment shaft housing into attachment hub, making certain that attachment power shaft fits into square attachment hub socket� It may Tighten attachment knob by turning be necessary to rotate attachment clockwise until attachment is back and forth� When attachment completely secured to Stand Mixer�...
-
Page 16: Tips For Great Results
200 mL (3/4 cup) GRADUALLY to 8 Whipping stages Watch cream closely during whipping� Because your KitchenAid Stand Mixer whips so quickly, there are just a few seconds between whipping stages� 16 | TIPS FOR GREAT RESULTS W11330574A.indd 16... - Page 17 TIPS FOR GREAT RESULTS MIXING TIPS Mixing time Cake mixes Your KitchenAid Stand Mixer will mix When preparing packaged cake mixes, use faster and more thoroughly than most Speed 4 for medium speed and Speed 6 other electric mixers� Therefore, the for high speed�...
-
Page 18: Care And Cleaning
CARE AND CLEANING Electrical Shock Hazard Plug into an earthed outlet. Always be sure to unplug Stand Mixer before cleaning� Wipe Stand Mixer Do not remove earth prong. with a soft, damp cloth� Do not use household/commercial cleaners� Wipe Do not use an adapter. off beater shaft frequently, removing Do not use an extension cord. -
Page 19: Troubleshooting
• If the problem is not due to one of the above items, see the “Warranty sheet”� ©2019 All rights reserved� KITCHENAID and the design of the stand mixer are trademarks in the U�S� and elsewhere� TROUBLESHOOTING | 19 W11330574A.indd 19 2/19/2019 2:58:21 PM... - Page 20 W11330574A.indd 20 2/19/2019 2:58:21 PM...
- Page 21 ÍNDICE PEÇAS E FUNÇÕES �������������������������������������������������������������������������������������� 22 Peças e acessórios ����������������������������������������������������������������������������������������22 SEGURANÇA DA BATEDEIRA ����������������������������������������������������������������������� 23 Instruções importantes de segurança ����������������������������������������������������������23 Requisitos elétricos ���������������������������������������������������������������������������������������26 USANDO A BATEDEIRA �������������������������������������������������������������������������������� 27 Guia de controle de velocidade �������������������������������������������������������������������27 Guia de acessórios ����������������������������������������������������������������������������������������28 Anexando/removendo a tigela ���������������������������������������������������������������������28 Elevando/abaixando a cabeça do motor �����������������������������������������������������29 Anexando/removendo o batedor plano, batedor de Borda Flexível*, fouet de fios ou gancho para massa ����������������������������������������������������������������������29...
-
Page 22: Peças E Funções
PEÇAS E FUNÇÕES PEÇAS E ACESSÓRIOS Centro de conexão Parafuso de encaixe Cabeça do Proteção contra respingos* motor Alavanca de travamento da cabeça Alavanca de do motor controle de (não velocidade mostrado) Eixo do batedor Tigela de aço inoxidável de 2,8 L* Parafuso de ajuste de altura do... -
Page 23: Segurança Da Batedeira
SEGURANÇA DA BATEDEIRA A sua segurança e a de terceiros é muito importante. Este manual e o seu produto contém muitas mensagens importantes de segurança. Sempre leia e siga as mensagens de segurança. Este é o símbolo de alerta de segurança. Este símbolo alerta sobre situações que podem trazer risco a sua vida, ferimentos a você... - Page 24 10. Não deixe o cabo de alimentação pender da borda da mesa ou do balcão. 11. O uso de acessórios não recomendados ou vendidos pela KitchenAid pode causar incêndios, choques elétricos ou lesões. 12. Não utilize a Batedeira em áreas externas.
-
Page 25: Requisitos Elétricos
SEGURANÇA DA BATEDEIRA REQUISITOS ELÉTRICOS Modelos: KEA26ABBNA, KEA26AEBNA ADVERTÊNCIA Tensão: 220 V~ Frequência: 60 Hz Potência: 275 W Modelos: KEA30 Series, KEA28AZBNA Tensão: 220 V~ Frequência: 60 Hz Potência: 300 W Perigo de choque elétrico Modelos: KEA33 Series, KEA28AZANA, KEA26ABANA, KEA26AEANA Conecte a uma tomada aterrada. -
Page 26: Usando A Batedeira
1500 Watts, entre a dispositivo e a tomada� • Se o cabo de alimentação estiver danificado, ele deve ser substituído� Entre em contato com a Central de Relacionamento KitchenAid mais próxima� USANDO A BATEDEIRA GUIA DE CONTROLE DE VELOCIDADE VELOCIDADE AÇÃO ANEXO DESCRIÇÃO... -
Page 27: Guia De Acessórios
USANDO A BATEDEIRA GUIA DE ACESSÓRIOS ACESSÓRIO Batedor plano e batedor Bolos, coberturas cremosas, doces, de Borda Flexível* para cookies, massas para torta, biscoitos, misturas normais e bolos de carne, purês de batata pesadas: Fouet de fios para Ovos, claras de ovos, creme de leite, misturas que precisem coberturas fervendo, pão de ló, incorporar ar:... -
Page 28: Elevando/Abaixando A Cabeça Do Motor
USANDO A BATEDEIRA ELEVANDO/ABAIXANDO A CABEÇA DO MOTOR Para abaixar a cabeça do motor: Para levantar a cabeça do motor: Pressione a alavanca para destravar Pressione a alavanca de travamento e colocar cuidadosamente a cabeça para a posição de destravada e de volte para baixo�... - Page 29 USANDO A BATEDEIRA Deslize o acessório no eixo do Mantenha a alavanca de travamento batedor e pressione para cima na posição de destravada e incline o o máximo possível� Então, gira o motor para trás� acessório para a direita, prendendo o acessório sobre o pino do eixo�...
-
Page 30: Espaço Entre O Batedor E A Tigela
USANDO A BATEDEIRA ESPAÇO ENTRE O BATEDOR E A TIGELA Sua Batedeira é ajustada de fábrica para que o batedor plano fique próximo, mas não encoste, no fundo da tigela� Se, por algum motivo, o batedor plano encostar no fundo da tigela ou estiver muito distante da mesma, você... -
Page 31: Usando A Proteção Contra Respingos
USANDO A BATEDEIRA Para remover a proteção contra Suspenda a frente da proteção contra respingos: Coloque o controle de respingos para fora da borda da velocidade em ”0“� Desconecte a tigela e puxe para frente� Remova o Batedeira da tomada� anexo e tigela�... -
Page 32: Operando O Controle De Velocidade
é suficiente� controle de velocidade“� ANEXOS OPCIONAIS A KitchenAid oferece uma ampla gama de acessórios opcionais, como moedores de alimentos ou acessórios para fazer massa� Eles podem ser acoplados ao centro de conexão da Batedeira, como mostrado aqui� Para anexar: Coloque o controle de Solte o botão do anexo girando ele... - Page 33 USANDO A BATEDEIRA Insira o acessório no centro de conexão, certificando-se de que o eixo de acionamento do centro de conexão esteja encaixado na posição Gire manualmente o parafuso de correta� Pode ser necessário girar encaixe girando ele no sentido o acessório para os lados� Quando horário até...
-
Page 34: Dicas Para Ótimos Resultados
2 ou mais claras de ovos GRADUALMENTE até 8 Pontos Com sua Batedeira KitchenAid, as claras de ovos chegam ao ponto mais rapidamente� Evite bater demais� CREME DE LEITE Coloque o creme de leite na tigela resfriada� Anexe a tigela e fouet de fios� Para evitar respingos, aumente a velocidade gradualmente até... - Page 35 DICAS PARA ÓTIMOS RESULTADOS DICAS DE USO Tempo de mistura Misturas para bolo Sua Batedeira KitchenAid misturará Ao preparar misturas para bolo de pacote, mais rapidamente e de maneira mais use a Velocidade 4 para velocidade média homogênea do que a maioria das outras e Velocidade 6 para velocidade alta�...
-
Page 36: Cuidados E Limpeza
CUIDADOS E LIMPEZA ADVERTÊNCIA Perigo de choque elétrico Sempre se certifique de desconectar Conecte a uma tomada aterrada. a Batedeira da tomada antes da Não remova o pino de aterramento. limpá-la� Passe um pano úmido na Batedeira� Não use produtos de Não utilize adaptadores. -
Page 37: Resolução De Problemas
(A x L x P) (cm) Volume (litros) Peso líquido (kg) Peso bruto (kg) 11,30 ©2019 Todos os direitos reservados� KITCHENAID e o design da batedeira são marcas comerciais nos EUA e em outros países� RESOLUÇÃO DE PROBLEMAS | 37 W11330574A.indd 37 2/19/2019 2:58:30 PM... - Page 38 W11330574A.indd 38 2/19/2019 2:58:30 PM...
- Page 39 W11330574A.indd 39 2/19/2019 2:58:30 PM...
- Page 40 ©2019 All rights reserved. KITCHENAID and the design of the stand mixer are trademarks in the U.S. and elsewhere. ©2019 Todos os direitos reservados. KITCHENAID e o design da batedeira são marcas comerciais nos EUA e em outros países. W11330574A 02/19 W11330574A.indd 40...
Need help?
Do you have a question about the KEA26 Series and is the answer not in the manual?
Questions and answers