Advertisement
Quick Links
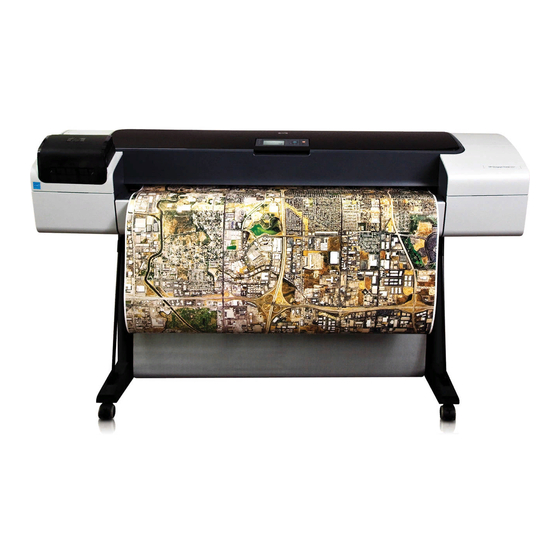
HP Designjet
T1200 (HD) MFP
Assembly Instructions
EN
セットアップ手順
JP
组装说明
ZHCN
組裝說明
ZHTW
조립 지시사항
KO
Petunjuk Pemasangan
© 2009 Hewlett-Packard Company
Large Format Division
Camí de Can Graells 1-21 · 08174
Sant Cugat del Vallès
Barcelona · Spain
All rights reserved
Printed in XXX
AP.indd 1
All manuals and user guides at all-guides.com
Read these instructions carefully...
EN
What you will need for this procedure
• Because the scanner is heavy, you may need three people to unpack it. When more than one
person is needed, the symbol at the foot of this box is displayed.
• During the stand assembly you will see some reference to the following symbol labels which ap-
pear on some items, standing for left side, and right side.
L
Left side
R Right side
以下の指示をよくお読みください。
JP
セットアップに必要なもの
• このスキャナは重いため、開梱する際に は 3 人必要になります。複数名で行う必 要がある作
業には、このボックスの下部に 示すような記号が表示されています。
• スタンドのセットアップ手順には、一部 のアイテムに左側と右側を示す以下のよう な記号が表
示されています。
L
左側
R
右側
请仔细阅读以下说明...
ZHCN
该组装过程需要注意哪些事项
• 因为扫描仪很重,打开包装时可能需要三个人。 如果需要一人以上,则会显示此框底部的符号。
• 在机架组装过程中,您会看到某些组件上显示的以下符号标签的一些参考信息,这些标签表示左
侧和右侧。
L
左侧
R
右侧
請仔細閱讀下列說明...
ZHTW
本程序中應注意的事項
• 因為掃瞄器很重,可能需要三名人員才有辦法拆裝。 當需要多人幫忙時,會以此圖框下端的符號
表示。
• 組裝機架時,在某些組件上會看到一些下列參考符號標籤,表示是左側或是右側。
L
左側
R
號標
이 지시사항을 주의깊게 읽으십시오.
KO
이 절차를 수행하는 데 필요한 사항
• 스캐너가 무거우므로 상자에서 꺼낼 때세 사람이 필요할 수도 있습니다. 두 명이상이 필요한 경우
에는 이 상자의 아래쪽에 기호가 표시되어 있습니다.
• 스탠드 조립 도중 다음 기호 레이블에대한 몇 가지 참조를 볼 수 있습니다.이러한 기호는 일부 항
목에 표시되며 왼쪽또는 오른쪽을 나타냅니다.
L
왼쪽
R
오른쪽
Baca petunjuk ini dengan cermat...
Persiapan untuk prosedur ini
• Karena pemindai ini berat, Anda mungkin memerlukan 3 orang untuk mengeluarkannya dari
kemasan. Simbol di bawah ini akan tercantum di kaki kotak kemasan diperlukan lebih dari satu
orang.
• Selama pemasangan dudukan, Anda akan melihat beberapa acuan tentang label simbol berikut
yang ditampilkan untuk beberapa item di sisi kiri dan kanan.
L
Sisi kiri
R
Sisi kanan
Your printer should already be as-
EN
sembled and working before start-
ing this procedure. For instructions
on how to assemble the printer,
please refer to the assembly poster
included with the printer.
この手順を開始する前に、プリンタを組み 立て済みで作
JP
動している状態にしてくださ い。プリンタの組み立て方
法についての詳 細は、プリンタに同梱されているセット
ア ップ ポスターを参照してください。
在开始执行此过程之前,您的打印机应该已组装好并且可正
ZHCN
常工作。 有关如何组装打印机的说明,请参考打印机附带
的组装示意图。
開始此程序前,印表機應已組合完畢而且可以使用。 如需
ZHTW
組裝印表機方法的指示,請參閱隨印表機附送之組裝卡。
이 절차를 시작하기 전에 프린터를 미리 조립하고 작동해야
KO
합니다. 프린터 조립 방법에 대한 지침은 프린터와 함께 제
공된조립 포스터를 참조하십시오.
Printer Anda harus telah terpasang dan berfungsi sebelum
memulai prosedur ini. Untuk petunjuk tentang cara
memasang printer, lihat poster petunjuk pemasangan yang
diberikan bersama printer.
The touch screen assembly can be
EN
mounted on either the right or the left
side of the stand.
タッチ スクリーンは、スタンドの右
JP
側ま たは左側のどちら側にも設置で
きます。
可以将触摸屏组件安装在机架右侧或左侧。
ZHCN
觸控螢幕組件可裝於機架的左側或右側。
ZHTW
터치 스크린 어셈블리는 스탠드의 오른쪽또는 왼쪽에 장착
KO
할 수 있습니다.
Unit layar sentuh dapat dipasang di sisi kiri atau kanan
dudukan.
28/01/2010 9:57:07
Advertisement

Related Manuals for HP Designjet T1200


Summary of Contents for HP Designjet T1200
- Page 1 All manuals and user guides at all-guides.com HP Designjet Read these instructions carefully... Your printer should already be as- What you will need for this procedure sembled and working before start- • Because the scanner is heavy, you may need three people to unpack it. When more than one ing this procedure.
- Page 2 All manuals and user guides at all-guides.com AP.indd 2 28/01/2010 9:57:09...
- Page 3 All manuals and user guides at all-guides.com ZHCN ZHTW AP.indd 3 28/01/2010 9:57:11...
- Page 4 All manuals and user guides at all-guides.com M6×30 M6×10 M6×10 Attach the lower bar to the two legs. Tighten the Turn the legs upside down, and attach the two feet to Attach the bottom bar to the legs. Carefully raise the legs into the upright position. screws with the T-handle torx driver T30 found in the the left and right legs ボトム...
- Page 5 All manuals and user guides at all-guides.com M6×30 Tighten up all screws firmly. Connect the rear table. This is fitted by locating Using two people, remove the scanner from the box. Fasten the top bar and wire guide to the two legs the four guide pins on the rear of the table into the The third person should place some packaging boxes using six screws.
- Page 6 All manuals and user guides at all-guides.com At this point you must decide on which side you are going to fit the touch screen assembly. This can be fitted on the left or right side of the stand. The next steps, 12 to 19, explain how to fit the touch screen assembly to the right side of the stand.
- Page 7 All manuals and user guides at all-guides.com M6x10 M5x14 M5×14 Attach the two bracket covers to the touch screen Attach two (M6X10) screws to the leg, and two Slide the touch screen bracket into place over the Tighten the four screws. bracket using two screws on the straight bracket (M5X14) screws with two starwashers;...
- Page 8 All manuals and user guides at all-guides.com M5×14 M5×14 With the protective foam in place, put the touch Remove the protective foam ends, and slide the hub of Connect the earth cable from the touch screen Fix the touch screen pen to the side of the touch screen face down and attach the monitor joint to the the touch screen assembly into the touch screen arm.
- Page 9 All manuals and user guides at all-guides.com The unit is now assembled and should appear as in the below illustration. 下の図のようになれば、ユニットの組み立ては 完了です。 现在,设备已组装完毕(如下图所示)。 ZHCN 裝置目前即已組裝完成,且應如下圖所示。 ZHTW 이제 장치가 조립되었으며 아래 그림과 같이 되어야 합니다. Sekarang unit telah terpasang dan akan terlihat seperti pada gambar di bawah ini.
- Page 10 All manuals and user guides at all-guides.com Slide the assembled printer under the scanner. The Connect the cable bundle to the touch screen as Remove the cover on the side of the scanner, and Fit the protected part of the bundle cable coming printer’s feet will be positioned outside the scanner’s shown (passing it between the bracket and the insert one of the FireWire cables through the slot at...
- Page 11 All manuals and user guides at all-guides.com If the touch screen assembly has been mounted on the left leg, the ‘Y’ power cable should only be attached to the left leg and cross bar. タッチ スクリーンが左脚に取り付けられている 場合、Y 字型電源ケーブルは左脚とクロス バー のみに取り付けてください。 如果触摸屏组件已安装到左侧桌腿上,...
- Page 12 All manuals and user guides at all-guides.com You are now required to clean the scan area. To do so you will need the cleaning tools provided in the maintenance kit and a cleaning fluid (not included in the maintenance kit). Caution: do not use abrasives, acetone, benzene, or fluids that contain these chemicals.
- Page 13 All manuals and user guides at all-guides.com Push down the two locks, and open the scanner Clean the glass with a lint-free cloth and a mild, Dry the glass fully using a separate clean, dry lint- Clean the white background plate with a lint-free cover to expose the scan area.
- Page 14 All manuals and user guides at all-guides.com Clean the transport rollers and surrounding area. Dry the white background plate, rollers, and Close the scanner cover and push down on the top Switch on the scanner and leave it to warm up until surrounding area fully using a separate clean, dry to lock it into place.
- Page 15 All manuals and user guides at all-guides.com Note: if when switching on the touch screen a No You are now required to calibrate the scanner. For scanner was found message appears, please press this you will need the scanner maintenance sheet, the Rescan option on the touch screen.
- Page 16 All manuals and user guides at all-guides.com Important: when setting up for the first time, make sure that the scanner is turned on for at least one To start the maintenance procedure: hour before moving on to the next step of camera alignment calibration. Slight light intensity changes 1: On the touch screen, press the setup tab.
- Page 17 Next, you should check the TCP/IP settings in your touch screen (go to: Setup/ Option/System/Advanced/Network settings/IP Address), and correct them if nec- essary. If you intend to scan to the network, with the HP Designjet scan software, files to be shared across the network should be placed in the D:\images directory.
- Page 18 All manuals and user guides at all-guides.com To add an HP Designjet printer to the printer list in your scanner software, follow these steps: Keep out dust and reduce maintenance time: when 1: On the touch screen go to the setup tab.
- Page 19 All manuals and user guides at all-guides.com When the maintenance procedure has completed, Your HP Designjet comes equipped with two The scanner’s ruler can be changed between For any further information on how to use magnetic media guides; these can be placed and...
- Page 20 © Copyright 2009 Hewlett-Packard Development Company, L.P. The information contained herein is subject to change without notice. The only warranties for HP products and services are set forth in the express warranty statements accompanying such products and services. Nothing herein should be construed as constituting an additional warranty.
Need help?
Do you have a question about the Designjet T1200 and is the answer not in the manual?
Questions and answers