Table of Contents
Advertisement
Quick Links
Advertisement
Table of Contents

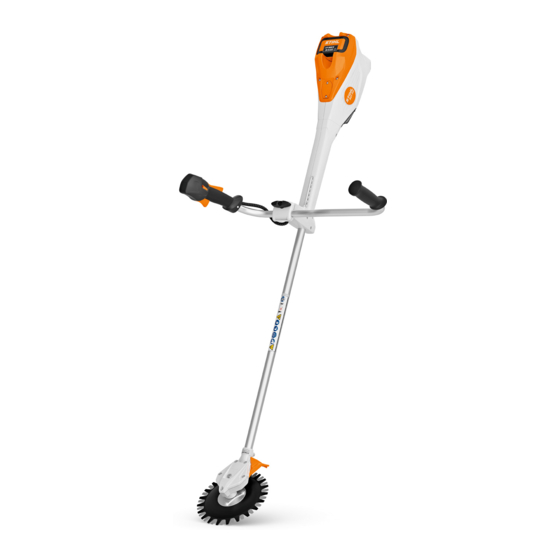
Summary of Contents for Stihl RGA 140
- Page 1 RGA 140 2 - 18 Instruction Manual...
-
Page 2: Table Of Contents
– Safety notices and precautions for Switching the Weeder On/Off....11 STIHL AP battery Checking Weeder and Battery....11 – User manual for STIHL AL 101, 300, 500 Working with the Weeder......12 chargers After Finishing Work........13 – Safety information for STIHL batteries and Transporting..........13... -
Page 3: Overview
15 Shaft The shaft connects all components. 16 Screw plug 23 24 The screw plug closes the filler opening for STIHL gear grease. 17 Gear housing The gear housing encloses the gearbox. 18 Blade mounting The blade mounting secures the blades. -
Page 4: Safety Precautions
The weeder may be used in the rain. Safety Precautions The weeder is powered by a STIHL AP battery or Warning symbols a STIHL AR battery. WARNING The warning symbols on the weeder or the bat‐... - Page 5 – The user is not under the influence of alcohol, medication or drugs. ■ Bystanders, children and animals cannot rec‐ ► If you are unsure: Consult a STIHL servic‐ ognize and assess the dangers of the weeder ing dealer. and objects being thrown into the air. This may...
- Page 6 ► Replace worn or damaged labels. ■ The battery is not protected against all ambi‐ ► If you are unsure: Consult a STIHL servic‐ ent conditions. If exposed to certain ambient ing dealer. conditions, the battery may catch fire or explode.
- Page 7 This may result in serious injury to people and damage to property. ► Stop working, remove the battery and con‐ sult a STIHL servicing dealer. ► Attach the transport guard. ■ Vibrations may occur while using the weeder.
- Page 8 ► If the weeder or the battery require servic‐ WARNING ing or repairs: Contact a STIHL servicing ■ Children are not aware of and cannot assess dealer. the dangers of the battery Children may be ►...
-
Page 9: Preparing Weeder For Operation
The LEDs can indicate the state of charge of the ► Fully charge battery as described in the User battery or any faults. The LEDs can be steady Manual for the STIHL AL 101, 300, 500 charg‐ green, steady red or flashing. ers. -
Page 10: Adjusting Weeder For User
English 8 Adjusting Weeder for User ► Position the control handle (7) on the handle‐ bar (3), trigger facing the gear housing, and line up the hole in the control handle with the hole in the handlebar. ► Fit the nut (7). ►... -
Page 11: Removing And Fitting The Battery
► Release the trigger and trigger lockout. ► Wait until the blades are no longer rotating. ► If the blades continue to rotate: Remove the battery and contact a STIHL servicing dealer. The weeder is defective. 11 Checking Weeder and Bat‐... -
Page 12: Working With The Weeder
► If the sharpening angle is not correct: Sharpen handle. the blades, 17.5. 12.2 Setting the Power Level ► If you are unsure: Consult a STIHL servicing dealer. Depending on the application, you can set 3 11.3 Testing the Battery power levels. The LEDs indicate the selected power level. -
Page 13: After Finishing Work
Storing the Battery 14.1 Transporting the weeder ► Switch off the weeder and remove the battery. STIHL recommends keeping the battery in a ► Attach the transport guard. charging state between 40% and 60 % (2 green LEDs lit). Carrying the weeder ►... -
Page 14: Cleaning
► If no grease can be seen on the end of the screw plug (2): ► Screw in the tube of STIHL gear lubri‐ cant (1). ► Squeeze 10 g of STIHL gear grease into the gear housing. ► Unscrew the tube of STIHL gear lubri‐ cant (1). -
Page 15: Repairing
► Switch off the weeder. ► Remove blades. ► Fit blades (1). ► Use a STIHL flat file to sharpen the cutting ► Screw in the screws (2) clockwise and tighten edge (2). The file only sharpens on the for‐... -
Page 16: Troubleshooting
State of charge of the ► Recharge the battery fully as described in not start when green. battery is too low. the User Manual for the STIHL AL 101, switched on. 300, 500 chargers. 1 LED emits The battery is too ►... -
Page 17: Spare Parts And Accessories
EN 50636‑2‑91: 81 dB(A) Battery – Sound power level L measured according to EN 50636-2-91: 93 dB(A) Contact the local authorities or a STIHL servicing – Vibration level a measured according to dealer for information on disposal. EN 50636-2-91 Improper disposal can be harmful to health and –... -
Page 18: Ukca Declaration Of Conformity
24 UKCA Declaration of Conformity The technical documents are stored in the Prod‐ uct Certification department of ANDREAS STIHL AG & Co. KG. The year of manufacture, country of manufacture and serial number are shown on the weeder. Dr. Jürgen Hoffmann, Director Product Certifica‐... - Page 19 24 UKCA Declaration of Conformity English 0458-845-0101-A...
- Page 20 *04588450101A* 0458-845-0101-A...


Need help?
Do you have a question about the RGA 140 and is the answer not in the manual?
Questions and answers