Table of Contents
Advertisement
Quick Links
Advertisement
Table of Contents

Related Manuals for Unipro UniGo One


Summary of Contents for Unipro UniGo One
-
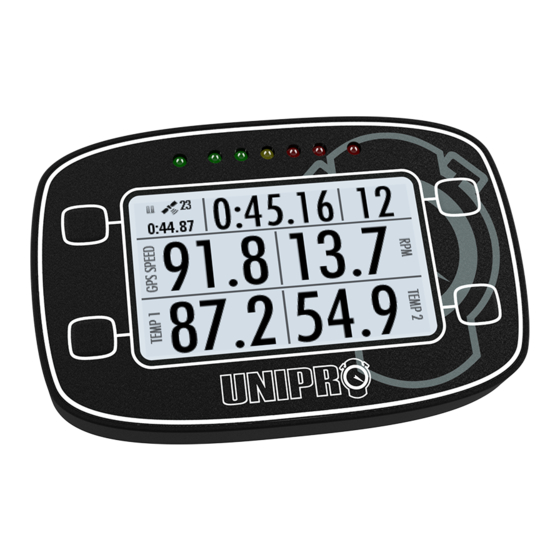
Page 1: Home Screen
UniGo One Laptimer User Guide... -
Page 2: Important Safety Instructions
Important safety instructions S a f e t y PLEASE READ THE SAFETY INSTRUCTIONS CAREFULLY • Read the instructions. • Keep these instructions. • Follow all instructions. • Be careful not to drop it on the ground. • Do not leave it under heavy objects. •... -
Page 3: Table Of Contents
TRACK SETUP DISCLAIMER TRACK DATABASE COPYRIGHT AUTO TRACK SELECT COUNTRY ntroductIon SELECT TRACK CONTENT OF PACKAGE TRACK NAME UNIQUE UNIGO ONE IDEAS TRIGGER EASY TO USE MAGNET COUNT OVERVIEW MAGNET DELAY SPECIFICATIONS IR OR LOOP DELAY TIME EXAMPLES KART SETUP... -
Page 4: Contents
Contents C o n t e n t s SPLITTER # VALUE LAP AND SPLIT TIMES FEEDBACK SETUP RUN MODE VIEW WARNING LEDS LAP TIME GRAPH LED BRIGHTNESS MIN/MAX ANALYSIS LAST LAP DATA COUNTERS AND TIMERS DATA HOLD TIME TIRE WEAR COUNTERS LAP TIME DISPLAY ENGINE TIMERS SPLIT TIME DISPLAY... -
Page 5: Copyright And Acknowledgments
This guide was written and produced by Unipro ApS. Unipro ApS Viborg Hovedvej 24 UniGo One User Guide version 1.00 DK-7100 Vejle Denmark Made for UniGo One firmware version 1.0x.xxx Tel +45 7585 1182 DISCLAIMER mail@uniprolaptimer.com www.uniprolaptimer.com Some of this user guide might contain informa- www.facebook.com/uniprolaptimer tion on future features. - Page 6 This page was intentionally left blank.
-
Page 7: Introduction
UNIQUE UNIGO ONE IDEAS slick design. This antenna design is less sensi- tive to movement of the antenna, and ensures UniGo One combines many new ideas not seen a perfect reception of GPS all the time. before in a Unipro Laptimer: •... -
Page 8: Overview
Overview I n t r o d u c t i o n Please note that this user guide is intended for UniGo One only. LED LAMPS 5 adjustable high BETTER/WORSE AMBIENT SENSOR brightness LED lamps Two extra LED lamps... -
Page 9: Specifications
Data upload USB full-speed with included USB cable, Wi-Fi or BLE Buttons 4 software defined with icons Software included Unipro Analyser analyze software. Both Windows and Mac version Casing Lightweight plastic Waterproof Dimensions 136.7 x 89.7 x 18.3 / 30.4 mm (5.38” x 3.53” x 0.72”/1.20”) Weight 350 g (12.35 ounces)**... -
Page 10: Examples
Examples I n t r o d u c t i o n... -
Page 11: Installing The Laptimer
I n s t a l l i n g t h e L a p t i m e r Installing the Laptimer A good installation is key to get good and reliable operation of UniGo. Read this installation guide and learn how to: Install the Laptimer, attach cables and sensors and see how to mount it all on the go-kart. -
Page 12: Connecting Rpm Wire
I n s t a l l i n g t h e Installation L a p t i m e r RPM wire attached with cable ties. UniGo mounted at the correct distance to the steering wheel. The RPM wire needs to run all the way from the Laptimer to the engine on the back. -
Page 13: Running Cables
I n s t a l l i n g t h e Installation L a p t i m e r RUNNING CABLES The installation of the Laptimer should be seen as a permanent installation on the go-kart and the time to run the cable in a nice way is time well spend. -
Page 14: Ir Receiver
IR RECEIVER version for everything else. The IR receiver use infrared light to trigger the Laptimer. A Unipro IR transmitter is placed at the start/finish line and the infrared light goes across the track. The infrared receiver placed on the kart will receive the infrared beam and trigger the Laptimer. -
Page 15: Speed Kit Front
I n s t a l l i n g t h e Installation L a p t i m e r The IR receiver is installed on the front of the kart. It should be pointing to the left or right depending on the placement of the transmitter. -
Page 16: Cylinder Temperature
I n s t a l l i n g t h e Installation L a p t i m e r EXHAUST TEMPERATURE The exhaust sensor is mounted in the exhaust pipe. The fitting for the exhaust sensor is welded to the exhaust 12 cm (4.7 inch) from the backside of the piston. - Page 17 I n s t a l l i n g t h e Installation L a p t i m e r Place the exhaust sensor in the fitting and fasten the nut. Do not tightening it too much. Exhaust sensor mounted with a big soft bend on the cable.
- Page 18 I n s t a l l i n g t h e Installation L a p t i m e r...
-
Page 19: Quick Guide
Read the Quick Guide and learn how to use the basic functions of the UniGo One: Turn UniGo One on and off, start logging data, analyze them on UniGo One and transfer them to a computer with the included USB cable or Wi-Fi. -
Page 20: Turning Unigo On
UniGo start by turning on the backlight at 25% and show a Unipro splash screen. This is BUILT-IN HELP showing as fast as it is possible, and it will stay When you move around in menus, UniGo will there until UniGo is fully booted. -
Page 21: First Setup
First setup. Essential settings needed to get ANALYZING started with UniGo One. When analyzing you will typically start with the To read more information about the first setup overview screen. This screen will give you the settings, please look in the “Configuring the... -
Page 22: Transfer With Usb
Because the battery is insides UniGo One and the box is sealed, there is now way of It is very easy to transfer data to the Unipro ”power cycling” if something goes wrong. We Analyser program. Just insert the included... - Page 23 Quick guide Q u i c k G u i d e...
- Page 24 Quick guide Q u i c k G u i d e...
-
Page 25: Venter Setup Mode
L a p t i m e r Configuring the Laptimer This chapter will learn you all about the configuration of UniGo One. Entering setup, most often settings, and every single setting. A correct setup is essential for the maximum performance of your Laptimer so make sure to read this chapter carefully. -
Page 26: C Onfiguring The L
C o n f i g u r i n g Setup mode t h e L a p t i m e r ENTERING TEXT from the popup menu. You always use the same way to enter text in The Backspace menu line is only visible if UniGo. -
Page 27: Vevent Setup
EVENT NAME TRACK DATABASE The track menu contains all the settings UniGo One can use two different track related to the track. databases. Factory tracks are all the tracks that Unipro made and this is a growing database with more and more tracks. -
Page 28: Track Name
C o n f i g u r i n g Setup mode t h e L a p t i m e r on the same lap. Use the up ( ) and down ( ) buttons to move around in the list and press the ok button ( ) to select a track. -
Page 29: Kart Setup
C o n f i g u r i n g Setup mode t h e L a p t i m e r KART SETUP COUNTER no. MENU The kart menu contains all the settings related The counter number 1 - 5 menu contains each to the kart. -
Page 30: Number Of Gears
C o n f i g u r i n g Setup mode t h e L a p t i m e r NUMBER OF GEARS ENGINE SETUP When driving a gear kart, you need to enter The engine menu contains all the settings the correct number of gears and then learn related to the engine. -
Page 31: Timer No
11900, 12200, 12500, RPM SENSITIVITY 12800 and 13100 RPM. The smaller delta UniGo One have a unique feature to ensure value, the faster reacts the shift light. the best possible RPM signal from the ignition. -
Page 32: Driver Setup
C o n f i g u r i n g Setup mode t h e L a p t i m e r DRIVER SETUP SENSORS SETUP The track menu contains all the settings related The driver menu contains all the settings to the track. -
Page 33: Feedback Setup
C o n f i g u r i n g Setup mode t h e L a p t i m e r FEEDBACK SETUP The feedback menu contains all the settings related to the feedback on UniGo. WARNING LEDS The 5 LEDs are all programmable. -
Page 34: Led Brightness
C o n f i g u r i n g Setup mode t h e L a p t i m e r Ignore below: If the minimum value is set, LAST LAP DATA the ignore under value can be used too. To When the start/finish line is passed, the avoid a constant warning when the channel Laptimer can show different information on the... -
Page 35: Better / Worse Feedback
C o n f i g u r i n g Setup mode t h e L a p t i m e r UNIGO SETUP The options are “None”, “Split time”, “Delta split time”. Here is a short explanation on The UniGo menu contains all the settings what the settings does. -
Page 36: Backlight Brightness
C o n f i g u r i n g Setup mode t h e L a p t i m e r 12-hour clock: If the time format is set to a numbers on the screen. The contrast can be set to a value between 12h clock, then you can chose between am -15 and +15. -
Page 37: Speed / Dist. Unit
C o n f i g u r i n g Setup mode t h e L a p t i m e r setting you can chose between the two. SPEED / DIST. UNIT When using UniGo in different countries, it might be necessary to change the different units between Metric and Imperial. - Page 38 C o n f i g u r i n g Setup mode t h e L a p t i m e r...
-
Page 39: Reference Guide
FAST: This mode is not remembered hours. There are some basic rules that can help you when you turn UniGo One off. It is in- reduce this aging. tended to give you some battery charge fast. It will fast charge the battery at a •... -
Page 40: Four Buttons
The up button is used to move up in menus and for increasing values. Communication and power cable The COMM connector on UniGo One is used The down button is used to move down in for external power/charging, expansion and menus and for decreasing values. -
Page 41: Turn Unigo Off
The startup screen will show an animated Unipro logo and the owners name. It is possible to add your own logo instead of the Power off screen when holding down the Unipro version. -
Page 42: Shift Light
R e f e r e n c e Operating UniGo G u i d e slowly or blink fast. If the RPM shift light is used, it will use the fast blink, and the warning LEDs should use constant or slow to avoid any confusions. -
Page 43: Home Screen
R e f e r e n c e Operating UniGo G u i d e see more about the warning levels, please look HOME SCREEN 2 at ”BATTERY EMPTY” on page 33. The regular tire pressure gauge simply shows the current tire pressure and continuously updates when air is released by pressing one or both of the valves on the pressure handle. -
Page 44: Run Mode 1
R e f e r e n c e Operating UniGo G u i d e ble. Please see ”SET UP SCREENS” on page 30. A small text will help you identify which channel is shown in each location. The data fields are updated twice per second. -
Page 45: Analyze Mode
R e f e r e n c e Operating UniGo G u i d e Run mode 3 will show two channel values List of sessions. Select the one you want. and best and max values. Use the up ( ) and down ( ) buttons to Above the lap time, the lap number and the move around in the list and press ok button recording icon, the best lap time and the best... -
Page 46: Lap And Split Times
R e f e r e n c e Operating UniGo G u i d e values, just press the menu ( ) button. The text at the top left corner will toggle between MIN and MAX to indicate the selection. The delta time compared to the best lap time will be shown all the time. -
Page 47: Min/Max Analysis
R e f e r e n c e Operating UniGo G u i d e the top of the screen. The horizontal lines are here. To change the counters, please see ”TIRE at steps of 0.1 second in this example. WEAR MENU”... -
Page 48: Memory Menu
R e f e r e n c e Operating UniGo G u i d e DELETE ALL SESSIONS If all the sessions in memory are already transferred to a PC, you might want to delete them all at once. You will have to confirm this before the session is deleted. -
Page 49: Wi-Fi
By default it is “unigo-xxxx” where available for analysis on the UniGo, but at the xxxx is the serial number. So if your UniGo One same time, they do take some of the available have serial number 1234, the SSID name will memory space. -
Page 50: Uniman Game
R e f e r e n c e Operating UniGo G u i d e UniMan in action. Just a small game for Space Invaders in action. Just a small game fun. for fun. When the game is started, you can use the When the game is started, you can use the buttons shown on the intro screen to control buttons shown on the intro screen to control... -
Page 51: Gps Info
MANUFACTURE DATE LEARN GEAR This is the date this UniGo was manufactured at the Unipro production. It is a good indica- For more information about your UniGo, tion on how old the Laptimer is. press the information ikon on the main menu. -
Page 52: Rpm Sensitivity
R e f e r e n c e Operating UniGo G u i d e RPM SENSITIVITY FIRMWARE UPDATE Updating the firmware is very easy on UniGo. For more information about your UniGo, You will not need any special software except press the information ikon on the main menu. - Page 53 Update screen when new firmware is being programmed into the flash. The next time you turn it on, you should see the new firmware version displayed on the startup screen. Please do not disconnect the power to UniGo while the update is in progress.
-
Page 55: Troubleshooting
If you don’t find the answer to the problem here, please contact your Unipro dealer for further assistance. Weak and hard to read text • Run the ignition wire as far away from the other cables. -
Page 56: Cleaning
Maintenance M a i n t e n a n c e Cleaning If the normal battery holder is used, please remove the batteries to avoid leaking when not To clean the case, display, and buttons used for a long time. The exterior surfaces of UniGo products are made from plastic box with a plastic overlay. -
Page 57: Service
Unipro dealer. Unipro ApS. You can always find the updated list of world- Attempted servicing by unauthorized people wide dealers on www.uniprolaptimer.com. -
Page 58: Index
Index I n d e x Acknowledgements V Quick guide 19 Contrast too low 51 Reference guide 37 Copyright V Safety II Display 38 Safety instructions II Screenshots, examples 10 Service 53 Specifications 9 Examples, screenshots 10 Table of contents III Firmware version V Troubleshooting 51 Guarantee 53... - Page 59 I n d e x...
- Page 60 Unipro ApS • Viborg Hovedvej 24 • DK-7100 Vejle • Denmark Tel: +45 7585 1182 • Fax: +45 7585 1782 www.uniprolaptimer.com...
Need help?
Do you have a question about the UniGo One and is the answer not in the manual?
Questions and answers