Table of Contents
Advertisement
Available languages
Available languages
Quick Links
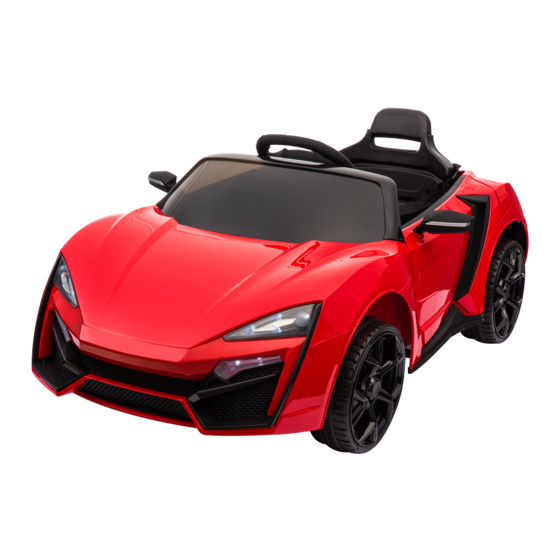
Part list Part Diagram
Part Name
No.
Wheel cover
1
Moto
2
Windshield
3
Seat
4
Mirror
5
Front wheel
6
Rear wheel
7
8
Rear axle
9
Gasket
10
Steering rod
11
Nut
12
Screw
13
Tapping screw
14
Charger
15
Remote control
16
Diagram
10/15A
10/15A
Please read the operating instrucitons carefully before using.
For your first time using the vehicle, must be sure charge the
product about 12 hours, otherwise maybe damge the battery.
Once using the battery car, couldnot make the battery depleted.
Specifications Introduction:
Item Name
6V7AH or12V7AH
Battery and Fuse
6V35W(driving motor) 6V9W(steering motor)
Motor
12V35W(driving motor) 12W9W(steering motor)
Suitable Age
37-96 Months
Load Capacity
Under 25KG
Size of Car
118*70*50CM
Speed
3-4KM/H
Using Time
Charging 8-12 Hours, Using 1-2 Hours
Input: 220V
Charge
Output: 6V500MAor 12V1000MA
Battery of RC
AAA1.5V
The data here are only for reference and the samples of each
type shall apply.
When the vehicle won't work
or can not be charged, please
check the fuse first and see
whether it is burnt out If the
fuse is broken, please change
with a new one, there is a spare
fuse in the fuse package. The
fuse is under the seat
Specifications
Advertisement
Table of Contents

Subscribe to Our Youtube Channel
Summary of Contents for Aosom QLS-5188
- Page 1 Part list Part Diagram When the vehicle won't work or can not be charged, please check the fuse first and see Diagram Part Name 10/15A 10/15A whether it is burnt out If the fuse is broken, please change Wheel cover with a new one, there is a spare Moto fuse in the fuse package.
- Page 2 CHILDREN FOUR-WHEEL BATTERY OPERATED CAR - Never use in roadway, near motor vehicles, on lawn space, on or near steep inclines or steps, swimming pools or other bodies of QLS-5188 GUIDE BOOK water; • Use the toy only on flat surfaces. such as inside your house, •Simulation Car Series...
- Page 3 Note and Caring for Your Vehicle: a:Rc-Manual Function Open the power switch, the light is open, press the rc-manual •When encounter the obstacle, the car would be stopped, please leave that then ridding. switch on "manual" position, press the "forward-back" switch to •Donot use indoor, in case of damaging to furniture or even a child fall.
- Page 4 3. Steering wheel : Insert the steering wheel into the end of the steering shaft, connector the music connector and power connector, insert the screw and tighten it. 1.wheel cover 4.Front Wheel 5.body 4.windshield and mirror: Put the wind frame to relevant 1.
- Page 5 Série de voitures de simulation Ne jamais utiliser dans le noir. Un enfant peut rencontrer des LIVRE DE GUIDE QLS-5188 Lumière colorée et musique merveilleuse obstacles inattendus et avoir un accident. Utilisez le véhicule ...
- Page 6 Si le véhicule ne fonctionne pas ou ne peut pas être chargé, veuillez tout Schéma de liste de pièces d’abord vérifier le fusible et voir s’il est grillé. Si le fusible est cassé, remplacez- Nom des pièces Diagramme le par un nouveau, il y a un fusible de Enjoliveur de roue rechange dans le paquet de fusibles.
- Page 7 a: Fonction Rc-Manual Lorsque vous rencontrerez un obstacle, la voiture serait arrêtée, laissez-la s'il Ouvrez l'interrupteur d'alimentation, la lumière est ouverte, appuyez sur Remarque et entretien de votre véhicule: Note and Caring for Your Vehicle: vous plaît. l'interrupteur de rc-manuel sur la position «manuelle», appuyez sur Ne pas utiliser à...
- Page 8 3. Volant: Insérez le volant dans l'extrémité de la colonne de direction, connectez le 1. Enjoliveur de roue connecteur de musique et le connecteur d'alimentation, insérez la 5.Carrosseri vis et serrez-le. 4. Roue avant Installez la roue et la rondelle sur l'essieu avant et fixez-les à l'aide d'une goupille 1.


Need help?
Do you have a question about the QLS-5188 and is the answer not in the manual?
Questions and answers