Table of Contents
Advertisement
Quick Links
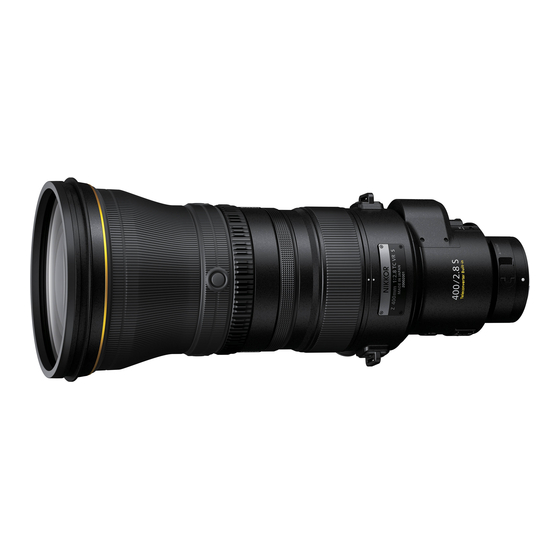
NIKKOR Z 400mm f/2.8 TC VR S
Reference Guide
• Read this document thoroughly before using the product.
• To ensure proper use of the product, be sure to read "For Your Safety" (page 5).
• After reading this document, keep it readily accessible for future reference.
© 2022 Nikon Corporation
SB2A01(11)
En
7MMA8611-01
Advertisement
Table of Contents

Related Manuals for Nikon NIKKOR Z 400mm f/2.8 TC VRS


Summary of Contents for Nikon NIKKOR Z 400mm f/2.8 TC VRS
- Page 1 • Read this document thoroughly before using the product. • To ensure proper use of the product, be sure to read “For Your Safety” (page 5). • After reading this document, keep it readily accessible for future reference. SB2A01(11) 7MMA8611-01 © 2022 Nikon Corporation...
-
Page 2: Table Of Contents
Table of Contents Introduction........... . . Before You Begin. - Page 3 Accessories............49 Specifications.
-
Page 4: Introduction
The latest version of the camera firmware can be downloaded from the Nikon Download Center at the URL below. https://downloadcenter.nikonimglib.com/ No reproduction in any form of this document, in whole or in part (except for brief quotation in critical articles or reviews), may be made without written authorization from NIKON CORPORATION. -
Page 5: For Your Safety
For Your Safety To prevent damage to property or injury to yourself or to others, read “For Your Safety” in its entirety before using this product. After reading these safety instructions, keep them readily accessible for future reference. WARNING: Failure to observe the precautions marked with this icon could result in death or severe injury. - Page 6 WARNING Keep dry. Do not handle with wet hands. Failure to observe these precautions could result in fire or electric shock. Do not use this product in the presence of flammable dust or gas such as propane, gasoline or aerosols. Failure to observe this precaution could result in explosion or fire.
- Page 7 CAUTION Do not leave the lens pointed at the sun or other strong light sources. Light focused by the lens could cause fire or damage to product’s internal parts. When shooting backlit subjects, keep the sun well out of the frame. Sunlight focused into the camera when the sun is close to the frame could cause fire.
-
Page 8: Using The Lens
Using the Lens Parts of the Lens: Names and Functions The parts of the lens are listed below. Fn ring Rotate to instantly recall a stored focus position (“memory recall”). “Memory Recall” (p.28) Control ring Rotate to adjust a setting such as [Aperture] or [Exposure compensation] assigned using the camera. - Page 9 Focus ring Use for manual focus. • When focusing using autofocus, you can adjust focus manually by rotating the ring while the shutter-release button is pressed halfway. Focus Due to the design of the focus system, shaking the lens while the camera is off may cause it to rattle;...
- Page 10 Slip-in filter holder For use with optional 46 mm screw-on filters. “Filters” (p.38) Slip-in filter holder tab Use when inserting or removing the filter holder. “Filters” (p.38) Parts of the Lens: Names and Functions...
- Page 11 Lens mounting mark Use when mounting the lens on the camera. “Attachment and Removal” (p.20) Rubber lens-mount gasket Helps prevent the ingress of water droplets or dust along the surfaces where the lens and camera meet when the lens is mounted on the camera.
- Page 12 Lens rotation indices Use when rotating the camera to shoot in landscape (“wide”) or portrait (“tall”) orientation. There are four indices positioned around the lens at 90º intervals. “Using the Tripod Collar” (p.35) Tripod collar ring rotation indices Use when rotating the camera to shoot in landscape (“wide”) or portrait (“tall”) orientation.
- Page 13 Tripod collar ring attachment screw Fix the tripod collar ring in place. “Using the Tripod Collar” (p.35) Security slot (for anti-theft cable) Attach a third-party anti-theft cable. For more information, see the documentation provided with the cable. Strap eyelets For use when attaching a strap. There are two eyelets, one on each side. “Attaching a Strap”...
- Page 14 [Custom controls], or [Custom controls (shooting)] in the documentation provided with the camera. There are four buttons positioned around the lens at 90º intervals. • Should you wish to rotate the buttons, contact a Nikon-authorized service representative. L-Fn button Press to perform a function assigned using the camera. For more...
- Page 15 Focus limit switch Choose the autofocus range. • FULL: Choose to focus on subjects at any distance between 2.5 m (8.21 ft) and ∞. • ∞ – 6 m: Focus is limited to distances of 6 m (19.69 ft) and more. Select this option for faster focusing if your subject will always be at distance of at least 6 m (19.69 ft).
- Page 16 19 20 21 Teleconverter switch Switch between focal length multipliers of 1× and 1.4×. “The Built-in Teleconverter” (p.30) Teleconverter switch lock Use to lock the teleconverter switch. “The Built-in Teleconverter” (p.30) Memory set button Save the current focus position. “Memory Recall” (p.28) Parts of the Lens: Names and Functions...
- Page 17 Lens hood Lens hoods block stray light that would otherwise cause flare or ghosting. They also serve to protect the lens. “Attaching and Removing the Lens Hood” (p.25) Clamp knob Use when attaching the lens hood. “Attaching and Removing the Lens Hood” (p.25) Parts of the Lens: Names and Functions...
- Page 18 Slip-on lens cap (front cap) • Be sure to reattach the cap when transporting the lens or when transporting the camera with the lens attached. • Reverse the lens hood before using the slip-on lens cap. “Attaching and Removing the Lens Hood” (p.25) Parts of the Lens: Names and Functions...
- Page 19 Lens cap (rear cap) Parts of the Lens: Names and Functions...
-
Page 20: Attachment And Removal
Attachment and Removal Attaching the Lens Turn the camera off, remove the body cap, and detach the rear lens cap. Attachment and Removal... - Page 21 Position the lens on the camera body, keeping the mounting mark on the lens aligned with the mounting mark on the camera body ( ), and then rotate the lens counterclockwise ( ) until it clicks into place. Attachment and Removal...
- Page 22 When the Lens Is Mounted on a Tripod: Attaching the Camera Position the camera on the lens, keeping the mounting mark on the lens aligned with the mounting mark on the camera body ( ), and then rotate the camera clockwise until the lens clicks into place ( Attachment and Removal...
- Page 23 Removing the Lens Turn the camera off. Press and hold the lens release button ( ) while turning the lens clockwise ( ). Attachment and Removal...
- Page 24 When the Lens Is Mounted on a Tripod: Removing the Camera Press and hold the lens release button ( ) while turning the camera counterclockwise ( Attachment and Removal...
-
Page 25: Attaching And Removing The Lens Hood
Attaching and Removing the Lens Hood Attaching the Lens Hood • When attaching the hood to the lens, slide the end of the hood over the end of the lens as shown ( ) and tighten the clamp knob securely ( •... - Page 26 Removing the Lens Hood • The hood can be removed by performing the attachment procedure in reverse order. • The same procedure can be used when the lens hood is reversed. Attaching and Removing the Lens Hood...
-
Page 27: Attaching A Strap
Attaching a Strap To attach a strap (whether the supplied strap or one that has been purchased separately), follow the steps below. • If the strap is not attached correctly, the lens could fall, causing injury. • Use a lens strap when carrying the camera with the lens attached. Using a strap attached to the camera alone could damage the strap or the mounts on the camera or lens, causing the camera or lens to fall. -
Page 28: Memory Recall
Memory Recall Save a frequently-used focus position to the lens. The saved position can then be quickly recalled. Saving Focus Positions • Focus on a subject at the desired distance and then press and hold the memory set button. An icon will be displayed in the camera monitor if the operation is successful. - Page 29 Using Stored Focus Positions Rotate the Fn ring to recall the last-saved focus position. Normal auto- or manual focus will be restored when the ring is released. Pressing the Shutter-Release Button Halfway During Memory Recall How focus will respond if the shutter-release button is pressed halfway while the Fn ring is rotated varies with the camera: •...
-
Page 30: The Built-In Teleconverter
The Built-in Teleconverter The built-in teleconverter increases focal length by 1.4×. Using the Built-in Teleconverter Slide the teleconverter switch lock in the direction shown ( ). The teleconverter switch is now unlocked. The Built-in Teleconverter... - Page 31 Slide the teleconverter switch to 1.4× ( ). The Built-in Teleconverter...
- Page 32 Slide the teleconverter switch lock in the direction shown ( ). • The teleconverter switch is now locked. • Return the teleconverter switch to 1× when the teleconverter is not in use. The Teleconverter Switch Lock After changing focal lengths, be sure to latch the teleconverter switch lock to prevent unintended operation of the teleconverter switch.
- Page 33 Using the Built-in Teleconverter: Notes • To ensure correct exposure and prevent vignetting or other unintended results, do not use the teleconverter switch while any of the following are in progress: Autofocus Vibration reduction Exposure Video recording AF fine-tuning • Note that incorrect focal length data may be recorded with photographs taken with a built-in or optional teleconverter.
- Page 34 Lens Firmware Updates Before updating the lens firmware, be sure the teleconverter switch is in the 1× position. Firmware cannot be updated with the switch in the 1.4× position. Do not operate the switch during firmware updates. The Built-in Teleconverter...
-
Page 35: Using The Tripod Collar
Using the Tripod Collar Attach tripods to the built-in rotating tripod collar, not to the camera. Attaching tripods to the built-in rotating tripod collar rather than to the camera allows the camera to be rotated as described below to take pictures in “tall” or “wide”... - Page 36 Rotate the camera, using the rotation indices for reference ( Tighten the tripod collar ring attachment screw ( For information on removing the built-in rotating tripod collar, contact a Nikon- authorized service representative. Using the Tripod Collar...
-
Page 37: Vibration Reduction (Vr)
Vibration Reduction (VR) The lens supports vibration reduction. Vibration reduction settings can be adjusted from the camera. See the documentation provided with the camera for details. Vibration reduction allows shutter speeds slower than would otherwise be the case, expanding the range of shutter speeds available. Vibration Reduction •... -
Page 38: Filters
Filters The lens is designed for use without filters, and can be used without a filter inserted under most conditions. In situations in which a filter is required, an optional 46 mm screw-on filter can be inserted in the slip-in filter holder as described below. - Page 39 Press the points on either side of the slip-in filter holder and open the cover. Insert a 46 mm screw-on filter. Depending on their shape, some filters cannot be used with the slip-in filter holder. Use filters that fit the holder. Filters...
- Page 40 Close the slip-in filter holder cover. Rotate the slip-in filter holder tab as shown ( ) and lower it back into its starting position ( ). Filters...
- Page 41 Insert the slip-in filter holder into the slip-in filter holder slot. Insert the holder with the side labeled “FRONT” facing forward (toward the focus ring). Slide the slip-in filter holder in until it latches. • Slide the slip-in filter holder in until it clicks into place. •...
- Page 42 Using Optional Filters • Using a filter slightly increases the minimum focus distance and shifts the focus distance from that shown by the focus distance display. • When using memory recall, be sure to attach the filter before storing the focus position.
- Page 43 • Before taking pictures, rotate the ring to control the reflections visible in the shooting display. • Using a filter slightly increases the minimum focus distance and shifts the focus distance from that shown by the focus distance display. • When using memory recall, be sure to attach the filter before storing the focus position.
-
Page 44: Precautions For Use
• Keep the CPU contacts clean. • Should the rubber lens-mount gasket be damaged, cease use immediately and take the lens to a Nikon-authorized service center for repair. • Reattach the lens caps when the lens is not in use. - Page 45 • We recommend that you place the lens in its case to protect it from scratches during transport. • Nikon will not be held liable in the event that the lens is stolen or damaged while a third-party anti-theft cable is attached to the security slot.
-
Page 46: Lens Maintenance
Lens Maintenance • Removing dust is normally sufficient to clean the glass surfaces of the lens. • When cleaning the fluorine-coated front lens element: Smudges, fingerprints, and other oily stains can be removed using a soft, clean cotton cloth or third-party lens cleaning tissue; clean from the center outwards using a circular motion. -
Page 47: Technical Notes
Technical Notes Cameras with AF-Assist Illuminators The lens or lens hood may block the light from the camera AF-assist illuminator. • For the information on using the lens with cameras that have built-in AF-assist illuminators, visit the site below. https://downloadcenter.nikonimglib.com/ Cameras with AF-Assist Illuminators... -
Page 48: Using The Lens On Cameras With A Built-In Flash
Using the Lens on Cameras with a Built- in Flash Shadows will be visible in photos where light from the built-in flash is obscured by the lens or lens hood. Remove the lens hood before shooting. Note, however, that depending on the distance to the subject and lens focal length, shadows may appear even when the lens hood is removed. - Page 49 Accessories Supplied Accessories • LC-K105 Lens Cap (front cap) • LF-N1 Lens Cap (rear cap) • HK-42 Lens Hood • LN-3 Strap • CL-L3 Lens Case Other Compatible Accessories • 46 mm filters (for use with slip-in filter holder) • C-PL460 Slip-in Circular Polarizing Filter •...
- Page 50 Specifications Mount Nikon Z mount • Without built-in teleconverter: 400 mm Focal length • With built-in teleconverter: 560 mm • Without built-in teleconverter: f/2.8 Maximum aperture • With built-in teleconverter: f/4 25 elements in 19 groups (including 7 elements in 4...
- Page 51 Approx. 156 mm × 380 mm (6.2 in. × 15 in.) to end of lens from camera lens mount flange) Weight Approx. 2950 g (6 lb 8.1 oz) Nikon reserves the right to change the appearance, specifications, and performance of this product at any time and without prior notice. Specifications...
- Page 52 Notices Notices for Customers in the U.S.A. This device complies with part 15 of the FCC Rules. Operation is subject to the following two conditions: (1) this device may not cause harmful interference, and (2) this device must accept any interference received, including interference that may cause undesired operation.
- Page 53 ● Modifications The FCC requires the user to be notified that any changes or modifications made to this device that are not expressly approved by Nikon Corporation may void the user’s authority to operate the equipment. Nikon Inc., 1300 Walt Whitman Road, Melville, New York 11747-3064, U.S.A.
Need help?
Do you have a question about the NIKKOR Z 400mm f/2.8 TC VRS and is the answer not in the manual?
Questions and answers