Table of Contents
Advertisement
Quick Links
Advertisement
Table of Contents

Summary of Contents for CDVI CDV43
- Page 1 ENG-437-D4-V1 / 201903 CDVI 2 WIRE INTERCOM SYSTEM CDV43 4.3" COLOR TFT MONITOR • Please read this manual carefully before using the product you purchase, keep safe for future use. • Please note that images and graphics in this manual may be different from the actual product.
-
Page 2: Parts And Functions
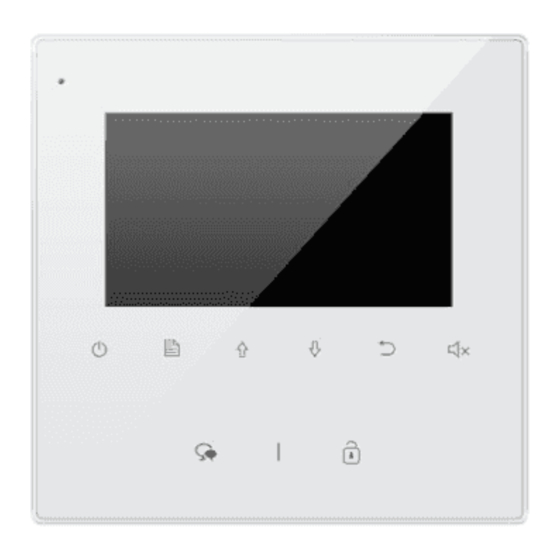
1.Parts and Functions Microphone LCD Screen Mounting Hook RING Connection Port Close Button Mute Button/Indicator Menu Button Return Button Up Button Down Button Talk/Mon Button Unlock Button Terminal Description SW+,SW-: Door bell call button connection port. Ring,GND: Extra buzzer connection port. RING NC: Reserved. -
Page 3: Basic Door Release Operation
1. Use the screws to fix the Mounting Bracket to the wall or standard Uk single gang back box. Fitting accessories includes Bracket , Special 2 wire connectors to connect with Monitor. 2. Connect the system (see connection chapter). Mount the unit onto the mounting bracket make sure it is attached securley. -
Page 4: Intercom Function
5.Intercom Function When the monitor is in standby mode, press Menu Button to enter main menu page. Use Button to move upward / downward to select Intercom Call, press Menu Button to enter intercom select page, there are 3 selections. Namelist Call : A user in one apartment can call other apartments in the system. -
Page 5: Don't Disturb Function
6. Don't Disturb Function When the monitor is in standby mode press Menu Button to enter main menu page. Button to move upward / downward to select Don't Disturb item press Menu Button (or press Mute Button/Indicator directly) to enter the no disturb page, you have 4 available selections. - Page 6 3. SIP Info - Select this item to view the Sip information and get QR code, press Menu button to change password. Divert Options No Divert Divert Sip Info 8.Download Setup 2Easy APP 1. Scan and download 2Easy APP, or search “2Easy” on APP store. Android 2.
- Page 7 3. Disable “IPV6” on 2Easy APP Most internet providers do not support IPV6 , please manually disable it with the following steps: Press here to disable Press here to enable Press here to disable...
- Page 8 4. After login to the SIP account on 2Easy APP, check on status bar or press on the “Registered” area to manually register until 2Easy APP displays Registered. 9. Surveillance door station via 2Easy APP On 2Easy APP, press “Monitor” and wait for a few seconds (Due to 2-Wire communication will take around 12 second to get video), blue screen is normally due to the monitor verifying the password and monitor code.
-
Page 9: Light Function
10.Light Function Menu Button to enter main menu page. Use When the monitor is in standby mode, press Button to move upward / downward to select Light item, press Menu Button to enter the light Option page, you have 3 items to select. Main Menu Light Option Divert Call... -
Page 10: Monitor Parameter Setting
12. Monitor Parameter Setting 12.1 How to enter the installation setting page Main Menu About Installer Setup S/W : 00.01.00 Divert Call [ 0000 ] Addr : 00.00 Light Video STD: AUTO Setup About Restore button to select button to increase/ Unlock Press decrease the value you want,... - Page 11 12.5 How to set the slave monitor address Maximum 4 monitors can be connected in one apartment,one master monitor together with 3 slave monitors, so you should set the address correctly.(note:must have one monitor to be set as master monitor) The code of 8000 is used to set the master monitor.
- Page 12 12.8 User Code Setup In the 2Easy system every apartment must have a unique identification called the User Code. The DIP swiches are used to configure the User Code for each Monitor. • Bit-1 to Bit-5 are used to User Code setting. The value is from 1 to 32, which have 32 different codes for 32 apartments.
-
Page 13: Basic Connection
12.9 How to enable/disable auto unlocking(Disable by default) Function Description: Auto unlocking allows the door to unlock after 5 seconds of a placed call from the door station without the need to answer or unlock the door, this allows the user to leave the door on the latch' for a known visitor. -
Page 14: Specifications
15. Specifications ● ● Power●supply●for●indoor●monitor:●● ● DC●20~28V● ● ● Power●consumption:● ●● Standby●0.17W;●Working●status●4.7W ● ● Monitor●screen:● ● 4.3●inch●digital●color●TFT ● ● Display●Resolutions:● ● 480(R,●G,●B)●x●272●pixels ● ● Video●signal:● ● 1Vp-p,●75Ω,●CCIR●standard ● ● Wiring:● ● 2●wires,●non-polarity ● ● Monitor●time:● ● 40●seconds ● ● Talking●time:● ●... - Page 15 Note...
- Page 16 The design and specifications can be changed without notice to the user. Right to interpret and copyright of this manual are preserved. DT-ENG-437/D4-V1...


Need help?
Do you have a question about the CDV43 and is the answer not in the manual?
Questions and answers