Table of Contents
Advertisement
Advertisement
Table of Contents

Related Manuals for CDVI CDV47DX


Summary of Contents for CDVI CDV47DX
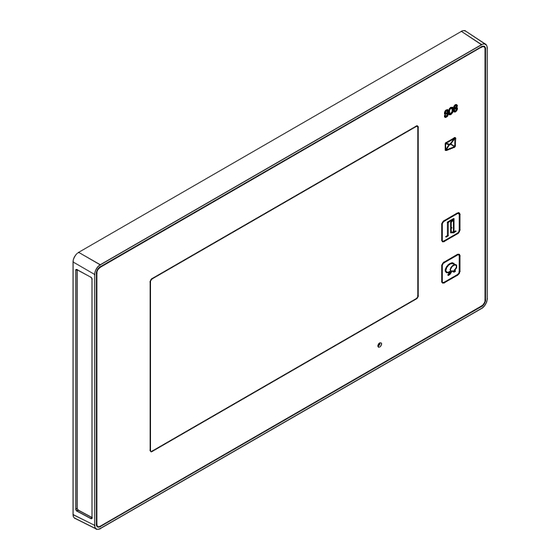
- Page 1 ENG-CDV47DX-V1 / 201904 CDVI 2 WIRE HOME Wi-Fi SYSTEM CDV47DX 7" COLOR TFT Wi-Fi MONITOR • Please read this manual carefully before using the product you purchase,and keep it well for future use. • Please note that images and sketch maps in this manual may be different from the actual product.
-
Page 2: Table Of Contents
Contents 1.Parts and Functions ..........1 2.Mounting ..............2 3.Main Menu ..............3 4.Answering a Call ............4 5.Pan, Tilt & Zoom ............5 6.Monitoring ..............6 7.Call Another Rooom or Apartment(Intercom) .... 7 8.View Call Record ............9 9.Do Not Disturb Function ........... 10 10.Divert Call .............. -
Page 3: Parts And Functions
1. Parts and Functions SD card 1 2 3 4 5 6 Key functions Item Description See the next page for details Digital LCD touch screen Display the visitors' image Unlock button Press to release the door Press to communicate hands free with visitor Talk/Mon button Press to view the outdoor condition in standby mode Microphone... -
Page 4: Mounting
Terminal description L1,L2: Bus line terminal. SW+,SW-: Doorbell input connec- tion port. Ring,GND: Extension buzzer input connection port. 1 2 3 4 5 6 USB-Wi-Fi adaptor NC: Reserved. DIP switches Bit1~Bit5: Reserved. Bit6: Video impedance matching • switch. • Set to ON if the monitor is at the DIP Switches end of the line or operates with CDV-DBC4A1, otherwise, set to... -
Page 5: Main Menu
3. Main Menu The Main menu is your starting point for using all the applications on your monitor. Touch Unlock button, or touch anywhere of the screen on monitor in standby mode, the Main menu will appear as follow: Monitor Intercom Touch to view outdoor scene. -
Page 6: Answering A Call
Icon Meaning Description Wi-Fi connection active and not connected Wi-Fi connection disabled Touch to enter Wi-Fi setting interface in shortcut. Wi-Fi connection active and configured While talking with a door station Shows status of talking, unlocking Displays which door station ect. -
Page 7: Pan, Tilt & Zoom
4. Touch the icons to adjust the parameters you want. 00:10 Door Station1 Adjust the image colour. Adjust the image brightness. Adjust the volume. 5. Touch to open the door for a visitor. 00:10 Door Station1 The door lock key display on screen briefly to indicate that the door lock has been released. -
Page 8: Monitoring
6. Monitoring This section can be used to monitor your home by enabling one of the cameras inside the apartment, the common areas (e.g. garages, garden), and at the entrance. 1. Touch to display the cameras in your system. 2. Touch to activate the desired camera on Monitor interface. -
Page 9: Call Another Rooom Or Apartment(Intercom)
The display shows the a live image by the active camera. 6 . To u c h t o a c t i v a t e a u d i o communication. 00:10 Door Station 2 To u c h a g a i n t o r e t u r n t h e Monitor interface. - Page 10 3. Touch to activate the communication with another room. 00:15 Inner Call Intercom Intercom Namelist Inner Call Guard Station Input Numbers Inner Broadcast 4. Touch to activate the communication with guard station. 00:15 Guard Call Intercom Intercom Namelist Inner Call Guard Station Input Numbers Inner Broadcast...
-
Page 11: View Call Record
8. View Call Record When there are one or more unread call records in the answering machine, clicking the icon shows them. 1. Touch to enter call record interface and display the records. These records include missed calls, incoming calls, outgoing calls and playback. -
Page 12: Do Not Disturb Function
9. Do Not Disturb Function If you don’t want to be disturbed, for example, at night, please follow the procedure below. 1. Touch to enter call scene interface. 2. Touch to set the no disturb mode: No Disturb 8H and No Disturb Always. CallScene CallScene Normal Use... -
Page 13: Divert Call
10. Divert Call Calls from door station can be diverted to your phone. Note:this function should be supported by Wi-Fi or SIP network. 1. Touch to enter call scene interface. 2. Touch to set the divert call mode: Divert Call If No Answer and Divert Call Always. CallScene CallScene Normal Use... -
Page 14: Installer Setup
11. Installer Setup Enter setting interface 1. Touch to enter setting interface. Call tune Call Tune Ring volume [04] General Ring time [35s] Installer Door1 calling tune [01] Wireless Door2 calling tune [01] About Door3 calling tune [01] 2. Touch the icon for the desired customisation: Ring volume - Ring time - Door1/2/3/4 calling tune - Doorbell calling tune -Intercom calling Call Tune tune -InnerCall calling tune -GuardCall calling tune... -
Page 15: Ring Tune Setting
Ring tune setting The ring call tune can be set individually to distinguish different calling source. 22 tones can be selected. Scroll to next interface 1. Touch to enter call tune setting Call Tune interface. Call Tune Ring volume [04] General Ring time [35s]... - Page 16 Date and time setting The current date and time can be modified at any time. General Date time set Call Tune Date and time General Date mode: MM_DD_YYYY General Language Time mode: HOUR_12 Installer Monitor time Date: xxxx_xx_xx Wireless Shortcut setting Time: xx:xx About...
- Page 17 Setting monitor time The monitor time can be changed at any time. It can be to set 30s, 60s, 90s, 120s, 150s, 180s, 210s, 240s, 270s, 300s. * 30s is the default monitor time. General Monitor time select Call Tune Date and time General 30(s)
- Page 18 SD card If an SD card is inserted into the divice, the SD card info can be reviewed on the device. SD Card General General SD information Call Tune Date and time Copy image General Language Installer Monitor time Wireless Shortcut setting About SD card...
-
Page 19: Installer Setting
Restoring to default setting The restore to default function allows the user to recover factory setting(default). General General Call Tune Date and time Call Tune Screen on in divert General Language General Restore to default Installer Monitor time Installer Wireless Shortcut setting Wireless About... - Page 20 Users code setting Touch to set the user code for each monitor. Current address Setting Call Tune Current addtess [01] General Intercom enable Enable Installer IPC Setting Wireless Monitor list manage About System settings 1. Enter the code by touching the digital number. 2.
- Page 21 System setting This section is reserved. Software upgrade Upgrading the device software online/SD card. Installer FW update Call Tune Current addtess [01] Installer Server Server1[47.91.xx.xx] General IPC Setting Download code 847xxx Installer Monitor list manage Wireless System settings About FW upgrade Check In the FW update interface, users can select the Servers/SD card to upgrade.Then touch "Check"...
- Page 22 Unlock mode setting Setting the unlock mode. Installer Installer Call Tune Current addtess [01] Call Tune Unlock time [03] General IPC Setting General Unlock mode [Open] Installer Monitor list manage Installer Auto reboot [Enable] Wireless System settings Wireless Reboot About FW upgrade About There are two unlock modes:...
-
Page 23: Wireless Setting
Wireless setting WIFI adaptor 1. Touch to enter wireless setting Setting interface. Call Tune Wifi switch [ON] General Wlan setting 2. Touch to activate the function, make Installer Wireless device regist [00] sure the wifi switch is ON. Wireless SIP config About SIP tools 3. - Page 24 7. Enter the password (if required). PWD: CDVI_ 8. Touch to activate the connection, and return to Wi-Fi information interface. 9. Go to Connect/Disconnect item. Wireless SSID: ****** PWD: ****** Auto connect/Disconnect Connected Registering a slave Wi-Fi monitor with master Wi-Fi monitor On master Wi-Fi monitor and slave Wi-Fi monitor, go into wireless setting interface.
- Page 25 2. Touch to enter the master / slave register interface. master Wi-Fi monitor slave Wi-Fi monitor Device manage Device manage Wireless Register new slave Wireless Register new master Master register Slave register Wireless My ID: 040019b93fa9/201 Wireless My ID: 040019b83ea9/201 Receive slave: Registered to: Slave ID:------------ / ---...
- Page 26 On the wireless setting interface 2. Touch to enter the SIP config. Setting Sip config Call Tune Wifi switch [ON] Wireless USER NAME 0e0019axxx General Wlan setting PASSWORD 230** Installer Wireless device regist [00] DOMAIN 2easyip.com Wireless SIP config Manual registration About SIP tools Use Default...
- Page 27 SIP tools SIP tools allow test of divert function and with an unattended door station. 1. Touch to enter the SIP tools page. Wireless Call Tune Wifi switch [ON] General Wlan setting Installer Wireless device regist [00] Wireless SIP config About SIP tools 2.
-
Page 28: About
In the SIP tools page, "SIP call statistics", "Clear SIP call statistics", "View SIP call logs", "Copy SIP call logs to SD", "View registered Phones" can be found. About 1. Touch to enter about interface. Setting Call Tune Device Type: DX47 General S/W Ver:... -
Page 29: Download Setup 2Easy App
12. Download Setup 2Easy APP 1. Scan and download 2Easy APP, or search “2Easy” on APP store. Android 2. On DX monitor, press “SIP Server” icon on main menu, and keep in “SIP config”, on 2Easy APP, press on top-right, to scan QR code on DX monitor, and press “Save”. - Page 30 3. Disable “IPV6” on 2Easy APP Most of internet providers doesn’t support IPV6 feature, please manually disable it with the following steps: Press here to disable Press here to enable Press here to disable -28-...
-
Page 31: Surveillance Door Station Via 2Easy App
4. After logging in to the SIP account on 2Easy APP, check on status bar, or press on the “Registered” area to manually register, until 2Easy APP display: 13. Surveillance door station via 2Easy APP On 2Easy APP, press “Monitor” and wait for a few second (Due to 2-Wire communication will take around 12 second to get video), blue screen is normally due to the DX monitor is verifying the password and monitor code. -
Page 32: Ipc Setting
14. IPC Setting Allows an IP camera to be viewed from the monitor. Setting IPC Setting Call Tune Current addtess [01] Installer Add IPC by searching General IPC Setting Add IPC by manual Installer Monitor list manage IPC list Wireless System settings IPC DHCP [Enable]... - Page 33 IPC list: IP camera list. IPC Setting IPC monitor Installer Add IPC by searching IPC edit [192.168.xxx.xxx] HeroSpeed Add IPC by manual IPC delete IPC list IPC DHCP [Enable] Touch to edit the IP camera's name IPC monitor IPC monitor IPC edit [192.168.xxx.xxx] HeroSpeed IPC edit...
-
Page 34: Specification
15. Specification ● Power supply: DC 20~28V ● Power consumption: Standby 0.3W; Working 7W ● Monitor screen: 7 Inch digital color TFT ● Display Resolutions: 800*3(R, G, B) x 480 pixels ● Video signal: 1Vp-p, 75Ω, CCIR standard ● Wiring: 2 wires, non-polarity ●... - Page 35 Note -33-...
- Page 36 ENG-CDV47DX-V1 The design and specifications can be changed without notice to the user. Right to interpret and copyright of this manual are preserved.
Need help?
Do you have a question about the CDV47DX and is the answer not in the manual?
Questions and answers