Table of Contents
Advertisement
Quick Links
Advertisement
Table of Contents

Related Manuals for Alpha-InnoTec LWP


Summary of Contents for Alpha-InnoTec LWP
- Page 1 Air/Water Heat Pumps Outdoor installation Operating Manual 83059700jUK...
-
Page 2: Table Of Contents
Delivery, storage, transport and installation Hydraulic integrations ............8 ........30 Scope of supply ........8 LWP 450AR3 with multifunction tank as domestic hot water tank Storage ............8 Heating ............ 30 Transport and unpacking ......8 LWP 450AR3 with multifunction tank as Installation .......... -
Page 3: About This Operating Manual
About this operating manual 1.3 Symbols and markings Identification of warnings This operating manual is part of the device. ► Before working on or with the device, read the Symbol Meaning operating manual carefully and follow it for all Safety-relevant information. activities at all times, especially the warnings and Warning of physical injuries. -
Page 4: Contact
● Germany: www.alpha-innotec.de ► Ensure that personnel are familiar with local ● EU: www.alpha-innotec.com regulations, especially those on safe and hazard- aware working. -
Page 5: Disposal
Injuries due to high temperatures Improper action If desuperheating is used, very high temperatures can Requirements for minimum scale and corrosion arise at the desuperheater and the desuperheater damage in hot water heating systems: lines. Contact can result in burns. ●... -
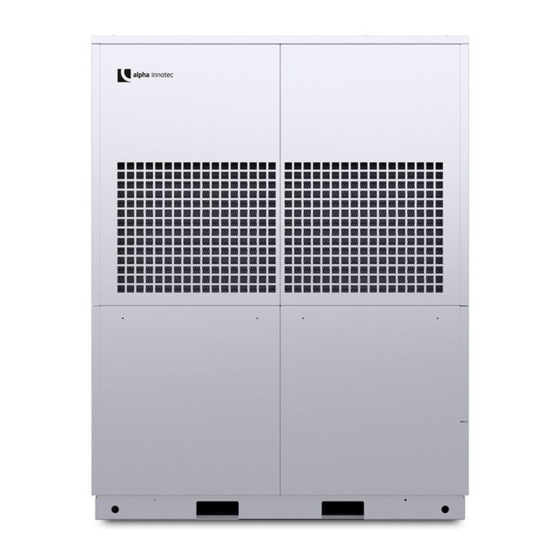
Page 6: Description
Description 3.2 Layout NOTE 3.1 Delivery condition This section essentially names components relevant for fulfilling the tasks described in this operating manual. Unit packed in a wooden strip with styrofoam / 1 Switch box cover PE angle strips and wrapped in plastic film 2 Fans 3 Evaporator 1 Holes for steel pipes ( “Transport with a ... -
Page 7: Accessories
3.3 Accessories Cooling Cooling is integrated in the units. The following The following accessories are available for the device options are possible for units with cooling function through the manufacturer's local partner: ( operating manual for the heating and heat pump ●... -
Page 8: Operation And Care
Operation and care Delivery, storage, transport and installation NOTE 5.1 Scope of supply The device is operated via the control panel of the heating and heat pump controller ► Check delivery immediately after receipt for ( operating manual for the heating and externally visible damage and completeness. -
Page 9: Installation
Ideally, the device should be transported with a lift Lift the unit with the crane and place it on the truck. base. ► Do not tilt the heat pump by more than 45°. Make sure that the unit's base frame is in full con- tact with the base. - Page 10 Installation Carefully lift the water protection barriers out of the interior of the unit. Do not damage any com- ponents when lifting out. CAUTION In the air outlet area, the air temperature is approx. 5 K below the ambient temperature. Under certain climatic conditions, an ice layer can therefore form in the air outlet area.
-
Page 11: Hydraulic Installation
Hydraulic installation After correct placement on the ventilator ring plates (②), 8 screw threads (⑤) protrude from each water protection barrier (④). IMPORTANT Components and lines for desuperheating must be able to withstand temperatures up to 90°C. IMPORTANT Dirt and deposits in the (existing) hydraulic system can Use the mounting material from the accessory cause damage to the heat pump. -
Page 12: Vertical Connection
6.1 Vertical connection Connect the unit to the fixed piping of the heating circuit via vibration decouplers. You must install View from below: View from inside: them to prevent the transfer of structurally borne sound to the fixed piping (accessory). 1 Desuperheating connections 2 Heating circuit connections 3 Styrodur cover 1 Desuperheating return Unscrew and remove the Styrodur cover and 2 Desuperheating supply then cut out the holes for the 4 pipes and the 3 Heating circuit return... -
Page 13: Horizonzal Connection
Electrical installation 6.2 Horizonzal connection Open break-outs on the right sidewall Connect the electrical cables Trim the 4 hoses (accessories) to length if required. Likewise the condensate hose inside the unit, which hangs loose from the condensate pan. IMPORTANT Irreparable damage to the compressor due to wrong Attach the hoses and the condensation hose and rotating field! lead out on the right side. -
Page 14: Flushing, Filling And Venting
Flushing, filling and venting 8.1 Heating water quality NOTE ● For detailed information refer, among other things, to the VDI Guidelines 2035 “Vermeidung Schäden Warmwasserheizanlagen” (preventing damage in hot water heating systems) ● Required pH value: 8.2 … 10; for aluminium materials: pH value: 8.2 … 8.5 ►... -
Page 15: Flushing, Filling And Venting The Heating Circuit
Insulate hydraulic connections 8.2 Flushing, filling and venting the heating circuit Insulate hydraulic lines in accordance with local Outlet pipe of the safety valve is connected. regulations. ► Ensure that the set pressure of the safety valve is Open shut-off devices. not exceeded. Perform a pressure test and check for leaks. NOTE Insulate external piping on site. -
Page 16: Commissioning
11 Commissioning Turn the adjusting knob (①) of the overflow valve (②) until the spread between the flow and return temperature is set as follows: CAUTION Outdoor Recommended Prior to commissioning the unit, the fan temperature setting protection grilles must be mounted and -10 °C the facing panels closed. 0 °C Relevant planning & design data of the system is ... -
Page 17: Maintenance
12 Maintenance ● Check at regular intervals whether the evaporator and the leaf guard need to be cleaned NOTE recommend that conclude maintenance agreement with an accredited heating company. 12.1 Basic principles The refrigerant circuit of the heat pump requires no regular maintenance. -
Page 18: Faults
13 Faults Read out the cause of the fault via the diagnos- tics program of the heating and heat pump con- troller. Contact the local partner of the manufacturer or the factory's customer service. Have the fault message and unit number to hand. 14 Dismantling and disposal 14.1 Dismantling ►... -
Page 19: Technical Data / Scope Of Supply
Technical data / scope of supply Performance data Values in brackets: (1 Compressor) LWP450AR3 Heating capacity | COP for A7/W35 acc. to DIN EN 14511-x: 2018 kW | COP 47.8 (31.03) | 3.57 (4.58) for A7/W45 acc. to DIN EN 14511-x: 2018 kW | COP —... -
Page 20: Performance Curves
Performance curves / operating limits / heating LWP 450AR3 Qh (kW) Temp„ (°C) Pe (kW) 35°C 1VD 55°C 1VD 35°C 2VD 55°C 2VD Temp„ (°C) Temp„ (°C) ∆p (bar) ∆p (bar) 1,500 0,125 1,350 1,200 0,100 1,050 0,900 0,075 0,750... - Page 21 LWP 450AR3 Performance curves / operating limits / cooling Q0 (kW) Temp¤ (°C) Pe (kW) 7°C 1VD 18°C 1VD 10°C 2VD 18°C 2VD Temp¤ (°C) Temp¤ (°C) ∆p (bar) ∆p (bar) 0,125 1,500 1,350 0,100 1,200 1,050 0,075 0,900 0,750...
- Page 22 Performance curves / Heißgasnutzung LWP 450AR3 Hz A2 Hz A7 35°C 2VD 35°C 1VD 55°C 2VD 55°C 1VD Temp (°C) Temp (°C) Kh A27 Hz A-7 35°C 2VD 7°C 1VD 55°C 2VD Temp (°C) Temp (°C) ∆p (bar) Kh A35...
-
Page 23: Dimensional Drawings
Dimensional drawings LWP 450AR3 1800 1800 1580 1580 1770 1770 Y (1 : 10) Y (1 : 10) Maß Allgemein- Allgemein- Oberflächen Oberflä toleranz toleranz Werk DIN ISO 2768 -cL DIN ISO 2768 -cL Datum Name Datum Name Bene Z (1 : 10) -
Page 24: Installation Plans
LWP 450AR3 Installation plan / base plan 1800 2000 1790 Z (1 : 10) Keys: 819492c Y (1 : 10) All dimensions in mm. ÄM 049/2020 02.12.2 ÄM 034/2019 26.02.2 Pos. Name Kondensatablauf 11.07.1 Blattformat: A3 quer PEP 010/2017 25.10.1 Horizontal connection Pos. -
Page 25: Minimum Clearances
Minimum clearances LWP 450AR3 Keys: 819492c Minimum clearances Mindestabstände in mm zu Gebäuden oder Wärmepumpen All dimensions in mm. Subject to change without notice | 83059700jUK | ait-deutschland GmbH Zust. -
Page 26: Minimum Clearances Parallel Connection
LWP 450AR3 Minimum clearances parallel connection 3800 8850 1000 1800 1000 4000 4000 luftseitig bevorzugte Aufstellvariante Preferred installation variant air side Kaskadenaufstellung 4 Geräte Mindestabstände in mm zu Gebäuden Keys: 819492c Parallel connection: 4 devices. Minimum clearances All dimensions in mm. -
Page 27: Coastal Installation
Coastal installation LWP 450AR3 IMPORTANT The minimum distances necessary for correct and safe operation as well as any service work must be observed. facing away from the coast / prevailing wind direction ● in a sheltered area near a wall ... -
Page 28: Condensate Line
External condensate line connection LWP 450AR3 Legende: 819492c Technische Änderungen vorbehalten. Aufstellungshinweise für Anschluss der Kondensatleitung außerhalb des Gebäudes. Kiesschicht zur Aufnahme von bis zu 700l Kondenswasser pro Tag als Pufferzone zum versickern. Keys: 819492c Kondensatablaufrohr DN 40 (bauseits) Pos. -
Page 29: Internal Condensate Line Connection
LWP 450AR3 Internal condensate line connection Legende: 819492c Technische Änerungen vorbehalten. Aufstellungshinweise für Anschluss der Kondensatleitung innerhalb des Gebäudes. Wichtig: Beim Anschluss der Kondensatleitung innerhalb eines Gebäudes muss ein Syphon eingebaut werden (siehe Abbildung 2a). An der Kondensatabflussleitung der Wärmepumpe dürfen keine zusätzlichen Keys: 819492c Abflussleitungen angeschlossen werden. -
Page 30: Hydraulic Integrations
LWP 450AR3 with multifunction tank as domestic hot water tank Heating ZWE 1 8371220a 8371220a Hydraulik: IBN-Code: Subject to change without notice | 83059700jUK | ait-deutschland GmbH... -
Page 31: Lwp 450Ar3 With Multifunction Tank As Domestic Hot Water Tank Heating And Cooling
LWP 450AR3 with multifunction tank as domestic hot water tank Heating and cooling ZWE 1 8371273 Industriestrasse 3 ait-Deutschland GmbH 95359 Kasendorf 8371273, XXX Subject to change without notice | 83059700jUK | ait-deutschland GmbH... -
Page 32: Keys Hydraulic Integration
Subject to change without notice | 83059700jUK | ait-deutschland GmbH... -
Page 33: Terminal Diagrams
Wall-mounted controller LWP 450AR3 Terminal diagram 1/2 1~N/PE/230V/50Hz 3~PE/400V/50Hz OUT8 OUT7 OUT6 /2.C2 OUT5 OUT4 OUT3 OUT2 OUT1 /2.C2 NTC1 GND1 NTC2 GND2 NTC3 GND3 NTC4 TFB1 GND4 NTC5 TRL ext. GND5 NTC6 GND6 NTC7 GND7 NTC8 GND8 NTC9 GND9... - Page 34 LWP 450AR3 Terminal diagram 2/2 Wall-mounted controller 3~N/PE/400V/50Hz /1.B4 3~N/PE/400V/50Hz /1.B3 Subject to change without notice | 83059700jUK | ait-deutschland GmbH...
-
Page 35: Expansion Board
Expansion board LWP 450AR3 Terminal diagram OUT 21 OUT 22 OUT 23 OUT 24 OUT 25 OUT 26 OUT 27 OUT 28 OUT 29 OUT 29 NTC 21 NTC 22 NTC 23 NTC 24 NTC 25 TFB2 NTC 26 TFB3... -
Page 36: Circuit Diagrams
Circuit diagram 1/4 LWP 450AR3 grey black yellow orange grey black yellow orange Subject to change without notice | 83059700jUK | ait-deutschland GmbH... - Page 37 LWP 450AR3 Circuit diagram 2/4 Subject to change without notice | 83059700jUK | ait-deutschland GmbH...
- Page 38 Circuit diagram 3/4 LWP 450AR3 OUT1 OUT2 OUT3 OUT5 OUT6 OUT7 OUT8 Subject to change without notice | 83059700jUK | ait-deutschland GmbH...
- Page 39 LWP 450AR3 Circuit diagram 4/4 GND1 GND2 GND3 GND4 GND5 GND6 GND7 GND8 GND9 GNDI1 AIN1 GNDI2 AIN2 M3 GND /2.D3 GNDO1 M3 E1 /2.D3 M4 GND /2.D7 GNDO2 M4 E1 /2.D7 brown green white Subject to change without notice | 83059700jUK | ait-deutschland GmbH...
- Page 40 GmbH Industriestraße 3 D-95359 Kasendorf E info@alpha-innotec.de W www.alpha-innotec.de alpha innotec – an ait-deutschland GmbH brand...
Need help?
Do you have a question about the LWP and is the answer not in the manual?
Questions and answers