
Related Manuals for Alpha-InnoTec LWAV Series


Summary of Contents for Alpha-InnoTec LWAV Series
- Page 1 Air/Water Heat Pumps Outdoor installation Operating Manual LWAV series 83059600lUK...
-
Page 2: Table Of Contents
Table of contents 13 Malfunctions About this operating manual ..........16 ...... 3 Validity ............3 14 Dismantling and disposal ......16 Reference documents ....... 3 14.1 Dismantling ..........16 Symbols and markings ......3 14.2 Disposal and recycling ......16 Contact ............ -
Page 3: About This Operating Manual
About this operating manual 1.3 Symbols and markings Identification of warnings This operating manual is an integral part of the unit. ► Before working on or with the unit, always read Symbol Meaning the operating manual carefully and follow it for all Safety-relevant information. -
Page 4: Contact
Only qualified and skilled personnel are able to carry out the work on the unit safety and correctly. Interfer- ● Germany: www.alpha-innotec.de ence by unqualified personnel can result in fatal inju- ● EU: www.alpha-innotec.com ries and material damage. -
Page 5: Disposal
Risk of injury from moving parts Improper action ► Only switch on the unit with fan protection grilles Requirements for minimum scale and corrosion dam- fitted. age in hot water heating systems: ● Professional planning and commissioning Injuries and environmental damage due to ●... -
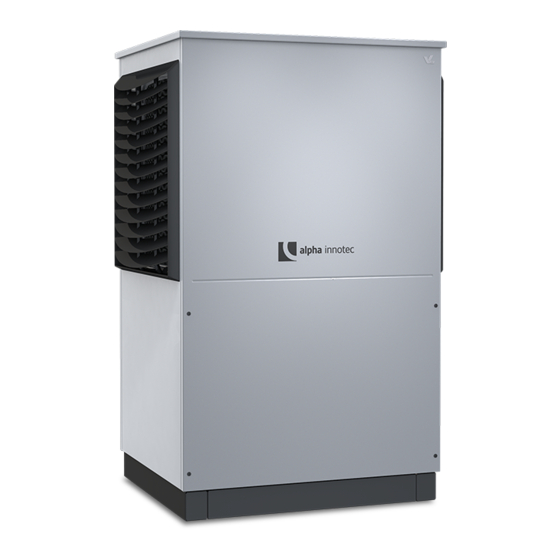
Page 6: Description
Description The heat pump module 3.1 As-delivered condition 1 Evaporator module 2 Fan module (can be removed if required) 3 Fan (radial) 4 Cooling circuit module The cooling circuit module 1 Side panels with design grilles 2 Base frame, sheet metal supports for the fan module 3 Front panel, cover, rear panel 4 Supporting crosspiece (left and right;... -
Page 7: Accessories
Nameplates drying or increase in the domestic hot water temper- ature can be carried out using an electric heating ele- One nameplate is attached to the heat pump module in ment, which is activated by the heat pump controller the rear facade cut-out at the factory. as required. -
Page 8: Care
4.2 Care 5.3 Unpacking and transport Wipe down the outside of the unit only using a damp Notes on safe transport cloth or cloth with mild cleaning agent (washing-up liq- uid, neutral cleaning agent). Do not use any aggres- The unit is heavy ( “Technical data / scope of supply”, sive, abrasive, acid or chlorine-based cleaning agents. -
Page 9: Installation
Unpacking Carrying the unit, transport using handcart Remove plastic films. Ensure that you do not dam- The housing panels have been set down. age the unit. There are two circumferential tensioning straps on the Dispose of the transport and packaging materi- heat pump module with openings at different heights al in an environmentally sound manner and in ac- that can be used for lifting and carrying. -
Page 10: Attach The Side Panel, The Rear Panel, The Cover And The Front Panel
Lift the heat pump over the unit base and place it NOTE with the levelling feet in the holes provided in the Always comply with the installation plan for unit base. Push the levelling feet under the con- the respective model. Note the size and mini- striction of the holes. -
Page 11: Installation Of Hydraulic System
Installation of hydraulic system Insert the vent at the highest point of the heating circuit. Ensure that the operating overpressures ( “Tech- Install the outside pipes of the heating circuit be- nical data / scope of supply”, page 17) are neath the frost line. -
Page 12: Electrical Installation
Electrical installation Route the two plug-in connections of the load and bus cables to the slots on the heat pump module. Join the connections. Establishing the electrical connections IMPORTANT Irreparable damage to the compressor due to wrong rotating field! ► Ensure a clockwise rotating field for the compres- sor’s load supply. -
Page 13: Flushing, Filling And Venting The Heating Circuit
Insulation of hydraulic Antifreeze in the heating circuit connections For air/water heat pumps installed outdoors, it is not necessary to fill a water/antifreeze mixture into the he- ating circuit. Insulate hydraulic lines in accordance with the local The heat pumps have safety devices that prevent the regulations. -
Page 14: Commissioning
11 Commissioning CAUTION Prior to commissioning the unit, the fan protection grilles must be mounted and the facing panels closed. Relevant planning & design data of the system is documented in full. The relevant energy supply company has been ... -
Page 15: Maintenance
12 Maintenance Check the evaporator and the condensate pan and clean them, if required Remove the front panel, the side panels and the NOTE cover, thus gaining access to the cover of the We recommend that you conclude a mainte- cleaning opening (①). -
Page 16: Cleaning And Flushing The Condenser
12.3 Cleaning and flushing the condenser ► Clean and flush the condenser according to the manufacturer’s instructions. ► After flushing the condenser with chemical clean- ing agent: neutralise any residues and flush the condenser thoroughly with water. 12.4 Annual maintenance ►... -
Page 17: Technical Data / Scope Of Supply
Technical data / scope of supply LWAV Performance data Values in brackets: (1 Compressor) LWAV 82R1/3 LWAV 122R3 Heating capacity | COP for A10/W35 acc. to EN14511 Partial load operation kW | COP 3,18 ı 5,25 5,50 ı 5,10 for A7/W35 acc. to EN14511 Partial load operation kW | COP 2,81 ı... -
Page 18: Performance Curves
Performance curves / operating limits / heating LWAV 82R1/3 Qh min/max [kW] Pel min/max [kW] 35°C 35°C 55°C 55°C -25 -20 -15 -10 Temp„ [°C] Temp„ [°C] ∆pmax [bar] 0,30 0,25 0,20 0,15 0,10 0,05 0,00 “ ” [m³/h] Temp„ [°C] 823290 c Legende:... - Page 19 Performance curves / cooling LWAV 82R1/3 Pel min/max [kW] Q0 min/max [kW] 7°C 7°C 18°C 18°C Temp [°C] Temp [°C] ∆pmax [bar] 0,30 0,25 0,20 0,15 0,10 0,05 0,00 [m³/h] Temp [°C] 823290 c Legende: Volumenstrom Kühlwasser TempWS Temperatur Wärmesenke Q0 min/max Q0 min/max minimale/maximale Kühlleistung Keys: 823290c...
-
Page 20: Lwav 122R3
Performance curves / operating limits / heating LWAV 122R3 Qh min/max [kW] Pel min/max [kW] 35°C 55°C 35°C 55°C -25 -20 -15 -10 Temp„ [°C] Temp„ [°C] ∆pmax [bar] 0,30 0,25 0,20 0,15 0,10 0,05 0,00 “ ” [m³/h] Temp„ [°C] 823291 c Legende:... - Page 21 Performance curves / cooling LWAV 122R3 Q0 min/max [kW] Pel min/max [kW] 7°C 18°C 7°C 18°C Temp [°C] Temp [°C] ∆pmax [bar] 0,30 0,25 0,20 0,15 0,10 0,05 0,00 “ [m³/h] Temp [°C] 823291 c Legende: Volumenstrom Kühlwasser TempWS Temperatur Wärmesenke Q0 min/max Q0 min/max minimale/maximale Kühlleistung Keys: 823291c...
-
Page 22: Dimensional Drawings 1
Dimensional drawings 1 LWAV Keys: UK819495-1a Legende: D819495-1a All dimensions in mm. Alle Maße in mm. Pos. Bezeichnung Dim. 12kW Dim. 8kW G 1" G 1" Pos. Name Heizwasser Austritt (Vorlauf) Vorderansicht Außengewinde Außengewinde Front view Item Name Dim. 12kW Dim. - Page 23 LWAV Dimensional drawings 2 Legende: D819495-2a Alle Maße in mm. Keys: UK819495-2a A1 Wärmepumpenmodul Vorderansicht All dimensions in mm. B1 Wärmepumpenmodul Seitenansicht von links Pos. Name A2 Ventilatormodul Vorderansicht Heat pump module front view B2 Ventilatormodul Seitenansicht von links Heat pump module side view from left Fan module, front view Technische Änderungen vorbehalten Fan module, side view from left...
-
Page 24: Installation Plans
Minimum clearances FO>6000 FO>2500 FO>2500 FB>1600 FB>1200 FS>1000 FS>1000 Keys: UK819496 Legende: D819496 All dimensions in mm. Technische Änderungen vorbehalten. Alle Maße in mm. Pos. Name Top view Draufsicht FA Complete external panel Wandaufstellung ohne Überbauung der Wärmepumpe FB Frost area (ice formation possible on cold days, no pipes conveying water, walkways, unsuitable plants) Wandaufstellung mit Überbauung der Wärmepumpe FO Free space up to the next object (no fixed obstacles, e.g. -
Page 25: Connection Set Ipwav Vertical
Connection set IPWAV vertical V (1 : 10) Legende: D819497-1 Technische Änderungen vorbehalten. Alle Maße in mm. Keys: UK819497-1 Seitenansicht von links All dimensions in mm. Rückansicht Detailansicht vertikales Anschlussset Pos. Name Side view from left Heizwasser Austritt (Vorlauf) Heizwasser Eintritt (Rücklauf) Rear view Kondensatablaufrohr DN 40 OKB Upper edge of ground... -
Page 26: Surface Foundation
Installation plan IPWAV vertical Surface foundation Y(1:5) Y(1:5) Legende: D819497-2 Technische Änderungen vorbehalten. Keys: UK819497-2 Alle Maße in mm. Pos. Name All dimensions in mm. OKF Oberkante Fundament Vorderansicht Foundation (frost-proof) Gerätekontur Draufsicht Pos. Name Hydraulic connection line OKB Oberkante Boden Detailansicht Y Front view Detailansicht Bodenbefestigung... -
Page 27: Strip Foundation
Strip foundation Installation plan IPWAV vertical X (1 X (1 : 5) X (1 : 5) Legende: D819497-3 Technische Änderungen vorbehalten. Alle Maße in mm. Legende: D819497-3 OKF Oberkante Fundam Vorderansicht Keys: UK819497-3 Technische Änderungen vorbehalten. Gerätekontur Draufsicht Pos. Name Alle Maße in mm. -
Page 28: Connection Set Wdfav Horizontal
Connection set WDFAV horizontal ±50 OKFB W (1 : 10) OKFB Legende: D819498-1 Technische Änderungen vorbehalten. Keys: UK819498-1 Alle Maße in mm. All dimensions in mm. Seitenansicht von links Detailansicht horizontales Anschlussset Pos. Name Side view from left Heizwasser Austritt (Vorlauf) OKFB Oberkante Fertigfußboden Complete external panel Pos. -
Page 29: Surface Foundation
Surface foundation Installation plan WDFAV horizontal ±50 OKFB Legende: D819498-2 ±50 Technische Änderungen vorbehalten. Alle Maße in mm. OKFB Oberkante Fertigfußboden Oberkante Fundament Keys: UK819498-2 Seitenansicht von links Oberkante Boden All dimensions in mm. Draufsicht Fertigaußenfassade Pos. Name Wanddurchführung Das Fundament darf keinen Körperschallkontakt zum Pos. -
Page 30: Strip Foundation
Installation plan WDFAV horizontal Strip foundation ±50 OKFB Legende: D819498-3 ±50 Technische Änderungen vorbehalten. Alle Maße in mm. OKFB Oberkante Fertigfußboden Keys: UK819498-3 Oberkante Fundament All dimensions in mm. Seitenansicht von links Oberkante Boden Draufsicht Fertigaußenfassade Pos. Name Pos. Name Side view from left Wanddurchführung Das Fundament darf keinen Körperschallkontakt zum... -
Page 31: With Condensate Drain Vertical
With condensate drain vertical WDFAV horizontal Surface foundation Strip foundation Flächenfundament Flächenfundament Streifenfundament Streifenfundament Fundament WDFAV LWAV Fundament WDFAV LWAV (bei Kondensatabfuhr vertikal) (bei Kondensatabfuhr vertikal) Keys: UK819498-4 All dimensions in mm. Legende: D819498-4 Legende: D819498-4 Technische Änderungen vorbehalten. Technische Änderungen vorbehalten. Pos. -
Page 32: Coastal Installation
Coastal installation LWAV IMPORTANT The minimum distances necessary for correct and safe operation as well as any service work must be ob- served. facing away from the coast / prevailing wind direction ● in a sheltered area near a wall ... -
Page 33: Condensate Line Connection
External condensate line connection Legende: D819497-4 Technische Änderungen vorbehalten. Aufstellungshinweise für Anschluß der Kondensatleitung außerhalb des Gebäudes. Kiesschicht zur Aufnahme von bis zu 50l Kondenswasser pro Tag Keys: UK819497-4 als Pufferzone zum Versickern. Kondensatablaufrohr DN 40 Pos. Name Wichtig: Bei direktem Einleiten des Kondenswassers in eine Abwasser- oder Gravel layer for holding up to 50 l condensate per day as buffer zone for seepage Regenwasserleitung muss ein Syphon gesetzt werden (Abbildung 1b). -
Page 34: Internal Condensate Line Connection
Internal condensate line connection Legende: 819497a-5 Technische Änderungen vorbehalten. Aufstellungshinweise für Anschluss der Kondensatleitung innerhalb des Gebäudes. Kondensatablaufrohr DN 40 Legende: 819497a-5 Wichtig: Beim Anschluss der Kondensatleitung innerhalb eines Gebäudes muss ein Syphon Pos. Name eingebaut werden (siehe Abbildung 2a). An der Kondensatabflussleitung der Wärmepumpe dürfen keine zusätzlichen Condensate drain pipe DN 40 Abflussleitungen angeschlossen werden. -
Page 35: Hydraulic Integration
LWAV with hydraulic station 8371235, IBN x 8371235 Subject to change without notice | 83059600lUK | ait-deutschland GmbH... -
Page 36: Lwav With Buffer Tank In Series And Hydraulic Module
LWAV with buffer tank in series and hydraulic module 12 12 8371234, 8371234 Subject to change without notice | 83059600lUK | ait-deutschland GmbH... -
Page 37: Lwav With Separation Buffer Tank
LWAV with separation buffer tank 8371305 8371305, XXX Subject to change without notice | 83059600lUK | ait-deutschland GmbH... -
Page 38: Keys Hydraulic Integration
Subject to change without notice | 83059600lUK | ait-deutschland GmbH... -
Page 39: Circuit Diagrams
LWAV 82R1/3 Circuit diagram 1/2 brown blue brown brown A white B yellow Subject to change without notice | 83059600lUK | ait-deutschland GmbH... - Page 40 Circuit diagram 2/2 LWAV 82R1/3 white green brown PE-Steu /1.B8 white green yellow brown L-Steu /1.B8 N-Steu /1.B8 /1.A3 E20-N /1.A3 Orange Yellow Black Blue Orange Yellow Black Blue blue blue black black black black blue blue black black White Green Brown White...
-
Page 41: Lwav 122R3
LWAV 122R3 Circuit diagram 1/2 black black brown brown grey grey blue brown black grey A white B yellow Subject to change without notice | 83059600lUK | ait-deutschland GmbH... - Page 42 Circuit diagram 2/2 LWAV 122R3 white green brown PE-Steu /1.B8 white green yellow brown L-Steu /1.B8 N-Steu /1.B8 /1.A3 E20-N /1.A3 Orange Yellow Black Blue Orange Yellow Black Blue blue blue black black black black blue blue black black White Green Brown White...
-
Page 43: Ec Declaration Of Conformity
EC Declaration of Conformity The undersigned confirms that the following designated device(s) as designed and marketed by us fulfill the standardized EC directives, the EC safety standards and the product-specific EC standards. In the event of modification of the device(s) without our approval, this declaration shall become invalid. - Page 44 GmbH Industriestraße 3 D-95359 Kasendorf E info@alpha-innotec.de W www.alpha-innotec.de alpha innotec – an ait-deutschland GmbH brand...
Need help?
Do you have a question about the LWAV Series and is the answer not in the manual?
Questions and answers