Subscribe to Our Youtube Channel
Summary of Contents for GE Cync CFIXCNLR4S1
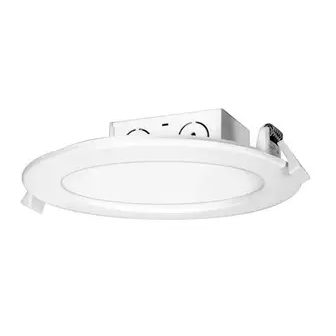
- Page 1 Wafer Downlight Installation Guide 4-in & 6-in Integrated LED Recessed Fixture GE and C by GE is a trademark of General Electric Company. Used under trademark license.
- Page 2 Gettings Started STEP 1 Download the Cync App, powered by Savant, on your smartphone STEP 2 Determine your Wafer Downlight location and complete installation STEP 3 Add your Wafer Downlight to the Cync App *DIRECTLY CONNECT TO AMAZON ALEXA Complete installation and turn on light. If Alexa says, “New light found”, you can begin using your light with Alexa.
- Page 3 Let’s Do It INCLUDED SOLD SEPARATELY Junction Box Integrated Wire Nuts (3) Hole Template Strain Relief LED Trim YOU’LL NEED Hammer Flathead Drywall Saw or Ladder Safety Needle Screwdriver Hole Saw Glasses Nose Pliers (4-1/4” or 6-1/4” diameter)
-
Page 4: Specifications
120, 60 Dimming Capability NOT FOR USE WITH DIMMER SWITCHES. Compatible with only CYNC and C by GE smart dimmers that provide dimming at the switch or through the CYNC App. BEFORE YOU BEGIN Read these instructions completely and carefully. - Page 5 Warning • Risk of fire or electric shock. Installation requires knowledge of luminaire electrical systems. If not qualified, do not attempt installation. Minimum 90°C Conductors, if uncertain contact a qualified electrician. • To prevent wiring damage or abrasion, do not expose wiring to edges of sheet metal or other sharp objects.
-
Page 6: Turn Off Power
BEFORE YOU DO ANYTHING: Turn Off Power STEP 1 Turn off power source at the main circuit breaker or fuse box. - Page 7 Mark the Location on the Ceiling & Cut the Hole STEP 2 Determine the position of your downlight: • Maximum distance from junction box to the downlight is 16 inches. • Location must be within range of 2.4GHz Wi-Fi to enable smart control.
- Page 8 Remove the Knockout & Wire the Wafer Downlight STEP 3 Remove the knockout using a hammer and screwdriver. Open the junction box cover. Attach the strain relief (not included) into the knockout hole. Route the wires through the strain relief. Connect the wires: •...
- Page 9 Place Junction Box in the Ceiling & Install the Fixture STEP 4 Place the junction box in the ceiling through the hole. Connect the light to junction box using the connector. Screw the connector together to complete the connection. STEP 5 Hold the spring clips against the fixture and gently guide into the ceiling until the clips snap into...
- Page 10 Additional Information and Warnings FCC Compliance Statement Compliance Notice: Warning: Changes or modifications to this unit not expressly approved by the party responsible for compliance could void the user’s authority to operate the equipment. NOTE: This equipment has been tested and found to comply with the limits for a Class B digital device, pursuant to Part 15 of the FCC Rules.
- Page 11 FCC RF Exposure Statement: Caution: To maintain compliance with the FCC’s RF exposure guidelines, place the product at least 20cm from nearby persons. IC statement This device complies with RSS247 of Industry Canada. Cet appareil se conforme à RSS247 de Canada d’Industrie. This device complies with Industry Canada license-exempt RSS standard(s).
- Page 12 Like your new Wafer Downlight? Share your experience! Leave a review where you purchased the product. GE and C by GE is a trademark of General Electric Company. Used under trademark license.


Need help?
Do you have a question about the Cync CFIXCNLR4S1 and is the answer not in the manual?
Questions and answers