
Subscribe to Our Youtube Channel
Related Manuals for MRMC STUDIOBOT TX90


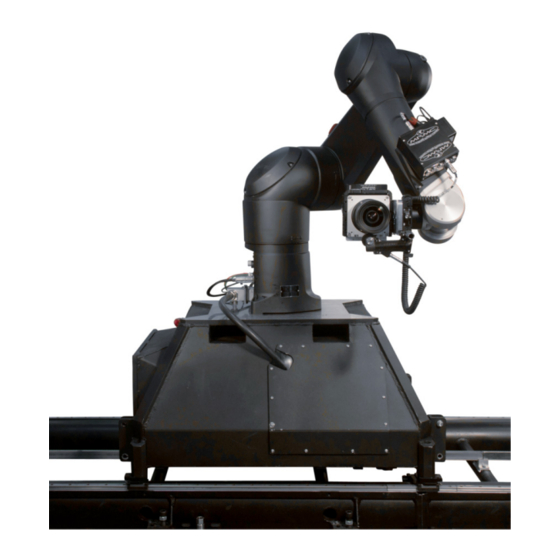
Summary of Contents for MRMC STUDIOBOT TX90
- Page 1 STUDIOBOT TX90 Quick Start Guide QSG Product Code: MRMC-2267-00 Products Covered: MRMC-2000-00-JB-0053, MRMC-2000-00-JB-0054 CRANES AND RIGS | BROADCAST | HEADS & DSLR | PRODUCT PHOTOGRAPHY | RENTALS...
- Page 2 Studiobot TX90 Quick Start Guide Products Covered: MRMC-2000-00-JB-0053, MRMC-2000-00-JB-0054 QSG Product Code: MRMC-2267-00 © 2021 Mark Roberts Motion Control Ltd. All rights reserved. No part of this publication may be reproduced, transmitted, or translated by any means — graphical, electronic, or mechanical — including...
-
Page 3: Table Of Contents
Mounting the Weight Plates (Studiobot TX90 on Pedestal) ................10 Mounting the Riser ..............11 Anchoring Studiobot TX90 on Pedestal to the floor..11 Mounting the Staubli Arm..........14 Connecting the cables — Studiobot On Pedestal ....16 Connecting the cables — Studiobot On Track....18 Starting up the Studiobot TX90 system ......20... - Page 4 Changing the duration of the move ....45 Modifying one of the Waypoints in the Move..............46 Adding a Waypoint in the Move .....46 Moving the Studiobot TX90 arm by hand......47 Appendix 1 Troubleshooting............50 Typical symptoms, causes, and actions ......50 Checking robot temperature using the pendant....51 Appendix 2 Specifications...............
-
Page 5: Chapter 1 Quick Start
Studiobot TX90 Quick Start Guide Overview Thank you for using the Studiobot TX90 from Mark Roberts Motion Control (MRMC). Studiobot TX90 is designed for reliable day-in, day-out use in professional studio and Outside Broadcast environments. It has a small, lightweight robotic arm which can be used either as camera rig or model mover. -
Page 6: Safety Procedures For Using Industrial Robots, Including High Speed Track
If you are using Studiobot TX90 on Track, you need to take extra steps during installation and use due to the additional risks involved in using track. See the separate Precision Track Quick Start Guide for information on laying the track, securing it to the floor, and mounting Studiobot TX90 onto it. -
Page 7: Assessing A Site
Studiobot TX90 Quick Start Guide Assessing a site Before setting up Studiobot TX90 you need to assess the site, paying particular attention to the following points: Is the ground or floor firm enough and level enough? You might have to use boards or bricks to create a level surface. The... - Page 8 Use the recommended minimum thickness steel plates. Check with MRMC if you are unsure of the exact requirements for your robot. ...
- Page 9 Studiobot TX90 Quick Start Guide Ideally have the robot surrounded on all four sides by a safety barrier, but where that is not practical, ensure that the maximum number of sides feasible are closed off, and that any person having to stand within reach of the robot is located as far away as possible for the shot.
-
Page 10: Software Setup
Studiobot TX90 Quick Start Guide Software setup Always ensure you have the right configuration for the robot you are using, such as maximum axis speeds and accelerations. Prior to running moves, enter in and keep to a minimum all software axis and Cartesian limits. -
Page 11: Mounting The Castor Wheels (Studiobot Tx90 On Pedestal)
Never bypass any safety hardware or software. Mounting the Castor Wheels (Studiobot TX90 On Pedestal) If the castor wheels are not mounted, use the following procedure to mount the castor wheels:... - Page 12 Studiobot TX90 Quick Start Guide Slide one castor wheel into the base ensuring that edge of the plate in the wheel assembly is inserted in the slot in the base. Castor wheel Base (Bottom) XXXX...
- Page 13 Studiobot TX90 Quick Start Guide Similarly insert all the castors into the base ensuring the plates are inserted into the slots. Stand the base on the wheels and tighten the four screws to secure the castor wheels on the base. Do not use the jack screws on the...
-
Page 14: Mounting The Weight Plates (Studiobot Tx90 On Pedestal)
Lower the base completely so it is resting on both wings. At this point, you can remove the castor wheels, if so desired. Put the weights onto the wings. Studiobot TX90 requires four boxes of weights — one at each corner. Each box contains 140kg of weights (7 ×... -
Page 15: Mounting The Riser
Anchoring Studiobot TX90 on Pedestal to the floor If you are setting up Studiobot TX90 on Pedestal in a permanent (or semi-permanent) location, you can anchor the pedestal to the floor as an... - Page 16 You can use either hole. Repeat for the other three corners of the pedestal. Temporarily remove Studiobot TX90 on Pedestal and at one of the four circles that you have drawn, draw a cross centred on the circle, to help you precisely locate the drill bit.
- Page 17 11. Repeat steps 7 to 10 for the other Drop-in three corners. anchor insert 12. Put Studiobot TX90 on Pedestal in place over the holes. 13. Insert the four retaining bolts × 4 corners through the corners of the base and into the drop-in anchor inserts, and tighten.
-
Page 18: Mounting The Staubli Arm
Studiobot TX90 Quick Start Guide Mounting the Staubli Arm Lower the TX90 Staubli arm on the Studiobot TX90 on Pedestal aligning the sides and screw cavities. Tighten the three screws. - Page 19 Studiobot TX90 Quick Start Guide Notes...
-
Page 20: Connecting The Cables - Studiobot On Pedestal
Studiobot TX90 Quick Start Guide Connecting the cables — Studiobot On Pedestal Umbilical going Cable up the arm wrap Serial Lens Ethernet J1201 for camera Video Video or sync Camera Power Teach Pendant Tally Power Tally HDMI Stäubli CS8 J110... - Page 21 Studiobot TX90 Quick Start Guide Ethernet Hub FreeD box Uni box 5V DC 24 V DC 24V IN From customer Power Supply: 120-240 Volts genlock INtime dongle cable in USB port SDI to convertor ROBOT ONLY To customer monitor Power Supply:...
-
Page 22: Connecting The Cables - Studiobot On Track
Studiobot TX90 Quick Start Guide Connecting the cables — Studiobot On Track Umbilical going Cable up the arm wrap Serial Lens Ethernet J1201 for camera Video Video or sync Camera Power Tally Power Studiobot TX90 Base Tally HDMI J110 ROBOT... - Page 23 Studiobot TX90 Quick Start Guide Ethernet Hub FreeD box Uni box 5V DC 24 V DC 24V IN From customer Power Supply: 120-240 Volts genlock INtime dongle cable in USB port SDI to convertor ROBOT ONLY To customer monitor Power Supply:...
-
Page 24: Starting Up The Studiobot Tx90 System
Make sure you have secured the area around Studiobot TX90. Put up guard rails around Studiobot TX90 (and the track) as necessary, and tell others on the set that you are now powering up the rig. - Page 25 Studiobot TX90 Quick Start Guide Hint The Stäubli CS8 is housed inside the Studiobot TX90 Studiobot Base, which you will TX90 Base plate not need to access covering under normal circumstances. However, in case of a fault, you can access CS8 by unscrewing the bolts on the plate covering the CS8 in Studiobot TX90 Base.
- Page 26 Studiobot TX90 Quick Start Guide 5.1 In the Windows Taskbar, right-click the INtime icon. 5.2 Select Restart NodeA. On the Flair PC, start the Flair application by double-clicking on the Flair icon on the Desktop. Flair automatically loads the relevant firmware into all attached axis...
-
Page 27: Studiobot Tx90 Start-Up Summary
You use the Track button in Flair to toggle the track on and off, independently of the Engage Robot/Disengage Robot button that you use to toggle the Studiobot TX90 arm on and off. 10. In Flair, move the Studiobot TX90 arm to its home position (rotated straight forward and tucked under). Hint... - Page 28 Studiobot TX90 Quick Start Guide In Flair: Zero the track and Lens Control Motor axes Engage Robot 10. Home the arm, carefully 11. Set the soft limits The rig is now ready to use.
-
Page 29: Shutting Down The Studiobot Tx90 System
If you are going to transport Studiobot TX90 to a new location, put the Studiobot TX90 arm into its transport position. You can do this either by using Flair (although you might have to reset the soft limits to reach the transport position) or by moving the arm manually. -
Page 30: Studiobot Tx90 Shut-Down Summary
Studiobot TX90 Quick Start Guide Studiobot TX90 shut-down summary Move Studiobot TX90 to the Home or Transport position In Flair: Disengage Robot In Flair: Toggle off the Track Press down all E-stops Close Flair Shut down Windows Switch off Studiobot TX90... -
Page 31: Freed Sync Box: Setup And Configuration
FreeD sync box needs to be configured before first use (normally configured at the factory). Connect the FreeD box via Ethernet to the same network as that of the Flair PC of the Studiobot TX90 rig. 5VDC In Solid green: Running,... - Page 32 Studiobot TX90 Quick Start Guide Power up the FreeD box by supply 5VDC IN. Install TeraTerm and set it up (free application). You can download it here: https://ttssh2.osdn.jp/index.html.en Launch TeraTerm and select Setup > Serial port.
- Page 33 Studiobot TX90 Quick Start Guide The Serial Port Setup and Connection dialog box will show the following information. Click Cancel to close the dialog box. Select Setup > Terminal. In the Terminal Setup dialog box, select the following options and click OK.
- Page 34 Studiobot TX90 Quick Start Guide Select Setup > Save Setup to save the setup. Type " " and press Enter. AT(Attention). If you get an ‘ ’ message as response, your setup was successful. If you don't get any response, check your physical connection (USB,...
- Page 35 Studiobot TX90 Quick Start Guide Type " " to get a menu of commands.
-
Page 36: Changing The Ip Address Of The Freed Box
Studiobot TX90 Quick Start Guide AT=? will respond with system information. Changing the IP address of the FreeD box To change the IP address of the FreeD box, enter AT+LIP=192.168.1.88 To change the port to , enter AT+LP=X... -
Page 37: Testing The Freed Box In Flair Setup
Studiobot TX90 Quick Start Guide Testing the FreeD box in Flair Setup In Flair, select Setups > Serial Devices Setup. The External Devices Setup window appears. In the Data Output line, ensure that FreeD is selected and assigned to the same IP address and Port as that of the... - Page 38 Studiobot TX90 Quick Start Guide AT+Debug=2 command gives you the following information:...
- Page 39 Studiobot TX90 Quick Start Guide FreeD " " gets printed every time the box receives a FreeD message from Flair. Freq " " determined by the Sync Generator (Genlock signal). Disconnecting the genlock signal will change the frequency to 0.
-
Page 40: Working With Local Area Networks
The Flair PC, nodes in Flair (such as lens boxes and track) and the FreeD box they communicate with each other through an Ethernet Local Area Network (LAN) are devices on the network. If you connect your MRMC equipment to a LAN or if you move this equipment between networks,... -
Page 41: Changing The Ip Address Of The Network Devices
Studiobot TX90 Quick Start Guide The LAN addresses of the MRMC devices are static. That is, they will stay the same unless you explicitly change them. Hint Most local networks use the SN and GW values shown in the above table, so under ordinary circumstances you will only need to be concerned with IP addresses. - Page 42 Studiobot TX90 Quick Start Guide Right-click on INtime Status Monitor and select “INtime Configuration”. INtime Status Monitor Double click on “Node Management”. Select the “Network” tab.
- Page 43 Studiobot TX90 Quick Start Guide Hover the mouse over the network card in the “NIC list” to display the ellipses on the right side. Click on the ellipses to see the cards (should be only 1). Select the NIC and click “Edit”.
-
Page 44: Nodes In Network Direct
Studiobot TX90 Quick Start Guide Select the IP address and select “Edit”. Edit the IP address to the desired value. Save and close the dialog box. Restart NodeA. Nodes in Network Direct The nodes in Network Direct in Flair include any lens boxes and track board. -
Page 45: Freed Box
Studiobot TX90 Quick Start Guide Power cycle the node and click “Find” to check that the IP address has been changed (this only works if the flair PC is on the same subnet). Repeat steps 1-7 for any other node whose IP address you want to change. -
Page 46: Using Iconic Display In Flair
Double clicking on a icon with read in the job associated with it. Flair.ini To activate the Iconic display, add the following line in the file. This is normally done as part of factory settings by MRMC: *Iconic: 0 Run Controls Icons jobs are displayed and executed using the specialised run control bar at the bottom of the screen. -
Page 47: Getting Ready To Create A Position
Studiobot TX90 Quick Start Guide This control shows a timeline with time being used to designate the timing of the move and waypoints in the motion are displayed with small yellow circles suspended in the time line from the top. A full selection of controls allows you to run the move (Green Arrow) as well as move to the beginning and end of the move. -
Page 48: Running A Goto To The Preset Position
Studiobot TX90 Quick Start Guide In the Waypoint dialog box, click Clear Job. Click Yes in the confirmation message. Click Set Start. Select a box on the main screen where you want to store the preset position. Click Save and specify a name for the preset position. -
Page 49: Running A Move
Studiobot TX90 Quick Start Guide Save the move by clicking the Save button and specify a name for the move. Now move the robot to the end position and click Set End in the Waypoint dialog box. Click Save and click Yes in the confirmation message. -
Page 50: Modifying One Of The Waypoints In The Move
Studiobot TX90 Quick Start Guide Modify the duration as desired and click the Scale button in the dialog box. Click Close to close the Scale dialog box. Save the move. Modifying one of the Waypoints in the Move Load the move that you want to modify. -
Page 51: Moving The Studiobot Tx90 Arm By Hand
3cm clearance between it and the base. Hint Moving the Studiobot TX90 arm by hand is usually a two-person job — one to operate the Brake Release switch and button and one to move the arm. - Page 52 Studiobot TX90 must have power and be switched on. If the robot is connected to a running Flair PC, click on the Disengage Robot button in Flair.
- Page 53 Studiobot TX90 Quick Start Guide Notes...
-
Page 54: Appendix 1 Troubleshooting
E-stop (if it has one). When they are all up, the Stäubli CS8 panel displays a “U”. If you have moved the Studiobot TX90 arm by hand, make sure you have turn the Brake Release Switch in the robot arm back to ‘0’... -
Page 55: Checking Robot Temperature Using The Pendant
Studiobot TX90 Quick Start Guide Checking robot temperature using the pendant The robots efficiency might suffer if the temperature inside the cabinet is too high. To check the temperature: Replace the bypass jumper from the Pendant connector in the Studiobot base with the Pendant connector on the teach pendant. - Page 56 Studiobot TX90 Quick Start Guide Select Main Menu > Control Panel. Press Enter. Select Controller Status and press ‘→’ .
- Page 57 Studiobot TX90 Quick Start Guide The Cabinet Temperature is shown on the pendant screen.
- Page 58 Studiobot TX90 Quick Start Guide Notes...
-
Page 59: Appendix 2 Specifications
Studiobot TX90 Quick Start Guide Appendix 2 Specifications Studiobot TX90 Quick Start Guide Studiobot TX90 Quick Start Guide Rig Weights Dimensions Studiobot TX90 Studiobot TX90 on Track on Pedestal Weight excluding Base 114kg 114kg Weight - Base 180kg Power Supply Unit 50kg (110.2lbs) -
Page 60: Operating Envelope
Temperature range: 0-45 °C (32-113 °F) Humidity tolerance: 0% to 85% relative humidity, non-condensing Studiobot TX90 on Track power requirements: 230 Volts, 2x16 Amps, 50-60 Hz with Earth (Ground) connection. Studiobot TX90 on Pedestal power requirements: 230 Volts, 16 Amps, 50-60 Hz with Earth (Ground) connection. - Page 61 Studiobot TX90 Quick Start Guide Studiobot TX90 On Pedestal can be configured to run on less, with a proportionate drop in performance. Transformer requirement: Two 3kW, 110-230V step-up transformers. Optional power generator requirements: 6 kVA...
- Page 62 Studiobot TX90 Quick Start Guide Notes...
- Page 63 Studiobot TX90 Quick Start Guide Notes...
- Page 64 Mark Roberts Motion Control Ltd. Unit 3, South East Studios, Blindley Heath, Surrey RH7 6JP United Kingdom Telephone: +44 (0) 1342 838000 info@mrmoco.com www.mrmoco.com...
Need help?
Do you have a question about the STUDIOBOT TX90 and is the answer not in the manual?
Questions and answers