
Subscribe to Our Youtube Channel
Related Manuals for MRMC TX90L


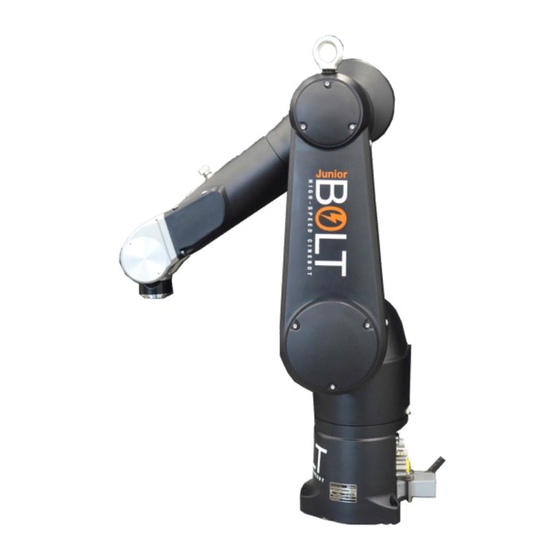
Summary of Contents for MRMC TX90L
- Page 1 TX90L Model Mover COMPACT LIGHTWEIGHT HIGH SPEED MODEL MOVER Quick Start Guide QSG Product Code: MRMC-2092-00 Products Covered: 20359 CRANES AND RIGS | BROADCAST | HEADS & DSLR | PRODUCT PHOTOGRAPHY | RENTALS...
- Page 2 TX90L Model Mover Quick Start Guide QSG Product Code: MRMC-2092-00 Products Covered: 20359 © 2020 Mark Roberts Motion Control Ltd. All rights reserved. No part of this publication may be reproduced, transmitted, or translated by any means — graphical, electronic, or mechanical — including...
-
Page 3: Table Of Contents
Installation safety ............3 Software setup ...............5 Operational safety............5 Connecting the cables ............8 Starting up the TX90L Model Mover system ....10 TX90L Model Mover start-up summary ....13 Shutting down the TX90L Model Mover system.....14 Moving the TX90L Model Mover arm by hand....15 Appendix 1 Troubleshooting............ - Page 4 TX90L Model Mover Quick Start Guide...
-
Page 5: Chapter 1 Quick Start
TX90L Model Mover Quick Start Guide Overview Thank you for using the TX90L Model Mover from Mark Roberts Motion Control (MRMC). TX90L Model Mover is designed for reliable day-in, day-out use in professional studio and Outside Broadcast environments. It has a small, lightweight robotic arm which can be used either as camera rig or model mover. -
Page 6: Safety Procedures For Using Industrial Robots
Milos. This section emphasises the safety concerns that are especially important around high-speed, high-acceleration, industrial-grade robots which can cause severe injuries, such as TX90L Model Mover. Unlike traditional motion control equipment, TX90L Model Mover can get to maximum speed in the blink of an eye - too fast for someone to be able to quickly move out of the way. -
Page 7: Assessing A Site
TX90L Model Mover Quick Start Guide Assessing a site Before setting up TX90L Model Mover you need to assess the site, paying particular attention to the following points: Does the site have access? You need to make sure you can carry it there using a pallet truck or forklift. - Page 8 TX90L Model Mover Quick Start Guide not come off during sudden motions, to become lethal missiles. Ensure all safety accessories are securely attached and in working order, including emergency stops, safety sensors, etc. Clearly mark the area around the robot in which no persons are allowed to enter.
-
Page 9: Software Setup
Have them sign the appropriate safety documents and disclaimers to ensure they understand this and are indemnifying MRMC if anything happens. ... - Page 10 TX90L Model Mover Quick Start Guide fully briefed on the safety requirements and that they know not to change their position or do anything other than the rehearsed moves without fully warning the operator. Any such person is to have a clear escape route to allow them to move safely away from the robot.
- Page 11 TX90L Model Mover Quick Start Guide Notes...
-
Page 12: Connecting The Cables
TX90L Model Mover Quick Start Guide Connecting the cables 48V DC 5V DC J1201 Ethernet Teach pendant or bypass Stäubli CS8 ETHERNET J110 ROBOT J113 ONLY J109 Safety Power Supply: ideally 240V Volt, 1-phase, 3-wire including Ground. - Page 13 TX90L Model Mover Quick Start Guide Power Supply: 120-240 Volts INtime dongle cable in USB port Ethernet Hub ROBOT ONLY E-STOP Jumper [14823] Jumper [19788] Hand Held RT-14 Jumper [15843]...
-
Page 14: Starting Up The Tx90L Model Mover System
Once you have attached all the cables, you power up the rig by switching on the components in the order described below. Make sure you have secured the area around TX90L Model Mover. Put up guard rails around TX90L Model Mover as necessary, and tell others on the set that you are now powering up the rig. - Page 15 TX90L Model Mover Quick Start Guide Hint When the power-up sequence has completed, the Stäubli CS8 shows an “A” on its display. cifX board Steady “A” Blinking Power up the Flair computer system and all of its components, including the RT-14 interface box. You can do this while the robot is powering up (step 2).
- Page 16 The horizontal position of the key bypasses E-stop from Hand Held box and Flair. Enable Therefore, the key should not be kept in horizontal button position when using TX90L Model Mover except for testing purposes. Key in vertical position Once all E-stop buttons on the system are up, the Stäubli CS8 display...
-
Page 17: Tx90L Model Mover Start-Up Summary
TX90L Model Mover Quick Start Guide In Flair, move the TX90L Model Mover arm to its home position (rotated straight forward and tucked under). Hint If the TX90L Model Mover arm is in a backward or reversed starting position, the arm might swing... -
Page 18: Shutting Down The Tx90L Model Mover System
Move TX90L Model Mover to its Home position. or... If you are going to transport TX90L Model Mover to a new location, put the TX90L Model Mover arm into its transport position. You can do this either by using Flair (although you might have to reset the soft limits to reach the transport position) or by moving the arm manually. -
Page 19: Moving The Tx90L Model Mover Arm By Hand
TX90L Model Mover Quick Start Guide Moving the TX90L Model Mover arm by hand In some circumstance you need to move the TX90L Model Mover arm manually with your own hands. For example: • Recovering from a software lock-up. For example if momentum has carried the arm outside the soft limits, the software might refuse to move the arm to get back inside the limits. - Page 20 TX90L Model Mover Quick Start Guide Person 1: Use the Brake Release Switch to select which TX90L Model Mover axis you want to move. Brake Release Switch should be in the ‘0’ position when not Axes positions in the moving the robot by hand...
- Page 21 TX90L Model Mover Quick Start Guide Notes...
- Page 22 TX90L Model Mover Quick Start Guide Notes...
- Page 23 TX90L Model Mover Quick Start Guide Notes...
-
Page 24: Appendix 1 Troubleshooting
E-stop (if it has one). When they are all up, the Stäubli CS8 panel displays a “U”. If you have moved the TX90L Model Mover arm by hand with the Brake Release Unit, make sure you have switch the selector knob back to 0. -
Page 25: Checking Robot Temperature Using The Pendant
TX90L Model Mover Quick Start Guide Checking robot temperature using the pendant The robots efficiency might suffer if the temperature inside the cabinet is too high. To check the temperature: Replace the bypass jumper from the Pendant connector in CS8 with... - Page 26 TX90L Model Mover Quick Start Guide Select Main Menu > Control Panel. Press Enter. Select Controller Status and press ‘→’ .
- Page 27 TX90L Model Mover Quick Start Guide The Cabinet Temperature is shown on the pendant screen.
- Page 28 TX90L Model Mover Quick Start Guide Notes...
-
Page 29: Appendix 2 Specifications
TX90L Model Mover Quick Start Guide Appendix 2 Specifications TX90L Model Mover Quick Start Guide TX90L Model Mover Quick Start Guide Rig Weights Dimensions TX90L Model Mover Weight 114kg Power Supply Unit 50kg (110.2lbs) Maximum camera payload 15kg Rig Performance... - Page 30 TX90L Model Mover Quick Start Guide Notes...
- Page 31 TX90L Model Mover Quick Start Guide Notes...
- Page 32 Mark Roberts Motion Control Ltd. Unit 3, South East Studios, Blindley Heath, Surrey RH7 6JP United Kingdom Telephone: +44 (0) 1342 838000 info@mrmoco.com www.mrmoco.com...
Need help?
Do you have a question about the TX90L and is the answer not in the manual?
Questions and answers