Table of Contents
Advertisement
Quick Links
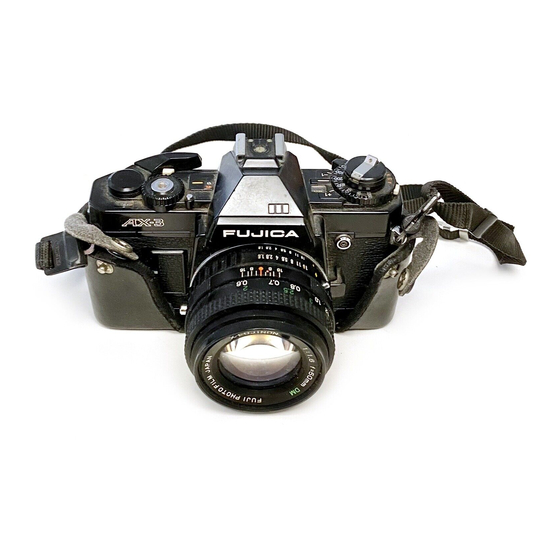
FUJICA AX-3
AKA - Porst CR-5
This camera manual library is for reference
and historical purposes, all rights reserved.
This page is copyright by
, M. Butkus, NJ.
This page may not be sold or distributed without
the expressed permission of the producer.
On-line camera manual library
If you find this manual useful, how about a donation of $3 to:
M. Butkus, 29 Lake Ave., High Bridge, NJ 08829
This will help me to continue to host this site,
buy new manuals, and pay their shipping costs.
It'll make you feel better, won't it?
If you use Pay Pal, use the link below.
Use the above address for a check, M.O. or cash.
www.PayPal.me/butkus
Venmo is @mike-butkus-camera
<<< IF YOU WOULD LIKE THIS OR ANY PDF FILE PRINTED, BOUND AND
MAILED TO YOU, SEE THIS OUTSIDE COMPANY'S OFFER >>>
Back to my main Camera Manual page
Fujica AX Accessories
Advertisement
Table of Contents

Related Manuals for FUJICA AX-3


Summary of Contents for FUJICA AX-3
- Page 1 FUJICA AX-3 AKA - Porst CR-5 This camera manual library is for reference and historical purposes, all rights reserved. This page is copyright by , M. Butkus, NJ. This page may not be sold or distributed without the expressed permission of the producer.
- Page 2 Go to Fujica System Accessories...
- Page 4 Fujica Photo Recorder for printing data on the film) expands your picture- taking scope well beyond present horizons. 5: Fujica X "short turn" 65 degree lens mount permits quick lens changing and accepts the entire line of the new X-Fujinon interchangeable lenses from wide-angle to telephoto as well as other lenses to let you take full advantage of the SLR system.
- Page 5 1. ATTACHING THE STRAP AND PUTTING THE CAMERA IN IT'S CASE 2. MOUNTING AND DISMOUNTING THE LENS Position the red dot on the lens rear opposite the red dot on the Lens Mount, then push the Lens in and turn it 65ø to the right (clockwise). It will lock into position with a click.
-
Page 6: Loading And Checking The Battery
3. LOADING AND CHECKING THE BATTERY Choosing the Right Battery You can Us any one of the following batteries but be sure to use a new battery. 6-volt silver oxide battery (4SR44). 6-volt alkaline manganese battery (4LR44). 6-volt lithium battery. * Special precautions for the use of batteries in cold weather 1. -
Page 7: Checking The Battery
CHECKING THE BATTERY If the battery is not up to the required strength, you will not get properly exposed pictures because your Fujica AX-3's shutter is electronically controlled regardless of the exposure mode employed. Make it a habit, therefore, to check the battery before you start taking pictures. - Page 8 Main Switch Your Fujica AX-3 has a main switch (ON/OFF/Self timer Lever) on the left side top of the camera (next to the Film Speed Selector). Before you start taking pictures and before you check the battery, be sure to switch it ON...
-
Page 9: Loading The Film
4. LOADING THE FILM: Use cartridge-packed 35mm roll film. Always load and unload film in subdued light. 1. Open the Camera Back by pulling the Film Rewind Knob all the way out. (It will not open unless the knob is fully pulled out.) 2. - Page 10 3. Pull out the film tip and insert it deeply into the slot of the Take-up Spool, but make sure it doesn't go through the spool hub. 4. Wind the film with a stroke or two of the Film Advance Lever and make sure the Sprocket Teeth catch the film perforations.
- Page 11 6. While watching the Exposure Counter, wind the film with the Film Advance Lever and press down the Shutter Release. Repeat until the second white dot from the letter "S" (first white dot from the red "O") appears in the center of the Exposure Counter. The film has now been positioned for the first shot.
-
Page 12: Aiming The Camera
* For further information, read the Auto Winder instruction manual. 5. SETTING THE FILM SPEED SELECTOR After loading the film, be sure to #t the Film Speed Selector because your pictures will not be properly exposed if it is not set for the speed of the film loaded in the camera. - Page 13 - - - - - - - - -- - - - - - - - - - - - - - - - - - - - - - - - - - - - - - - - - - - - - - - - - - - - - - - - -- - - - The shutter on your Fujica AX-3 is electronically controlled from 1/1000 sec.
-
Page 14: Viewfinder Information
Notes: 1. Remember, your Fujica AX-3 has a built-in "memory lock," that is, the shutter speed obtained by depressing the Shutter Release halfway down will remain locked and the LED indicator in the Viewfinder will not change position until you take your finger off the Shutter Release even if there are changes in subject brightness and aperture value {refer to the paragraph entitled "AK lock"... - Page 15 3. PROCEDURE FOR TAKING AUTOMATIC EXPOSURE PICTURES 1. Set the Shutter Speed Selector to AE or AEL. 2. Use any aperture you want; that is, if your lens is an X-Fujinon 1:1.6 50 mm DM, set the Aperture Ring to any one of the f-numbers from F1.6 to 3.
-
Page 16: Focusing The Lens
4. FOCUSING THE LENS Focusing with the split image rangefinder In the center of the viewfinder of your Fujica AX-3 you will see a split- image spot a microprism collar; around it which, in turn, is surrounded by a ground glass screen. Any one of them can be used focusing the lens. -
Page 17: Rewinding The Film
2. Your subject is in sharp focus when it appears sharp and clear. This method is recommended for focusing the lens quickly and for copying work. Estimate the distance from camera to subject with your eye and set the Distance Ring to that distance (white numbers= meters, green numbers= feet). - Page 18 2. Erect the Rewind Crank and turn it in the direction of the arrow. You will feel a sudden release of tension when the film has been rewound into its cartridge. 3. Open the Camera Back by pulling the Rewind Knob all the way out and unload the film.
- Page 19 2. AE LOCK (EXPOSURE MEMORY) Your Fujica AX-3 has two Shutter Speed Selector settings for automatic exposure: AE and AEL, and the camera's automatic exposure setting can be locked when it is set to AE L. 1. When the Shutter Release is pressed halfway down, the shutter speed...
- Page 20 Shooting with a Praktica thread mount Fujinon Lens (Mounted with the Mount Adapter X-S) 1. Set the Shutter Speed Selector to AE or AE L. 2. Set the Aperture Ring to the desired value. 3. Press in the Preview Button and, while holding it there, look through the Viewfinder and press the Shutter Release halfway down to make sure that neither the overexposure nor the underexposure warning signal is blinking.
- Page 21 Note: If you are shooting with the Shutter Speed Selector set to AEL, be sure to press in the Preview Button before you press the Shutter Release halfway down because your picture will not turn out properly exposed if you do it the other way around. Shooting with an Ultra-telephoto Lens, with the Lens Mounted in Reverse, and through an Auto Extension Bellows.
- Page 22 4. MANUAL EXPOSURE In the manual mode, both the shutter speed and aperture are set manually. 1. Set the Shutter Speed Selector to any speed you want to use. 2. Set the Aperture Ring to any f-number you want to use. 3.
- Page 23 8. To take pictures requiring long exposures of 2 seconds or more, set the shutter speed selector to "B". The shutter will remain open for as long as the shutter release button is held depressed so that you can trip the shutter when you want to.
-
Page 24: Multiple Exposure
NOTE: Exposure compensation of +2 and -2 can be made by means of the Film Speed Selector. For example, if you are using an ISO/ASA 100 film and an amount of compensation required is +2, set the Film Speed Selector to ISO/ASA 25. 6. - Page 25 1. If the film has been already wound, pull out the Film Advance Lever tip slightly (by a standoff angle of the lever) and take your first picture. 2. With the lever tip in this position, press in the Rewind Button. Then wind the film with the Film Advance Lever.
- Page 26 3. To prevent light from entering through the Eyepiece, shut the Eyepiece Shutter with the Eyepiece Shutter Lever. 4. Swing the Main Switch all the way out toward you so that the letters "SELF" appears in the Main Switch Window. 5.
- Page 27 8. CONTROLLING THE DEPTH OF FIELD To check the effects of the aperture you selected -how well the background has been blurred out or how deep the zone of sharpness is- look through the Viewfinder and stop down the Lens to the taking aperture by pressing in the Preview Button.
-
Page 28: Taking Flash Pictures
All the interchangeable lenses of your Fuji AX have a depth of field scale etched on the top of the lens barrel. If you are using an F1.6, 50 mm lens and have set the Aperture Ring to F8 and the Distance Ring to 5m, everything approximately between 3.5 and 8.7 meters from the camera will turn out sharp (the distance between the two 8s on the depth-of-field scale.) - Page 29 The Fujica Auto Strobe AZ has a guide number of 17 and it lets you take automatic flash pictures with the entire range of apertures on your camera lens. This is a highly effective flash for taking pictures of groups of...
- Page 30 3. Set the Strobe's Distance Selector to either the yellow, green, or red mark. Them marks represent the following shooting distances: Yellow ..1 - 2.7 m {3.3 - 8.9 ft.) Green ..1 - 5.3 m (3.3 - 17.5 ft.) Red ..1.5 - 10.7 m (5 - 35.3 ft.) 4.
- Page 31 The situation calls for using bounce light. The Fujica Auto Strobe 300X has a head that will tilt O - 90ø, and when tilted, it automatically converts into a twin flash having a main (G. No.
- Page 32 1. Clip the strobe foot into the camera's accessory shoe. 2. Use any shutter speed except B. 3. If you are using an X-Fujinon DM lens, set the Strobe's F-number dial to F1.4 (marked in red). If you are using an X-Fujinon lens, set it to the maximum aperture of the lens.
-
Page 33: Changing The Lens
5. Switch the strobe switch to "AUTO" and shoot as soon as the Ready Lamp turns on. 6. To take your picture, focus the lens, compose your subject, and press down the Shutter Release. Note: The continuous diagonal lines on the right show the farthest shooting distances and the hyphenated lines on the left show the nearest shooting distances. - Page 34 These are capable of full aperture metering and programmed, shutter- preferred, and aperture-preferred automatic exposure. However, your Fujica AX-3 is provided for full aperture metering and aperture-preferred automatic exposure only. Do not set the Aperture Ring to the orange (diamond) mark.
- Page 35 They are not provided with functions (2) and (4) of the DM lenses. 3. USING PRAKTICA SCREW-MOUNT FUJINON LENSES These lenses are mounted on your Fujica AX-3 with the Mount Adapter X-S (optional). The procedure for taking pictures is explained below. For details read the instructions packed with the adapter.
-
Page 36: Camera Care
1. Screw the Mount Adapter X-S on the rear end of your lens. 2. Place the red dot on the adapter's rear end against the red dot on the camera's Lens Mount and turn the lens 65ø to the right (clockwise). It will lock into position with a click. - Page 37 X-Fujinon Z 1:3.5 - 4.5 f=43 - 75 mm DM. 7-component, 7 element. Lens Mount: Fujica X Mount (bayonet mount) :65' turn: 43.5 mm flange back Viewfinder: Silvered pentaprism eye level type. Finder Field of View: 92% vertically and horizontally.
- Page 38 Camera Back: Snaps open when the film rewind crank is pulled out: can be removed and replaced with a data back (Fujica Photo Recorder, optional! for printing data on the film. Film Loading: Multiple-slit take-up spool for easy loading.
- Page 39 Included Accessories: Hard case, carrying strap, lens front cap, rubber lens hood. Interchangeable Lenses: See list on page 48. Optional Accessories: Fujica Auto Winder X. Fujica Auto Strobe AZ, Fujica Auto Strobe 300X, Fujica Photo Recorder, Fujica Mount Adapter X S. Fujica Auto Extension Tube X25, Fujica Auto Extension Tube X50, Fujica Auto Bellows X, Fujica Slide Copier X.