Table of Contents
Advertisement
Quick Links
®
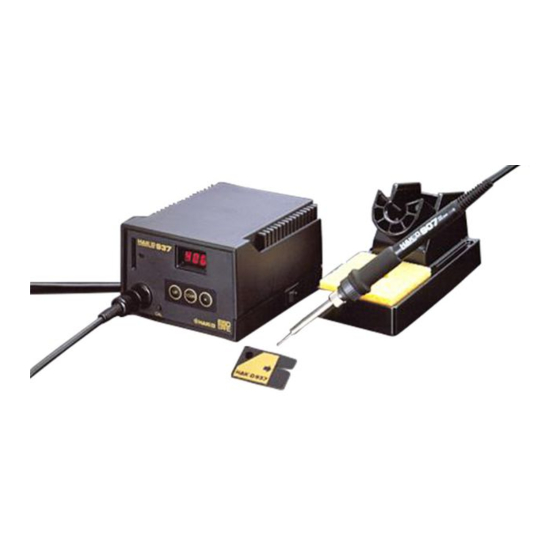
Merci dʼavoir choisi la station de soudage
HAKKO 937.
Veuillez lire le présent manuel avant dʼutiliser lʼ
unité HAKKO 937. Rangez le manuel en lieu sûr,
facile dʼaccès pour des références ultérieures.
CAUTION
When seeking tip replacements, select only "HAKKO"
genuine soldering iron tips that are intended for your
particular model of soldering iron (Please refer to the
instruction manual).
If an incompatible tip or a tip made by another manufacturer
is used, the original performance of the soldering iron may
not be obtained. Furthermore, the heating element, P.W.B.
and transformer may be damaged.
Packing List ....................................................................... 1
Precautions ....................................................................... 1
Name of Parts ................................................................... 2
Setting up & Operating the HAKKO 937 ...................... 2 - 3
Parameters ........................................................................ 5
Calibration of Iron Temperature ..................................... 6, 7
Tip Care and Use, Maintenance ........................................ 8
Tips .............................................................................. 8, 31
Troubleshooting Guide .................................................... 10
the Heating Element and Cord Assembly ................ 11, 12
Specifications .................................................................. 13
Wining Diagram ............................................................... 13
Station ........................................................................... 14
Iron Holder/Iron ............................................................. 15
Instruction Manual
使用說明書
日本白光牌
電焊臺
感謝您購買HAKKO 937電焊臺。使用HAKKO 937前,請詳
閱本使用說明書,閱後請妥為收存,以備日後查閱
當您需要更換焊咀或其他配件時,請選擇正確原裝白光配
件。如閣下疏忽選擇錯誤,將會引起不必要的嚴重效果。
* 焊咀可能不升溫或令正常溫度不穩定。
* 會令發熱元件壽命縮短。
* 焊臺內的電路板及變壓器容易發生故障。
* 溫度不正常令焊咀受損不上錫,縮短壽命,影響操作。
* 如選擇仿造配件安裝在原裝白光產品上,將嚴重影響該產
品所有功能。
** 對於選擇不正規白光產品或仿造產品及任何配件而引起任
何問題與本公司無關。特此聲明。
包裝清單 ........................................................................................ 16
注意事項 ........................................................................................ 16
部件名稱 ........................................................................................ 17
和使用 HAKKO 937 .............................................................. 17 - 19
參數 ................................................................................................. 20
校準焊鐵溫度 ..........................................................................21, 22
焊鐵頭的維護和使用 ................................................................... 23
焊鐵頭 .......................................................................................23, 31
錯誤標記 ........................................................................................ 24
排除故障 ........................................................................................ 25
如何檢查發熱元件和組裝電線破損 ....................................26, 27
規格 ................................................................................................. 28
電路圖 ............................................................................................. 28
電焊臺 .......................................................................................... 29
焊鐵 .............................................................................................. 30
警告
目 錄
Advertisement
Table of Contents

Related Manuals for Hakko Electronics 937


Summary of Contents for Hakko Electronics 937
-
Page 1: Table Of Contents
Precautions ............... 1 部件名稱 ..................17 Name of Parts ..............2 和使用 HAKKO 937 .............. 17 - 19 Setting up & Operating the HAKKO 937 ...... 2 - 3 參數 ....................20 Parameters ................ 5 校準焊鐵溫度 ................21, 22 Calibration of Iron Temperature ........6, 7 焊鐵頭的維護和使用... -
Page 3: Name Of Parts
CAL Pot Plug/ Power Switch Calibrator Setting up & Operating the HAKKO 937 CAUTION The sponge is compressed. It will swell when moistened with water. Before using the until, dampen the sponge with the water and squeeze it dry. Failure to do so may result in damage to the soldering tip. - Page 4 4. Turn the power switch to on. The temperature is preset at 400°C at the Heater factory. Lamp The heater lamp flickers when the temperature has stabilized. 5. Press the button to display the preset tempe- 2 3 4 rature.
- Page 5 2. Any HAKKO 937 card can be used with any HAKKO 937 station. 3. Even if the card is left in the station, the HAKKO 937 will operate normally. If the power is turned off while the card is inserted, the soldering iron will heat to the previously set temperature.
-
Page 6: Parameters
Parameters The HAKKO 937 has the following parameters. Parameter settings can be adjusted. 1. °C or °F temperature display selection 2. Heater-error temperature-tolerance 3. Display of room temperature compensation value ( test mode) Once parameter-input mode has been entered, set the parameters in the order shown below. After all the parameters have been set, normal operation will be resumed. -
Page 7: Calibration Of Iron Temperature
Attach the CAL pot plug. We recommend the HAKKO 191/192 thermometer for measuring the tip temperature. B. Calibrating with a Room 1. Allow the HAKKO 937 to cool to room temperature for (Test Mode) Thermometer one hour. 2. Press and hold down buttons simultaneously and turn the power switch on.(See the page parameter.) - Page 8 Calibration Chart Example : To calibrate the 900M-T-LB tip at a room, temperature of 22°C (70°F), adjust the CAL potentiometer until the digital display reads 20 (66). Room Temperature : ....22°C (70°F) Compensation Value : .... -2°C (-4°F) Digital Display : ...... 20°C (66°F) 900S Compensation Compensation...
-
Page 9: Tip Care And Use, Maintenance
Tip Care and Use Tip Temperature ---------------- High soldering temperatures can degrade the tip. Use the lowest possible soldering temperature. The excellent thermal recovery characteristics ensure efficient and effective soldering even at low temperatures. This also protects the soldered items from thermal damage. Clean the tip regularly with a cleaning sponge, as oxides and ... - Page 10 Error Messages Various error messages will be displayed when there is a problem with the HAKKO 937 unit. If the fol- lowing message is displayed, see the troubleshooting guide. After the power has been turned on, the system checks System Error the memory and the programs.
-
Page 11: Troubleshooting Guide
Trouble Shooting Guide Problem 1. Check 1. Is the fuse blown? The unit does not operate. • Determine why the fuse blew and eliminate the cause, then replace the fuse. a. Is the inside of the iron short-circuited? b. Is the grounding spring touching the heating element? c. -
Page 12: Checking For Breakage Of The Heating Element And Cord Assembly
Checking for breakage of the heating element and cord assembly Disconnect the plug and measure the resistance value between the connec- ting plug pins as follows. a. Between pins 4 & 5 (Heating Element) 2.5 – 3.5 Ω (Normal) b. Between pins 1 & 2 (Sensor) 43 –... - Page 13 ② 1. Slide the handle cover toward the cord and remove the ① screw securing the heating element. ③ 2. Turn the nut counterclockwise and remove it. ④ 3. Remove the tip ⑤ 4. Pull both the heating element and the cord toward the tip ⑥...
-
Page 14: Specifications
Specifications Name HAKKO 937 Power Consumption Station Name 937 Station ESD Output Voltage 24V AC Temperature Range 200°C - 480°C / 400°F - 899 °F Dimensions 120(W) x 93(H) x 140(D) mm / 4.7 x 3.7 x 5.5 in. Weight (w/o Cord) 1,300 g (2.9 lbs.) -
Page 15: Parts List Station
Parts List Tapping Screw M2.6 × 8 (1) Binding Head Tapping Screw (Fluted Point) M3.5 × 50 (4) Tapping Screw Item M3 × 12 (1) Part No. Part Name Description ① B2034 Upper Case E.S.D. B2036 P.W.B. for Temp. Control ②... -
Page 16: Iron Holder/Iron
Parts List (continued) 907/907 Item Part For Use Part Name Description With B1784 Nut ① B1794 Nut B1786 Tip Enclosure ② B1787 Tip Enclosure Soldering Tip See page 31 ③ Soldering Tip See page 31 B2022 Nipple ④ B2033 Nipple ⑤... -
Page 18: 部件名稱
部件名稱 焊鐵插座 大塊清潔海綿 隔膜片 小塊清潔海綿 焊鐵架底座 插卡 組裝電線 校準計 CAL 圓 電源開關 塞 / 校準計 裝置和使用HAKKO 937 注意: 海綿是可擠壓物體,水濕則漲大。使用海綿時,先濕水再擠乾。否則會損壞焊鐵頭。 A. 焊鐵架 1. 小塊清潔海綿 將小塊清潔海綿先濕水再擠乾,置入焊鐵架底 座四個小凹洞之一。 2. 添水至圓1所示水平面。小塊海綿吸收水分後, 可使置於其上的大塊海綿一直保持潮濕狀態。 * 也可以單用大塊海綿( 省去小塊海綿和添 水)。 3. 然後霑濕大塊海綿,置於焊鐵架底座。 注記: 900S 型和 907 / 908 型焊鐵架有所不同。 更換焊... - Page 19 4. 按開電源開關。廠方已預設攝氏400度。當溫度 穩定時,發熱器指示燈即會閃亮。 發熱器 指示燈 5. 按下 鈕以顯示預設溫度。顯示歷時兩秒鐘。 C. 設定溫度 注意: 確認以正確方位將插卡插入卡孔。設定溫度時,發熱元件是斷電源。 例子 : 攝氏 400 度改為 350 度 1. 將插卡插入卡孔。最左邊數位(100數位)將會閃亮。表示電 焊臺溫度正在設定模式,100數位可進行調節。 把插卡插入 2. 選擇所需數值以取代100數位。 按下 鈕或 鈕。 利用“上” 或“下” 鈕以改換顯示數值如下圖所示: 2 3 4 所需數字顯示時,即按下 鈕。 中間數位(10數位)開始閃亮,表示10數位可以設定。. ォ 按下...
- Page 20 當插卡還留插在電焊臺內, 若要 1. 按下 鈕,並且按著不放至少1秒鐘。首先顯示預設 溫度,然後100數位開始閃亮,表示已輸入溫度設定模 改換設定溫度, 可以按照下述方 式。閃亮開始後,便可進行改換溫度程序。 法進行。 2. 如果 鈕按下不至I秒鐘,現存的設定溫度將顯示兩秒 鐘,然後顯示焊鐵頭溫度。 插卡 1. 設定溫度後,取出插卡,預設之溫度便不能改換,除非 再插入插卡,重新設定,即使關掉電源開關,也不能改 換預設之溫度。因此: a. 可以隨意開關電源而不必每一次重新設定溫度。 b. 既準確又安全地控制溫度。 2. 任何HAKKO 937插卡都適用於HAKKO 937電焊臺。 3. 即使插卡還留插在電焊臺卡孔內,HAKKO 937仍然能照 常操作。如果插卡插入插孔時,電源被切斷,則焊鐵將 昇溫至前此所設定之溫度。 電焊臺可累積使用 為了更方便工作和取更高焊接效率, 可將兩臺電焊臺重疊使 用。...
- Page 21 參數 HAKKO 937使用下列參數,參數可調節。 1. 選擇攝氏(℃)或華氏(℉)溫度顯示 2. 發熱器─失誤溫度─公差 3. 顯示室溫補整值(測試模式) 當參數一輸入模式 輸入後,按照下述次序設定參數。 當所有參數都設定之後,便開始正常操作。 參數輸入模式 1. 關掉電源開關。同時按下 與 鈕不放,然後按開 電源開關。 2. 繼續按著 與 鈕,直到顯示屏顯示“C”或“F” 為止。 3. 當顯示屏顯示“C”或“F”時,電焊臺是處在參數輸 入模式。 選擇參數─輸入模式。按下 或 鈕將輪流顯示“C” 1. 攝氏 “C” 或華氏 “F” 溫度顯示 與“F”。按下 鈕以選擇“C”或“F”。 選擇“C”或“F”溫度顯示之後,發熱器─失誤溫度將顯 示,並在100數位閃亮。 2. 發熱器─失誤溫度─公差...
-
Page 22: 校準焊鐵溫度
2: 使用室內溫度計校準。 注記: 我廠建議使用方法 (1) , 這方法比較準確。 A. 以焊鐵頭溫度計進行校準 1. 設定溫度為攝氏400度(華氏750度)。 2. 待溫度穩定時,取去校準計CAL圓塞。 3. 當溫度穩定時,利用(一)字頭螺絲起子或小(+)字 頭螺絲起子調節螺絲(電焊臺誌有CAL字樣者),直到 焊鐵頭溫度計顯示攝氏400度(華氏750度)為止。順時 針方向旋轉螺絲為增溫,反時針方向為減溫。之後塞緊 校準計CAL圓塞。 * 我廠建議使用HAKKO 191/192溫度計以測量焊鐵頭溫 度。 1. 先讓HAKKO 937將到室內溫度一小時。 B. 以室內溫度計進行校準(測 試模式) 2. 同時按下 與 鈕,並且按著不放,按開電源開 關。(請參閱“參數頁。”) 注意: 如果進行(2)與(3)步驟時發生錯誤,則電焊臺將開 始正常操作,發熱元件開始昇溫。發生這種情況時,應 切斷焊鐵電源,並讓焊鐵回復到室內溫度。 3. 顯示室溫補整值(測試模式),即是所側得的焊鐵頭溫 度。... - Page 23 校準表 例如: 如果是在室溫攝氏22度(華氏70度)時進行校準900M-T-LB型焊鐵頭,應調節CAL電位計直到 顯示20(66)的數字為止。 室溫..攝氏22度(華氏70度) 校準表值...攝氏 -2度(華氏 -4度) 數字顯示...攝氏20度(華氏66度) 900S 編號 室溫± 編號 室溫± T編號 室溫± 900S-T-1.2D 900M-T-0.8D 900L-T-LB 900S-T-1.6D 900M-T-1.2D 900L-T-2B ℃ ℉ 900S-T-2C 900M-T-1.6D 900LT-2.4D 900S-T-1C 900M-T-2.4D 900L-T-3.2D 900S-T-B 900M-T-3.2D 900L-T-2C ℃ ℉ 900S-T-1 900M-T-1.2LD 900L-T-2CF* ℃ ℉ 900M-T-SB 900L-T-3C 900M-T-B...
-
Page 24: 焊鐵頭的維護和使用
焊鐵頭的維護和使用 溫度過高會減弱焊鐵頭功能,因此應選擇儘可能低之 ●焊鐵頭溫度 ---------------- 溫度。此焊鐵頭的溫度回復力優良,較低的溫度也可以充 分的焊接,可保護對於溫度敏感之元件。 ●清理 --------------------------- 應定期使用清潔海綿清理焊鐵頭。焊接後,焊鐵頭的殘餘 焊劑所衍生的氧化物和碳化物會損害焊鐵頭,造成焊接差 誤,或者使焊鐵頭導熱功能減退。 長時間連續使用焊鐵時,應每周一次拆開焊鐵頭清除氧化 物,防止焊鐵頭受損而減低溫度。 ●當不使用時 ---------------- 不使用焊鐵時,不可讓焊鐵長時間處在高溫狀態,會使焊 鐵頭上的焊劑轉化為氧化物,致使焊劑頭導熱功能大為減 退。 ●使用後 -------------------------- 使用後,應抹淨焊劑頭,鍍上新錫層,以防止焊劑頭引起 氧化作用。 保養 檢查和清理焊鐵頭 1. 設定溫度為攝氏250度(華氏482度)。 2. 溫度穩定後,以清潔海綿清理焊鐵頭,並檢查焊鐵頭狀 況。 注意: 切勿用銼刀剔除焊鐵頭上的氧化 3. 如果焊鐵頭的鍍錫部份含有黑色氧化物時,可鍍上新錫 物。 層,再用清潔海綿抹淨焊鐵頭。如此重復清理,直到徹 底除去氧化物為止,然後再鍍上新錫層。 4. 如果焊鐵頭變形或衍生重鏽,必須替換新的。 焊鐵頭 焊鐵頭溫度因焊鐵頭形狀不同而有所差異。 最理想是使用焊鐵頭溫度計以調節焊鐵頭溫度。 (請參閱第 22 頁... -
Page 25: 錯誤標記
錯誤標記 當HAKKO 937電焊臺發生問題時, 將會顯示各種錯誤標記。 如果顯示下列標記時, 請參照排除故障指南。 系統失誤 電源按開後,此系統便開始檢查記憶體與程序。如發現反 常現象, 標記顯示,所有操作完全停頓。 如果是傳感器或傳感器電路的任何部份失靈時, 傳感器失誤 標記顯示時,輸送到焊鐵的電流便被切斷。 如果電流輸送至焊鐵,而焊鐵溫度比所設定的發熱器-失誤 發熱器失誤 溫度-公差低,溫度顯示便會閃亮,表示發熱器可能失靈。 例如假設設定溫度為攝氏400度,而發熱器-失誤溫度-公差 溫度顯示閃亮 為攝氏50度,即使發熱器接受了電流,焊鐵溫度還是低於 攝氏350度。 顯示屏幕開始閃亮,表示發熱器可能失靈。 例如: 400-50=350 顯示屏將開始閃亮。 注記: 如果溫度開始再昇高,顯示屏便停止閃亮 ─ 即使所顯示 的溫度是低於攝氏 350 度。 維修之前 注意: 進行維修之前應關掉電源,否則可能發生觸電事故。 若電線損壞,應請廠家或其他維修服務代理商或類似之合格人士修理,以免傷害身體或損壞電 焊臺。... -
Page 26: 排除故障
排除故障 故障1: 電焊臺不能操作。 檢查1. 保險絲是否燒斷? · 確定保險絲燒斷原因後,更換新保險絲。 a. 焊鐵內部是否短路? b. 接地彈簧是否觸及發熱元件? c. 發熱元件引線是否扭曲與短路? 檢查2. 電線是否破損? · 更換新電線。 故障2: 焊鐵頭不昇溫,傳感器或 檢查3. 電線與/或連接插頭是否鬆脫? 發熱器失誤顯示。 · 重新連接 檢查4. 焊鐵電線是否破損? · 請參閱“組裝電線破損檢查法”。 檢查5. 發熱元件是否破損? · 請參閱“發熱元件破損檢查法”。 故障3: 焊鐵頭斷斷續續地昇溫。 → 檢查4. 故障4: 焊鐵頭霑不上銲錫。 檢查6. 焊鐵頭溫度是否過高? ·重新設定適當溫度。... -
Page 27: 如何檢查發熱元件和組裝電線破損
如何檢查發熱元件和組裝電線破損 拔出插頭,測試連接插頭的腳與腳之 間的電阻值如下:如果“a”與“b”之 a. 第4腳與第5腳之間(發熱元件) 2.5-3.5歐姆(正常) 間的電阻值有異於上表電阻值,需更 b. 第1腳與第2腳之間(傳感器) 43-58歐姆(正常) 換發熱元件(傳感器)和/或電線。請 c. 第3腳與焊鐵頭之間 2歐姆以下 按照程序1和2進行。 如果“c”電阻值大於上表電阻值,則 要砂紙或鋼絨輕輕擦除下圖所示部位 的氧化層。 1. 發熱元件破損 如何拆開907/908型焊鐵 ① ② ③ 1. 向反時針方向扭開螺帽 ,取出焊鐵頭護套 和焊鐵頭 。 ④ 2. 向反時針方向扭開套頭 ,從焊鐵中拉出套頭。 ⑫ ⑥ ⑪ 3. 從手柄 中取出發熱元件 和電線 (向著焊鐵頭方向... - Page 28 ② 1. 將手柄護套 從電線方向推移,鬆開栓緊發熱元件的螺絲 ① 。 ③ 2. 向反時針方向扭開和取出螺帽 。 ④ 3. 取出焊鐵頭 。 ⑤ 4. 向著焊鐵頭方向,從手柄6拉出發熱元件 和電線。 測試終端板的傳感器和發熱元件的電阻值。此電阻值應與907 和908型一樣。 關於更換程序,請參閱更換部件的使用說明書。 2. 焊鐵電線破損 1. 按開焊鐵電源,溫度設定為攝氏480度(華氏896度)。在 焊鐵電線的各個不同部位(包括鬆緊部位)搖動或纏結, 測試焊鐵電線有以下兩個方法: 如果發熱器的液晶指示燈閃亮,則應更換電線。 注意: 雖然焊鐵電線正常,當溫度達到攝氏480度(華氏896 度)時,發熱器的液晶指示燈將會閃亮。 2. 測試焊鐵插頭腳和終端板電線之間的電阻值。 腳1-紅色 腳2-藍色 腳3-青色 腳4-白色 腳5-黑色 電阻值應為0歐姆,若大過0歐姆或∞,應更換電線。 請參閱更換部件的圖示。除去燒斷的保險絲,然後再焊接新 3.
-
Page 29: 電路圖
規格 名稱 HAKKO 937 耗電 60 瓦特 控制臺 Name 937 電焊臺 /937 電焊臺 ESD 輸出電壓 交流電 24 伏特 溫度範圍 2 攝氏 200-480 度 / 華氏 392-899 度 外形體積 寬 120 x 高 93x 深 140 毫米 /4.7x3.7x5.5 英寸 重量 (不包括電線)... -
Page 30: 部件清單 電焊臺
部件清單(電焊臺) 攻絲頭螺釘 M2.6 × 8 (1) 攻絲頭螺釘 (帶槽的點) M3.5 × 50 (4) 序號 部件編號. 部件名稱 說明 ① B2034 上蓋 D.E.S. 攻絲頭螺釘 B2036 控溫電路板 ② M3 × 12 (1) B2322 電路板 ③ B2035 操作前板 ④ B2006 插座 ⑤ B2037 插卡 ⑥ B2018 校準計CAL圓塞... - Page 31 部件清單(焊鐵) 907/907 序號. 部件編號 部件名稱 說明 供用於 B1784 螺帽 ① B1794 螺帽 B1786 焊鐵頭護套 ② B1787 焊鐵頭護套 焊鐵頭 參閱第31頁 ③ 焊鐵頭 參閱第31頁 B2022 套頭 ④ B2033 套頭 ⑤ B2032 接地彈簧 907, 908 ⑥ A1321 發熱元件 舊編號900M - H, 900L - H 907, 908 ⑦...
Need help?
Do you have a question about the 937 and is the answer not in the manual?
Questions and answers