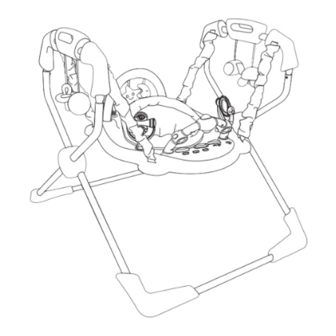
Summary of Contents for Love N Care X-Factor BP 9001
- Page 1 Instruction Manual “ X-Factor ” Stationary Centre IMPORTANT: PLEASE READ INSTRUCTIONS CAREFULLY AND KEEP FOR FUTURE REFERENCE! I TEM: B P 9 0 0 1...
- Page 2 WARNING To prevent serious injury or death Use only for a child who is able to hold head upright unassisted and who is not able to walk or climb out of product. Never leave child unattended. Always keep child in view while in product. ...
- Page 3 PARTS Bouncer x1 Base x2 U Frame Seat Pad x1 Seat Ring x1 U Frame Spinner Toys x2 Plush Arch Toy x1 Spinner Ball Toy x1 Arch Toy x1 X Frame x2 Music Tray x1 TOOL NEEDED: Phillips Screwdriver...
- Page 4 1. Put the X Frames and the base together as shown in the diagram. 2. Push the button in the end of the poles inward (a), then slot the poles fully into base (b). 3. Ensure that the buttons are protruding through. Slot U Frame on the bouncer onto the ends of the X Frame until it...
- Page 5 1. Slot the Spinner ball toy, into the round holes on the bouncer, see diagram. 2. Push into the holes until the studs on the ends of toy lock over the housing on the underside of the bouncer and cannot be Slot the two spinner toys into the round holes in the end of the bouncer, see diagram.
- Page 6 Slot the plush arch toy into the round holes on the main tray, see diagram. Make sure both lock hooks snap into the lock hook holes. Before fitting the music insert you will need to fit the batteries. Unfasten the screw in the battery cover using a X-head screwdriver.
- Page 7 To assemble music tray slot the arch toy into the music tray as shown. 1. Slot the music tray on the bouncer, see diagram. Ensure both front locks hook into the openings. 2. Push down on the back of music tray. Ensure that both back locks are securly in place.
-
Page 8: Battery Safety Information
Slide the switch on the back of the music insert along for , quiet music or loud music. the front of the music insert rent tunes. Loud Quiet Battery safety information Hint: We recommend using alkaline batteries for longer battery life. ... - Page 9 1. Pull the crotch section of the seat pad outwards, the warning label will be at the back and the adjustment strap for the seat pad will be at the bottom. 2. Slot the seat pad onto the seat ring so that the on the warning label are aligned with on on the back of...
- Page 10 1. Slot the assembled seat into the hole in the middle of the bouncer. 2. While holding the sides of the bouncer, push down on the seat ring until the clips on the seat ring lock over the edge of the bouncer.
- Page 11 Assessing the correct seat height: Place the child in the seat of the bouncer. The child’s toes without bouncing. Always adjust the seat if the child’s feet are fully on the WARNING: Never attempt to adjust the seat with the child in it.
-
Page 12: Care And Maintenance
To raise the height of the seat: Grip the buckle on the rear of the seat pad. Pull the loose end of the webbing away from the buckle until the correct heigh is achieved. You may need to place the child in the seat several times before the correct height is achieved. - Page 13 Contact Us: Love N Care Pty Ltd. 297-299 Canterbury Rd, Revesby NSW 2212 Australia Contact No: 02 9774 4655 Fax: 02 9774 4633 Email: info@lovencare.com.au Website: www.lovencare.com.au...


Need help?
Do you have a question about the X-Factor BP 9001 and is the answer not in the manual?
Questions and answers