
Subscribe to Our Youtube Channel
Related Manuals for Onean Carver


Summary of Contents for Onean Carver
- Page 3 For this reason, we have prepared this user manual. It will help you to know your new Carver board and to use it correctly. It contains information related to the assembly, care, use and maintenance of your Carver board.
- Page 4 Last update: 2017/07/11 This user’s manual is subject to be changed due to potential modifi cations in design.
- Page 5 • Do not lend your equipment to anyone who has not been instructed in the use of the Carver. • When entering the water, you must avoid entering through wave break areas and in case of doing so, you must always place yourself between the board and the wave.
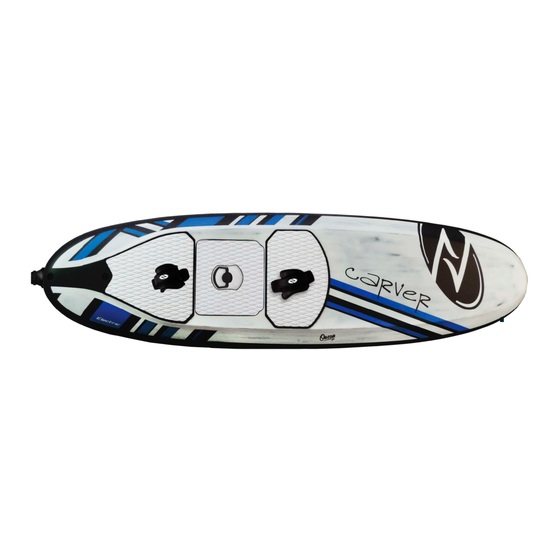
- Page 6 Construction with EPS core and laminated fi breglass and epoxy full sandwich. • Weight (without the battery): 13kg / 28.6lbs • Length: 240cm / 7´8” • Width: 70cm / 27.7” • Thickness: 15cm / 5.9” • Volume: 170L CARVER USER’S MANUAL...
- Page 7 Input power: 220-230Vac (*Also steel swivels to stop tangles. Custom made security available 110Vac) magnet pull system. • Charging current: 15 Amps • Output voltage: 50,4 Vdc Hard plastic and fi ber 6,5 inch UsBox fi ns. CARVER USER’S MANUAL...
- Page 8 3. Screw the piece to secure it. Leash screw 3. Fix the screw attaching the fin to the Screw insert board. Leash insert CARVER USER’S MANUAL...
- Page 9 2. Place the screw through the screw insert and hold the footstrap. 3. Align the holes with the footstrap insert. Footstrap screw 4. Screw the footstrap to secure it. Insert for the battery magnet Screw insert Footstrap insert CARVER USER’S MANUAL...
- Page 10 Once the battery is placed Sensor on the pad, grab it by the upper handle and place in the battery compartment. The blue LED on the front of the board will light up indicating the connection. Display Battery percentage 100% CARVER USER’S MANUAL...
- Page 11 Pull from the upper handle perpendicularelly to extract the battery. 7. Keep vent always closed other moment and do not turn it more than three full turns. CARVER USER’S MANUAL...
- Page 12 Connector Body Input battery connectors 6. When the battery is fully charged the LEDs will turn off and you must proceed to disconnect the battery. Charge Indicators CARVER USER’S MANUAL...
- Page 13 Always with the battery initially disconnected: 1. With controller totally LEDs place the drop over the logo. 2. On this position, press on the drop SYNC BATTERY until the fi rst LED of the board display CARVER USER’S MANUAL...
- Page 14 Staggered 1 The power bar will progressively light up. Press on the drop to set the desired value according to the following description. Medium High CARVER USER’S MANUAL...
- Page 15 In case that ¨Staggared 2¨doesn´t allow us to reach planing we could use this one. Staggered 3 Staggered 5 Medium High Medium High CARVER USER’S MANUAL...
- Page 16 6. Always secure the wirstband before use. 7. In order to activate the jet, press on the drop with the index fi nger and thumb. 8. The power will vary depending on the pressure placed on the drop. CARVER USER’S MANUAL...
- Page 17 3. In case of fall, the magnetic key will detatch, stopping the jet. Once the rider is back on the board ready to continue its use, the magnetic key should be properly placed again. CARVER USER’S MANUAL...
- Page 18 • The Carver board is suitable for fresh ans salt water use. Ideal conditions • Make sure the leash and the magnetic security key (kill switch) are in good are with no wind and fl at water. condition. • Be aware of local regulations before using and the areas where this kind •...
- Page 19 Shift the weight towards the side where you intend to turn to ease the movement. The more speed, the easier it is to turn. The board turns like a conventional board. CARVER USER’S MANUAL...
- Page 20 • Do not operate in areas of high current or waves. The Carver is not meant to be used to surf waves. In case of being tilted by a wave, the rider could suff er severe damages.
- Page 21 It is not recommendable to place it upside down and never exposed to direct sunlight over long periods of time. • Periodically apply grease on the impeller, stator/nozzle. • Between uses, always keep the discharge connectors clean. • Do not impact the turbine or rest the board over it. CARVER USER’S MANUAL...
- Page 22 • Use only a cloth and fresh water to clean it. • Do not drop, open, crush or burn. • Do not pull from the drop cable. CARVER USER’S MANUAL...
- Page 23 SW3. You will see the impeller (A) until the end using the hex moving out of the Jet unit while key SW2,5. Manually screw the screwing the set screw (6). set screw (6) to the tool (7). CARVER USER’S MANUAL...
- Page 24 (8) and introduce the flat clockwise. The assembly the hex key SW3. washer (4) creating the 1 & 2 while slightly mount “assembly 2”. onthe the Jetpack’s Shaft (B). Apply grease assembly 1 assembly 2 CARVER USER’S MANUAL...
- Page 25 In case that the battery power connectors seem excessively corroded, these will have to be replaced. Therefore, make use of the tube hex key on the image next to this text in order to unscrew the old connectors and screw the new ones. CARVER USER’S MANUAL...
- Page 27 We´re here to help www.onean.com | support@onean.com @oneanboards fb.me/oneanboards @oneanboards...
Need help?
Do you have a question about the Carver and is the answer not in the manual?
Questions and answers