Table of Contents
Advertisement
Quick Links
Advertisement
Table of Contents

Related Manuals for Onean TWIN


Summary of Contents for Onean TWIN
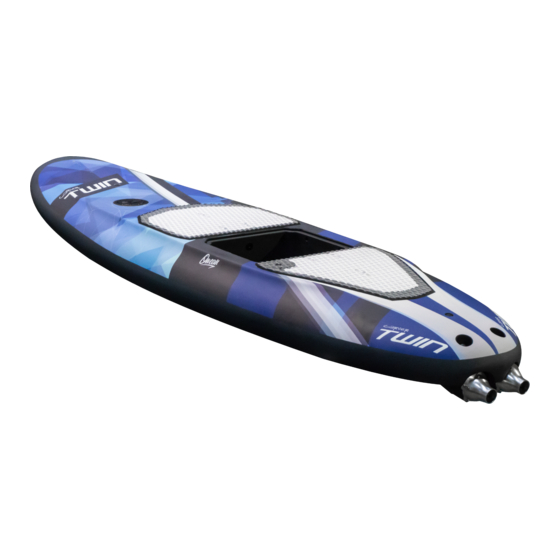
- Page 1 FULL USER MANUAL...
- Page 3 For this reason, we have prepared this user manual. It will help you to know your new Twin board and to use it correctly. It contains information related to the assembly, care, use and maintenance of your Twin board.
-
Page 4: Table Of Contents
index 1. M .........5 4. u ...10 ecurity heckS Se and onFiguration oF the quiPMent 2. P ..........6 4.1. B ..........10 aTTery acking 4.1.3 b ........12 2.1. T ..........6 attery harge oard 2.2. T ..........6 4.2. w ......13 ireless onTroller 2.3. -
Page 5: M Ain S Ecurity C Hecks
• Do not lend your equipment to anyone who has not been instructed in the use of the Twin. • When entering the water, you must avoid entering through wave breaking areas and in case of doing so, you must always place yourself between the board and the wave. -
Page 6: P Acking L Ist
Short circuit protection. Reverse polarity protection. Charging indicator. 2.2. t • Input power: 220-230 VAC (*Also available 110 VAC) • Semi rigid Twin Bag. • Charging current: 15 A • Full bag inner padded reinforcement. • Output voltage: 50.4 VDC •... -
Page 7: Q I Charger For The Wireless Controller
Custom made security magnet pull system. 2.11. h 2.16. uS b andLe Made of highly durable thermoplastic Hard plastic and fibre 6,5 inch Us Box fins. rubber, end webbing is doubled and stitched for extra strength and security. TWIN USER’S MANUAL... -
Page 8: F Irst Assembly
3. Screw the piece to secure it. Leash screw Screw insert 3. Fix the screw attaching the fin to the board. Leash insert TWIN USER’S MANUAL... -
Page 9: I Nsert The Battery Magnet
Please, screw the female connectors, found in the wireless controller case, in the holes of the bottom part of the battery using the tool provided on the tooling kit. Female connectors Battery bottom Screw insert Footstrap insert TWIN USER’S MANUAL... -
Page 10: Se And C Onfiguration Of The
Once the battery is placed on the pad, grab it by the upper handle Visualization Visualization Charge% Charge% and place in the battery compartment. The blue LED on the front of the board will light up indicating the connection. 100% TWIN USER’S MANUAL... - Page 11 6. In order to ease the extraction of the battery, turn the vent one full round counter-clock wise. Pull from the upper handle perpendicularelly to extract the battery. 7. Always keep vent closed other moment and do not turn it more than three full turns. Antenna´s LED TWIN USER’S MANUAL...
-
Page 12: B Attery C Harge
Connector body Battery connectors 6. When the battery is fully charged the LEDs will turn off and you must proceed to disconnect the battery. Charging indicator TWIN USER’S MANUAL... -
Page 13: W Ireless C Ontroller
In order to access the configuration menu, you must stick to the following extra energy resource which must be used only for emergencies. indications: 1. With the controller totally off (no LEDs ) place the drop over the logo. SYNC BATTERY TWIN USER’S MANUAL... - Page 14 Once the first two LEDs start flashing you must press on the drop to access this submenu. Staggered 1 The power bar will progressively light up. Press on the drop to set the desired value according to the following description. Medium High TWIN USER’S MANUAL...
- Page 15 It requires a bit more power. In case that ¨Staggared 2¨doesn´t allow us to reach planning skills order entire range appropriately. we could use this one. Staggered 3 Staggered 5 Medium High Medium High TWIN USER’S MANUAL...
- Page 16 6. Always secure the wristband before use. 7. In order to activate the jet, press on the drop with the index finger and thumb. 8. The power will vary depending on the pressure placed on the drop. TWIN USER’S MANUAL...
-
Page 17: S Ecurity M Echanisms
3. In case of a fall, the magnetic key will detach, stopping the jet. Once the rider is back on the board ready to continue its use, the magnetic key should be properly placed again. TWIN USER’S MANUAL... -
Page 18: S Afety G Uidelines
Make sure the leash and the magnetic security key (kill switch) are in good 5.1 t erMS oF condition. • The Twin board is suitable for fresh and salt water use. Ideal conditions • Make sure the remote works properly before heading to the water. are with no wind and flat water. •... -
Page 19: G Etting Out Of The Water
Shift the weight towards the side where you intend to turn to ease the movement. The more speed, the easier it will be to turn. The board turns like a conventional board. TWIN USER’S MANUAL... -
Page 20: M Easures
• Do not operate in areas of high current or waves. The Twin is not meant to be used to surf waves. In case of being tilted by a wave, the rider could suffer severe damages. - Page 21 • Unless in charging, protect always the battery´s connectors with the plastic cover. The plastic covers avoid entering water inside the connector. In case you forget protecting the battery´s connector, water could damage the battery irreversibly. TWIN USER’S MANUAL...
-
Page 22: M Aintenance
Keep always the female and male charge connectors lubricated. Apply silicone grease inside the battery´s female charge connector. Then, insert the charger´s male connector into the battery´s female connector to distribute the grease through the charger´s pins. TWIN USER’S MANUAL... -
Page 23: Mpeller
Jet unit while key SW2,5. Manually screw the screwing the set screw (6). Finally, set screw (6) to the tool (7). unscrew the screw (5) and save it. TWIN USER’S MANUAL... - Page 24 (1) to the JetUnit’s unscrew the Assembly 2 using the hex key SW3. shaft (B) holding it from from the shaft (B) holding it the hex cap (8). from the hexagonal cap (8). Apply grease Assembly 1 Assembly 2 TWIN USER’S MANUAL...
-
Page 25: C Onnectors
Therefore, make use of the tube hex key on the image next to this text in order to unscrew the old connectors and screw the new ones. Male connectors must be tightened to 2.5 Corroded connectors TWIN USER’S MANUAL... -
Page 26: Iagnosis System
This means the leash magnet is not placed on the killswitch. You only have to position it on its place and continue riding. witch aiLure LED 1 and 4 means failure in the switch of the Turbine #1. LED 2 and 5 means failure in the switch of the Turbine #2. Contact with your nearest dealer or Onean. TWIN USER’S MANUAL... - Page 28 We´re here to help We´re here to help www.onean.com | support@onean.com @oneanboards fb.me/oneanboards OneanBoards...
- Page 29 ONEAN to verify the veracity of the defects, their origin, The guarantee of the repair carried out will have a duration of 6 months and the moment of their appearance.
- Page 30 ONEAN. It will be understood in any case that there is an improper use or poor conservation when the instructions contained in the manual and/or documentation delivered with the article have not been complied with.
Need help?
Do you have a question about the TWIN and is the answer not in the manual?
Questions and answers