Table of Contents
Advertisement
Quick Links
Advertisement
Table of Contents

Related Manuals for Stihl KM 56 R


Summary of Contents for Stihl KM 56 R
- Page 1 KM 56 R 2 - 18 Instruction Manual...
-
Page 2: Table Of Contents
KombiSystem NOTICE In the STIHL KombiSystem a number of different KombiEngines and KombiTools can be com‐ Caution where there is a risk of damaging the bined to produce a power tool. In this instruction machine or its individual components. -
Page 3: Safety Precautions And Working Techniques
Only use KombiTools and accessories that are If you have never used a power tool before: explicitly approved for this power tool by STIHL Have your dealer or other experienced user or are technically identical. It is important that show you how to operate your machine –... - Page 4 English 3 Safety Precautions and Working Techniques Transporting the machine manual fuel pump (only in machines with a manual fuel pump). In case of leakage and damage, do not start the engine – risk of fire! Have the machine serviced by a dealer before using it –...
- Page 5 Never use a power tool that is no correct the idle speed setting at regular intervals. longer safe to operate. In case of doubt, contact STIHL recommends you have this work done by a dealer. a STIHL servicing dealer.
-
Page 6: Approved Kombitools
– Hand protection (wearing warm gloves) Use only a spark plug of the type approved by – Work breaks STIHL and make sure it is in good condition – see "Specifications". The period of usage is shortened by: – Any personal tendency to suffer from poor cir‐... -
Page 7: Mounting The Loop Handle
5 Mounting the Loop Handle English Mounting the Loop Handle Mounting the Barrier Bar The new machine is delivered with the loop han‐ dle pre-assembled on the unit. Using the Barrier Bar ► Take out the screws (1) and remove them along with washers (2) and nuts (3) ►... -
Page 8: Carrying Ring
English 6 Carrying ring Orienting and Securing the Loop Handle ► Insert the clamp (3) in the loop handle (4) and position them together on the shaft (5) ► Position the clamp (6) against the shaft By changing the distance (A), the handle can be ►... -
Page 9: Fueling
7.2.2 Engine oil tions and without harming the environment! If you mix the fuel yourself, use only STIHL two- Fueling stroke engine oil or another high-performance engine oil classified as JASO FB, JASO FC,... -
Page 10: Starting / Stopping The Engine
► Remove the cap. Filling up with fuel Take care not to spill fuel while fueling and do not overfill the tank. STIHL recommends you use the STIHL filler nozzle (special accessory). Closing screw-type tank cap 1 Throttle trigger lockout 2 Throttle trigger 3 Stop switch with Run and 0 = Stop positions. - Page 11 9 Starting / Stopping the Engine English ► Press the manual fuel pump bulb (4) at least ► Hold the unit firmly on the ground with your left five times – even if the bulb is filled with fuel. hand and press down – do not touch the throt‐ tle trigger or lockout lever.
-
Page 12: Operating Instructions
English 10 Operating Instructions 10 Operating Instructions 9.2.6 As soon as the engine runs 10.1 During break-in period A factory-new machine should not be run at high revs (full throttle off load) for the first three tank fillings. This avoids unnecessary high loads dur‐ ing the break-in period. -
Page 13: Adjusting The Carburetor
– the arrow points to eroded. Install only suppressed spark plugs of the recess. the type approved by STIHL – see "Specifica‐ ► Move the choke lever (1) to <. tions". ► Fit the filter cover in position, making sure the 13.1... -
Page 14: Engine Running Behavior
STIHL servicing dealer. STIHL recommends that maintenance and repair 15 Storing the Machine work be carried out only by authorized STIHL dealers. For periods of 30 days or longer 0458-540-8321-D... -
Page 15: Maintenance And Care
Intake port for cooling air Visual inspection Clean Check if installed Spark arresting screen in muffler Check or replace All accessible screws, Tighten nuts and bolts (not adjusting screws) Safety information label replace STIHL recommends STIHL servicing dealers 0458-540-8321-D... -
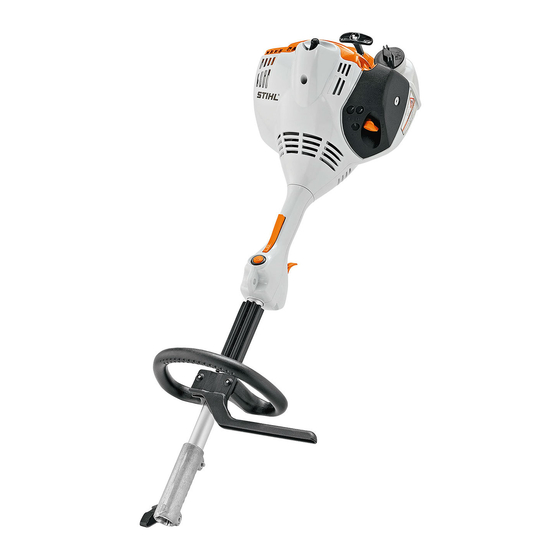
Page 16: Main Parts
Sound and Vibration Levels 2 Fuel cap 3 Tank For further details on compliance with Vibration Directive 2002/44/EC, see 4 Starter grip 5 Muffler www.stihl.com/vib 6 Carburetor adjusting screws 19.5.1 KombiTools 7 Choke lever For version see "Approved KombiTools". 8 Air filter cover... -
Page 17: Maintenance And Repairs
... 8.2 m/s replacement parts. The K‑factor in accordance with Directive Original STIHL parts can be identified by the 2006/42/EC is 2.0 dB(A) for the sound pressure STIHL part number, the { logo and the level and sound power level; the K‑factor in... - Page 18 English 22 EC Declaration of Conformity The KombiEngine described here may be oper‐ ated only in conjunction with the KombiTools approved by STIHL for use with this KombiEn‐ gine. Technical documents deposited at: ANDREAS STIHL AG & Co. KG Produktzulassung The year of manufacture and serial number are applied to the product.
- Page 19 22 EC Declaration of Conformity English 0458-540-8321-D...
- Page 20 *04585408321D* 0458-540-8321-D...
Need help?
Do you have a question about the KM 56 R and is the answer not in the manual?
Questions and answers