Table of Contents
Advertisement
Available languages
Available languages
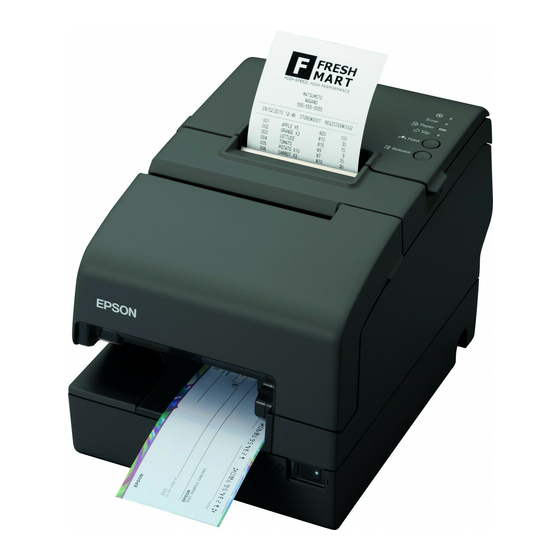
TM-H6000II
User's Manual / Bedienungsanleitung
Gebruikershandleiding / Manuel d'utilisation
Manual Do Utilizador / Manual del usuario
Manuale dell'utente
401361302
Advertisement
Table of Contents

Related Manuals for Epson TM-H6000II M147B


Summary of Contents for Epson TM-H6000II M147B
- Page 1 TM-H6000II User’s Manual / Bedienungsanleitung Gebruikershandleiding / Manuel d’utilisation Manual do utilizador / Manual del usuario Manuale dell’utente 401361302...
-
Page 2: Dip Switch Tables
Labels / Etiketten / Etiketten / Étiquettes / Etiquetas / Etiquetas / Etichette DIP Switch Tables Serial SW Function 1-1 Data receive error Ignored 1-2 Receive buffer 45 bytes capacity 1-3 Handshaking XON/XOFF 1-4 Data word length 7 bits 1-5 Parity check Enabled 1-6 Parity selection Even... -
Page 3: Emc And Safety Standards Applied
Neither Seiko Epson Corporation nor its affiliates shall be liable to the purchaser of this product or third parties for damages, losses, costs, or expenses incurred by purchaser or third parties as a result of: accident, misuse, or abuse of this product or unauthorized modifications, repairs, or alterations to this product, or (excluding the U.S.) failure to strictly comply with Seiko Epson Corporation’s operating and maintenance instructions. -
Page 4: Safety Precautions
Shut down your equipment immediately if it produces smoke, a strange odor, or unusual noise. Continued use may lead to fire. Immediately unplug the equipment and contact your dealer or a SEIKO EPSON service center for advice. Never attempt to repair this product yourself. Improper repair work can be dangerous. - Page 5 Labels WARNING: Do not connect a telephone line to the drawer kick-out connector or the display module connector; otherwise the printer and the telephone line may be damaged. CAUTION: Thermal head and paper feed motor for the thermal section are hot.
-
Page 6: Installing The Paper Roll
Do not use paper rolls that have the paper glued or taped to the core because they might cause a paper jam. To prevent paper jams, make sure that nothing obstructs paper coming out of the paper exit, and do not pull the paper out of the printer. 4 TM-H6000II User’s Manual... -
Page 7: Installing The Ribbon
English Installing the Ribbon EPSON recommends the use of genuine EPSON ribbon cassettes. 1. Turn on the printer. Turn the knob on the ribbon cartridge. Open the front cover of the printer, and insert the new ribbon. 2. Turn the knob 2 or 3 times and check the ribbon position. -
Page 8: Inserting Slip Paper
Error light on or blinking. Make sure that the printer cover is properly closed. Turn off the printer and check for a paper jam. The autocutter is jammed or the paper roll cover will not open. 1. Turn off the printer and open the unit cover. -
Page 9: Cleaning The Print Head
Cleaning the Print Head CAUTION: After printing, the print head can be very hot. Be careful not to touch it. Also let it cool before you clean it. Do not damage the print head by touching it with your fingers or any hard object. Open the paper roll cover, and clean the thermal element (the green part) of the print head with a cotton swab moistened with an alcohol solvent (ethanol, methanol, or IPA). -
Page 10: Cleaning The Micr Mechanism
Be sure not to use an adhesive cleaning sheet. Follow the steps below: 1. Load a paper roll in the printer; turn off the power; then open the paper roll cover and turn the power back on while holding down the RELEASE button. - Page 11 MICR reader with the display device in place. Make sure that the printer is not subjected to any impact or vibration when it is performing a MICR reading. Endorsement Printing...
- Page 12 1. Turn the ribbon cassette knob. Then open the unit cover. Inside the printer, push the levers backward to open the unit. 2. Insert the ribbon into the printer in the position shown and turn the knob again to seat the ribbon. Then close the printer.
- Page 13 TM-H6000II Specifications Print method Receipt: Thermal line Slip: 9-pin serial impact dot matrix Endorsement: 8-pin shuttle impact dot matrix Print font Receipt: 9 Slip: 5 Endorsement: 5 Columns Receipt: 56/42 Slip: 60/45 Endorsement: 40 Character size Receipt: Slip: Endorsement: 1.1 Character sets 95 alphanumeric, 37 international characters Print speed...
- Page 14 English 12 TM-H6000II User’s Manual...
- Page 15 Bedienungs- und Wartungsanleitungen der Seiko Epson Corporation genau einzuhalten. Die Seiko Epson Corporation ist nicht haftbar für Schäden oder Probleme, die bei Verwendung von Optionen oder Verschleißteilen auftreten, die nicht als Original-Epson-Produkte oder von der Seiko Epson Corporation zugelassene Epson Produkte gelten.
- Page 16 Verwendung besteht Feuergefahr. Ziehen Sie den Netzstecker des Gerätes sofort aus der Netzsteckdose und benachrichtigen Sie Ihren Händler oder ein SEIKO EPSON Service Center. Versuchen Sie keinesfalls das Gerät selbst zu reparieren. Falsch durchgeführte Reparaturarbeiten können Gefahren mit sich bringen.
- Page 17 Keine Fremdkörper in das Gerät fallen lassen. Beim Eindringen von Fremdkörpern besteht Feuergefahr. Falls Wasser oder sonstige Flüssigkeiten in das Gerät gelangen, sofort den Netzstecker ziehen und den Händler oder den SEIKO EPSON Kundendienst zu Rate ziehen. Bei weiterer Verwendung besteht Feuergefahr.
-
Page 18: Einlegen Der Papierrolle
Deutsch Etiketten WARNUNG: Kein Telefonkabel an die Schnappsteckerbuchse oder an die Displaymodul-Buchse anschließen, da sonst der Drucker und die Telefonkabel beschädigt werden können. VORSICHT: Der Thermokopf und der Papiervorschubmotor des Thermoabschnittes sind heiß. Anschlüsse Schnittstelle Einlegen der Papierrolle Hinweis: Keine Papierrollen verwenden, bei denen das Papier mit Klebstoff oder Klebeband an der Rolle befestigt ist. - Page 19 Einlegen des Farbbandes EPSON empfiehlt die Verwendung von Original-EPSON- Farbbandkassetten. 1. Den Drucker einschalten. Den Knopf an der Bandkassette drehen. Die vordere Abdeckung des Druckers öffnen und ein neues Band einlegen. Siehe Abbildungen auf Seite 5. 2. Den Knopf zwei- oder dreimal drehen und die Bandposition überprüfen.
- Page 20 Deutsch MICR- und Indossierdruck (werksseitig installierte Optionen) Lesen von MICR-Zeichen auf Schecks VORSICHT: Keine Schecks mit Heftklammern einlegen. Andernfalls kann es zu Papierstaus, MICR-Lesefehlern und einer Beschädigung des MICR- Kopfes kommen. Sicherstellen, daß die Schecks flach und nicht gewellt, gefalzt oder verknittert sind.
- Page 21 3. Das Reinigungsblatt wie einen normalen Scheck einlegen. VORSICHT: Darauf achten, daß das Blatt mit der richtigen Seite nach oben und in der richtigen Richtung eingelegt wird. Das Reinigungsblatt nur einmal verwenden und dann entsorgen. 4. Wenn das Blatt ausgeworfen wird, die Taste RELEASE drücken und das Blatt aus dem Drucker herausnehmen.
- Page 22 Deutsch Technische Daten des TM-H6000II Druckmethode Druckfont Spalten Zeichengröße (B × H) Zeichensätze Druckgeschwindigkeit Papierabmessungen Papierstärke Kopierfähigkeit Farbband Lebensdauer d. Farbbandes Schnittstelle (kompatibel) Datenpuffer D.K.D.-Funktion Stromversorgung Stromverbrauch Temperatur Luftfeuchtigkeit Zuverlässigkeit Gesamtabmessungen Gewicht 20 TM-H6000II Bedienungsanleitung Quittung: Thermozeile Blatt: 9-poliger serieller Dot-Matrix-Anschlag Indossierung: 8-poliger Dot-Matrix-Shuttle-Anschlag Quittung: 9 ×...
- Page 23 (behalve in de VS) niet nauw in acht nemen van de door Seiko Epson Corporation verstrekte aanwijzingen voor gebruik en onderhoud.
- Page 24 U wordt erop gewezen dat wijzigingen of aanpassingen die niet uitdrukkelijk door SEIKO EPSON Corporation zijn goedgekeurd, u het recht op gebruik van de apparatuur kunnen ontnemen. Veiligheidsmaatregelen Dit gedeelte bevat belangrijke informatie voor veilig en effectief gebruik van dit product.
- Page 25 SEIKO EPSON servicecentrum. Verder gebruik kan tot brand leiden. LET OP: Sluit de snoeren niet anders aan dan beschreven in deze handleiding.
- Page 26 Om vastlopen van papier te voorkomen dient u ervoor te zorgen dat het papier uit de papieropening niet geblokkeerd wordt en mag u het papier niet uit de printer trekken. Zie de afbeeldingen op pagina 4. 24 Gebruikershandleiding voor de TM-H6000II...
- Page 27 Installeren van het lint EPSON beveelt gebruik aan van de originele EPSON lintcassettes. 1. Zet de printer aan. Draai aan de knop van de lintcassette. Open het voorpaneel van de printer en installeer het nieuwe lint. Zie de afbeeldingen op pagina 5.
- Page 28 PRESAT brand (KIC) "CHECK READER CLEANING CARD." Geen zelfklevende reinigingsvellen gebruiken. Doe het volgende: 1. Plaats een papierrol in de printer; zet de stroom uit; open het deksel van de papierrol en zet de stroom weer aan terwijl u de RELEASE-knop ingedrukt houdt.
- Page 29 Wees uitermate voorzichtig als u de displayapparatuur installeert en controleer de herkenningssnelheid van de MICR-lezer terwijl de displayapparatuur is geïnstalleerd. Zorg ervoor dat de printer niet beweegt of trilt wanneer hij de MICR-lezing uitvoert. Endosseren Als uw printer is voorzien van het optionele endosseermechaniek, dient u het endosseerlint op de volgende wijze te installeren: Zet de stroom uit voordat u een lintcassette installeert.
- Page 30 Nederlands Specificaties voor de TM-H6000II Afdrukmethode Ontvangst/Kassabon: Thermische regel Bon: 9-pens seriële dot matrix Endosseren: 8-pens shuttle dot matrix Afgedrukt lettertype Ontvangst/Kassabon: 9 Bon: 5 Endosseren: 5 Kolommen Ontvangst/Kassabon: 56 / 42 Bon: 60 /45 Endosseren: 40 Tekengrootte Ontvangst/Kassabon: Bon: Endosseren: Tekenverzamelingen 95 alfanumeriek, 37 internationale lettertekens...
- Page 31 Bien que le plus grand soin ait été accordé à la rédaction du présent ouvrage, Seiko Epson Corporation dénie toute responsabilité en cas d’erreurs ou d’omissions. La société ne saurait être responsable des préjudices découlant de l’utilisation des renseignements ci-dedans.
- Page 32 étrange ou s’il émet des bruits inhabituels. En persistant à l’utiliser dans ces circonstances, on risquerait de provoquer un incendie. Débrancher immédiatement l’équipement et contacter le distributeur ou un centre de service SEIKO EPSON pour demander conseil. Ne jamais essayer de réparer ce produit soi-même. Toute réparation erronée peut être dangereuse.
- Page 33 En cas de pénétration d’eau ou d’un autre liquide renversé dans l’équipement, débrancher immédiatement le cordon d’alimentation et contacter le distributeur ou un centre de service SEIKO EPSON pour demander conseil. En persistant à utiliser l’équipement dans ces circonstances, on risquerait de provoquer un incendie.
- Page 34 Français ATTENTION : La tête thermique et le moteur d’avance papier sont chauds. Connecteurs interface Installation de la bobine papier Remarque: L’emploi de bobines dont le papier est fixé au mandrin par de la colle ou un ruban adhésif est à bannir. Ces bobines présentent des risques de bourrage de papier.
-
Page 35: Installation Du Ruban
Installation du ruban EPSON recommande l’emploi de cassettes de ruban EPSON. 1. Mettez l’imprimante sous tension. Tournez le bouton de la cassette de ruban. Ouvrez le capot avant de l’imprimante et installez le ruban. Voir schémas, page 5. 2. Tournez le bouton de 2 ou 3 tours et vérifiez que le ruban est bien installé. - Page 36 Français Lecture de caractères magnétiques et impression d’endos (Options installées à l’usine) Lecture des caractères magnétiques des chèques personnels ATTENTION : Ne pas introduire des chèques avec agrafes sous peine de coincer le papier, d’entraîner des erreurs de lecture des codes magnétiques et d’endommager la tête du lecteur.
- Page 37 2. Appuyez sur la touche RELEASE 7 fois de suite et refermez le capot du logement de la bobine. L’imprimante imprime le message suivant sur un ticket de caisse et le voyant SLIP se met à clignoter. 3. Introduisez le feuillet de nettoyage comme s’il s’agissait d’un chèque.
- Page 38 Français Fiche technique des modèles TM-H6000II Méthode d’impression Ticket de caisse : thermique ligne Feuillet : matrice de pointes à impact 9 broches série Endos : matrice de pointes à impact 8 broches à navette Police d’impression Ticket de caisse : 9 × 17 / 12 × 24 Feuillet : 5 ×...
-
Page 39: Manual Do Utilizador
(excluindo os Estados Unidos) falta de cumprimento estrito das instruções de funcionamento e manutenção da Seiko Epson Corporation. A Seiko Epson Corporation não assume responsabilidade por nenhum dano ou problema que resulte do uso de qualquer acessório opcional ou de consumo que não seja um produto designado como Produto Original Epson ou Produto Epson Aprovado pela Seiko Epson Corporation. - Page 40 Nome do tipo: M147B ou M147C Os seguintes padrões aplicam-se somente a impressoras cujos rótulos incluam os mesmos. (A EMC [compatibilidade eletromagnética] é testada usando-se a fonte de alimentação EPSON). Europa: Marca EC Segurança: EN 60950 América do EMI: FCC/ICES-003 Classe A Norte: Segurança: UL 1950/CSA C22.2 N...
- Page 41 Se derramar água ou outro líquido no equipamento, desligue o cabo de corrente imediatamente e contacte o Serviço de Assistência a Clientes EPSON. Se continuar a utilizar o equipamento, poderá provocar um incêndio ou um choque eléctrico. CUIDADO: Ao ligar os cabos, siga estritamente as instruções do manual.
- Page 42 Português Etiquetas ADVERTÊNCIA: Não conecte uma linha telefônica ao conector de abertura da gaveta ou ao conector do módulo de display, caso contrário a impressora e a linha telefônica poderão sofrer danos. CUIDADO: A cabeça térmica e o motor de alimentação do papel para a seção térmica estão quentes.
- Page 43 Instalação da fita A EPSON recomenda o uso de cassetes de fita genuínos EPSON. 1. Ligue a impressora. Vire o botão giratório no cartucho de fita. Abra a tampa frontal da impressora e introduza a fita nova. Veja as ilustrações na página 5.
- Page 44 Português Impressão MICR (reconhecimento de caractere de tinta magnética) e de endosso (opções instaladas pela fábrica) Leitura de caracteres MICR em cheques pessoais CUIDADO: Não introduza cheques contendo grampos. Isto poderá causar atolamento do papel, erros de leitura MICR e danos à cabeça MICR. Verifique se os cheques estão lisos e sem dobras, enrolados ou amassados.
- Page 45 2. Pressione o botão RELEASE 7 vezes, em seguida, feche a tampa do rolo de papel. A impressora imprime a mensagem abaixo no papel tipo recibo e a luz SLIP pisca. 3. Introduza a folha de limpeza da mesma forma que um cheque comum.
- Page 46 Português Especificações da TM-H6000II Método de impressão Recibo: linha térmica Comprovante: matriz de pontos de impacto com 9 agulhas Endosso: matriz de pontos de impacto por transferência com 8 agulhas Fonte de impressão Recibo: 9 × 17 / 12 × 24 Comprovante: 5 ×...
-
Page 47: Manual Del Usuario
éste electrónico, mecánico, de fotocopia, grabación, u otro cualquiera, sin el permiso previo por escrito de Seiko Epson Corporation. No se asume ninguna responsabilidad de patentes en lo referente a la información aquí contenida. Aún cuando se han tomado todas las precauciones en la preparación de este libro, Seiko Epson Corporation no asume ninguna... -
Page 48: Precauciones De Seguridad
Nombre del modelo: M147B o M147C Las siguientes normas se aplican solamente a las impresoras que estén marcadas con las correspondientes etiquetas. (EMC se ensaya utilizando la fuente de alimentación EPSON.) Europa: Marca de CE Seguridad: EN 60950 América del EMI:... - Page 49 Si se derrama agua o algún otro líquido dentro del equipo, desenchufe el cable eléctrico inmediatamente, y después comuníquese con su distribuidor o con un servicio técnico EPSON. El seguir usándolo podría causar un incendio. PRECAUCIÓN: No conecte los cables en formas que difieran a las mencionadas en este manual.
- Page 50 Español Etiquetas ADVERTENCIA: No conecte una línea telefónica al conector del cajón o al conector del módulo de visualización; de lo contrario, la impresora y la línea telefónica pueden dañarse. PRECAUCIÓN: La cabeza térmica y el motor de alimentación del papel para la sección térmica están calientes.
- Page 51 Instalación de la cinta EPSON recomienda utilizar cartuchos de cinta EPSON genuinos. 1. Encienda la impresora. Haga girar la perilla del cartucho de cinta. Abra la cubierta frontal de la impresora y coloque la nueva cinta. Vea las ilustraciones en la página 5.
- Page 52 Español Impresión de MICR y de endosos (Opciones instaladas en la fábrica) Lectura de caracteres MICR en los cheques personales PRECAUCIÓN: No inserte cheques que tengan grapas. Esto puede causar obstrucciones de papel, errores de lectura de MICR, y daños a la cabeza MICR.
- Page 53 2. Presione 7 veces el botón RELEASE; después, cierre la cubierta del rollo de papel. La impresora imprime el siguiente mensaje en papel de recibos, y la luz SLIP destella. 3. Inserte la hoja de limpieza como si fuera un cheque normal. PRECAUCIÓN: Cuide de insertar la hoja con el lado correcto hacia arriba, y en la dirección correcta.
- Page 54 Español Especificaciones de la impresora TM-H6000II Método de impresión Recibos: térmica de líneas Boletas: matriz de puntos de impacto, serial, con 9 agujas Endosos: matriz de puntos de impacto con 8 agujas Fuente de impresión Recibos: 9 × 17 / 12 × 24 Boletas: 5 ×...
- Page 55 Malgrado questo manuale sia stato preparato con la massima cura, la Seiko Epson Corporation non si assume alcuna responsabilità per eventuali errori o omissioni ivi contenuti, né per eventuali danni risultanti dall’uso delle informazioni contenute in questo manuale.
-
Page 56: Precauzioni Di Sicurezza
L’uso continuato potrebbe costituire causa d’incendio. Staccare immediatamente la spina dell’unità e rivolgersi al rivenditore o alla SEIKO EPSON per assistenza in merito. Non riparare mai da soli questa unità. La riparazione impropria potrebbe creare un pericolo. - Page 57 Se acqua o altri liquidi cadono accidentalmente nell’unità, staccare immediatamente il cavo di alimentazione, quindi rivolgersi per consigli al rivenditore o al centro di assistenza della SEIKO EPSON. L’uso continuato dell’unità potrebbe causare incendio. Non assoggettare la stessa presa di corrente a carichi multipli. Il sovraccarico potrebbe causare un incendio.
- Page 58 Italiano Etichette AVVERTENZA: Non collegare una linea telefonica al connettore estraibile nel cassetto; la stampante e la linea telefonica possono danneggiarsi. ATTENZIONE: La testina termica e il motore di alimentazione della carta per la sezione termica sono molto caldi. Connettori interfaccia Installazione del rotolo della carta Nota:...
-
Page 59: Pulizia Della Testina Di Stampa
Installazione del nastro La EPSON raccomanda di usare nastri originali EPSON. 1. Accendere la stampante. Girare la manopola sulla cartuccia del nastro. Aprire il pannello di copertura anteriore della stampante ed inserire il nuovo nastro. Vedere le figure a pagina 5. - Page 60 Italiano Stampa di MICR e del timbro bancario (opzioni installate dalla fabbrica) Lettura di caratteri MICR sugli assegni bancari ATTENZIONE: Non inserire gli assegni con le graffette attaccate su di essi. Ciò potrebbe causare inceppamenti della carta, errori nella lettura MICR e danni alla testina MICR.
- Page 61 2. Premere 7 volte il pulsante RELEASE; quindi chiudere il pannello di copertura del rotolo della carta. La stampante stampa il seguente messaggio al ricevimento della carta e la spia SLIP lampeggia. 3. Inserire il foglio detergente come un normale assegno. ATTENZIONE: Verificare che il foglio sia inserito con la faccia rivolta in alto e che sia inserito nella corretta direzione.
- Page 62 Italiano Specifiche TM-H6000II Metodo di stampa Ricevuta: linea termica Foglio mobile: a matrice di punti ad impatto, seriale a 9 aghi Convalida: a matrice di punti ad impatto, navetta, a 8 aghi Font di stampa Ricevuta: 9 × 17 / 12 × 24 Foglio mobile: 5 ×...
- Page 64 Printed in China 2000.12...
Need help?
Do you have a question about the TM-H6000II M147B and is the answer not in the manual?
Questions and answers