Advertisement
Quick Links
Advertisement

Related Manuals for Saba FL914L21W


Summary of Contents for Saba FL914L21W
-
Page 2: Table Of Contents
Thank you for choosing SABA quality. This product has been developed by our team of professional and according to European regulations. In order to get the most out of your new appliance, we recommend that you read this instruction manual carefully and keep it for future reference. -
Page 3: Safety Instructions
SAFETY INSTRUCTIONS • Safety Instructions For your safety, the information in this manual must be followed to minimize the risk of fire or explosion, electric shock, or to prevent property damage, personal injury or loss of life. Explanation of the symbols: Warning! This combination of symbol and signal word indicates a potentially dangerous situation which may result in death or... - Page 4 – bed and breakfast type environments. – Areas for communal use in blocks of flats or in launderettes. • This appliance is designed to wash 9.0 /10.0 /12.0 kg of dry laundry Warning! The electric shock! • If the supply cord is damaged, it must be replaced by the manufacturer, its service agent or similarly qualified persons in order to avoid a hazard.
- Page 5 • Do not use any socket with rated current less than that of appliance. Never pull out power plug with wet hand. • Please remember to disconnect water and power supply immediately after the clothes are washed. Risk to children! •...
- Page 6 Risk of explosion! • Do not wash or dry articles that have been cleaned in, washed in, soaked in, or dabbed with combustible or explosive substances (such as wax, oil, paint, gasoline, degreasers, dry-cleaning solvents, kerosene, etc.) This may result in fire or explosion.
- Page 7 • The appliance shall not be installed at a humid place. • Remove all packages and transport bolts before using the appliance. Otherwise, serious damage may result. Risk of damaging appliance! • The product is only for home use and is only designed for the textiles suitable for machine washing and drying.
- Page 8 • Before washing the clothes at first time, the product shall be operated in one round of the whole procedures without the clothes inside. • Flammable and explosive or toxic solvents are forbidden. Gasoline and alcohol etc. shall not be used as detergents. Please only select the detergents suitable for machine washing, especially for drum.
- Page 9 • Do not dry unwashed items in the appliance. • Items that have been soiled with substances such as cooking oil, acetone, alcohol, petrol, kerosene, spot removers, turpentine, waxes and wax removers should be washed in hot with an extra amount of detergent before being dried in the appliance.
-
Page 10: Installation
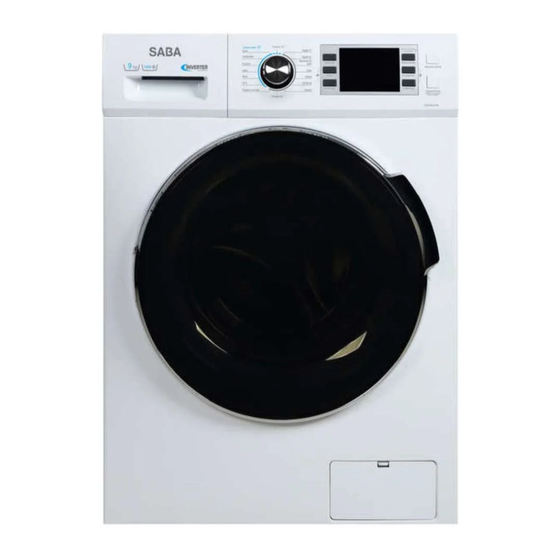
Installation • Product Description 1. Top cover 6. Drain hose 2. Control panel 7. Water supply hose 3. Power supply cord 8. Detergent dispenser 4. Drum 9. Door 5. Service filter Note! • The product line chart is for reference only, please refer to real product as standard. - Page 11 Accessories Transport hole Supply hose Supply hose hot Drain hose Owner’s manual plug cold water water (optional) support (optional) Installation area Warning! • Stability is important to prevent the product from wandering! • Make sure that the product should not stand on the power cord.
- Page 12 Unpacking the washing machine Warning! • Packaging material (e.g. Films, Styrofoam) can be dangerous for children. • There is a risk of suffocation! Keep all packaging well away from children. 1. Remove the cardboard box and Styrofoam packing. 2. Lift the washing machine and remove the base packing. Make sure the small triangle foam is removed with the bottom one together.
- Page 13 Levelling the washing machine Warning! • The lock nuts on all four feet must be screwed tightly against the housing. 1. Check if the legs are closely attached to the cabinet. If not, please turn them to their original positions tighten the nuts. 2.
- Page 14 Connect the inlet pipe as indicated, there are two ways to connect the inlet pipe. 1. Connection between ordinary tap and inlet hose. slide bushing damp nut Loosen clamp nut and Tighten clamp nut Press slide bushing, Connection finished four bolts insert inlet hose into connecting base 2.
- Page 15 water supply hose water Inlet valve Drain Hose Warning! • Do not kink or protract the drain hose. • Position drain hose properly, otherwise damage might result of water leakage. There are two ways to place the end of drain hose: water trough 1.
-
Page 16: Operations
Hose Retainer Warning! • When installing drain hose, fix it properly with a rope. • If drain hose is too long, do not force it into washing machine as it will cause abnormal noises. Operations Quick Start Caution! • Before washing, please make sure it’s installed properly. •... - Page 17 3. Power on the wash machine and press «Delay» and «Spin» at the same time within 10 seconds then display « t19 » 4. Press to start the wash machine and wait till display «****» 1. Before Washing Main wash Softener Prewash Plug in...
- Page 18 Note! 1. If default is selected, step 3 can be skipped. 2. The function button line chart is for reference only, please refer to real product as standard. 3. After Washing Buzzer beep or «End» on display. Before Each Washing •...
- Page 19 Check the label Take out the items out of the Knot the long strips.zip or pockets button Separate clothes with Turn easy-pilling and long- Put small clothes into the different textures pile fabric inside out pillowslip Warning! • When washing a single piece of clothes, it may easily cause great eccentricity and give alarm due to great unbalance.
- Page 20 Detergent Dispenser Pre-Wash detergent Main Wash detergent Softener Pull out the dispenser Caution! • Detergent only need to be added in «case I» after selecting pre-washing for machines with this function. Programme I II Programme I II Coton Intensive Synthetic ECO 40-60 Sterilization Delicate...
- Page 21 Note! • As for the agglomerated or ropy detergent or additive, before they are poured into the detergent box, it is suggested to use some water for dilution to prevent the inlet of detergent box from being blocked and overflowing while filling water. •...
- Page 22 On/off Start/Pause Product is switched On/Off. Press the button to start or pause the washing cycle. Option Programmes This allows you to select an Available according to the additional function and will laundry type. light when selected. ...
- Page 23 Remain Mute Buzzer Delay H Reload Speed Wash Child Lock My Cycle Door Lock Extra Rinse Spin Speed Pre Wash Temp. M Rate Of Progress (Pre Wash- Wash -Rinse-Spin) Delay Time N Wash Time Error...
- Page 24 Option Delay Set the Delay function: 1. Select a programme; 2. Press the Delay button to choose the time (the delaying time is 0-24 H.); 3. Press [Start/Pause] to commence the delay operation Choose the Programme Setting time Start Cancel the Delay function: Press the [Delay] button until the display be 0H.
- Page 25 Pre Wash The Prewash function can get an extra wash before main wash. It is suitable for washing the dust rises to surface of the clothes. You need to put detergent into the Case (I) when select it. Extra Rinse The laundry will undergo extra rinse once after you select it.
- Page 26 Reload This operation can be executed during the washing progress. When the drum is still rolling and there is large amount of water with high temperature in the drum. The state is unsafe and the door cannot be opened forcefully. To press [Start/Pause] for 3 sec. to reload, and start the clothes adding in the midway function.
- Page 27 Other Functions Temp. Press the button to regulate the temperature (Cold,20°C,30°C, 40°C,60°C,90°C) Spin Press the button to change the speed. 1400:0-600-800-1000-1200-1400 1500:0-600-800-1000-1200-1500 Programme Default Speed(rpm) 1400 1500 Cotton 1400 1500 Synthetic 1200 1200 Sterilization Jeans 20°C 1000 1000 Rinse & Spin 1000 1000 Spin Only...
- Page 28 Programme Default Speed(rpm) Sportwear Rapid 45’ Quick 15’ Child Lock To avoid mis operation by children. Press [Extra Rinse] and [Pre Wash] 3 sec. till buzzer beep. Caution! When child lock is activated and program starts, child lock indicator will switch on, and the CL and remaining time on the display are alternately displayed In 0.5s.
- Page 29 Mute the buzzer Choose the Press the [Temp.] and [Spin] for 3sec., the Programme buzzer is mute. To act the buzzer function, press the button again for 3 seconds. The setting will be kept until the next reset. Caution! • After Muting the buzzer function, the sounds will not be activated any more.
- Page 30 Programmes Programmes are available according to the laundry type. Programmes Cotton Hard-wearing textiles, heat-resistant textiles made of cotton or linen. Synthetic Wash synthetic articles, for example: shirts, coats, blending. While washing the knitting textiles, detergent quantity shall be reduced due to its loose string construction and easily forming bubbles.
- Page 31 ECO 40-60 This program is specially designed for washing duvet coats. Default 40°c, not selectable, suitable for laundry washing at about 40°C-60°C. Delicate For delicate, washable textiles, e.g. made of silk, satin, synthetic fibres or blended fabrics. Wool Hand or machine-washable wool or rich wool textiles.
- Page 32 Jeans 9.0 10.0 12.0 1:45 9.0 10.0 12.0 0:58 20°C 9.0 10.0 12.0 1:01 Rinse & Spin 9.0 10.0 12.0 0:20 Spin Only 9.0 10.0 12.0 0:12 Intensive 9.0 10.0 12.0 3:48 ECO 40-60 9.0 10.0 12.0 3:13/ 3:32/ 3:41/ 3:53/ 3:56 Delicate 9.0 10.0 12.0...
-
Page 33: Maintenances
Maintenances Cleaning And Care Warning! • Before your maintenance starts, please unplug the machine and close the tap. Cleaning The Cabinet Proper maintenance on the washing machine can extend its working life. The surface can be cleaned with diluted non-abrasive neutral detergents when necessary. - Page 34 Note! Don’t put laundry in the washing machine during the drum cleaning. Cleaning The Door Seal And Glass Wipe the glass and seal after each wash to remove lint and stains. If lint builds up it can cause leaks. Remove any coins, buttons and other objects from the seal after each wash.
- Page 35 Washing the filter In washing machine: 1. Screw off the inlet pipe from the backside of the machine. 2. Pull out the filter with long nose pliers and reinstall it back after being washed. 3. Use the brush to clean the filter.
- Page 36 Pull out the dispenser Clean the dispenser Clean inside the recess Insert the dispenser drawer with press drawer under water with an old toothbrush drawer the A Note! • Do not use alcohol. solvents or chemical products to clean the machine.
- Page 37 Emergency drain hose Open the lower cover cap Rotate 90°C and pull out the After water runs out, reset the emergency drain hose, and drain hose take off the hose cap Remove extraneous matter Close the lower cover cap Open the filter by turning to the counterclockwise Caution! •...
- Page 38 • When the appliance is in use and depending on the programme selected there can be hot water in the pump. Never remove the pump cover during a wash cycle, always wait until the appliance has finished the cycle, and is empty. When replacing the cover, ensure it is securely re-tightened.
- Page 39 Indicator or Disconnect the Check if the power display does not power PC board is shut down and light or harness has the power plug is connection problem connected correctly Abnormal noise Check if the fixing (bolts) have been removed Check it’s installed on a solid and level floor...
- Page 40 Overtime water Check if the drain draining hose is blocked Water overflow Restart the washer Others Please try again first, call up service line if there are still troubles Note! • After the check, activate the appliance. If the problem occurs or the display shows other alarm codes again, contact the service.
- Page 41 12.0kg 595*595*850 73kg 2000W FL1214L21W Product fiche Product fiche concerning to Regulation (EU) No 2019-2014 Supplier’s name or trademark: SABA Supplier’s address (b): 80 boulevard du Mandinet, 77432 Marne la Vallée, Cedex 2 Model identifier:FL914L21W General product parameters: Parameter Value...
- Page 42 Water consumption in Energy consumption litre per cycle, based in kWh per cycle, on the eco 40-60 based on the eco 40- programme. Actual 60 programme. Actual 0.57 water consumption energy consumption will depend on how will depend on how the appliance is used the appliance is used.
- Page 43 (c) If the product database automatically generates the definitive content of this cell the supplier shall not enter these data. Product fiche concerning to Regulation (EU) No 2019-2014 Supplier’s name or trademark: SABA Supplier’s address ft: Model identifier: FL1015L21W General product parameters:...
- Page 44 Rated Rated Maximum capacity capacity temperature inside Remaining moisture Half Half the treated textile content ft (%) ft (°C) Quarter Quarter Rated 1500 capacity Spin-drying efficiency Spin speed (a) (rpm) Half 1500 class ( Quarter 1500 Rated 3 : 59 capacity Programme duration Type...
- Page 45 Supplier’s name or trademark: SABA Supplier’s address ft: Model identifier: FL1214L21W General product parameters: Parameter Value Parameter Value Height Rated capacity (“) (kg) 12.0 Dimensions in cm Width Depth Energy efficiency class EEIw (a) 60.0 Washing efficiency Rinsing effectiveness 1.04...
- Page 46 Rated 4 : 00 capacity Programme duration Type free-standing Half 3 : 00 (®) (h:min) Quarter 3 : 00 Airborne acoustical Airborne acoustical noise emissions in noise emission class ( the spinning phase ( (spinning phase) (dB(A) re 1 pW) Off-mode (W) 0.50 Standby mode (W)
-
Page 47: Disposal Of Old Electrical Appliances
Consumers should contact their local authority or retailer for information concerning the correct disposal of their old appliance. SABA is a trademark of Technicolor or its a liates used under license by Conforama. SABA is a German brand born in 1923 in the heart of the Black Forest.
Need help?
Do you have a question about the FL914L21W and is the answer not in the manual?
Questions and answers