
Related Manuals for Emerson PD6537


Summary of Contents for Emerson PD6537
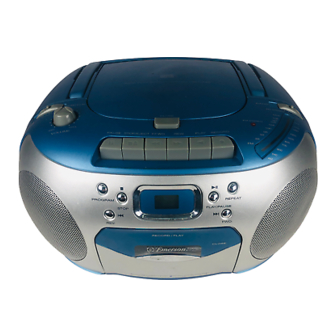
- Page 1 PORTABLE CD, CD-R / RW PLAYER with CASSETTE RECORDER and AM / FM STEREO RADIO OWNER’ S MANUAL PD6537 Visit our web site at www.emersonradio.com PD6537_ib011303.p65 13/1/2003, 14:48...
-
Page 2: Important Safety Instructions
TO PREVENT FIRE OR SHOCK HAZARD, DO NOT USE THIS PLUG WITH AN EXTENSION CORD, RECEPTACLE OR OTHER OUTLET UNLESS THE BLADES CAN BE FULLY INSERTED TO PREVENT BLADE EXPOSURE. TO PREVENT FIRE OR SHOCK HAZARD, DO NOT EXPOSE THIS APPLIANCE TO RAIN OR MOISTURE. WARNING: TO REDUCE THE The lightning flash with arrow- head symbol, within an equi-... -
Page 3: Before We Begin
This product was manufactured using the highest quality components and standards of workmanship. It was tested by Emerson inspectors and found to be in perfect working order before it left our factory. However, there is always the chance that some problem may occur because of rough handling during shipment to the retail store or to the final consumer. -
Page 4: Important Notes
IMPORTANT NOTES • Avoid installing this unit in places exposed to direct sunlight or close to heat radiating appliances such as electric heaters, on top of other stereo equipment that radiates too much heat, places lacking ventilation or dusty areas, places subject to constant vibration and/ or humid or moist areas. -
Page 5: Preparation For Use
PREPARATION FOR USE UNPACKING AND SET UP ·Carefully remove the unit from the carton and remove all packing materials from the unit. ·Carefully remove any small strips of tape which may have been used to keep the CD and Cassette doors closed during shipment. ·Open the CD compartment by pressing the OPEN button on top panel and lifting upward. -
Page 6: Battery Operation
NOTE: This unit has a polarized AC plug with one wide blade and one narrow blade. This plug will only fit into a matching polarized AC outlet. This is a safety feature to reduce the possibility of electric shock. If this plug will not fit in your AC outlet, you probably have an outdated non-polarized outlet. -
Page 7: Location Of Controls And Indicators
LOCATION OF CONTROLS AND INDICATORS TOP VIEW FRONT VIEW PD6537_ib011303.p65 13/1/2003, 14:48... - Page 8 1.) VOLUME Control. 2.) FUNCTION (TAPE-POWER OFF/RADIO/CD ) Selector Switch. 3.) Carrying Handle. 4.) CD door. 5.) AC Cord Socket (Back Cabinet). 6.) Battery Compartment (Back Cabinet). 7.) FM Telescopic Antenna. 8.) TUNING Control. 9.) BAND (FM STEREO/FM/AM) Selector Switch. 10.) FM STEREO Indicator.
-
Page 9: Listening To The Radio
OPERATING INSTRUCTIONS LISTENING TO THE RADIO 1.) Move the FUNCTION selector to the RADIO position. 2.) Move the BAND selector to the desired band, FM STEREO, FM or AM. 3.) Tune to your desired station with the TUNING control. If you have set the BAND selector to FM STEREO and you tune to a FM Stereo station the FM STEREO LED Indicator will light. -
Page 10: Playing Compact Discs
PLAYING COMPACT DISCS Note: Although this portable CD player can read CD-R and CD-RW discs, in addition to normal CDs, the playability of CD-R and CD-RW discs may be effected by the type of software that was used to create the discs, as well as the quality and condition of the blank media you are using. -
Page 11: Repeat Playback
6.) To Stop playback at any time press the CD STOP the display again shows the total number of tracks on the disc. After the last track has played the disc stops automatically and the display again shows the total number of tracks on the disc. 7.) Open the CD door, remove your disc, and close the CD door again. -
Page 12: Programmed Playback
PROGRAMMED PLAYBACK You can program up to 19 tracks on a disc to playback in any desired order. You may also program a specific track to play several times within the same program. Note: The player cannot be programmed while a disc is playing. If a disc is playing press the STOP button to stop playback before you begin the programming steps below. - Page 13 After the last programmed track has played the player stops but the programmed tracks remain in the memory. To play the programmed tracks again, press the PROGRAM button and then the PLAY/PAUSE button. To cancel the programmed sequence from memory, press the STOP button at programming mode, open the CD door, or move the FUNCTION selector to the TAPE (POWER OFF) position.
-
Page 14: Playing Cassette Tapes
PLAYING CASSETTE TAPES 1.) Open the cassette door by pressing the STOP 2.) Place a pre-recorded cassette tape into the slots on the inside of the door with the exposed tape facing up and the full reel on the right side. 3.) Move the FUNCTION selector to the TAPE position. - Page 15 MAKING A TAPE RECORDING This model allows you to make tape recordings directly from the CD player, or the radio. • Refer to “PLAYING COMPACT DISCS” if necessary to operate the CD player. • Refer to “LISTENING TO THE RADIO” if necessary to tune in the station you wish to record from radio.
-
Page 16: Stereo Headphone Jack
STEREO HEADPHONE JACK Connect a set of stereo headphones (not included) with a 3.5mm mini plug to the PHONES jack (located at left side cabinet) for private listening without disturbing others. Before putting on the headphones reduce the VOLUME control to a low level, then put the headphones on and gradually increase the VOLUME control to a comfortable listening level. -
Page 17: Care And Maintenance
CARE AND MAINTENANCE ABOUT CASSETTE TAPES Whenever you record on a cassette any previously recorded material is erased as the new material is recorded. To prevent you from accidentally erasing material which you wish to save, blank cassettes are equipped with erase prevention tabs for each side of the tape. -
Page 18: Cassette Care
CASSETTE CARE Two common causes of trouble experienced when using cassettes are: 1.) Tape jamming — Leading to uneven speed in playback, and 2.) Tape tangling — Where the tape wraps itself around vital parts of themechanism. To reduce the likelihood of these problems occurring, the following precautions should be observed: •... -
Page 19: Compact Disc Care
COMPACT DISC CARE • To remove a disc from its storage case, press down on the center of the case and lift the disc out, holding it carefully by the edges. • Fingerprints and dust should be carefully wiped off the disc’ s recorded surface with a soft cloth.Unlike conventional records, compact discs have no grooves to collect dust and microscopic debris, so gently wiping with a soft cloth should remove most particles. -
Page 20: Troubleshooting Guide
Insert CD with Iabel side Wipe disc with cloth or use another disc. TO FIND THE LOCATION AND PHONE NUMBER OF YOUR NEAREST SERVICE CENTER PERMITTED TO PERFORM WARRANTY... 1-800-695-0098 PLEASE CALL: 1-800-898-9020 Emerson Radio Corp. Consumer Affairs Dept. 1901 Diplomat Drive, 13/1/2003, 14:48... -
Page 21: Limited Warranty
Emerson Radio Corp. in the amount of $9.00 (not required by California residents) to cover shipping and handling costs, and enclose a copy of your proof of purchase. - Page 22 EMERSON RADIO CORP. EMERSON Part No.: 16-2887 Printed in China 301-01 PD6537_ib011303.p65 13/1/2003, 14:48...
Need help?
Do you have a question about the PD6537 and is the answer not in the manual?
Questions and answers